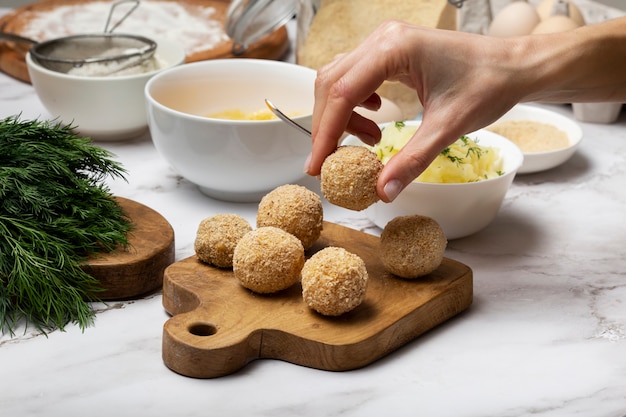
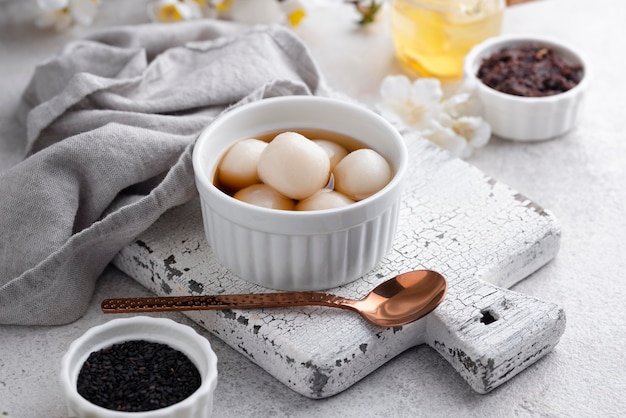
You know those little, squishy, translucent balls that add a delightful chewiness to bubble tea, puddings, and desserts? Those are tapioca pearls, and I've become quite obsessed with them lately, experimenting with different ways to cook them and discovering all sorts of delicious possibilities. So, if you're looking to master the art of tapioca pearls, you've come to the right place. This guide is your one-stop shop, packed with everything you need to know, from choosing the right pearls to troubleshooting common cooking issues. Let's dive in and unleash your inner bubble tea master!
Part 1: Choosing the Right Tapioca Pearls

Before you even think about starting to cook, it's essential to choose the right tapioca pearls. Not all pearls are created equal, and picking the right ones can make all the difference in the texture and taste of your final dish. You'll find them in various sizes, shapes, and colours, but for the most authentic bubble tea experience, I recommend the classic small, round, black pearls. These are typically the most readily available and offer a perfect balance of chewiness and sweetness. But feel free to experiment with larger pearls, or even colourful ones, for a more playful vibe.
What to Look For:
- Freshness: The first thing to look for is freshness. Look for pearls that are firm and shiny, not dull or dry. Fresh pearls will have a good texture and a subtle, sweet flavour. If they feel brittle or crumbly, they're likely not as fresh and might not cook properly.
- Size: As I mentioned, classic pearls are small and round, usually about the size of a pea. They offer a delightful bite and are perfect for slurping through a bubble tea straw. If you prefer a different size or shape, that's totally fine. But be aware that cooking times can vary based on size. Larger pearls might need a bit longer to cook through.
- Colour: The most common colour is black, but you'll also find white, brown, and even colourful pearls. These variations are often just about aesthetics. Choose whichever colour suits your recipe and preference.
- Brand: Some brands are known for their high quality and consistency. If you're new to tapioca pearls, go for a reputable brand to avoid surprises. You want pearls that cook evenly and don't break down too easily.
When you're at the supermarket, don't be afraid to give the pearls a good look over. You want them to be firm, not brittle or crumbly. Trust me, a little inspection goes a long way!
Part 2: The Importance of Soaking

Now, before you even think about putting those pearls on the stove, you need to give them a good soak. Soaking is crucial for two main reasons. Firstly, it helps to hydrate the pearls, making them plump and chewy. Think of it like giving them a little drink before their big culinary moment. Secondly, soaking helps to wash away any excess starch, which can cloud your finished product. No one wants a cloudy bubble tea or pudding! This is a step you definitely don't want to skip.
Soaking 101:
- Water: Use clean, cold water for soaking. You can use a bowl or a large container, just ensure the pearls are fully submerged. The amount of water doesn't have to be exact.
- Time: Soaking time depends on the type of pearls and your personal preference. For small, black pearls, I recommend soaking for at least 30 minutes, up to a couple of hours. This allows the pearls to soften and absorb moisture, preparing them for a delicious transformation.
- Temperature: Cold water is best for soaking. Warm or hot water can cause the pearls to break down too quickly. You want to give them a gentle soak, not a rapid bath. Patience is key here, as is the right temperature.
Once you've soaked your pearls, drain them well. This will help prevent any excess water from diluting your final dish. You want those pearls to be ready to absorb all the flavours and textures you're going to add!
Part 3: The Boiling Method

Now, let's get to the heart of the matter: cooking the tapioca pearls. There are a couple of popular methods, but I find the boiling method to be the most reliable. This method involves simmering the pearls in water until they become translucent and chewy, a true delight for your taste buds.
Boiling Basics:
- Pot: Use a medium-sized pot with a lid. Make sure the pot is deep enough to accommodate the pearls and water without overflowing. You want enough space for the pearls to move around freely and cook evenly.
- Water: Fill the pot with enough water to cover the pearls by a few inches. You want them to have plenty of room to move around and cook evenly.
- Bring to a boil: Heat the water to a rolling boil. Once the water is boiling, gently add the soaked pearls. You'll hear a gentle sizzling sound as they go in, a sign they're ready to transform.
- Simmer: Reduce the heat to a simmer and cover the pot with the lid. Let the pearls simmer for about 15-20 minutes. This allows them to cook through and become soft, but still maintain that wonderful chewy texture.
- Test for doneness: After 15 minutes, use a spoon to scoop out a few pearls. Gently bite into one to check for doneness. If they're still hard, simmer for a few more minutes. If they're too soft, well, you might have overcooked them.
Don't be tempted to rush the cooking process. Overcooked pearls can become mushy and lose their chewy texture. Patience is key! Just like a good pot of tea, tapioca pearls need time to brew to perfection.
Part 4: The Stovetop Method
For those who prefer a simpler approach, there's always the stovetop method. It's a bit less precise than boiling, but it can be just as effective. The idea is to cook the pearls in a pan with water, stirring frequently until they're cooked through. It's a good option if you don't have a large pot or if you prefer a more hands-on approach.
Stovetop Steps:
- Pan: Use a medium-sized pan with a lid. You'll want enough space for the pearls and water to move around.
- Water: Add enough water to cover the pearls by about an inch. Don't worry if the water level seems a bit low; it will evaporate as the pearls cook.
- Heat: Heat the water over medium heat. Once the water is simmering, add the soaked pearls and stir gently to prevent sticking.
- Stir: Stir the pearls frequently, about every 2-3 minutes, to ensure they cook evenly and don't stick to the bottom of the pan.
- Cook: Continue stirring and cooking the pearls for about 15-20 minutes, or until they become translucent and chewy. You'll notice the water gradually evaporating as they cook.
The key to success with the stovetop method is consistent stirring. Make sure you keep a close eye on the pearls and stir them frequently to prevent them from burning or sticking to the pan. A little extra attention goes a long way!
Part 5: The instant pot Method
Ah, the Instant Pot – a modern kitchen marvel that can do it all! You can definitely use it to cook tapioca pearls. The Instant Pot's pressure cooking function helps to shorten the cooking time, and it produces consistently chewy pearls every time. It's a great option for busy folks who want to save time without sacrificing texture.
Instant Pot Instructions:
- Water: Add 1 cup of water to the Instant Pot.
- Pearls: Pour the soaked tapioca pearls into the Instant Pot.
- Pressure cook: Close the Instant Pot lid and set the valve to seal. Cook on high pressure for 2 minutes.
- Natural release: Once the cooking time is complete, let the pressure release naturally for 10 minutes.
- Quick release: After the natural release, carefully release the remaining pressure using the quick release valve.
- Drain: Drain the pearls thoroughly before using them in your favourite recipe.
The Instant Pot method is quick and easy, but it does require a little bit of patience with the pressure release. Make sure you follow the instructions carefully to avoid any mishaps.
Part 6: Mastering the Perfect Chewy Texture
So, you've cooked your tapioca pearls. Now, how do you know if they're actually cooked properly? The key to perfect tapioca pearls is achieving that delightful chewy texture. It's the hallmark of a well-cooked pearl, offering a satisfying contrast to the smooth and creamy goodness of your dessert or bubble tea.
Signs of a Perfectly Cooked Pearl:
- Translucent: The pearls should be translucent, almost glassy in appearance. This indicates that they've cooked through and absorbed the water, becoming plump and juicy.
- Chewy: The pearls should have a distinct chewiness, not mushy or crumbly. They should bounce back slightly when you press them with a spoon. This is the signature texture of perfectly cooked tapioca pearls.
- No White Center: If you cut a pearl open, you shouldn't see any white, uncooked center. This means the pearl is fully cooked and ready to eat.
- Slightly Soft: The pearls should be slightly soft to the touch, but still have a firm texture. They shouldn't be hard or feel like they're still raw.
If your pearls are still too hard, simply simmer them for a few more minutes. But if they're already soft and mushy, there's not much you can do. It's best to start fresh with a new batch.
Part 7: Common cooking mistakes and Troubleshooting
Cooking tapioca pearls isn't always a smooth ride. Sometimes, you might encounter a few bumps along the way. Don't worry, I've been there too! Here are some common cooking mistakes and how to troubleshoot them.
Mistakes and Solutions:
| Mistake | Solution |
|---|---|
| Pearls are too hard | Simmer for a few more minutes until they reach the desired texture. You can always add a little more time to the cooking process, but be careful not to overcook them. |
| Pearls are too soft/mushy | Start fresh with a new batch of pearls. It's better to start again than to try to salvage overcooked pearls. |
| Pearls are sticky/clumped together | Stir the pearls frequently while cooking to prevent sticking. You can also add a splash of water if the pearls start to stick. |
| Pearls are cloudy | Make sure you soak the pearls thoroughly to remove any excess starch. Soaking helps to wash away the excess starch, which can cause cloudiness. |
| Pearls are not cooked evenly | Use a larger pot with plenty of water to ensure the pearls cook evenly. Make sure there's enough space for the pearls to move around freely and cook evenly. |
Remember, practice makes perfect! The more you cook tapioca pearls, the more familiar you'll become with the process. Don't be afraid to experiment and find what works best for you.
Part 8: Storing Tapioca Pearls
Once you've cooked your tapioca pearls, it's important to store them properly to maintain their texture and freshness. Here's a quick guide to storing them so you can enjoy them later.
Storage Tips:
- Cool: After cooking, immediately drain the pearls and rinse them with cold water. This helps to stop the cooking process and prevent them from becoming mushy.
- Refrigerate: Store the cooled pearls in an airtight container in the refrigerator for up to 3 days.
- Freeze: If you want to store them longer, you can freeze them. Simply spread the cooked pearls on a baking sheet lined with parchment paper and freeze for a couple of hours. Once frozen, transfer them to an airtight container or freezer bag. They'll keep well in the freezer for up to 3 months.
- Reheat: To reheat frozen pearls, simply boil them in fresh water for a few minutes until they're heated through.
Remember, the key to storing tapioca pearls is to keep them cool and moist. Avoid letting them dry out, as this can affect their texture.
Part 9: Beyond Bubble Tea: Delicious Tapioca Pearl Recipes
We've covered the basics of cooking tapioca pearls. But now, let's talk about all the delicious things you can make with them. While they're synonymous with bubble tea, tapioca pearls are incredibly versatile and can be incorporated into a wide array of desserts and even savory dishes. Here are a few ideas to get your creative juices flowing:
Sweet Delights:
- Mango sticky rice: Add tapioca pearls to your classic mango sticky rice for a delightful chewy texture. The pearls add a playful contrast to the soft, sticky rice and sweet mango.
- Puddings: Tapioca pearls are a wonderful addition to creamy puddings, such as vanilla pudding, chocolate pudding, or even rice pudding. They add a fun, chewy element to these classic desserts.
- Cheesecake: For a unique twist, incorporate tapioca pearls into your cheesecake filling. They'll add a delightful texture contrast. The chewy pearls will play beautifully against the smooth, creamy cheesecake.
- Ice Cream: Mix tapioca pearls into your favourite ice cream for a fun and chewy treat. They're a great way to add a bit of texture and fun to your ice cream creations.
- fruit salad: Toss tapioca pearls into a fruit salad for a surprising and refreshing touch. They add a bit of sweetness and chewiness, making the salad even more enjoyable.
Savory Adventures:
- Salads: Tapioca pearls can add a unique texture to salads, especially those with Asian-inspired flavours. They're a great way to add a bit of fun and surprise to your salads.
- Soup: Add a handful of tapioca pearls to your favourite soup for a creamy and satisfying texture. They add a bit of thickness and chewiness, making the soup even more comforting.
- Stir-fries: Tapioca pearls can be added to stir-fries for a chewy and slightly sweet element. They add a bit of texture and sweetness to the dish, creating a more interesting flavour profile.
Tapioca pearls offer a world of culinary possibilities. Don't be afraid to experiment and create your own unique recipes.
FAQs
Here are some frequently asked questions about tapioca pearls, and the answers you need to feel confident in your cooking journey!
1. Can I use pre-cooked tapioca pearls?
Absolutely! You can buy pre-cooked tapioca pearls, which are usually available in the refrigerated or frozen sections of most supermarkets. These pre-cooked pearls are a convenient option if you don't have time to cook them yourself. However, the texture might not be as chewy as freshly cooked pearls. They are often a bit softer and may have lost some of their flavour.
2. What happens if I overcook tapioca pearls?
Overcooked tapioca pearls will become mushy and lose their chewy texture. They might also start to break down and release starch, which can make your dish cloudy. If you overcook them, it's best to start fresh with a new batch.
3. Can I substitute tapioca pearls with other ingredients?
It depends on what you're making. If you're using tapioca pearls for texture, you can try other chewy ingredients, such as boba, popping boba, or even small pieces of mochi. If you're using them for their sweetness, you can try adding more sugar or honey to your dish.
4. How do I make tapioca pearls at home?
While you can find tapioca pearls in most supermarkets, you can actually make your own! It involves a process of mixing tapioca starch with water and forming small balls, then cooking them in boiling water. It's a fun and rewarding process, but it requires a bit of practice and patience.
5. Are tapioca pearls gluten-free?
Yes, tapioca pearls are naturally gluten-free. They're made from tapioca starch, which is derived from the cassava root, and contains no gluten. They're a great option for those with gluten sensitivities or celiac disease.
Everyone is watching

How to Cook Frozen Lobster Tails Perfectly: A Step-by-Step Guide
RecipesLobster. Just the word conjures up images of lavish meals, special occasions, and a taste of luxury. But let's...

Pigs in a Blanket Cooking Time: How Long to Bake for Perfect Results
RecipesAh, pigs in a blanket. Just the name conjures up images of those delightful little parcels of crispy pastry en...

Pork Fillet Cooking Time: How Long to Cook It Perfectly
RecipesPork fillet, or tenderloin as it's sometimes called, is a real favourite in our house. It's so versatile, and...

The Ultimate Guide to Tender, Juicy Pulled Pork
RecipesRight, let's talk pulled pork. It's one of those dishes that just screams "comfort food," doesn't it? I mean...

The Ultimate Guide to Cooking Sweet Potatoes: From Roasting to Mashing
RecipesSweet potatoes. Just the name conjures up images of warm, comforting dishes, bursts of vibrant color, and a to...
