Let's face it, there's nothing quite like a juicy, perfectly cooked hamburger. It's a simple pleasure, but one that can be surprisingly tricky to master. While the grill might be the classic choice for burger-making, I've found that the stovetop can be just as rewarding, and honestly, much more convenient. No need to wait for the weather to cooperate, or haul out the grill – just a good quality pan and a bit of know-how!
I've been cooking burgers on the stovetop for years, and I've learned a few tricks along the way. I'm not talking about those thin, dry patties you sometimes find at restaurants. I'm talking about thick, juicy, flavour-packed burgers that will leave you craving just one more bite (don't worry, I won't judge if you lick the plate clean).
So, gather your favorite ground beef, grab that cast-iron skillet, and let's embark on this culinary adventure together!
(Part 1) The Beefy Basics

Choosing the Right Beef
The first step in this burger journey is selecting the perfect ground beef. You want something with a good fat content – think 80/20 – to ensure your burger stays juicy and flavorful. The fat renders as it cooks, adding that irresistible richness and moisture that separates a good burger from a dry one. Now, if you prefer a leaner burger, opt for 90/10, but remember to add a little extra fat – think bacon or a pat of butter – to help keep it from drying out.
Prepping Your Meat
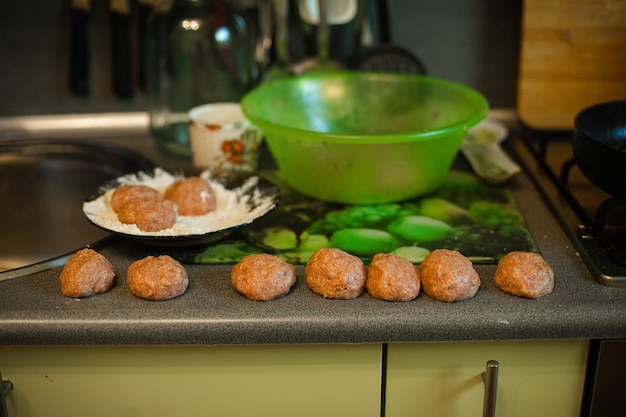
Alright, let's talk about shaping those patties. I'm a firm believer in thick burgers, around 1.5 inches tall. They cook more evenly, retain moisture better, and offer a more satisfying bite. When you're forming those patties, use a gentle hand – don't squish them! And make a small indentation in the center with your thumb. This little trick helps prevent the patty from puffing up during cooking, ensuring a flat, even cook.
Seasoning Secrets
Salt and pepper are the foundation of any good burger seasoning, but don't be afraid to get creative! Garlic powder, onion powder, paprika – even a touch of cayenne pepper can add complexity and depth of flavor. Remember, a little goes a long way!
I have a secret weapon that my dad passed down: a sprinkle of Worcestershire sauce directly onto the patties before cooking. It's a flavor enhancer like no other, adding a savory umami note that elevates the burger experience.
(Part 2) Mastering the Stovetop

The Cast-Iron Advantage
When it comes to cooking burgers on the stovetop, my go-to tool is a cast-iron skillet. It's practically indestructible, heats evenly, gets incredibly hot, and gives those burgers those gorgeous grill marks that make them look as good as they taste. Plus, it develops a seasoned patina over time that adds another layer of flavor to your cooking.
Heating Up
Before you even think about adding the patties to the pan, make sure it's good and hot. I'm talking medium-high heat, where you hear a gentle sizzle when you drop a few drops of water into the pan. If your pan isn't hot enough, the burgers will steam instead of sear, resulting in a pale, lackluster burger.
Adding a Touch of Fat
Don't be shy about adding a little fat to your pan. A tablespoon of butter or a drizzle of olive oil will help prevent sticking and add another layer of flavor. Just don't go overboard – you don't want your burgers to be swimming in oil!
The Art of Searing
This is where the real magic happens! Once your pan is piping hot, gently lay those patties down. You'll hear that satisfying sizzle as the beef hits the heat. Resist the urge to move them for a few minutes! Let them cook undisturbed for about 3-4 minutes per side. You'll know they're ready to flip when the edges start to brown, and the patty releases easily from the pan.
Flipping It Right
Use a spatula to flip the patties – never a fork! You don't want to pierce them and lose all those precious juices. One good flip is all you need, so trust the process and resist the urge to check on them too often.
(Part 3) Cooking to Perfection

cooking times and Doneness
The cooking time will depend on the thickness of your patties and your preferred level of doneness. For a medium-rare burger, aim for 4-5 minutes per side. For medium, cook for 5-6 minutes per side. And for a well-done burger, cook for 6-7 minutes per side.
Remember, it's always better to err on the side of undercooked. You can always cook it a bit more, but you can't uncook it!
I like to use a meat thermometer to ensure my burgers are cooked to the right temperature. For medium-rare, it should be around 130°F (54°C). For medium, aim for 140°F (60°C). And for well-done, it should reach 160°F (71°C).
The Resting Ritual
Once your burgers are cooked to your liking, don't rush to put them on the buns! Give them a couple of minutes to rest, covered with foil. This allows the juices to redistribute throughout the patty, resulting in a more tender and juicy burger.
(Part 4) The Ultimate Burger Experience
Building the perfect burger
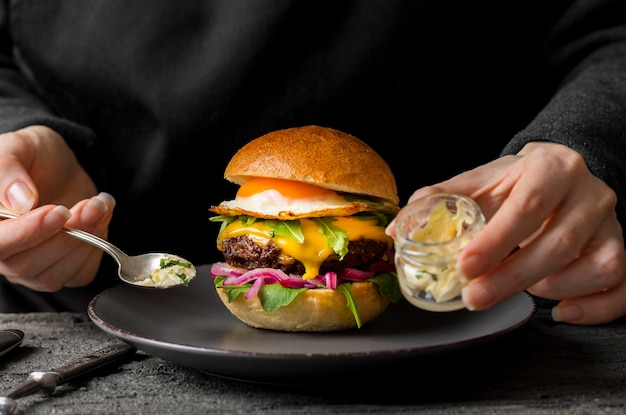
Now for the fun part! It's time to assemble your burger masterpiece. Start with a toasted bun, slather on your favorite toppings, and let your creativity run wild.
I'm a traditionalist at heart. My go-to toppings are simple: crisp lettuce, juicy tomato slices, tangy pickles, thinly sliced onions, and a good dollop of creamy mayonnaise. But I'm always open to experimentation. Bacon, cheese, avocado, caramelized onions, sauteed mushrooms – the possibilities are endless!
The Cheese Factor
If you're a cheese lover, you have a few options. You can place a slice of cheese on top of the patty during the last minute of cooking, allowing it to melt beautifully. Or, you can add it after the burgers have rested. Either way, melted cheese is a must-have for many burger enthusiasts!
The Bun Situation
And let's not forget the bun! You want something soft and fluffy, but sturdy enough to hold up to all those delicious toppings. Don't be afraid to venture beyond the standard white bun. Experiment with brioche, pretzel buns, or even a sourdough roll.
My favorite way to toast a bun is in a dry skillet over medium heat. Just toss them in for a minute or two, flipping them once, until they're golden brown and crispy.
(Part 5) Sidekicks and Extras
Burgers Need Friends
No burger is truly complete without a few sidekicks. Think about those classic pairings: crispy french fries, onion rings, creamy potato salad, tangy coleslaw.
The Perfect Pairing
My personal favorites are a plate of crispy fries. The contrast of the crunchy fries with the juicy burger is just irresistible. I also like to balance out the richness with a simple side salad.
The Right Beverage
And of course, no burger experience is complete without a cold drink. A classic choice is a refreshing glass of iced tea or lemonade. But a cold beer or a milkshake are also great options, depending on your mood.
(Part 6) Tips and Tricks for Burger Bliss
The Doneness Debate
Some people prefer their burgers rare, while others like them well-done. It's all about personal preference. But I always recommend cooking your burger to at least medium, which is 140°F (60°C), to ensure it's safe to eat.
Don't Overcrowd the Pan
Give those burgers some space to breathe! If you overcrowd the pan, they'll steam instead of sear, resulting in a tough, dry burger.
Use a Spatula
When flipping your patties, use a spatula instead of a fork. A fork will pierce the patty, letting out those precious juices. A spatula will gently lift and flip the burger without disrupting its structure.
Don't Press Down
Resist the urge to press down on your burgers as they cook. This will squeeze out the juices, leaving you with a dry burger. Just let them cook undisturbed and you'll be rewarded with a juicy, flavorful patty.
Control the Heat
Keep a close eye on the heat. If your pan is too hot, the burgers will burn on the outside before they have a chance to cook through. If it's not hot enough, they'll steam and won't develop a nice sear.
(Part 7) From Beginner to Burger Master
Start Simple, Get Creative
Don't be afraid to start simple and build your skills from there. Once you've mastered the basics, feel free to experiment with different seasonings, toppings, and even burger recipes. The world of burgers is your oyster!
Embrace the Imperfect Burger
Remember, even the most seasoned cooks have their off days. Don't be too hard on yourself if your burgers don't turn out perfectly every time. Just keep practicing, experimenting, and having fun, and you'll eventually become a burger master.
Have Fun!
Making burgers should be an enjoyable experience! Gather your family and friends, put on some good music, and savor the process. The most important thing is to relax and have a good time. After all, it's all about creating delicious memories.
(Part 8) FAQs
Q: Can I use frozen ground beef?
A: It's not ideal, but if that's all you have, you can use it. Just make sure it's fully thawed before you cook it, and you may need to cook it a little longer to reach the desired doneness.
Q: How do I know if my burger is cooked through?
A: The best way to tell is to use a meat thermometer. For medium-rare, it should be around 130°F (54°C). For medium, aim for 140°F (60°C). And for well-done, it should reach 160°F (71°C).
You can also check for doneness by pressing on the center of the patty. If it springs back, it's done. If it's still soft, it needs to cook a bit longer.
Q: What if my burger is too dry?
A: If your burger is a little dry, you can add some moisture back by topping it with a sauce like bbq sauce or ketchup. Or, you can try adding a slice of cheese or some avocado to help add richness and moisture.
Q: What if my burger is too greasy?
A: If your burger is too greasy, you can try draining some of the excess fat from the pan before flipping it. Or, you can use a paper towel to blot up the excess grease.
Q: Can I make burgers on the stovetop if I don't have a cast-iron skillet?
A: You absolutely can! Any heavy-bottomed pan will work, like a stainless steel skillet or a nonstick pan. Just make sure the pan is hot before you add the patties, and don't overcrowd the pan.
Now, go forth and conquer the world of stovetop burgers! You've got this!
Everyone is watching

How to Cook Frozen Lobster Tails Perfectly: A Step-by-Step Guide
RecipesLobster. Just the word conjures up images of lavish meals, special occasions, and a taste of luxury. But let's...

Pigs in a Blanket Cooking Time: How Long to Bake for Perfect Results
RecipesAh, pigs in a blanket. Just the name conjures up images of those delightful little parcels of crispy pastry en...

Pork Fillet Cooking Time: How Long to Cook It Perfectly
RecipesPork fillet, or tenderloin as it's sometimes called, is a real favourite in our house. It's so versatile, and...

The Ultimate Guide to Cooking Delicious Frankfurters
RecipesLet's face it, we all love a good frankfurter. It's a classic, simple, and always satisfying. But let's be rea...

Wolf Meat Recipes: A Guide to Cooking Wild Game
RecipesLet's be honest, you don't see wolf meat at your local butcher shop every day. It's a bit of a wild card, but ...
