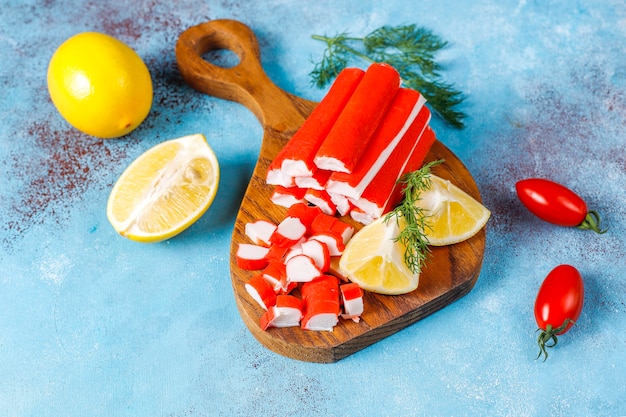
Ah, frozen snow crab legs. They’re a real treat, aren’t they? The promise of succulent, sweet crab meat, all ready to be cracked open and devoured. But let’s be honest, sometimes those frozen beauties end up a bit dry and rubbery, leaving you disappointed. Not anymore, my friend! I’ve been down that road myself, experimenting with different methods, and I’ve finally cracked the code for cooking perfect snow crab legs, every single time. I’m spilling all my secrets, so get ready to elevate your crab game.
(Part 1) The Right Tools – Your culinary arsenal
First things first, let’s talk tools. Having the right equipment is like having the right weapons in a battle – it makes all the difference. You wouldn’t try to win a sword fight with a spoon, would you? So, let's make sure you’ve got your culinary arsenal ready to go.
Essential Equipment:
Here’s what you need to become a crab leg master:
- A Large Stockpot or dutch oven: You need a pot big enough to hold your crab legs comfortably, without them overcrowding and steaming unevenly. Imagine a swimming pool for your crab legs, not a cramped sardine can.
- A Steamer Basket: This is a crucial piece of equipment, especially when steaming. It lifts the crab legs above the water, allowing steam to circulate evenly, resulting in perfectly cooked crab meat.
- A Pair of crab crackers: These are essential for cracking open those delicious legs. Think of them as the key to unlocking the sweet, juicy treasure inside.
- A Crab Fork: You’ll need this to pick out all the succulent crab meat. Imagine a tiny, dedicated fork just for your crab feast.
- Kitchen Shears: These are super handy for snipping off the tips of the legs before cooking. It helps prevent them from breaking during the cooking process. It’s like a little insurance policy for your delicious crab legs.
- A Timer: You need to keep track of the cooking time, so a trusty timer is a must. No one wants to overcook or undercook their crab legs.
(Part 2) The Secret Ingredient: Salt Water Magic
Now, let’s get to the heart of the matter. This is where the real magic happens – salt water. It’s not just about adding a bit of flavour; it’s about creating the perfect environment for your crab legs to cook in.
Science Behind the Salt water bath
You see, the salt in the water actually helps to draw out moisture from the crab meat, making it incredibly tender and flavourful. Imagine the salt acting like a little magnet, pulling out the natural juices and concentrating the deliciousness.
How to Create the Perfect Salt Water Bath:
It’s really quite simple:
- Fill your pot: Fill your large stockpot or Dutch oven with enough water to cover the crab legs by about two inches. You want them to be comfortably submerged, like they’re taking a luxurious crab bath.
- Add salt: Now comes the crucial part – add a generous amount of salt. We’re aiming for a salty taste that's just a bit more than seawater. Imagine you’re at the beach, but a little bit saltier. A good rule of thumb is about a cup of salt per gallon of water, but don’t be afraid to go a bit heavier if you like things salty. It's your crab leg party, so you decide!
- Bring to a boil: Bring the water to a rolling boil, making sure the salt dissolves completely before you add your crab legs.
(Part 3) The Art of Defrosting: A Gentle Touch
Alright, now let’s talk about defrosting. This is a crucial step that people often get wrong, but it makes a huge difference in the final outcome.
The Best Method: The Refrigerator Method
My go-to method is the refrigerator method. It's the gentlest approach, ensuring your crab legs defrost evenly, preserving their delicate texture and flavour. Think of it as giving your crab legs a luxurious spa treatment.
- Prepare your crab legs: Transfer your frozen crab legs to a plate lined with paper towels. This helps absorb any excess moisture as they defrost.
- Time to relax: Cover the plate with plastic wrap and place it in your refrigerator for 24 hours. Yes, 24 hours! I know it might sound like a long time, but trust me, it’s worth the wait. The slow defrosting process ensures the meat stays juicy and tender.
Alternative Methods: When Time is Tight
Now, let’s be real. Sometimes you don't have 24 hours to spare. If you need a quicker method, here are two options, but remember, they’re not as good as the refrigerator method.
- Cold Water Defrosting: Place the frozen crab legs in a bowl of cold water, making sure the water is constantly changing. This takes about 3-4 hours. Keep the water cold, not lukewarm, to avoid uneven thawing.
- Microwave Defrosting: This is the least ideal option and can sometimes lead to uneven thawing. Use the defrost setting on your microwave and keep a close eye on your crab legs.
(Part 4) Cooking Time – Finding the Sweet Spot
We’re getting closer to the grand finale! Now, let's talk about cooking time. This is where things can get tricky, but don't worry. I’ll break it down for you.
Factors Influencing Cooking Time
The perfect cooking time depends on a few things:
- Crab Leg Size: Smaller crab legs cook faster than larger ones, so keep that in mind. It's like cooking a small steak versus a thick one – the smaller one needs less time.
- Cooking Method: Boiling and steaming have slightly different cooking times. Think of it like baking – you wouldn’t cook a cake at the same temperature as a pizza.
General Cooking Times for Snow Crab Legs:
Here’s a general guide to cooking times, but remember, it's always better to err on the side of undercooked rather than overcooked. You can always cook them a bit longer if needed. It's better to be safe than sorry, and enjoy juicy, tender crab meat.
| Size of Crab Legs | Boiling Time (Minutes) | Steaming Time (Minutes) |
|---|---|---|
| Small (under 6 inches) | 8-10 | 6-8 |
| Medium (6-8 inches) | 10-12 | 8-10 |
| Large (8-10 inches) | 12-15 | 10-12 |
| Extra Large (over 10 inches) | 15-20 | 12-15 |
Checking for Doneness: The Telltale Signs
The best way to know if your crab legs are cooked is to check the meat. Here’s what you should look for:
- Opaque and Firm: The meat should be opaque and firm, not translucent or mushy. If it’s still translucent, it needs more cooking time. Imagine it like a piece of chicken – if it’s still pink inside, it needs more time on the grill.
- Easy to Pull Away: The crab meat should easily pull away from the shell. If it sticks, it needs more time.
(Part 5) The Boiling Method: A Classic Approach
Let’s talk about boiling. It’s a classic method, simple and straightforward. A good choice if you’re a bit unsure about other techniques.
The Boiling Process: A Step-by-Step Guide
- Prepare your salt water bath: Follow the instructions in Part 2 to get your salt water bath boiling. Imagine you're setting the stage for a delicious crab leg performance.
- Add the crab legs: Gently lower the thawed crab legs into the boiling water. Don’t overcrowd the pot, and make sure the water is back at a rolling boil. Think of it like a relaxing hot tub for your crab legs.
- Cook, cook, cook: Use the general cooking times listed in Part 4, adjusting based on the size of your crab legs.
- Remove from the heat: Once the crab legs are cooked, remove them from the pot using a large spoon or tongs.
- Cool down: Let the crab legs cool for a few minutes before serving.
(Part 6) The Steaming Method: A Gentle Touch
Now, let's move on to steaming. This is my personal favourite, as it's a more gentle method that results in a delicate flavour and texture. Think of it like a spa treatment for your crab legs.
The Steaming Process: A Step-by-Step Guide
- Prepare your steamer: Fill the base of your steamer with about an inch of water.
- Bring the water to a boil: Place the steamer over medium-high heat and bring the water to a rolling boil.
- Add the crab legs: Once the water is boiling, place the thawed crab legs in the steamer basket. Don’t overcrowd the basket. Give them room to breathe!
- Steam to perfection: Use the general steaming times listed in Part 4, adjusting based on the size of your crab legs.
- Remove and cool: Once the crab legs are cooked, carefully remove the steamer basket from the pot. Let them cool for a few minutes before serving.
(Part 7) Tips and Tricks – Elevate Your Crab Game
Now, for some extra tips and tricks that can help you take your crab leg cooking to the next level.
Tips for Success
- Don't overcook: Overcooked crab meat is dry and rubbery. It's better to err on the side of undercooked. You can always cook them a bit longer if needed. Think of it as a delicate dance – you don’t want to overstep and ruin the flavour.
- Serve immediately: Freshly cooked crab legs are the best, so try to serve them as soon as possible after they've cooked. Imagine the anticipation building as you bring the steaming crab legs to the table.
- Dip it up: A good dipping sauce can really enhance the flavour of your crab legs. My personal favourites are melted butter, lemon butter, and garlic butter. Think of it as a finishing touch that takes your crab leg experience to the next level.
- Crack and enjoy: Once they’re cooked and cooled slightly, crack open those delicious crab legs and enjoy!
Tricks of the Trade
- Add aromatics: Elevate your crab legs by adding aromatics to your boiling water or steamer. Some good options include lemon slices, bay leaves, peppercorns, and fresh herbs like parsley or thyme. Think of it as adding a symphony of flavours to your crab leg symphony.
- Keep them moist: Once the crab legs are cooked, keep them moist by covering them with a damp paper towel or plastic wrap. It’s like keeping your crab legs in a mini spa after their hot bath.
- Don’t discard the broth: The broth from your crab legs is packed with flavour. You can use it to make a delicious soup or seafood sauce. Think of it as a secret weapon for your culinary arsenal.
(Part 8) FAQs – Your Crab Leg Questions Answered
Now, let’s answer some common questions people have about cooking frozen snow crab legs.
1. Can I refreeze cooked crab legs?
It’s not recommended to refreeze cooked crab legs. They’ll lose their texture and flavour. Think of it like a wilted flower – it's best to enjoy it fresh.
2. What if my crab legs are still frozen?
If your crab legs are still frozen, don’t panic. Just add them to your boiling water or steamer and increase the cooking time by about 5 minutes.
3. Can I use fresh crab legs instead of frozen?
Absolutely! Fresh crab legs are fantastic and cook up beautifully. The cooking time will be shorter, about half the time for frozen crab legs.
4. How do I know if my crab legs are bad?
Check for signs of spoilage:
- A strong, fishy smell: This is a sign of spoilage. Think of it like a spoiled fish – if it smells off, it's off.
- Discoloration: The crab legs should be a bright white or light orange colour. If they’re grey or brown, they’re likely bad.
- Slimy texture: If the crab legs feel slimy or sticky, they're bad.
5. How long can I store cooked crab legs in the refrigerator?
Cooked crab legs can be stored in the refrigerator for up to 3 days. Keep them in an airtight container or wrapped tightly in plastic wrap.
(Part 9) Conclusion: Your Crab Leg Journey Begins
Well, there you have it! My comprehensive guide to cooking frozen snow crab legs perfectly every time. I hope you’ve found it useful. Remember, the key is to use fresh, high-quality crab legs, defrost them properly, and cook them in a flavourful salt water bath.
Now, go forth and conquer the world of crab legs!
Everyone is watching

How to Cook Frozen Lobster Tails Perfectly: A Step-by-Step Guide
RecipesLobster. Just the word conjures up images of lavish meals, special occasions, and a taste of luxury. But let's...

Pigs in a Blanket Cooking Time: How Long to Bake for Perfect Results
RecipesAh, pigs in a blanket. Just the name conjures up images of those delightful little parcels of crispy pastry en...

Pork Fillet Cooking Time: How Long to Cook It Perfectly
RecipesPork fillet, or tenderloin as it's sometimes called, is a real favourite in our house. It's so versatile, and...

The Ultimate Guide to Tender, Juicy Pulled Pork
RecipesRight, let's talk pulled pork. It's one of those dishes that just screams "comfort food," doesn't it? I mean...

The Ultimate Guide to Cooking Delicious Frankfurters
RecipesLet's face it, we all love a good frankfurter. It's a classic, simple, and always satisfying. But let's be rea...