There's something about the unassuming bag of dried black beans that holds so much promise. They sit there, dark and unassuming, yet they have the potential to transform into the heart of countless delicious dishes. But let's be honest, cooking dried beans can be a bit of a culinary gamble. Those memories of mushy, undercooked, or even worse, bloated beans still haunt me.
But after years of trial and error, I've finally cracked the code to consistently achieving perfect dried black beans. It's not about magic, but about understanding the nuances – from picking the right beans to mastering the art of the simmer.
This guide is your roadmap to bean-cooking nirvana, filled with my personal experiences, tips, and tricks that have helped me conquer the bean-cooking battlefield. Get ready to discover the joy of perfectly cooked black beans, a versatile ingredient that will elevate your culinary game.
(Part 1) Choosing the Right Beans – The Foundation of Flavor
Picture this: you're ready to bake a cake, but your flour is stale. Would you still use it? Probably not. So why settle for less-than-perfect beans? Choosing the right beans is the first step to a truly delicious outcome.
A Fresh Start: Avoiding Stale Beans
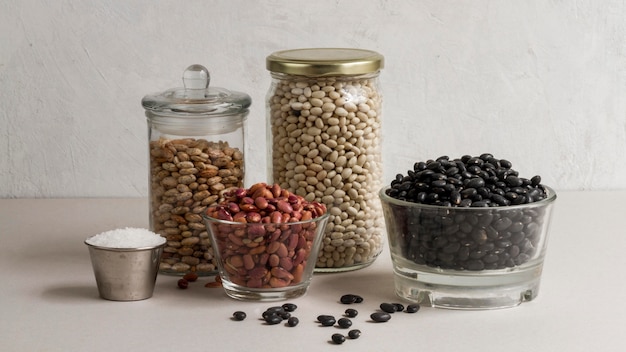
Look for beans that are firm and plump, boasting a vibrant black hue. Avoid anything that looks discolored, shriveled, or dusted with a white film – these are signs of aging and won't yield the tender texture you desire. I've learned the hard way that using beans that have been sitting around for ages can lead to disappointing results, leaving you with tough little pellets instead of the velvety smooth beans you crave.
Bean Variety: Choosing the Right Partner
Black beans aren't all created equal. Each variety offers unique characteristics, adding a distinct touch to your dishes.
- Black Turtle Beans: These are the most common, boasting a firm texture and a mild flavor that's perfect for a variety of recipes.
- Black Beans: Similar to turtle beans but a bit smaller in size. These beans often hold their shape well, making them ideal for salads.
- Achoque Beans: These larger beans offer a richer, more earthy flavor. Their firm texture makes them perfect for dips, stews, and dishes where you want a bit more bite.
Black turtle beans are my go-to choice for everyday dishes, while achoque beans bring an extra layer of depth when I'm craving something bolder.
(Part 2) The Soak: Unlocking the Bean's Potential
Soaking is more than just a step; it's a culinary transformation. It's about softening the beans' tough outer layer, preparing them for a smooth and effortless cooking journey.
Why Soak? A Culinary Transformation
Soaking not only makes the beans easier to cook, but it also helps to:
- Reduce gas and bloating: Soaking removes some of the starches that can cause digestive discomfort.
- Shorten cooking time: Soaking softens the beans, making them cook faster.
- Ensure even cooking: Soaking helps the beans absorb water evenly, leading to a consistent texture.
My first attempt at cooking dried beans without soaking was a culinary disaster. The beans were hard as rocks, and it felt like I was battling them instead of cooking them. Soaking is a must, even though it requires a little patience.
The Soaking Ritual: Step-by-Step
Here's how I approach the soaking process:
- Rinse thoroughly: Use a fine-mesh strainer to rinse the beans under cold water. This ensures you remove any debris or dust that might be hiding.
- Create the soaking solution: Combine the rinsed beans with about 3 times the amount of cold water in a large bowl. I usually go for a 1:3 ratio of beans to water, making sure the beans are fully submerged.
- A pinch of salt: Add a generous pinch of salt to the soaking water. This not only seasons the beans but also helps prevent them from becoming mushy.
- Refrigerate for optimal results: Cover the bowl with plastic wrap or a lid and refrigerate for at least 8 hours, up to 24 hours.
You can soak at room temperature, but I find that the beans can develop an unpleasant "funky" taste after a few hours. The fridge keeps them fresh and avoids any unexpected surprises.
(Part 3) The Simmer: A Gentle Approach to Culinary Perfection
The simmer is where the magic happens. It's about coaxing the beans into tenderness, achieving that velvety smooth texture that melts in your mouth. It's about embracing a slow, gentle approach, allowing the beans to reach their full potential.
The Power of a Gentle Simmer
High heat can actually make beans tough and unappealing, so a low and slow approach is key. A gentle simmer allows the beans to cook evenly, creating that melt-in-your-mouth texture we all crave.
I've learned this lesson the hard way. Those times I tried to speed up the process with high heat resulted in disappointing, hard beans. The gentle simmer is a culinary secret that delivers consistently perfect results.
Simmering Secrets: Step-by-Step
Here's how to master the art of simmering:
- Drain and rinse: Drain the soaked beans and rinse them thoroughly under cold water.
- Pot prep: Transfer the rinsed beans to a large pot with a lid.
- Plenty of water: Add fresh water to the pot, ensuring the beans are fully covered by at least 2 inches of water.
- Bring to a boil: Bring the water to a boil over high heat.
- Reduce and simmer: Reduce the heat to low and simmer gently for 1 to 2 hours, or until the beans are tender but still hold their shape.
- Skim for clarity: Skim off any foam that forms on the surface of the water during cooking. This helps to maintain a clear broth and prevent cloudiness.
- Seasoning touch: Add salt to taste about 15 minutes before the beans are done.
(Part 4) Checking for Doneness: The "Smash Test"
The "smash test" is my go-to method for determining if my beans are ready. It's a simple yet effective way to ensure that you're not biting into tough, undercooked beans.
The "Smash Test": A Culinary Finger Test
Take a single bean and gently press it between your fingers. If it easily mashes into a smooth paste, your beans are perfectly cooked.
I find this method much more reliable than simply looking at the beans. They might appear cooked, but if they're still hard on the inside, you'll know it when you bite into them.
Signs of Undercooked Beans: Don't Give Up!
If your beans are still too hard, don't panic! Simply simmer them for another 15-20 minutes, and then test them again.
Signs of Overcooked Beans: Time to Start Over (Or a Quick Fix)
If your beans are too mushy, it's best to start over with a fresh batch. However, if you're in a hurry, try adding a tablespoon of cornstarch to the pot and simmering for another 10 minutes. The cornstarch will help to thicken the broth and give the beans a slightly firmer texture.
(Part 5) The Finishing Touches: Elevating Flavor and Texture
Your beans are perfectly cooked, but now it's time to take them from good to great. These finishing touches will add depth of flavor and textural variety.
Seasoning Magic: A Symphony of Flavors
I always start with a good dose of salt, but you can also experiment with other seasonings:
- Smoked Paprika: Adds a smoky depth that complements the beans beautifully.
- Cumin: A classic pairing for black beans, cumin brings a warm, earthy note.
- Garlic Powder: Adds a subtle, savory flavor that enhances the bean's natural taste.
Textural Variety: Adding Depth and Crunch
For a textural contrast, try adding chopped onions, peppers, or cilantro. You can also experiment with a tablespoon of olive oil or a dollop of sour cream before serving, adding richness and a creamy element.
(Part 6) Storage: Keeping Your Beans Fresh and Ready to Use
You've created a pot of perfectly cooked black beans, but now it's time to make sure they stay delicious and ready for future culinary adventures.
Refrigeration: Fresh and Ready for the Week
You can store cooked black beans in the refrigerator for up to 5 days. Simply transfer them to an airtight container and let them cool completely before storing.
I love making a big batch on the weekend, ensuring I have a flavorful foundation for quick and easy meals throughout the week. They're perfect for salads, soups, burritos, and so much more.
Freezing: A Culinary Time Capsule
Freezing cooked black beans is a great way to preserve them for up to 3 months. Transfer them to a freezer-safe container and freeze them.
To use frozen beans, defrost them in the refrigerator overnight or in the microwave.
(Part 7) Culinary Applications: A World of Bean-Inspired Dishes
The best part? Your perfectly cooked black beans are ready to star in countless dishes, adding heartiness, flavor, and versatility to your culinary creations.
Salad Star: A Hearty Addition
Black beans are a classic salad addition, providing a protein-rich element and a satisfying texture. Try them in a simple black bean and corn salad, a southwestern-style salad with avocado and cilantro, or a hearty bean salad with chopped vegetables and a vinaigrette.
Soup and Stew Hero: Comforting and Flavorful
Black beans are a staple in soups and stews, adding creaminess and a comforting depth of flavor. They shine in classic black bean soup, spicy chili, or hearty vegetable stew.
Burrito and Taco Essential: A Filling and Delicious Addition
Black beans are a must-have for any burrito or taco enthusiast. They provide a delicious and protein-rich filling that can be dressed up with your favorite toppings, like cheese, salsa, and guacamole.
Beyond the Classics: A Culinary Adventure
Black beans go beyond the typical dishes, offering a world of culinary possibilities:
- Dips and Spreads: Black beans are the base for delicious dips and spreads. Try a simple black bean dip with avocado and cilantro, or a more complex dip with roasted vegetables and spices.
- vegetarian chili: Black beans are a star ingredient in vegetarian chili, adding texture, protein, and a delicious earthy flavor.
- Burgers and Meatless Loaf: Black beans are a fantastic base for vegetarian burgers and meatless loaf, offering heartiness and a satisfying flavor.
(Part 8) Troubleshooting: Solving Common Bean-Cooking Challenges
Even with the best intentions, sometimes things don't go as planned. Here's how to tackle some common bean-cooking challenges.
Problem: Beans are too hard
Solution: If your beans are still too hard after simmering for the recommended time, simmer them for another 15-20 minutes, and then test them again.
Problem: Beans are too mushy
Solution: If your beans are too mushy, it's best to start over with a fresh batch. However, if you're in a hurry, you can try adding a tablespoon of cornstarch to the pot and simmering for another 10 minutes. The cornstarch will help to thicken the broth and give the beans a slightly firmer texture.
Problem: Beans are gassy
Solution: Soaking the beans before cooking helps to remove some of the starches that can cause gas and bloating. You can also try adding a tablespoon of baking soda to the soaking water.
(Part 9) FAQs: Common Questions and Answers
1. How long do dried black beans need to soak?
Dried black beans should be soaked for at least 8 hours, or up to 24 hours. Soaking helps to break down the tough outer layer of the beans and makes them easier to cook.
2. Can I cook black beans without soaking them?
You can cook black beans without soaking them, but it will take significantly longer, and the beans may not be as tender. It's generally recommended to soak dried beans before cooking for the best results.
3. How long do black beans take to cook?
Soaked black beans typically take 1-2 hours to cook, depending on the type of beans and your preferred level of tenderness.
4. Can I use a pressure cooker to cook black beans?
Yes, you can cook black beans in a pressure cooker. This is a great option if you're short on time. Simply follow the manufacturer's instructions for cooking dried beans in a pressure cooker.
5. What can I do with leftover cooked black beans?
Leftover cooked black beans can be stored in the refrigerator for up to 5 days. You can use them in salads, soups, burritos, tacos, dips, and many other dishes.
Everyone is watching

How to Cook Frozen Lobster Tails Perfectly: A Step-by-Step Guide
RecipesLobster. Just the word conjures up images of lavish meals, special occasions, and a taste of luxury. But let's...

Pork Fillet Cooking Time: How Long to Cook It Perfectly
RecipesPork fillet, or tenderloin as it's sometimes called, is a real favourite in our house. It's so versatile, and...

Pigs in a Blanket Cooking Time: How Long to Bake for Perfect Results
RecipesAh, pigs in a blanket. Just the name conjures up images of those delightful little parcels of crispy pastry en...

The Ultimate Guide to Cooking Delicious Frankfurters
RecipesLet's face it, we all love a good frankfurter. It's a classic, simple, and always satisfying. But let's be rea...

Wolf Meat Recipes: A Guide to Cooking Wild Game
RecipesLet's be honest, you don't see wolf meat at your local butcher shop every day. It's a bit of a wild card, but ...