There's a reason roast chicken is a classic comfort food. The aroma alone can transport you back to childhood memories of family dinners, and the succulent meat and crispy skin are just irresistible. But let's be honest, sometimes perfecting a roast chicken can feel like a culinary puzzle. Overcooked? Dry? Undercooked? I've been there, and I'm here to help you avoid those pitfalls. So grab a notepad, a glass of something refreshing, and let's get cooking together.
(Part 1) - Choosing the Right Chicken: Your Foundation for Flavor

The first step towards a stunning roast chicken is picking the right bird. I'm a firm believer in fresh, free-range chicken. There's a noticeable difference in the flavour, trust me! A 5lb chicken is ideal for a family meal, but if you're feeding a crowd, you might want to go for a larger one.
What to Look for at the Butcher's: A Guide to Freshness
Don't be intimidated by the butcher's counter! It's a great place to get personalized advice. When choosing your chicken, look for these signs of freshness:
- Color: The skin should be a pale yellow or white, not too pink. A pink hue could indicate the chicken wasn't properly chilled or might have been sitting out for a while.
- Smell: A fresh chicken will have a mild, slightly sweet smell. If it smells strong or sour, steer clear.
- Firmness: The chicken should feel firm to the touch. If it's mushy or feels like it's losing its shape, it might not be as fresh.
(Part 2) - Prepping the Chicken: Getting Ready to Roast

Now, let's get our chicken ready to shine! It's a simple process, but these steps make a big difference in the final result.
Patting it Dry: The Key to Crispy Skin
I always start by patting the chicken dry with paper towels. This removes excess moisture, allowing the skin to crisp up beautifully in the oven. Imagine that golden, crackling skin! Delicious!
Seasoning: A Symphony of Flavors
Next, it's time for seasoning. I love a simple blend of salt and freshly ground black pepper. But you can add your own twist! A pinch of paprika or cayenne pepper adds a touch of heat, while herbs like rosemary, thyme, or sage lend a delightful aroma. Don't be afraid to get creative!
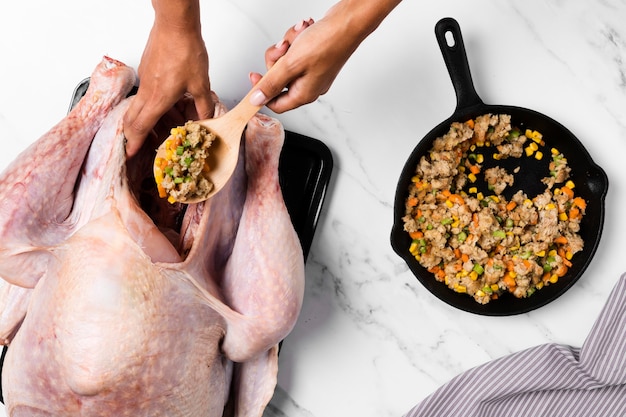
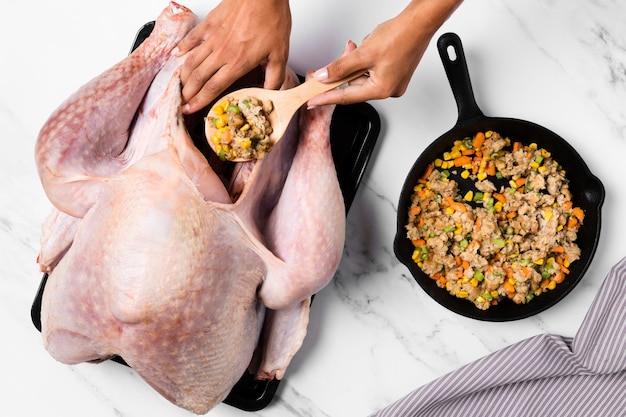
Stuffing the Chicken: Adding a Delicious Dimension
Stuffing the chicken is optional, but I find it adds another layer of flavour. Some folks prefer a simple herb and lemon stuffing, while others go for a classic breadcrumb mixture. If you're stuffing, be careful not to overfill the cavity. Leave some space for the stuffing to cook properly.
(Part 3) - Getting Ready to Roast: Setting the Stage for Success

We've got our chicken prepped and ready to go. Now, let's get our oven ready to work its magic.
Choosing the Right roasting pan: A Spacious Home for Your Chicken
A large, shallow roasting pan is ideal for a 5lb chicken. You want a pan big enough to comfortably hold the chicken without overcrowding it, allowing for good air circulation. I recommend using a roasting rack as well. This elevates the chicken off the bottom of the pan, ensuring even cooking and crispy skin on all sides.
Preheating the Oven: The Power of a Steady Temperature
Preheating your oven to 350°F (175°C) is essential. This gentle heat allows the chicken to cook slowly and evenly, resulting in tender meat and a beautiful golden-brown exterior.
(Part 4) - Roasting the Chicken: Bringing Your Bird to Life
Here comes the moment we've been waiting for! It's time to get that chicken into the oven and let it work its magic.
Placing the Chicken in the Oven: A Comfortable Position for Perfect Cooking
Place the chicken in the roasting pan, breast side up, and pop it into the preheated oven. If you're using a roasting rack, make sure it's positioned so that the chicken is sitting comfortably on top. We want that chicken to feel at home!
roasting time: The Key to Doneness
Now, here's where the roasting time comes into play. It's a bit of an art, and the exact time can vary depending on your oven and your desired level of doneness. As a general rule, a 5lb chicken will take around 1 hour and 45 minutes to 2 hours.
A good tip is to start checking the chicken's internal temperature after about an hour and 30 minutes. I'll tell you how to do that in just a bit!
(Part 5) - Checking for Doneness: Making Sure Your Chicken is Ready to Shine
You're almost there! It's time to make sure that chicken is cooked to perfection. There are a few ways to tell if it's ready to serve.
Using a meat thermometer: A Scientific Approach to Doneness
The most reliable way to check for doneness is using a meat thermometer. Insert it into the thickest part of the thigh, making sure it doesn't touch any bone. The chicken is cooked when it reaches an internal temperature of 165°F (74°C).
Other Signs of Doneness: Visual Cues and Texture
While the thermometer is the most reliable method, you can also look for other signs of doneness:
- Juices: When you pierce the thigh with a fork, the juices should run clear, not pink.
- Leg Movement: The leg should feel firm to the touch, and when you gently pull it, it should move freely without resistance.
- Skin: The skin should be golden brown and crispy.
(Part 6) - Resting the Chicken: Letting the Juices Settle In
Resist the urge to dive in right away! After you remove the chicken from the oven, let it rest for 15-20 minutes before carving. This allows the juices to redistribute throughout the meat, making it incredibly juicy and tender.
While the chicken is resting, you can make your gravy or prepare your sides. It's a great time to catch your breath and savor the delicious aroma filling your kitchen.
(Part 7) - Carving the Chicken: Unveiling the Deliciousness
The resting time is over, and it's time to carve! This is where a sharp carving knife comes in handy. If you don't have one, a good chef's knife will work just fine.
Carving Tips: Getting It Right, Step by Step
Follow these steps for a neat and easy carving process:
- Start with the Breast: Begin by cutting down the length of the breastbone, separating the two breasts.
- Slice the Breast Meat: Carefully slice the breast meat away from the bone, working from the bone outwards.
- Thigh and Leg: Cut the thigh and leg meat away from the bone, or leave them whole if you prefer.
- Remove the Wings: You can remove the wings for easier serving, or leave them attached.
(Part 8) - Serving the Chicken: A Feast for the Senses
Congratulations! You've just mastered the art of roasting a chicken. Now, it's time to celebrate your culinary achievement.
Serving Ideas: From Traditional to Creative
Roast chicken is incredibly versatile. Here are some ideas to inspire you:
- Classic Comfort: Serve the chicken with mashed potatoes, roasted vegetables, and a rich gravy. This is a timeless combination that never fails to impress.
- Light and Fresh: Slice the chicken breast and serve it on a salad with a lemon vinaigrette dressing.
- Hearty and Savory: Dice the leftover chicken and use it in a soup or stew.
- Chicken Sandwiches: Make a delicious chicken sandwich with the leftover meat, dressed with your favorite toppings.
(Part 9) - Tips for a Crispy Skin: The Secret to Deliciousness
There's nothing quite like that crispy, golden-brown skin. It's a flavor sensation that elevates a roast chicken to another level. Here are some tips to help you achieve that perfect crunch:
- Dry It Out: Pat the chicken dry thoroughly with paper towels before roasting. This helps to remove excess moisture, allowing the skin to crisp up better.
- Give It Space: Don't overcrowd the roasting pan. Give the chicken plenty of room to breathe and circulate air around it.
- High Heat Start: Roast the chicken at a high temperature, around 400°F (200°C) for the first 30 minutes. This helps the skin to brown and crisp up. Then, reduce the temperature to 350°F (175°C) for the rest of the cooking time.
- Basting: Basting the chicken with melted butter or oil during the cooking process helps to keep the skin moist and crispy. Just be careful not to over-baste, or the skin will become soggy.
(Part 10) - Troubleshooting: Solutions to Common Roasting Challenges
Let's face it, sometimes things don't go perfectly in the kitchen. Here are some common roasting issues and how to fix them:
Dry Chicken: Reviving a Dry Bird
If your chicken turns out dry, it's likely that it was overcooked. To prevent this, make sure you use a meat thermometer and remove the chicken from the oven as soon as it reaches 165°F (74°C).
If you already have a dry chicken, there are ways to salvage it. You can try adding a little moisture back in by adding a bit of broth or water to the pan. You can also slice the chicken and serve it with a sauce, such as a creamy gravy or a lemon butter sauce.
undercooked chicken: Bringing It to the Right Temperature
If your chicken is still pink in the middle, it's not fully cooked. Don't panic! Simply return it to the oven and cook it for another 15-20 minutes, or until the internal temperature reaches 165°F (74°C).
Unevenly Cooked Chicken: Achieving Even Doneness
An unevenly cooked chicken usually means it was overcrowded in the roasting pan. Make sure you leave enough space between the chicken and the sides of the pan, and consider using a roasting rack to help the chicken cook evenly.
(Part 11) - Alternatives to Roasting: Exploring Different Cooking Methods
While roasting is the classic method for cooking a chicken, there are other options available, each with its own unique flavour and texture.
Chicken in a Crockpot: Hands-Free Cooking
A crockpot is a great way to cook a chicken hands-free. Simply place the chicken in the crockpot, add some seasonings and liquids, and cook it on low for 6-8 hours. This results in incredibly tender and flavorful chicken, perfect for shredding and using in salads, tacos, or sandwiches.
grilled chicken: A Smoky and Flavorful Option
If you're looking for a faster cooking method, grilling chicken offers a unique smoky flavour. Just be sure to cook it over medium heat and turn it frequently to prevent burning.
pan-fried chicken: Quick and Easy Weeknight Meals
pan-frying chicken is a great option for quick and easy weeknight meals. Cut the chicken into pieces and cook it in a skillet over medium heat until golden brown and cooked through. Pan-fried chicken is perfect for stir-fries, salads, or serving with a side of rice or mashed potatoes.
(Part 12) - Leftover Chicken Ideas: Getting Creative with Your Leftovers
Leftover chicken is a treasure trove of culinary possibilities! Here are some ideas to make the most of those delicious leftovers:
- Salad Superstar: Add shredded chicken to a salad for a protein boost and a satisfying meal.
- Sandwich Sensation: Use leftover chicken for a hearty and flavorful sandwich.
- Soup and Stew Magic: Dice the chicken and use it to add flavour and protein to your favorite soups and stews.
- Chicken Pot Pie: A comforting classic, chicken pot pie can be made with leftover chicken for a quick and easy meal.
- Freezing for Later: If you have more leftover chicken than you can use immediately, freeze it for later use. It's a convenient way to have a quick meal on hand.
FAQs: Addressing Your Most Common Questions
Q1: How do I know if my chicken is cooked through?
The best way to tell if your chicken is cooked through is to use a meat thermometer. Insert it into the thickest part of the thigh, making sure it doesn't touch any bone. If the temperature reads 165°F (74°C), it's ready. You can also look for clear juices when you pierce the thigh with a fork. If the juices are still pink, the chicken needs more time in the oven.
Q2: What happens if I overcook my chicken?
Overcooked chicken will be dry and tough. To prevent this, use a meat thermometer to check the internal temperature and remove the chicken from the oven as soon as it reaches 165°F (74°C).
If you already have a dry chicken, there are ways to salvage it. You can try adding a little moisture back in by adding a bit of broth or water to the pan. You can also slice the chicken and serve it with a sauce, such as a creamy gravy or a lemon butter sauce.
Q3: What should I do if my chicken is undercooked?
If your chicken is undercooked, it needs more time in the oven. Return it to the oven and cook it for another 15-20 minutes, or until the internal temperature reaches 165°F (74°C).
Q4: Can I roast a frozen chicken?
It's not recommended to roast a frozen chicken. It's best to thaw it completely in the refrigerator before roasting. This ensures even cooking and prevents the chicken from being undercooked in the center.
Q5: What kind of sides go well with roast chicken?
Roast chicken goes well with a variety of sides, including mashed potatoes, roasted vegetables, gravy, stuffing, and salad. Get creative and choose your favourites!
Remember, roast chicken is a simple yet satisfying dish. With a little practice and some helpful tips, you can create a delicious and impressive meal for yourself and your loved ones. Happy cooking!
Everyone is watching

How to Cook Frozen Lobster Tails Perfectly: A Step-by-Step Guide
RecipesLobster. Just the word conjures up images of lavish meals, special occasions, and a taste of luxury. But let's...

Pigs in a Blanket Cooking Time: How Long to Bake for Perfect Results
RecipesAh, pigs in a blanket. Just the name conjures up images of those delightful little parcels of crispy pastry en...

Pork Fillet Cooking Time: How Long to Cook It Perfectly
RecipesPork fillet, or tenderloin as it's sometimes called, is a real favourite in our house. It's so versatile, and...

The Ultimate Guide to Tender, Juicy Pulled Pork
RecipesRight, let's talk pulled pork. It's one of those dishes that just screams "comfort food," doesn't it? I mean...

The Ultimate Guide to Cooking Delicious Frankfurters
RecipesLet's face it, we all love a good frankfurter. It's a classic, simple, and always satisfying. But let's be rea...
