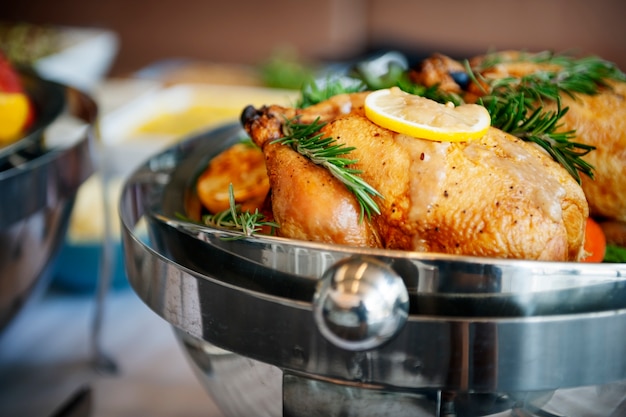
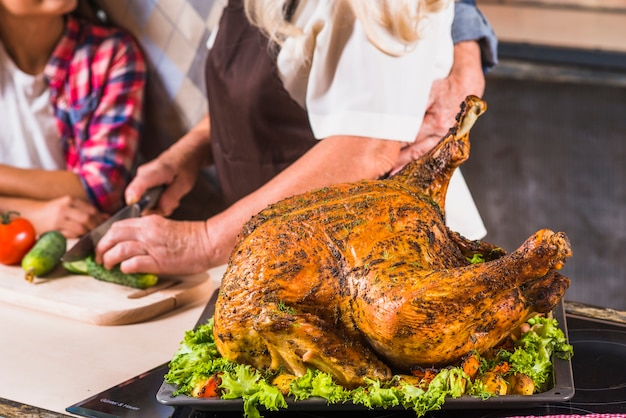
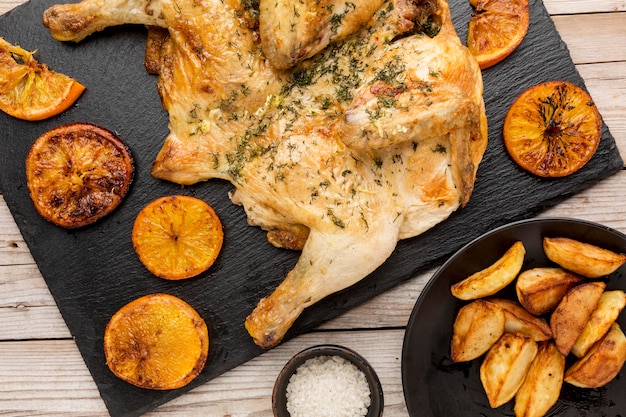
Ah, the humble roast chicken. A classic Sunday dinner staple, a comforting weeknight meal, and a dish that always brings a smile to the face. But let's be honest, sometimes roasting a whole chicken can feel a bit daunting. How long do you cook it for? How do you ensure it's juicy and perfectly cooked? Don't worry, my culinary friends, I'm here to guide you through the process with a step-by-step guide that'll have you turning out roast chicken masterpieces in no time.
(Part 1)
Choosing the Right Chicken

First things first, you need to pick your perfect poultry. This isn't just about grabbing the first chicken you see; there are a few things to consider to guarantee a delicious outcome.
Size Matters
Let's talk about size. A good rule of thumb is to allow about 45 minutes per kilogram of chicken for roasting. So, a 1.5kg chicken will likely take about 1 hour and 15 minutes to cook. If you're feeding a smaller crowd, a smaller chicken (around 1kg) will be perfect, cutting down on cooking time without compromising on flavour.
Free-Range vs. Supermarket Chickens
Now, this is a personal preference, but I always try to go for free-range chickens whenever possible. They tend to have a richer flavour and a more tender texture. But, if you're on a tight budget, supermarket chickens are perfectly acceptable. Just make sure you pick one that looks plump and healthy, with no bruises or discolouration.
Beyond Size: Freshness and Age
While size is important, don't overlook the overall freshness and age of the chicken. Look for chickens that have a clear, slightly glossy skin and feel firm to the touch. Avoid those that are dull or have a strong smell. You want a chicken that's been raised properly, allowing for a tender and flavorful roast.
Preparing the Chicken for a Stellar Roast

You've got your chosen chicken, now it's time to get it ready for the oven. A little prep work goes a long way in ensuring a delicious result.
Rinse and Pat Dry: The First Step to Success
Give your chicken a thorough rinse under cold running water. This helps remove any remaining bacteria or grime. Then, pat it dry with kitchen paper. A damp chicken won't brown nicely in the oven, so drying it is crucial.
Seasoning: The Art of Flavor
Here's where you can really make your roast chicken your own. My go-to seasoning is a simple mix of salt, pepper, and paprika. But the possibilities are endless! Feel free to experiment with different herbs and spices, like rosemary, thyme, garlic powder, or even a squeeze of lemon juice. A good trick is to rub the seasoning under the skin, as well as on the surface, to infuse the meat with flavor.
Stuffing or No Stuffing: A Question of Choice
Stuffing your chicken is a personal choice. I tend to avoid it, as it can sometimes make the chicken cook unevenly. If you do decide to stuff it, choose a well-seasoned stuffing, and don't overfill the cavity. Also, remember to cook the stuffing separately if you're unsure about its internal temperature.
Mastering the Art of Roasting

You've prepped the chicken, now it's time to turn it into a culinary masterpiece. Roasting a chicken is a simple process, but there are a few key steps to remember.
Preheat Your Oven: The Foundation for Even Cooking
Preheat your oven to 180°C (350°F). This is essential for ensuring the chicken cooks evenly and quickly. A hot oven helps to seal in the juices and create a crispy skin.
The Power of a Roasting Rack
A roasting rack is crucial for ensuring even cooking on all sides. Place the chicken on the rack, then put it in a roasting pan. This allows the hot air to circulate around the chicken, and it also catches any delicious juices that drip down, which you can use later for gravy.
Basting: The Secret to Moisture
While the chicken is roasting, you'll need to baste it periodically. This involves spooning the juices from the roasting pan over the chicken. It helps keep the chicken moist and flavorful. You can baste every 20-30 minutes with a spoon or brush.
Cooking Time: A General Guide
As I mentioned earlier, a good rule of thumb is 45 minutes per kilogram of chicken. However, the best way to tell if your chicken is cooked through is to use a meat thermometer. Insert the thermometer into the thickest part of the thigh (avoiding any bone). The chicken is ready when the internal temperature reaches 74°C (165°F).
Resting the Chicken: Allowing the Flavors to Bloom
Once the chicken is cooked, it's tempting to carve it right away, but resist the urge! Let it rest for 10-15 minutes before carving. This allows the juices to redistribute throughout the meat, resulting in a more succulent and flavorful chicken.
Carving the Chicken: The Final Act
After resting, it's time to carve your culinary masterpiece. This is where you get to enjoy the fruits of your labor.
Tools of the Trade: Getting Equipped
You'll need a sharp carving knife and a carving fork for this task. If you don't have a carving knife, a sharp chef's knife will do the trick.
Carving Techniques: A Step-by-Step Guide
1. Remove the Legs: Cut through the joint between the thigh and the body to remove the legs.
2. Separate the Drumstick: Separate the drumstick from the thigh by cutting through the joint.
3. Remove the Wings: Cut through the joint where the wings attach to the body.
4. Carve the Breast: Carve the breast meat into slices, working from the bone outwards.
Serving the Roasted Chicken: A Symphony of Flavor
Your chicken is carved, now it's time to present it beautifully and enjoy your culinary creation.
Accompaniments: Elevating the Feast
Roast chicken is best served with a selection of delicious sides. Popular choices include:
Roasted vegetables (potatoes, carrots, parsnips)
Gravy (made with the chicken juices)
Presentation: The Finishing Touches
Arrange the carved chicken on a serving platter, and then surround it with your chosen accompaniments. You can garnish the chicken with fresh herbs, like rosemary or thyme, for an extra touch of freshness.
FAQs: Addressing Common Roast Chicken Concerns
You've followed my guide, but maybe you still have a few questions. Here are some answers to common queries about roasting a chicken:
1. How do I know if my chicken is cooked?
As mentioned earlier, the best way to tell is with a meat thermometer. Insert it into the thickest part of the thigh, avoiding any bone. The chicken is cooked when the internal temperature reaches 74°C (165°F).
2. Can I roast a frozen chicken?
It's not recommended to roast a frozen chicken. Always defrost it completely before roasting. This ensures the chicken cooks evenly and safely.
3. How long should I roast a chicken for?
A good rule of thumb is to allow 45 minutes per kilogram of chicken. However, cooking time can vary depending on the size and type of chicken. Always check the internal temperature to ensure it's cooked through.
4. What if my chicken is overcooked?
If your chicken is overcooked, it will be dry and tough. You can try to remedy this by adding some gravy or sauce to the chicken.
5. What can I do with leftover roasted chicken?
leftover roast chicken is a delicious base for sandwiches, salads, soups, or pasta dishes. You can also store it in the fridge for up to 3 days or freeze it for up to 3 months.
Conclusion: Embrace the Joy of Roasting
So there you have it! A comprehensive guide to help you conquer the art of roasting a chicken. Remember, the most important thing is to enjoy the process. Don't be afraid to experiment with different seasonings and techniques. And most importantly, have fun! After all, cooking should be a joyful experience.
Happy roasting!
Everyone is watching

How to Cook Frozen Lobster Tails Perfectly: A Step-by-Step Guide
RecipesLobster. Just the word conjures up images of lavish meals, special occasions, and a taste of luxury. But let's...

Pigs in a Blanket Cooking Time: How Long to Bake for Perfect Results
RecipesAh, pigs in a blanket. Just the name conjures up images of those delightful little parcels of crispy pastry en...

Pork Fillet Cooking Time: How Long to Cook It Perfectly
RecipesPork fillet, or tenderloin as it's sometimes called, is a real favourite in our house. It's so versatile, and...

The Ultimate Guide to Cooking Delicious Frankfurters
RecipesLet's face it, we all love a good frankfurter. It's a classic, simple, and always satisfying. But let's be rea...

Wolf Meat Recipes: A Guide to Cooking Wild Game
RecipesLet's be honest, you don't see wolf meat at your local butcher shop every day. It's a bit of a wild card, but ...
