Let's be honest, folks, there's nothing quite like a juicy, perfectly grilled burger. The sizzle of the meat, the smell of smoke in the air, the anticipation of that first bite… it's pure summer bliss. But let's face it, grilling a burger that's cooked to perfection isn't always a walk in the park. You've got to get the temperature just right, the cooking time dialed in, and even the flipping needs to be done with a certain finesse. Over the years, I've grilled more burgers than I can count, and I've learned a thing or two about what it takes to make a truly incredible burger. So, gather around, fellow burger enthusiasts, because I'm about to share my secrets to grilling burgers that are juicy, flavorful, and cooked to your exact liking, every single time.
Part 1: The Meat: Choosing Your Perfect Patty

Let's start with the heart of the matter – the meat. There's a whole world of burger possibilities out there, from classic beef to turkey, chicken, and even veggie patties. But let's be real, a classic beef burger is hard to resist. When choosing beef, I usually go for ground chuck or sirloin. These cuts offer a good balance of lean meat and fat, which is crucial for a juicy and flavorful burger. Don't be afraid to chat with your butcher; they're the experts, and they can help you find the perfect cut for your grilling needs.
The Importance of Fat: Don't Be Afraid of Fat!
Now, some folks might think all that fat is bad for you, but trust me, it's a key player in making a great burger. Fat keeps the burger moist and adds a rich flavor that can't be replicated with leaner meat alone. Just remember, a little fat goes a long way; aim for about 80% lean and 20% fat for the best results.
Getting to Know Your Meat: A Hands-On Approach
Once you've got your meat, it's time to get up close and personal. Give it a good feel; a quality patty should be firm and springy to the touch, not mushy or crumbly. If your meat feels a little loose, don't worry! A little bit of breadcrumbs or oats can help bind it together and make a more stable patty. And when you're forming the patties, be gentle; don't press them down too hard. This can squeeze out the precious juices, resulting in a dry burger. We want to keep those juices locked in!
Crafting the Perfect Patty: Shape, Size, and Secrets
Now, for the fun part: shaping those patties. I like to aim for about 1/2 inch thickness, a little wider than my burger bun. This ensures a nice, juicy patty that won't shrink too much during cooking. And here's a little trick I learned from my dad: make a small divot in the center of each patty. This little indentation helps the patty cook evenly and prevents it from puffing up too much. It's a subtle detail, but it makes a big difference in the end result.
Part 2: The Grill: Choosing Your Weapon

Now, let's talk about the grill – your trusty sidekick in this burger-making journey. There are two main camps: gas and charcoal. I'm a big fan of the smoky, charcoal-grilled flavor, but a gas grill is a great option if you're looking for convenience. No matter what type of grill you choose, keep it clean. A clean grill is essential for good grilling, trust me!
Preheating: Setting the Stage for Success
Before you throw those burgers on the grill, preheat it to medium-high heat. For gas grills, that's usually around 400-450 degrees Fahrenheit. For charcoal, you want those coals glowing red, signifying medium-high heat. I always use a grill thermometer to check the temperature, but if you don't have one, you can use the old-fashioned hand test. Hold your hand about 6 inches above the grill; if you can only hold it for 3-4 seconds before it gets too hot, you're in the right ballpark.
Direct vs. Indirect Heat: Mastering the Art of Control
Here's where things get interesting: you can use both direct and indirect heat to your advantage when grilling burgers. Direct heat is perfect for searing the patty and creating that delicious, crispy crust. Indirect heat is ideal for cooking the patty through without burning the outside. Most grills have a direct and indirect heat zone. On a gas grill, you can achieve this by turning off the burners in one zone and leaving them on in another. For charcoal, simply move the coals to one side to create your indirect heat zone. I often start my burgers over direct heat to sear them, then move them to the indirect heat zone to finish cooking. This method ensures a juicy, flavorful burger with a nice crust, without any burnt edges.
Part 3: The Cooking Process: From Sear to Perfection

Alright, it's time to get those burgers onto the grill! And remember, it's always a good idea to oil your grill grates before you start. This will help prevent the burgers from sticking, making your grilling experience a whole lot smoother.
The Art of Searing: Creating That Irresistible Crust
Place your patties onto the hot grill, making sure they have enough space between them so they can cook evenly. Now, it's tempting to constantly poke and prod at them, but resist that urge! The less you mess with them, the better. We want to give those burgers a good sear on both sides, so let them cook undisturbed for about 3-4 minutes per side. Once they've developed a nice crust, you can flip them over.
Don't Be Afraid to Use a Thermometer: Measuring Up to Perfection
If you're serious about grilling perfect burgers, a meat thermometer is your new best friend. It's the only way to be sure your burgers are cooked to your desired level of doneness. The USDA recommends cooking burgers to an internal temperature of 160 degrees Fahrenheit. But personally, I prefer a little more "rare" – I usually aim for an internal temperature of around 130-140 degrees Fahrenheit. No matter your preference, a meat thermometer takes the guesswork out of cooking and ensures your burgers are cooked to perfection.
Mind the Flare-Ups: Keeping Those Flames Under Control
As those burgers cook, keep an eye out for flare-ups. These are little bursts of flames that happen when fat drips onto the hot coals or burner. If you see a flare-up, quickly move the burger to a cooler part of the grill. Otherwise, you'll end up with a burnt burger, and nobody wants that.
Part 4: The Flip: Once and Only Once
Now, here's a crucial piece of advice: flip your burger just once. Don't flip it over and over again. Each flip disrupts the cooking process and can result in a dry burger. A single flip, after the initial sear, helps to keep those juices locked in and prevents the burger from drying out. Just be patient and let it cook through – remember, we're aiming for juicy, flavorful perfection!
Part 5: The Cheese: Choosing Your Melty Delight
If you're adding cheese, now's the time to get it on. The world of cheese is your oyster! Classic cheddar, gooey mozzarella, spicy pepper jack – the possibilities are endless. Just make sure you choose a cheese that melts well and won't turn into a rubbery mess. I often add the cheese during the last few minutes of cooking, giving it time to melt and become gloriously gooey. You can also use a cheese slice, which I tend to add during the initial sear, allowing it to get a nice golden brown color. But remember, cheese is completely optional; some folks prefer their burgers sans cheese.
Part 6: The Toppings: Embracing Your Creativity
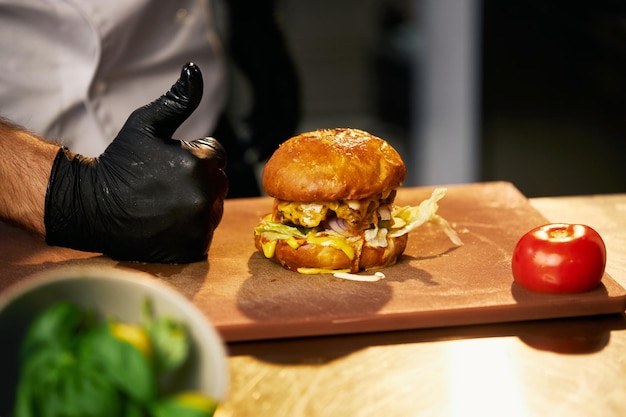
Alright, we've arrived at the fun part: the toppings! This is where you can truly unleash your creativity. Classic toppings like lettuce, tomato, onion, and pickles are always a safe bet. But don't be afraid to get adventurous. Try adding some grilled pineapple, crispy bacon, or even a fried egg. The possibilities are endless! Just remember to keep it simple. Too many toppings can overwhelm the flavor of the burger.
Part 7: The Bun: Choosing the Perfect Partner
Last but not least, we have the bun – the perfect partner for your burger masterpiece. Choose a bun that's soft and fluffy, but not too thick. You want a bun that's sturdy enough to hold up to all those juicy toppings, but also soft and pillowy enough to complement the burger. I usually toast the bun lightly before adding the burger, just for a little extra crunch. And if you're feeling fancy, butter the bun before toasting it for a richer flavor. It's all about those small details, isn't it?
Part 8: The Assembly: Bringing It All Together
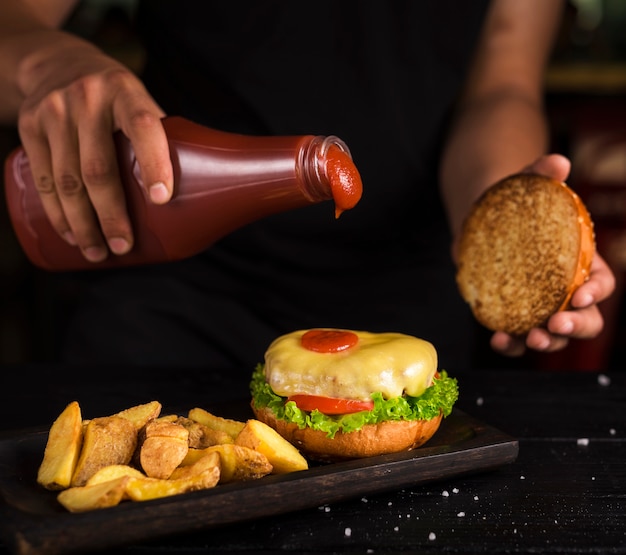
It's time to put it all together. Start with a generous amount of your favorite burger sauce. I usually go for a classic ketchup and mayonnaise mix. Then, carefully add your burger, followed by your chosen toppings. And that's it! You've just grilled the perfect burger. Take a bite and savor the flavor. It's all those little details that come together to create a truly delicious experience.
Part 9: The side dishes: Rounding Out the Meal
Don't forget about the sides! A perfect burger deserves a perfect companion. My go-to side dishes are a simple salad, crispy fries, or a fresh coleslaw. These classics pair perfectly with a juicy burger and create a complete meal. But if you're feeling adventurous, try grilling some corn on the cob or grilling up some seasonal vegetables. The possibilities are endless!
Part 10: FAQs: Answering Your Burger Questions
Here are some common questions about grilling the perfect burger:
1. How do I know if my burger is cooked to the right temperature?
The best way to tell is to use a meat thermometer. The USDA recommends cooking burgers to an internal temperature of 160 degrees Fahrenheit. You can certainly cook them to your desired level of doneness, but always make sure they're cooked to at least 160 degrees Fahrenheit for food safety purposes.
2. How long should I cook a burger on each side?
The cooking time will depend on the thickness of the patty and the heat of your grill. As a general rule of thumb, cook for about 3-4 minutes per side for a medium-rare burger. For a well-done burger, you'll need to cook it for longer, about 5-6 minutes per side. Use your meat thermometer to check the internal temperature and ensure the burger is cooked to your liking.
3. Can I grill burgers on a cast iron skillet?
Absolutely! A cast iron skillet is a great way to grill burgers indoors, especially when the weather isn't cooperating. Just preheat the skillet over medium-high heat and add a little bit of oil before you start cooking. Also, make sure you have a lid for the skillet to help steam the burgers and cook them evenly.
4. What are the best toppings for a burger?
This is all up to your personal preference. But I always say, keep it simple! Classic toppings like lettuce, tomato, onion, and pickle are always a good choice. You can also add some cheese, bacon, or a fried egg. But remember, too many toppings can overwhelm the flavor of the burger.
5. What are the best tips for grilling a perfect burger?
Here are some of my top tips for grilling a perfect burger:
- Choose a good quality cut of beef, like ground chuck or sirloin, with about 80% lean and 20% fat.
- Don't overwork the patty when you're forming it. Just gently pat it into shape.
- Preheat your grill to medium-high heat before you start cooking.
- Oil the grill grates before you place the burgers on the grill to prevent them from sticking.
- Don't flip the burger more than once. This helps to keep the juices locked in.
- Use a meat thermometer to check the internal temperature and ensure your burger is cooked to your desired level of doneness.
- Don't be afraid to experiment with different toppings and seasonings.
Remember, grilling is all about practice and experimentation. Don't be afraid to try new things and experiment with different flavors. And most importantly, enjoy the process! Grilling a perfect burger is all about having fun and creating a delicious meal that you can share with friends and family.
Part 11: Beyond the Basics: Leveling Up Your Burger Game
Now, for those who want to take their burger grilling skills to the next level, let's dive into some advanced techniques and tips. We've covered the basics, but there's always more to learn, more ways to elevate your burger game.
1. Mastering the reverse sear: Achieving Tenderness and Crust
This technique involves cooking the burger over low heat for a longer period of time, then finishing it with a quick sear over high heat. This results in a burger that's perfectly cooked through and incredibly juicy, with a delicious sear on the outside. To reverse sear a burger, preheat your grill to low heat (about 250 degrees Fahrenheit). Place the burgers on the grill and cook for about 30 minutes, or until they reach an internal temperature of 130-140 degrees Fahrenheit. Then, increase the heat to high and sear the burgers for 1-2 minutes per side.
2. The Power of Smoking: Infusing Flavor with Smoke
For a truly unforgettable burger experience, try smoking your burgers. Smoking adds a unique depth of flavor that you simply can't achieve with grilling alone. To smoke a burger, use a smoker that's preheated to 225-250 degrees Fahrenheit. Place the burgers on the smoker and cook for about 1-1.5 hours, or until they reach an internal temperature of 130-140 degrees Fahrenheit. You can also add wood chips to the smoker to enhance the smoky flavor of your burgers. Oak, hickory, and pecan are popular choices.
3. The Art of burger seasoning: Enhancing Flavor with Spices
It's not just about the cooking; it's about the flavor. Experiment with different seasonings to enhance the flavor of your burgers. Simple salt and pepper are always a classic choice, but you can also add garlic powder, onion powder, paprika, or even a little bit of chili powder. I personally love to add a pinch of smoked paprika to my burgers for a touch of smokiness. Don't be afraid to get creative and try new combinations of seasonings.
4. Elevate Your Burger Game with a Burger Press: Achieving Consistency
A burger press is a simple but invaluable tool for making perfectly shaped and evenly cooked burgers. The press helps to create a consistent thickness and shape, ensuring that the burger cooks evenly. It also helps to prevent the patty from shrinking too much during cooking. If you're serious about your burger game, a burger press is a worthwhile investment.
5. The Burger Experiment: Try New Cuts of Meat: Expanding Your Horizons
Don't be afraid to step outside your comfort zone and try new cuts of meat. While ground chuck and sirloin are classics, there are other great options out there. Try ground brisket, ground short rib, or even a blend of different cuts of beef. Experimenting with different cuts of meat can add new flavors and textures to your burgers.
Part 12: Conclusion: The Journey Continues
There you have it, the ultimate guide to grilling a perfect burger. It's a simple dish, but with a little bit of effort and attention to detail, you can create a burger that's truly unforgettable. So next time you fire up the grill, remember these tips and tricks. And remember, it's all about having fun and enjoying the process. Happy grilling!
Everyone is watching

How to Cook Frozen Lobster Tails Perfectly: A Step-by-Step Guide
RecipesLobster. Just the word conjures up images of lavish meals, special occasions, and a taste of luxury. But let's...

Pigs in a Blanket Cooking Time: How Long to Bake for Perfect Results
RecipesAh, pigs in a blanket. Just the name conjures up images of those delightful little parcels of crispy pastry en...

Pork Fillet Cooking Time: How Long to Cook It Perfectly
RecipesPork fillet, or tenderloin as it's sometimes called, is a real favourite in our house. It's so versatile, and...

The Ultimate Guide to Tender, Juicy Pulled Pork
RecipesRight, let's talk pulled pork. It's one of those dishes that just screams "comfort food," doesn't it? I mean...

The Ultimate Guide to Cooking Sweet Potatoes: From Roasting to Mashing
RecipesSweet potatoes. Just the name conjures up images of warm, comforting dishes, bursts of vibrant color, and a to...
