Ah, white rice. It's the humble sidekick in so many dishes, the blank canvas for countless culinary creations. Yet, it’s also a source of kitchen frustration for many. Mushy, sticky, undercooked – the horror stories are plentiful! But fear not, fellow rice enthusiasts. I'm here to share my years of experience, trials, and triumphs in the kitchen to guide you towards perfectly cooked white rice every single time. It's a journey we'll take together, from understanding the fundamentals to mastering different techniques and tackling those pesky common mistakes. Let's get started!
(Part 1) The Foundation: Understanding White Rice
Before we even think about boiling water, let's get acquainted with the different types of white rice and why knowing their unique characteristics is key to success. It's not all just "rice," you know! There are subtle differences that influence texture, cooking time, and even the final taste.
1.1. The Rice Family Tree: From Long Grain to Short Grain
Imagine a rice family tree. At the top, we have the main branches – long-grain, medium-grain, and short-grain. Each branch has its own personality, determining how it behaves in the pot and on the plate.
- long-grain rice: Think of this as the star athlete of the rice family. Long-grain rice is known for its long, slender grains that cook up fluffy and separate. They don't clump together, making them perfect for dishes like stir-fries, pilafs, and fried rice where you want distinct grains. Think basmati rice, with its fragrant aroma, or jasmine rice, prized for its delicate floral notes. They both fall into this long-grain category.
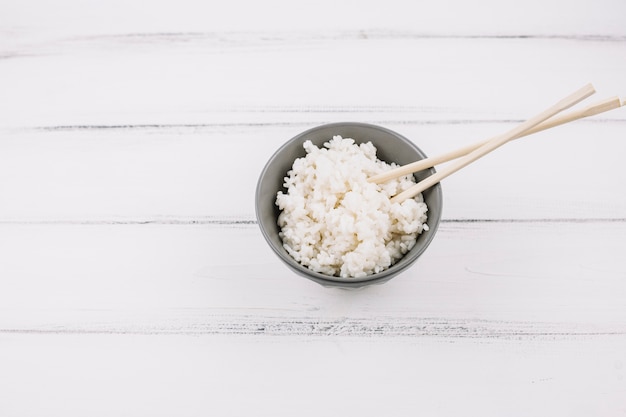
- medium-grain rice: This is the middle child, bridging the gap between the long and short. It's a bit more plump than long-grain and cooks up with a slightly stickier texture. This is great for rice bowls and sushi, where a gentle cling is desired. It adds a nice structure to those dishes.
- short-grain rice: This is the cuddly one of the family, known for its short, round grains that create a truly sticky and chewy texture. This is what you'll use for japanese rice dishes, mochi (a sweet rice cake), and even sushi, where that sticky texture is crucial for forming the rolls. Think of Japanese short-grain rice as the ultimate glutinous rice.
Understanding these different types is crucial to your rice journey. choosing the right rice based on your desired texture will make a world of difference. Remember, rice isn't just a side dish; it's an ingredient, playing a vital role in the overall dish.
1.2. The Ratio: The Secret to Success
The most important concept to grasp is the magical ratio: 1 cup of rice to 2 cups of water. This ratio is the foundation for cooking most white rice varieties. It's the golden rule, the recipe for perfect rice. This is the amount of water that allows the rice to absorb moisture evenly, resulting in those fluffy, perfectly cooked grains. Any deviation from this ratio will lead to a rice disaster – mushy, sticky, or dry. But remember, some recipes might call for slightly different ratios, so always read the instructions carefully.
(Part 2) Classic Method: The Stovetop Approach
This is the method we've all seen our grandparents use, the tried-and-true way to cook rice. It's simple, doesn't require any fancy equipment, and with a little practice, yields delicious results. Here's a step-by-step guide to help you master the stovetop approach:
2.1. Gather Your Tools and Ingredients
You'll need a medium-sized saucepan with a lid, a measuring cup (for accuracy!), a fork (for fluffing), and, of course, your chosen white rice. Add a pinch of salt for flavour if you like. You can also add aromatics like bay leaves or a cinnamon stick for an added twist.
2.2. The Rinse Ritual
This step is essential for achieving fluffy rice and preventing stickiness. Add your rice to a fine-mesh sieve and rinse it under cold water until the water runs clear. This removes excess starch that can make the rice sticky. Don't overthink it, a quick rinse will do. You'll notice the difference in the final texture.
2.3. The Boiling Point
Now, let's get cooking! Add the rinsed rice and the water to your saucepan. Bring the mixture to a rolling boil over medium-high heat. You'll know it's boiling when you see those energetic bubbles bubbling up to the surface. This is the first crucial step.
2.4. The Simmer Down
This is where the patience comes in. Reduce the heat to low, cover the saucepan with a lid, and simmer for 15-20 minutes. The rice will gently cook, absorbing the water and reaching that perfect texture. Resist the temptation to lift the lid during this time. Let the rice cook undisturbed and allow the steam to do its magic.
2.5. The Resting Ritual
This step is often overlooked, but it's crucial for achieving that perfect fluffy texture. Once the rice is cooked, leave it to sit with the lid on for another 5-10 minutes. This allows the rice to steam and absorb any remaining moisture, resulting in those fluffy, separated grains.
2.6. Fluff and Serve
After the resting period, carefully fluff the rice with a fork. This will separate the grains and prevent them from sticking together. Your perfectly cooked rice is now ready to be enjoyed!
The classic stovetop method is a reliable and simple way to cook perfect rice. It's a great starting point for anyone who wants to master the art of rice cooking. It's also a great way to appreciate the simplicity and beauty of traditional cooking methods.
(Part 3) The pressure cooker Advantage
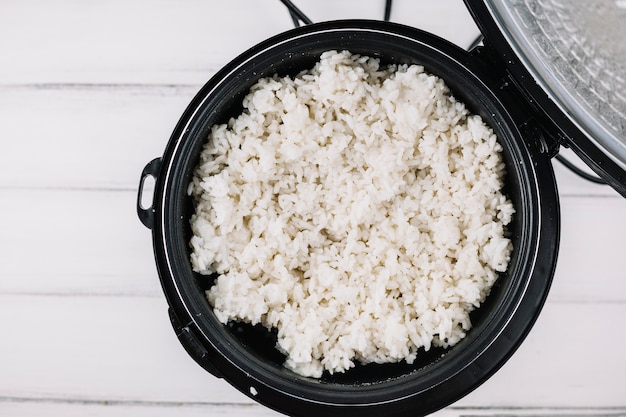
For those who prefer a faster and more convenient approach, the pressure cooker is a game-changer. It cuts the cooking time significantly, delivering delicious results without compromising on texture. I must confess, this method has been a revelation for me! No more waiting around!
3.1. The Pressure Cooker Essentials
You'll need a pressure cooker with a rice setting or manual setting, a measuring cup, a fork, and your favourite rice.
3.2. Rinse and Add
Just like before, start by rinsing the rice under cold water until the water runs clear. Then, add the rinsed rice and water to your pressure cooker.
3.3. Pressure Up
Close the lid tightly and bring the pressure cooker to high pressure. If you have a rice setting, simply select it. If you're using the manual setting, you'll need to adjust the timing based on the type of rice you are using. Refer to the manufacturer's instructions for guidance.
3.4. Release and Rest
Once the cooking cycle is complete, allow the pressure to release naturally for 10 minutes before releasing any remaining pressure manually. This is crucial for ensuring the rice has fully cooked. The natural release allows the steam to work its magic, resulting in that perfect texture.
3.5. Fluff and Serve
Carefully open the pressure cooker and fluff the rice with a fork. Your rice is now ready to be enjoyed! The pressure cooker method is a fantastic time-saver for busy nights, but it still delivers those fluffy, perfectly cooked grains.
The pressure cooker is a great way to speed up the rice-cooking process without sacrificing quality. It's also a great option for those who want to use less energy and water for cooking.
(Part 4) The rice cooker: Effortless Elegance
For those who want the ultimate in convenience, the rice cooker is a true godsend. It takes the guesswork out of cooking, allowing you to set it and forget it. It's perfect for busy weeknights or those who simply want a foolproof method. I must admit, I love the simplicity of using a rice cooker. It's my go-to when I need to focus on other parts of the meal.
4.1. Rice Cooker Set-Up
You'll need a rice cooker, a measuring cup, and your chosen rice. Some rice cookers even come with a steamer basket, which you can use for steaming vegetables while the rice cooks! Multitasking at its finest.
4.2. Rinse and Add
Rinse the rice under cold water until the water runs clear. Add the rinsed rice to the rice cooker's inner pot, and add water according to the rice cooker's instructions. Most rice cookers have measuring lines on the inside of the pot to help you get the ratio right. You can also add a pinch of salt for flavour.
4.3. Press "Cook"
Close the rice cooker's lid and press the "Cook" button. The rice cooker will do the rest, automatically adjusting the cooking time and heat based on the type of rice you are using. Most rice cookers will beep or have a light indicator to signal that the rice is ready. The technology takes care of the details so you can relax.
4.4. Keep Warm
Once the rice is cooked, the rice cooker will switch to a "Keep Warm" setting. You can leave the rice in the cooker for a few hours without it drying out. Perfect for those who don't want to eat right away.
4.5. Fluff and Serve
When you're ready to serve, simply fluff the rice with a fork. Your rice is now ready to be enjoyed!
The rice cooker method is incredibly user-friendly and delivers consistently delicious results. It's a fantastic option for anyone who wants to enjoy perfect rice without any fuss. It's the ultimate hands-off approach to rice cooking.
(Part 5) Mastering the Art of Rice Texture: From Fluffy to Sticky
cooking rice is more than just following a recipe; it's about achieving the right texture for your dish. You can adjust the cooking process to create a range of textures, from fluffy and separate to sticky and cohesive. It's all about finding that perfect balance.
5.1. Achieving Fluffy Rice
For a fluffy texture, you want the grains to be separate and airy. Imagine a cloud of rice. This is ideal for stir-fries, pilafs, and dishes where the rice needs to hold its shape. It's all about showcasing the individual grain. Here's how to achieve that fluffy texture:
- Use a high-quality rice: Long-grain varieties like basmati and jasmine are known for their fluffiness. They have that airy, light texture that makes them perfect for those dishes.
- Rinse thoroughly: Removing excess starch is essential for a fluffy texture. Remember, starch is the culprit behind sticky rice.
- Maintain the correct ratio: Stick to the 1:2 ratio of rice to water. It's the foundation of perfect rice.
- Simmer gently: Don't boil the rice too hard. Let it cook slowly and gently to allow the grains to absorb the water evenly.
- Rest properly: Allow the rice to steam for at least 5 minutes after cooking. This allows the rice to absorb any remaining moisture.
- Fluff with a fork: Gently fluff the rice with a fork to separate the grains. But don't overdo it! You don't want to break the grains.
5.2. Achieving Sticky Rice
For a sticky texture, you want the grains to be slightly more cohesive, clinging together in a soft and chewy mass. Imagine rice that wants to stay together. This is perfect for sushi and rice bowls where a bit of cling is desired. It helps hold the dish together and adds a nice texture. Here's how to achieve that sticky texture:
- Use short-grain rice: Japanese short-grain rice is known for its stickiness. It's the perfect rice for achieving that sticky texture.
- Rinse sparingly: Don't rinse the rice too thoroughly, as you want to keep some of the starch. Remember, starch is your friend when it comes to sticky rice. A quick rinse is sufficient.
- Adjust the ratio: Some recipes might call for a slightly different ratio for sticky rice.
- Cook for a shorter time: You might want to reduce the simmering time slightly to prevent the rice from becoming too mushy.
- Don't fluff too much: Gently fluff the rice, but don't over-fluff it, as this will separate the grains. You want to keep that cohesion.
(Part 6) Common Rice Mistakes and How to Avoid Them
We've all been there – those rice mishaps that leave us with a sticky mess or a dry, crumbly disaster. It's part of the learning process. But by understanding the common mistakes and learning how to avoid them, you can cook perfect rice every time. It's about avoiding those pitfalls and mastering the art of rice cooking.
6.1. Overcooked Rice: A Soggy Situation
The most common mistake is overcooking the rice. This results in mushy, sticky rice that lacks any texture. It's a sad sight, a rice disaster waiting to happen. To avoid overcooking, ensure you don't exceed the recommended cooking time. Watch the rice carefully, and don't be afraid to taste a few grains to check for doneness. You'll know it's overcooked if the grains are soft and have lost their distinct shape.
6.2. Undercooked Rice: Crunchy Chaos
On the other hand, undercooked rice will be crunchy and hard. This happens when the rice hasn't had enough time to absorb the water properly. It's a bit like biting into a rice pebble. To prevent undercooked rice, make sure the rice cooks for the full recommended time. You can check if it's undercooked by tasting a few grains. If they are still crunchy, it needs more time.
6.3. The Water-to-rice ratio: A Crucial Balance
Sticking to the correct water-to-rice ratio is crucial for perfect rice. It's the foundation of good rice cooking. If you use too much water, the rice will be mushy. If you use too little water, the rice will be dry and crumbly. Always measure the ingredients carefully and make sure you're using the appropriate ratio for the type of rice you're cooking.
6.4. Stirring Madness: A No-No
Resist the urge to stir the rice during cooking. Stirring releases more starch and can lead to sticky rice. It disrupts the cooking process and can result in a sticky mess. Let the rice cook undisturbed, ensuring the water is evenly absorbed. Only fluff the rice once it's cooked.
6.5. Lid Lifting: A Recipe for Disaster
Avoid lifting the lid during the cooking process. This disrupts the steam circulation and can result in uneven cooking. The rice needs to cook undisturbed, allowing the steam to do its magic. It's best to let the rice cook quietly and peacefully.
(Part 7) Beyond White Rice: Exploring the World of Grains
While we're on the topic of grains, it's worth venturing beyond the realm of white rice. There's a whole world of delicious and nutritious grains waiting to be discovered. Each grain has its unique flavour, texture, and nutritional benefits, offering a fantastic opportunity to expand your culinary horizons.
7.1. brown rice: A nutritional powerhouse
Brown rice is the whole grain version of white rice, meaning it retains the bran and germ, which are rich in fibre, vitamins, and minerals. It's a nutritional powerhouse, offering a good source of complex carbohydrates. It has a slightly nutty flavour and a chewier texture than white rice. While brown rice takes longer to cook than white rice, it's definitely worth incorporating into your diet for its health benefits.
7.2. Quinoa: A Superfood Star
Quinoa is technically a seed, but it's often used as a rice substitute. It's a complete protein, meaning it contains all nine essential amino acids, making it a great option for vegetarians and vegans. Quinoa is also a good source of fibre, iron, and magnesium. It has a mild, slightly earthy flavour and a fluffy texture, making it a versatile grain that can be used in salads, soups, and even as a breakfast cereal.
7.3. wild rice: A Unique Delicacy
Wild rice is a long, slender grain that grows in lakes and rivers. It's a wild and free spirit! It has a nutty flavour and a slightly chewy texture, offering a unique taste experience. It's a good source of fibre, protein, and iron. Wild rice is often used as a garnish or mixed with other grains, adding a touch of elegance and adventure to your dishes.
7.4. Freekeh: An Ancient Grain
Freekeh is a whole-wheat grain that's harvested while still green and then roasted. This unique process gives it a smoky, nutty flavour and a chewy texture. It's an ancient grain with a modern twist. It's a good source of fibre, protein, and iron. Freekeh can be used in salads, soups, or as a side dish, adding a touch of history and flavour to your meal.
(Part 8) FAQs: Your Rice-Related Questions Answered
I'm sure you have some questions about cooking rice. It's a common topic of conversation in kitchens everywhere! Let's address some of the most common concerns.
8.1. Can I Cook Rice in Advance?
Absolutely! Cooked rice can be stored in the refrigerator for up to 3-4 days. Simply let the rice cool completely, transfer it to an airtight container, and store it in the refrigerator. To reheat, microwave the rice until it's hot, or you can reheat it on the stovetop with a little bit of water. It's a great way to save time and have a quick meal ready when you need it.
8.2. Can I Use Tap Water to Cook Rice?
It's generally safe to use tap water to cook rice, but if you're concerned about impurities or chlorine taste, you can use filtered water. It's a matter of personal preference and your local water quality.
8.3. What Happens If I Don't Rinse the Rice?
If you don't rinse the rice, it can become sticky and clumpy. Rinsing removes excess starch, which helps to prevent this. It's a simple step that makes a big difference in the final texture.
8.4. Can I Add Salt to Rice?
Yes, adding a pinch of salt to rice while it's cooking enhances the flavour. However, don't add too much salt, as it can make the rice taste salty. It's all about balance and finding that perfect flavour.
8.5. How Do I Know When Rice is Done Cooking?
The best way to check if rice is done is by tasting a few grains. If they are soft and have no trace of crunchiness, the rice is cooked. You can also check if the water has been absorbed. If it has, the rice is most likely done. Don't be afraid to taste-test your rice to ensure perfection.
Everyone is watching

How to Cook Frozen Lobster Tails Perfectly: A Step-by-Step Guide
RecipesLobster. Just the word conjures up images of lavish meals, special occasions, and a taste of luxury. But let's...

Pork Fillet Cooking Time: How Long to Cook It Perfectly
RecipesPork fillet, or tenderloin as it's sometimes called, is a real favourite in our house. It's so versatile, and...

Pigs in a Blanket Cooking Time: How Long to Bake for Perfect Results
RecipesAh, pigs in a blanket. Just the name conjures up images of those delightful little parcels of crispy pastry en...

The Ultimate Guide to Cooking Delicious Frankfurters
RecipesLet's face it, we all love a good frankfurter. It's a classic, simple, and always satisfying. But let's be rea...

Wolf Meat Recipes: A Guide to Cooking Wild Game
RecipesLet's be honest, you don't see wolf meat at your local butcher shop every day. It's a bit of a wild card, but ...