Ribs, those succulent, smoky, fall-off-the-bone masterpieces, are the undisputed kings of comfort food. But achieving that perfect level of tenderness and flavour can be a bit of a culinary puzzle, especially if you're new to the rib game. I've been there, staring down a rack of ribs, wondering how long to cook them and which method would yield the best results. Don't worry, you're not alone! After countless experiments and countless rib-roasting adventures, I've finally cracked the code and I'm here to share my ultimate guide to crafting ribs that will have everyone licking their fingers (and maybe even the plate!).
(Part 1) The Anatomy of a Rib: Understanding the Cuts

Before we dive into the world of cooking times and techniques, let's get acquainted with our star ingredient: the rib. Ribs are essentially a collection of bones connected by meat, and they come in various forms. Knowing the differences between these cuts will help you choose the perfect rib for your recipe and cooking style.
The Baby Back Rib: A Crowd Favourite
Baby back ribs are the most popular choice for a reason. They're smaller and have a fantastic meat-to-bone ratio, which means more delicious, tender meat per bone. The meat is known for its inherent tenderness and juiciness, making it a true delight. Plus, the curved shape of the bones is perfect for holding in your hand and savouring every bite.
spare ribs: The Hearty and Economical Option
Spare ribs are the larger cousins of baby back ribs, offering a more substantial meal. They typically include a membrane on the bone side, which can be quite tough. It's essential to remove this membrane before cooking to ensure a tender final product. While spare ribs may be a bit tougher than baby backs, they are generally more economical, making them a budget-friendly choice for larger gatherings.
St. Louis Ribs: The Trimmed and Tender Version
St. Louis ribs are essentially spare ribs that have been trimmed to remove the flap of meat and cartilage. This process results in a more consistent and uniform cut with a greater proportion of meat. They're a great middle ground between baby back and spare ribs in terms of size, tenderness, and flavour, making them a popular choice for rib enthusiasts.
(Part 2) Choosing the perfect ribs: A Guide to the Butcher's Counter

Now that you're armed with knowledge of the different cuts, let's talk about choosing the perfect ribs at the butcher counter. It's an exciting moment, but with a few simple tips, you can ensure you're selecting the best possible ingredients for your rib masterpiece.
- The Marble Effect: Look for ribs with a good marbling, meaning there's a balance of fat and lean throughout the meat. This fat will render during cooking, adding moisture and flavour to the ribs. Avoid ribs that are too lean, as they may dry out during cooking.
- Colour Clues: Ribs should have a fresh, bright, reddish-pink colour. Avoid ribs that are pale or have a greyish hue, which can indicate they're not as fresh. A vibrant colour is a good sign of quality and flavour.
- The Feel Test: Gently press your fingers against the ribs. They should feel firm and springy, not mushy or soft. This indicates the ribs are fresh and well-handled.
(Part 3) Prepping for Perfection: The Art of Rib Preparation

You've got your ribs, now it's time to prep them for the cooking process. I'm a bit of a perfectionist when it comes to ribs, so I like to take the time to ensure they're prepped just right. You don't have to be a master chef, but a few key steps can make a significant difference in the final outcome.
The Membrane Removal Ritual: A Vital Step
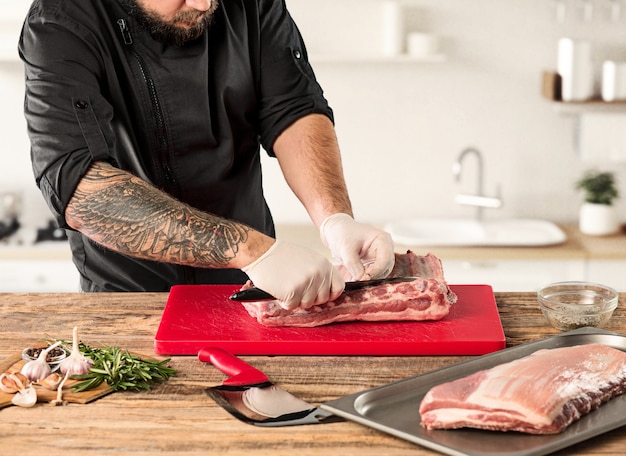
Spare ribs have a tough membrane on the bone side, often called the silver skin, that can hinder the meat from becoming tender and can create a chewy texture. It's a bit of a chore, but trust me, it's absolutely worth it! Here's how I do it:
- Locate the Membrane: It's a thin, translucent, white membrane running along the bone side of the ribs.
- Grip and Pull: Grab the membrane at one end with a paper towel or clean cloth, and gently pull it away from the ribs. It may tear, but that's perfectly fine. Just keep pulling until the entire membrane is removed.
- Patience is Key: This step requires a little patience, but the reward is worth the effort. You'll be rewarded with ribs that are incredibly tender and succulent.
Seasoning Secrets: Crafting a Delicious rib rub
Now, let's give those ribs some serious flavour! I'm a huge fan of dry rubs, as they create a beautiful, crispy, flavorful crust. Here's my go-to rib rub, but feel free to experiment and create your own unique blend:
- 2 tablespoons paprika: This adds a rich, smoky flavour and a beautiful reddish-brown colour.
- 1 tablespoon brown sugar: Provides a touch of sweetness that balances the savoury flavours.
- 1 tablespoon garlic powder: Offers a fragrant, robust garlic flavour that permeates the meat.
- 1 tablespoon onion powder: Adds a sweet, caramelized onion flavour that complements the other spices.
- 1 tablespoon salt: Enhances the natural flavours of the meat and helps to retain moisture.
- 1 teaspoon black pepper: Provides a spicy kick and adds depth of flavour.
- 1 teaspoon chili powder (optional): For those who like a bit of heat, chili powder adds a warm, spicy dimension to the rub.
Generously rub the dry rub into the ribs, ensuring every nook and cranny is coated. Then, wrap the ribs tightly in plastic wrap and place them in the refrigerator for at least 2 hours or even overnight. This step allows the flavours to develop and meld with the meat, creating a deeper, more complex flavour profile. It's like giving your ribs a little flavour party in the fridge, and I promise, they'll thank you later!
(Part 4) Cooking Methods: Finding the Right Technique for You
Now, the big question: how do you transform those gorgeous, prepped ribs into a culinary masterpiece? You have several options, each with its unique charm and appeal. I've tried them all, and I can confidently say that there's no wrong way to cook ribs. It's all about finding the method that best suits your taste, your time constraints, and your equipment.
The Slow and Smoky Maestro: smoking ribs
For the ultimate smoky, tender, and flavourful ribs, smoking is the way to go. It's a method that requires a bit more time and attention, but the results are absolutely phenomenal. You'll need a smoker, either a charcoal smoker or a gas smoker. The principle remains the same: slow and steady wins the race.
- Temperature Control: The ideal temperature for smoking ribs is between 225°F and 250°F (107°C and 121°C). This gentle heat allows the meat to cook slowly and evenly, breaking down the connective tissues and rendering the fat for incredible tenderness and juiciness.
- Wood Choice: The type of wood you choose for smoking will impart a distinct flavour to your ribs. Some popular choices include hickory, mesquite, pecan, and applewood. Hickory provides a robust, smoky flavour, while mesquite offers a slightly more intense, earthy flavour. Pecan creates a sweet and nutty flavour, and applewood imparts a delicate, fruity sweetness. Experiment with different woods to find your favourites.
- Time Commitment: Smoking ribs is a slow and deliberate process, typically taking anywhere from 4 to 6 hours, depending on the size of the ribs and your desired level of tenderness. Patience is key, and the results will be worth the wait!
Smoking ribs is a truly captivating culinary experience. The aroma of smoke filling the air is intoxicating, and watching those ribs slowly transform into tender, smoky masterpieces is mesmerising. It's a sensory journey that involves all your senses, making it an unforgettable experience.
The Oven's Gentle Embrace: oven-baked ribs
If you don't have a smoker or are looking for a simpler method, oven-baked ribs are a fantastic alternative. You can achieve results comparable to smoked ribs, with a bit less effort. Here's what you need to know:
- Low and Slow: Preheat your oven to 300°F (149°C). This low temperature allows the meat to cook slowly and evenly, rendering the fat and creating those melt-in-your-mouth ribs. Cook the ribs for 2 to 3 hours, or until they reach the desired tenderness.
- Moisture is Key: To prevent the ribs from drying out, wrap them tightly in aluminum foil halfway through the cooking time. This creates a steamy environment that helps to keep the meat moist and tender.
- Sauce it Up: During the last 30 minutes of cooking, remove the foil and brush the ribs with your favourite barbecue sauce. This allows the sauce to caramelize and create a beautiful, sticky glaze. For an extra layer of flavour, you can brush the sauce on multiple times during those final 30 minutes.
Oven-baked ribs are a reliable and delicious choice, perfect for a weeknight meal when you want a comforting, flavourful dish without too much fuss. The oven does most of the work, leaving you to relax and enjoy the anticipation of that amazing aroma filling your kitchen.
The Instant Gratification: pressure cooker Ribs
For those who crave convenience and speed, the pressure cooker is a game-changer for cooking ribs. This method is incredibly fast, and the results are surprisingly good. It's a bit of a shortcut, but sometimes, that's exactly what we need!
- Fast and Furious: Pressure cook the ribs for 45 to 60 minutes, depending on the size and thickness of the ribs. The pressure cooker's high heat and pressure break down the connective tissues quickly, resulting in incredibly tender meat.
- Tenderness is Key: The pressure cooker excels at creating tender, succulent ribs with minimal effort.
- Finishing Touches: Once the ribs are cooked, brush them with your favourite sauce and broil them for a few minutes to create a crispy, caramelized glaze. This adds a touch of extra flavour and texture.
Pressure cooker ribs are a lifesaver for busy weeknights or when you're short on time. They're fast, easy, and surprisingly delicious, though they may not achieve the same level of smoky depth as smoked ribs. They're still a fantastic option for a quick, flavourful meal.
(Part 5) The Crucial Factor: Temperature and Doneness
Now, let's talk about the key ingredient to perfectly cooked ribs: temperature. It's the difference between ribs that fall off the bone and those that are dry and tough.
The internal temperature Tells the Story
The ideal internal temperature for cooked ribs is between 190°F and 205°F (88°C and 96°C). This ensures the meat is cooked through and incredibly tender. You can use a meat thermometer to check the internal temperature. Insert the thermometer into the thickest part of the ribs, making sure it doesn't touch the bone.
The bone test: A Simple Way to Gauge Doneness
If you don't have a meat thermometer, you can use the bone test to gauge doneness. Gently try to lift a rib from the rack. If the meat falls off the bone easily, the ribs are done. If the meat still clings to the bone, they need a bit more cooking time.
Visual Clues to Tenderness
Look for ribs that have a slightly browned and crispy exterior. The meat should be tender and pull away easily from the bone. The fat should be rendered and translucent, adding moisture and flavour to the ribs.
(Part 6) The Art of Sauce: Adding that Final Touch
Ribs are like a blank canvas, waiting for a splash of flavour. That's where the sauce comes in. I'm a huge fan of a good barbecue sauce, and I've tasted countless recipes over the years. A good barbecue sauce should be sweet, smoky, tangy, and well-balanced.
When to Apply the Sauce
There's a bit of debate on when to apply the sauce. Some people like to add it early in the cooking process, while others prefer to save it for the end. My personal preference is to apply the sauce during the last 30 minutes of cooking. This allows the sauce to caramelize and create a beautiful glaze on the ribs. You can also brush the sauce on multiple times during those final 30 minutes to build a thicker, richer glaze.
Sauce Variations: From Sweet to Spicy
There are countless possibilities when it comes to barbecue sauce. You can find sauces that are sweet, smoky, tangy, spicy, or a combination of all of them. Experiment with different flavours and find your favourites. Some popular options include Kansas City-style, which is known for its sweet and smoky flavour, Memphis-style, which is vinegar-based with a tangy kick, and Carolina-style, which is mustard-based with a tangy and peppery flavour.
DIY Sauce: Creating Your Own Masterpiece
If you're feeling adventurous, try making your own barbecue sauce. It's surprisingly easy and allows you to create a flavour profile that perfectly suits your tastes. You can use a base of ketchup, vinegar, brown sugar, and spices, and then add your own personal touches, like molasses, honey, or chili powder. It's a great way to personalize your ribs and express your creativity in the kitchen.
(Part 7) The Resting Ritual: Let Your Ribs Relax
Once your ribs are cooked to perfection, resist the urge to dive right in! Let them rest for a bit. This allows the juices to redistribute throughout the meat, resulting in even more tender, flavorful ribs. Wrap the cooked ribs tightly in aluminum foil and let them rest for at least 15 minutes. This simple step makes a world of difference in the final result.
(Part 8) Slicing and Serving: Showcasing Your Ribs
The moment of truth! It's time to slice and serve those beautiful ribs.
Slicing with Precision: A Key to Success
Use a sharp knife to cut the ribs into individual ribs, or into smaller pieces, if desired. Baby back ribs are often sliced into smaller portions for easier eating, while spare ribs are typically served whole.
Sidekick Selection: Complementary Companions
Ribs are best enjoyed with a side of creamy coleslaw, tangy baked beans, or a crisp green salad. Cornbread or potato salad also make excellent companions. Don't forget the napkins! Ribs are a messy business, but a delicious one at that.
(Part 9) FAQs: Answering Your Rib-Related Questions
I've fielded countless questions about ribs over the years, so I've compiled a list of the most common ones. Here are some of the most frequently asked questions and my answers:
1. What's the best way to cook ribs?
There is no single "best" way to cook ribs. It depends on your preferences and available time. If you have the time and patience, smoking ribs is the ultimate method. For a simpler, faster option, oven-baking is a fantastic choice. And for those short on time, pressure cooking offers convenience and delicious results.
2. How long should I cook ribs?
The cooking time for ribs varies based on the size, thickness, and chosen cooking method. Smoking ribs typically takes 4 to 6 hours, while oven-baked ribs usually require 2 to 3 hours. Pressure cooker ribs can be cooked in just 45 to 60 minutes.
3. How do I know when ribs are done?
Use a meat thermometer to check the internal temperature of the ribs. They should reach an internal temperature of 190°F to 205°F (88°C to 96°C). Alternatively, you can use the bone test. If the meat falls off the bone easily, the ribs are done.
4. What's the best barbecue sauce for ribs?
The best barbecue sauce is the one you enjoy the most. There are countless options available, ranging from sweet to smoky, tangy to spicy. Experiment with different styles and flavours to find your favourite.
5. How do I store leftover ribs?
Leftover ribs can be stored in an airtight container in the refrigerator for up to 3 days. To reheat, microwave them or bake them in a 350°F (177°C) oven until heated through. You can also slice the ribs and enjoy them cold in salads or sandwiches.
(Part 10) The Final Bite: Ribs as a culinary journey
Cooking ribs is a culinary adventure, a journey that involves patience, precision, and a touch of culinary magic. It's a process that rewards you with tender, juicy, and flavorful ribs that are sure to satisfy your cravings and leave you wanting more. So, gather your ingredients, fire up your smoker, or preheat your oven, and embark on your own rib-roasting adventure. You'll be amazed by the results and the incredible flavour that awaits.
Everyone is watching

How to Cook Frozen Lobster Tails Perfectly: A Step-by-Step Guide
RecipesLobster. Just the word conjures up images of lavish meals, special occasions, and a taste of luxury. But let's...

Pigs in a Blanket Cooking Time: How Long to Bake for Perfect Results
RecipesAh, pigs in a blanket. Just the name conjures up images of those delightful little parcels of crispy pastry en...

Pork Fillet Cooking Time: How Long to Cook It Perfectly
RecipesPork fillet, or tenderloin as it's sometimes called, is a real favourite in our house. It's so versatile, and...

The Ultimate Guide to Tender, Juicy Pulled Pork
RecipesRight, let's talk pulled pork. It's one of those dishes that just screams "comfort food," doesn't it? I mean...

The Ultimate Guide to Cooking Sweet Potatoes: From Roasting to Mashing
RecipesSweet potatoes. Just the name conjures up images of warm, comforting dishes, bursts of vibrant color, and a to...
