Ah, summer in the UK! There's nothing quite like the feeling of sunshine on your face, a barbecue sizzling away, and the aroma of sweet corn on the cob wafting through the air. But let's be honest, getting that perfect bite of corn can be a bit of a gamble. Sometimes it's undercooked, leaving you chewing on tough kernels, and other times it's overcooked and turns into a mushy, flavourless mess.
Over the years, I've become quite the corn connoisseur, experimenting with different cooking methods and timings to nail that perfect balance of sweetness and tenderness. And now, I'm ready to share all my secrets with you! This article is your ultimate guide to achieving corn-on-the-cob perfection every single time. So, grab your apron, fire up the grill, and let's dive into the world of corn-on-the-cob goodness!
Part 1: Choosing the Right Corn

The first step to a truly delightful corn experience is choosing the right ears. You want corn that's bursting with flavour, plump with juicy kernels, and fresh as a daisy! Here's how to spot a winning ear:
1. Freshness is Key
Forget the limp, pale corn lurking in the back of the supermarket. You want fresh, vibrant corn, ideally picked that very day. If you can, head to a local farmer's market or even better, pick your own from a farm. The joy of plucking your own corn is a summer ritual I highly recommend! If you're buying from a supermarket, look for corn with a recent harvest date and make sure the husks are bright green and tightly wrapped.
2. Husks Tell a Story
The husks are like a window into the corn's soul! They should be vibrant green and tightly wrapped around the ear, like a protective shield. Avoid corn with wilted, dry husks, as this indicates that the corn is past its prime.
3. Kernels: A Peek Inside
Gently peel back a few layers of husk to have a peek at the kernels. They should be plump, full, and milky white, not dry or shrunken. These plump kernels are the key to that juicy, bursting-with-flavour experience.
4. The Silk: A Sign of Ripe Corn
The silk, those thread-like strands sticking out of the top of the ear, should be brown and dry. This is a sign that the corn is ripe and ready for harvest.
5. The Squeeze Test
I always give the corn a gentle squeeze to see how firm it feels. It should be firm, like a healthy fruit. If it feels squishy, it's probably overripe.
Once you've snagged your prize-winning corn, don't forget to store it properly! Keep it in the fridge, wrapped in a plastic bag, for up to a week.
Part 2: Preparing the Corn

Now that you have your fresh, perfect corn, it's time to get ready for cooking!
1. Removing the Husks: A Gentle Touch
Start by gently peeling back the husks, leaving the silk attached for now. Then, use your fingers to carefully pull the silk off the ear. Some folks prefer to remove the silk before cooking, but I find it easier to do it after.
2. A Clean Ear: Washing for Flavor
After removing the husks, rinse the corn under cold water to remove any dirt or debris. This also helps keep it moist during cooking, resulting in even cooking and a more tender texture.
3. Butter and Seasoning: Get Creative!
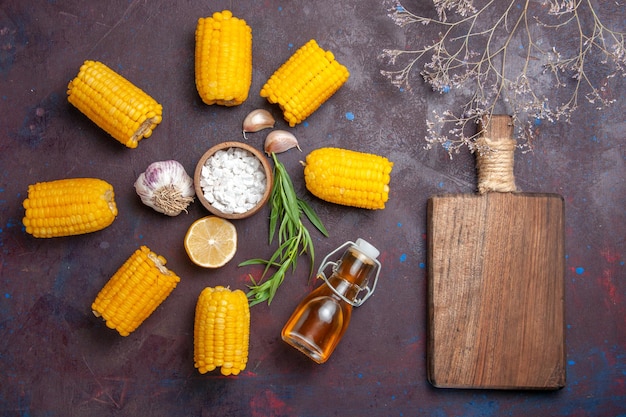
This is where you can let your culinary creativity run wild! For a classic flavour, I like to brush the corn with melted butter. But, if you're feeling adventurous, try adding a little olive oil and a pinch of salt and pepper. You can also sprinkle on herbs like thyme, rosemary, or basil for an extra burst of flavour. The possibilities are endless!
Part 3: Cooking Methods: Choose Your Adventure

Now comes the fun part: choosing your cooking method! Each method brings its own unique flavour and texture to the table. Here are my top contenders:
1. Boiling: Simple, Reliable, and Delicious
Boiling is the classic method for good reason. It's simple, reliable, and delivers perfectly cooked corn every time. Fill a large pot with water, bring it to a rolling boil, and then add the corn. Cook for 3 to 5 minutes, or until the kernels are tender. Boiling ensures that the corn is cooked evenly throughout.
2. Steaming: A Healthy and Flavorful Option
If you're looking for a healthy and flavourful way to cook your corn, steaming is your go-to method. Fill a steamer basket with water, bring it to a boil, and then add the corn. Cover the pot and steam for 5 to 7 minutes, or until the kernels are tender. Steaming helps to preserve the corn's natural sweetness and nutrients, making it a winning choice for health-conscious cooks.
3. Grilling: Charred and Smoky Goodness
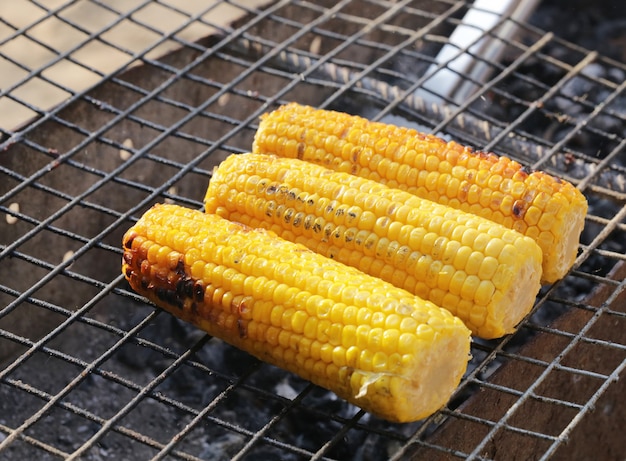
For a smoky, barbecue-style flavour, grilling is the way to go! Preheat your grill to medium heat and place the corn directly on the grill grates. Cook for 10 to 15 minutes, turning occasionally, until the kernels are slightly charred and tender. The smoky flavour adds a unique depth of flavour to the sweet corn.
4. Microwaving: Quick and Easy
If you're short on time, microwaving is a quick and easy option. Place the corn in a microwave-safe dish, add a tablespoon of water, and cover the dish with plastic wrap. Microwave on high for 3 to 5 minutes, or until the kernels are tender. This method is perfect for busy evenings or when you're craving corn in a flash.
Part 4: Timing is Everything
The cooking time for corn on the cob can vary depending on the size of the ears and the cooking method you're using. But don't worry, I've got you covered with these general guidelines:
| Cooking Method | Cooking Time |
|---|---|
| Boiling | 3 to 5 minutes |
| Steaming | 5 to 7 minutes |
| Grilling | 10 to 15 minutes |
| Microwaving | 3 to 5 minutes |
It's always a good idea to check the corn for doneness before taking it off the heat. You don't want to overcook it and end up with mushy kernels.
Part 5: The "Kernel Test": Your Ultimate Guide to Doneness
The "kernel test" is your secret weapon to perfectly cooked corn. Use a sharp knife to slice a kernel off the ear. The kernel should be tender and easily pierced with a fork. If it's still hard or tough, cook the corn for a few more minutes. This simple test is your guarantee of delicious, tender corn.
Part 6: Serving Your Corn: A Feast for the Senses
Once your corn is cooked, it's time to get creative with your toppings and serve it up! Here are a few ideas to tantalize your taste buds:
1. Butter and Salt: A Classic Delight
This is the classic way to serve corn on the cob. Simply brush the corn with melted butter and sprinkle with salt to taste. It's simple, satisfying, and never fails to please.
2. chimichurri sauce: A Burst of Flavor
For a vibrant and tangy twist, try topping your corn with chimichurri sauce. This Argentinian herb sauce is made with fresh herbs like parsley, oregano, and garlic, mixed with olive oil and red wine vinegar. It adds a complex flavour profile that elevates your corn to new heights.
3. Spicy Mayo: For the Heat Seekers
If you like a bit of heat, try mixing your favourite mayonnaise with sriracha or hot sauce. The creamy mayo balances out the spice, creating a delicious and addictive topping.
4. Avocado Crema: A Creamy and Delicious Treat
For a creamy and decadent topping, blend together avocado, lime juice, and cilantro. This creamy sauce adds a touch of richness and freshness to your corn.
Part 7: Storing Your Corn: Keeping It Fresh and Delicious
If you have leftover corn, don't fret! Store it in the refrigerator for up to 3 days. It's best to store it in a sealed container or wrap it tightly in plastic wrap to keep it moist and prevent freezer burn.
You can also freeze leftover corn on the cob for later use. To freeze corn, simply wrap it in plastic wrap and then place it in a freezer-safe bag. When you're ready to use it, thaw it overnight in the refrigerator and then cook it according to the instructions above.
Part 8: FAQs
I'm often asked questions about corn on the cob, so I've compiled some of the most common ones here, along with detailed answers:
1. Can you cook corn on the cob from frozen?
Yes, you can cook corn on the cob from frozen. Simply add the frozen corn to boiling water and cook for 5 to 7 minutes, or until heated through. It's a great way to use up leftover corn or when you don't have fresh corn on hand.
2. How do you know if corn is bad?
If the husks are dry and wilted, the kernels are shrunken, or there is a bad smell, it's best to discard the corn. Don't risk eating spoiled corn!
3. What are the benefits of corn?
Corn is a good source of fiber, vitamins, and minerals. It's also a good source of antioxidants, which help protect your body from damage caused by free radicals. Corn is a delicious and nutritious addition to any diet.
4. How can you make corn sweeter?
Soaking corn in cold water for 30 minutes before cooking can help to make it sweeter. This is because the soaking process helps to rehydrate the kernels, making them more tender and juicy.
5. What can I do with leftover corn kernels?
Leftover corn kernels are a versatile ingredient! You can use them in salads, soups, stews, and other dishes. Try adding them to your favourite recipes for a touch of sweetness and texture.
I hope this comprehensive guide has given you all the information you need to cook the perfect corn on the cob. Remember, choose fresh corn, use your favourite cooking method, and don't forget to experiment with different toppings! Enjoy!
Everyone is watching

How to Cook Frozen Lobster Tails Perfectly: A Step-by-Step Guide
RecipesLobster. Just the word conjures up images of lavish meals, special occasions, and a taste of luxury. But let's...

Pigs in a Blanket Cooking Time: How Long to Bake for Perfect Results
RecipesAh, pigs in a blanket. Just the name conjures up images of those delightful little parcels of crispy pastry en...

Pork Fillet Cooking Time: How Long to Cook It Perfectly
RecipesPork fillet, or tenderloin as it's sometimes called, is a real favourite in our house. It's so versatile, and...

The Ultimate Guide to Cooking Delicious Frankfurters
RecipesLet's face it, we all love a good frankfurter. It's a classic, simple, and always satisfying. But let's be rea...

The Ultimate Guide to Tender, Juicy Pulled Pork
RecipesRight, let's talk pulled pork. It's one of those dishes that just screams "comfort food," doesn't it? I mean...
