Summertime. The sun is warm, the air smells like barbeque, and there's nothing quite like biting into a juicy ear of corn on the cob. It's a quintessential summer food, evoking memories of childhood picnics and lazy afternoons by the grill. But achieving that perfect balance of tenderness and sweetness can be tricky. Sometimes, it ends up undercooked and crunchy, other times, it's overcooked and mushy.
Over the years, I've learned a thing or two about cooking corn on the cob, and I'm here to share my secrets with you. Get ready to transform those bland, supermarket ears into the most delicious corn you've ever tasted. We're diving into the world of corn, from choosing the perfect ear to mastering the different cooking methods, and everything in between. So grab your apron, because we're about to embark on a culinary adventure!
(Part 1) Choosing the perfect corn

The journey to delicious corn begins with selecting the right ears. You want corn that's fresh, plump, and bursting with flavor. You know, the kind that makes you want to grab a whole ear and devour it right there in the produce aisle. Here's what to look for:
Look for Freshness
fresh corn is your best bet. Fresh corn will have bright green husks that are silky and tightly wrapped around the ear. If the husks are dull or brown, or if the silk is dry and brittle, the corn is likely older and might not be as flavorful.
Check for Plumpness
Give the husks a gentle squeeze. They should feel firm and plump, not loose or squishy. A good way to test for firmness is to pick up an ear of corn and hold it by the tip of the husk. If the ear feels heavy, it's probably plump and packed with kernels.
Don't Forget the Kernels!
Before you buy it, gently peel back a few layers of the husk to reveal the kernels. They should be plump and full, with a bright yellow or white color. Avoid corn with kernels that are small, wrinkled, or shriveled. Those are signs that the corn isn't as fresh and flavorful.
(Part 2) boiling corn on the cob

Boiling is the classic method of cooking corn on the cob. It's a simple, reliable technique that consistently produces tender, juicy corn. It's a great choice for a weeknight meal, and it's perfect for families with kids, as it's a forgiving method.
Prepare the Corn
First, remove the husks and silks. I prefer to leave a few layers of the outer husk attached to the ear to prevent the corn from drying out too much while it's cooking. Then, carefully remove the silky threads. You can do this by pulling them off with your fingers, or by using a knife to scrape them off.
Fill the Pot
Fill a large pot with enough water to cover the corn by at least an inch or two. Add a tablespoon of salt to the water. The salt adds flavor to the corn and helps to enhance its natural sweetness. I like to use kosher salt, but regular table salt works fine too.
Bring the Water to a Boil
Bring the water to a rolling boil over medium-high heat. Once the water is boiling, carefully add the corn ears to the pot. Avoid overcrowding the pot, as this will affect the cooking time.
Cook Until Tender
Cook the corn for about 3-5 minutes, or until the kernels are tender when pierced with a fork. You can test the doneness by carefully pulling back a husk and piercing a kernel with a fork. If it goes in easily, the corn is ready.
Remove and Serve
Once the corn is cooked, carefully remove it from the pot using a slotted spoon. Drain the corn, then serve it immediately with butter, salt, pepper, or any other toppings you like.
(Part 3) grilling corn on the Cob

grilling corn on the cob adds a smoky depth of flavor and a delightful char that's perfect for summer barbeques. It elevates the simple corn on the cob to a whole new level of deliciousness.
Prepare the Corn
Just like with boiling, start by removing the husks and silks. Leave a few layers of husk attached for moisture.
Preheat the Grill
Preheat your grill to medium-high heat. For gas grills, preheat the burners for about 10 minutes. For charcoal grills, let the coals burn down until they're covered with a thin layer of ash.
Grill the Corn
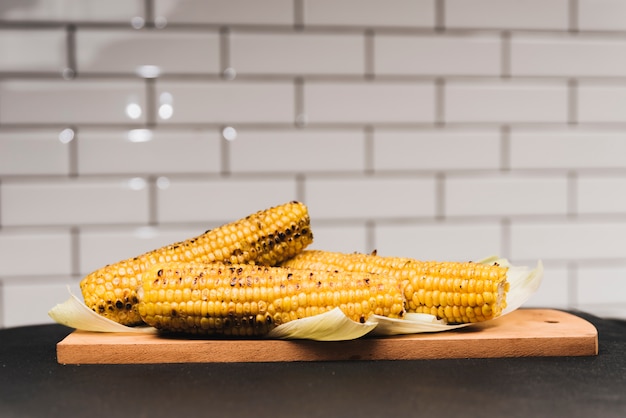
Place the corn ears directly on the grill grates and cook for about 10 minutes, turning every few minutes to ensure even cooking. You'll know the corn is ready when the kernels are slightly charred and tender.
Serve
Remove the corn from the grill and serve it immediately. I like to brush the corn with a little bit of melted butter, season it with salt and pepper, and then sprinkle on some fresh herbs like parsley or cilantro.
(Part 4) microwave cooking
I know, I know. Microwaving corn? It might not be the most traditional or fancy method, but it's surprisingly quick and easy for a weeknight meal when you're short on time.
Prepare the Corn
Remove the husks and silks, leaving a few layers of husk attached for moisture.
Microwave
Place the corn on a microwave-safe plate and microwave for 3-5 minutes, or until the kernels are tender. You'll know it's ready when you can easily pierce the kernels with a fork.
Serve
Remove the corn from the microwave and serve it with your favorite toppings.
(Part 5) Cooking Time Chart
Here's a handy table summarizing the average cooking times for corn on the cob using different methods. This is a great quick reference guide to keep handy in your kitchen:
| Cooking Method | Time |
|---|---|
| Boiling | 3-5 minutes |
| Grilling | 10-12 minutes |
| Microwave | 3-5 minutes |
Remember, these are just general guidelines. The actual cooking time may vary depending on the size of the corn ears and your preference for doneness.
(Part 6) How to Tell if Corn is Done
Finding the sweet spot of tenderness is key to delicious corn on the cob. Here's how to check if your corn is cooked:
The Fork Test
The easiest way to test the doneness is by using a fork. Gently pierce a kernel with the fork. If it goes in easily and the kernel is tender, then the corn is cooked.
The Husk Test
For boiled corn, you can gently pull back a husk and check the kernels. If they look plump and slightly glossy, then they're likely cooked.
The Taste Test
This is the ultimate test, of course. Take a bite. If the kernels are tender and sweet, then you've achieved perfection.
(Part 7) corn on the cob toppings
Once your corn is cooked, it's time for the fun part: the toppings! Get ready to experiment and elevate your corn on the cob to the next level of deliciousness.
Classic Butter and Salt
This classic combination is a timeless favorite. Simply slather the corn with melted butter and season it generously with salt and pepper.
Spicy Chili Butter
For a touch of heat, melt butter with a tablespoon of chili flakes or your favorite chili oil. Then, brush it onto the corn. You can adjust the amount of chili flakes to your preferred level of spiciness.
Lime and Cilantro
This combination offers a refreshing twist. Sprinkle the corn with chopped cilantro and a squeeze of fresh lime juice. The lime adds a bright acidity, and the cilantro provides a fresh, herbaceous flavor.
Cheddar Cheese and Bacon
For a cheesy, bacon-y indulgence, sprinkle the corn with shredded cheddar cheese and crumbled bacon. You can use your favorite cheddar cheese, from mild to sharp, to suit your taste.
Creamy Ranch Dressing
Who doesn't love ranch dressing? Brush the corn with ranch dressing for a creamy, tangy flavor that's perfect for those who love a little tang.
Other Options
Don't be afraid to get creative! Experiment with different herbs, spices, and cheeses. Try sprinkling on some crumbled feta, smoked paprika, or even a drizzle of honey for a unique twist.
(Part 8) Tips and Tricks
Here are a few tips and tricks to make your corn on the cob experience even more enjoyable:
Don't Overcook
Overcooked corn becomes mushy and loses its flavor. Stick to the recommended cooking times to avoid this.
Add Butter While Hot
The heat of the corn will melt the butter evenly, creating a creamy, delicious coating.
Use a Corn Cutter
If you're tired of struggling to get those kernels off the cob, invest in a corn cutter. It's a simple tool that makes removing the kernels from the cob a breeze.
Don't Throw Away the Husks
Compost the husks, or use them to wrap fish or other foods for grilling. They're a great way to add natural flavor and moisture to your grilling.
(Part 9) Storing Leftovers
If you have leftover corn on the cob, store it in the refrigerator for up to 3 days. To reheat it, you can microwave it for 30-60 seconds, or boil it in water for a few minutes.
(Part 10) FAQs
Q: How do I know if corn is fresh?
Look for corn with bright green husks and silky threads. The husks should feel firm and plump, not loose or squishy. If you can, peek at the kernels to ensure they're plump and full.
Q: What happens if I overcook corn on the cob?
Overcooked corn will become mushy and lose its flavor. It's important to stick to the recommended cooking times.
Q: Can I freeze corn on the cob?
Yes, you can freeze corn on the cob. Cook the corn according to your preferred method. Then, let it cool completely, wrap it tightly in plastic wrap, and place it in a freezer-safe bag.
Q: What's the best way to store corn on the cob after cooking?
After cooking, you can store the corn in the refrigerator for up to 3 days. Wrap it tightly in plastic wrap or place it in a plastic container to keep it fresh.
Q: How can I make corn on the cob more interesting?
Experiment with different toppings! Try adding herbs, spices, cheeses, or even a drizzle of honey.
Everyone is watching

How to Cook Frozen Lobster Tails Perfectly: A Step-by-Step Guide
RecipesLobster. Just the word conjures up images of lavish meals, special occasions, and a taste of luxury. But let's...

Pigs in a Blanket Cooking Time: How Long to Bake for Perfect Results
RecipesAh, pigs in a blanket. Just the name conjures up images of those delightful little parcels of crispy pastry en...

Pork Fillet Cooking Time: How Long to Cook It Perfectly
RecipesPork fillet, or tenderloin as it's sometimes called, is a real favourite in our house. It's so versatile, and...

The Ultimate Guide to Cooking Delicious Frankfurters
RecipesLet's face it, we all love a good frankfurter. It's a classic, simple, and always satisfying. But let's be rea...

Wolf Meat Recipes: A Guide to Cooking Wild Game
RecipesLet's be honest, you don't see wolf meat at your local butcher shop every day. It's a bit of a wild card, but ...
