As a pizza enthusiast who's spent countless hours perfecting my own homemade pizzas, I've learned that achieving that perfect crust, with its golden-brown crispness and irresistible chewiness, is an art. It's not just about throwing a pizza in the oven and hoping for the best; it's about understanding the interplay of temperature, timing, and techniques. So, let's delve into the world of pizza baking and unravel the secrets to transforming your homemade dough into a delicious masterpiece.
(Part 1) The Importance of Oven Temperature: A Crucial First Step

The saying "hot oven, happy pizza" is not just a catchy phrase; it's a fundamental truth. A blazing hot oven is absolutely essential for achieving that coveted crispy crust. I've learned this the hard way – a lukewarm oven produces a doughy, soggy pizza that falls short of the mark.
The Ideal Heat: 500°F (260°C)
The ideal temperature for pizza baking is around 500°F (260°C). I know, it seems incredibly hot! But trust me, this intense heat is the secret to transforming dough into a perfectly cooked pizza. It not only creates a beautifully blistered crust but also ensures that the toppings cook evenly without becoming dry and rubbery.
Preheating: The Foundation of Success
Before you even think about putting your pizza in the oven, preheat it for at least 30 minutes. This allows the oven to reach its peak temperature, ensuring that the pizza cooks quickly and evenly, resulting in a crust that's both crispy and flavorful. Think of it as a warm-up for your pizza baking marathon.
(Part 2) Unleashing the Power of the Pizza Stone: A Crust's Best Friend
For years, I baked my pizzas on a simple baking sheet. It worked, but the crust always lacked that delightful crunch. Then, I discovered the magic of a pizza stone.
The Pizza Stone: A Kitchen Essential
A pizza stone is a flat, thick piece of ceramic or stone that absorbs heat like a sponge. It then releases this stored heat evenly, creating a wonderfully crisp and uniformly cooked crust. This even heat distribution is what sets it apart from a regular baking sheet, preventing soggy patches and ensuring a perfectly cooked pizza. It's a worthwhile investment for anyone serious about their pizza game.
Using the Pizza Stone: A Simple Process
Using a pizza stone is surprisingly simple. Place it in your preheating oven, allowing it to soak up all that heat. Once the oven reaches its desired temperature, gently slide your pizza onto the hot stone. You don't need any oil or parchment paper—the stone's surface is perfect for a seamless baking experience.
(Part 3) Dough: The Foundation of a Delicious Pizza
The dough is the soul of your pizza, the foundation on which the entire experience rests. There are countless pizza dough recipes out there, but I've found that a simple, straightforward recipe using high-protein flour delivers the best results.
Flour: The Key Ingredient
High-protein flour, like bread flour, is a pizza dough's best friend. It's rich in gluten, a protein that provides the dough with its elasticity and structure. This is crucial for a pizza that can hold its own under the weight of toppings without becoming floppy and sad. Think of gluten as the pizza's internal support system, ensuring it maintains its shape and integrity.
Kneading: A Labor of Love
Don't underestimate the power of kneading. It's a vital step in developing the gluten, resulting in a smooth, pliable dough that's ready to be transformed into a pizza masterpiece. I usually knead my dough for about 10 minutes, but feel free to go for longer if you have the time. It's like a mini workout for your dough, strengthening its structure and creating a more resilient base.
Rising: Letting the Yeast Work Its Magic
After kneading, let your dough rise in a warm, draft-free place. This allows the yeast to do its thing, making the dough light and airy, adding to its delicious texture. The rise time will vary depending on the temperature, but I usually let mine rise for about an hour or two. It's a patient process, but the results are well worth the wait.
(Part 4) Shaping the Pizza: An Art in Itself
Once your dough has risen beautifully, it's time to shape it into a beautiful pizza base. I find that a simple round shape works best, but feel free to get creative and experiment with different shapes.
Stretching: A Gentle Touch
Gently stretch the dough with your fingertips, working from the center outwards. Don't be afraid to push the dough to its limits—it can handle it. If it starts to resist, let it rest for a few minutes before continuing to stretch. It's like a gentle dance with the dough, encouraging it to expand and become the canvas for your culinary masterpiece.
Thickness: Finding Your Perfect Balance
For a classic crispy crust, aim for a thickness of about 1/8 inch. However, if you prefer a thicker crust, go for it! The important thing is to be consistent with the thickness throughout the entire pizza. Experiment and find what you like best.
Tips for Shaping: Mastering the Art
Here are a few tips to make shaping your pizza dough a breeze:
- Work on a lightly floured surface to prevent the dough from sticking. It's like a gentle dusting of flour to keep things moving smoothly.
- Use a rolling pin if you prefer a more even thickness. It's a classic tool for achieving a uniform base.
- Don't overwork the dough—the less you handle it, the better. Overworking can make the crust tough. Treat it with care and it will reward you with a soft, chewy texture.
(Part 5) The Art of Toppings: A Symphony of Flavors
Now, let's unleash your culinary creativity—topping time! The world of pizza toppings is vast, offering endless possibilities. From classic combinations to your own unique creations, the choice is yours.
Sauce Essentials: The Foundation of Flavor
A good quality tomato sauce is the foundation of a great pizza. I prefer to make my own, but you can certainly use a store-bought variety. Just avoid those overly sweet, watery sauces that dilute the flavors of your pizza.
The Importance of Cheese: A Melty Delight
Mozzarella is the undisputed champion of pizza cheese. It melts beautifully, adding a creamy, tangy flavor that complements any topping. I like to use a combination of fresh mozzarella and shredded mozzarella for the best of both worlds—the creamy freshness of fresh mozzarella combined with the melting goodness of shredded mozzarella.
Don't Overdo It: A Balance of Flavors
It's tempting to pile on the toppings, but resist the urge! Too many toppings can make the pizza soggy and heavy. Stick to a few well-chosen ingredients that complement each other. Let the flavors shine through. Remember, less is more when it comes to toppings.
(Part 6) Baking Time: The Moment of Truth
With your pizza topped and ready to go, it's time to slide it into that scorching hot oven.
Baking Time: A General Guide
The baking time will vary depending on the size of your pizza and the thickness of the crust. For a 12-inch pizza with a thin crust, I typically bake for about 8-10 minutes. However, keep in mind that ovens can vary in temperature, so adjust the baking time accordingly.
Signs of Doneness: A Visual Guide
Here are a few telltale signs that your pizza is ready for the spotlight:
- The crust is golden brown and slightly charred on the bottom. It's like a badge of honor, showcasing the intense heat it endured.
- The cheese is melted and bubbly. It's a testament to the oven's heat and the cheese's ability to transform.
- The toppings are cooked through. This ensures that your pizza is not only visually appealing but also safe to eat.
(Part 7) Resting and Serving: A Moment of Anticipation
Once your pizza is out of the oven, give it a few minutes to rest before slicing. This allows the cheese to set and prevents the toppings from sliding off when you cut it. It's like a brief pause before the grand finale.
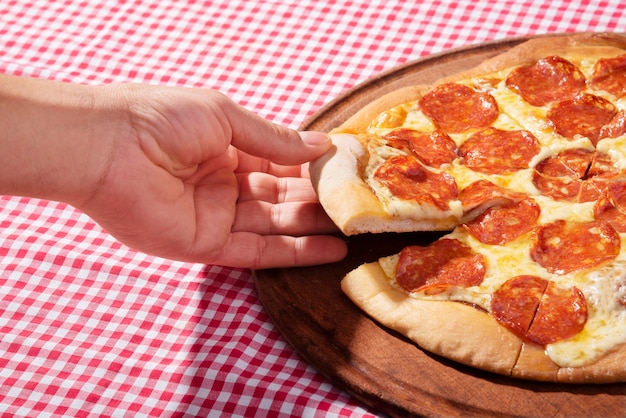
Slicing and Serving: A Final Touch
Use a sharp pizza cutter to slice your pizza. I find that a wheel-shaped cutter works best for clean, even slices. It's a satisfying final step in creating a pizza that's as visually appealing as it is delicious.
The Ultimate Pizza Experience: A culinary journey
Now, take a moment to admire your creation. The crust should be crispy and blistered, the cheese perfectly melted and gooey, and the toppings bursting with flavor. Take a bite and savor the deliciousness! It's a culmination of effort, skill, and passion, and the reward is a pizza that's truly a masterpiece.
(Part 8) Troubleshooting Common Baking Issues: Overcoming Challenges
Even the most experienced pizza bakers encounter occasional challenges in the kitchen. Here are a few common baking issues and how to overcome them:
1. Undercooked Crust: A Call for More Time
If your crust is still soft and doughy, it means it wasn't cooked long enough. Simply put it back in the oven for a few more minutes until it reaches your desired level of crispness. Don't be afraid to give it a little extra time to achieve that perfect texture.
2. Burnt Crust: A Sign of Overheating
On the other hand, if your crust is burnt, it means the oven was too hot or the pizza was baked for too long. To prevent this, lower the oven temperature or keep a close eye on the pizza and remove it from the oven as soon as the crust is golden brown. It's a delicate balance, but with practice, you'll learn to read the signs.
3. Soggy Crust: A Tale of Excess Moisture
A soggy crust is usually caused by too much sauce or too many watery toppings. To prevent this, drain any excess liquid from the sauce before spreading it on the dough, and avoid using toppings that are prone to releasing a lot of moisture, like pineapple. Choose toppings that complement the crust, not drown it.
4. Uneven Cooking: A Matter of Heat Distribution
If your pizza isn't cooking evenly, it's likely due to an unevenly preheated oven or a pizza stone that hasn't been heated sufficiently. Make sure to preheat your oven for at least 30 minutes and allow the pizza stone to heat up along with the oven. It's essential to ensure that the heat is distributed evenly, creating a perfect baking environment.
(Part 9) FAQs: Addressing Common Questions
Here are some frequently asked questions about baking pizza at home:
1. Can I bake pizza in a regular oven?
Yes, you can absolutely bake pizza in a regular oven, but you may not achieve the same level of crispness as you would with a pizza stone. To improve the crust, try placing a baking sheet on the bottom rack of the oven while it preheats. This will create a barrier between the pizza and the heat, which can help to cook the crust more evenly. It's a creative workaround for those who don't have a pizza stone.
2. What if I don't have a pizza stone?
If you don't have a pizza stone, you can still bake a delicious pizza! Use a baking sheet lined with parchment paper, or even a cast iron skillet. Just be sure to preheat your chosen baking surface along with the oven. Experiment and find what works best for you.
3. How long should I let the dough rise?
The rising time for pizza dough depends on the temperature and humidity of your kitchen. A good rule of thumb is to let it rise until it has doubled in size. This usually takes about 1-2 hours. Patience is key here; allow the yeast to work its magic, transforming the dough into a light, airy delight.
4. Can I freeze pizza dough?
Yes, you can freeze pizza dough. Just shape it into a disc, wrap it tightly in plastic wrap, and then place it in a freezer bag. It will last for several months in the freezer. To use, thaw the dough in the refrigerator overnight before baking. It's a great way to have homemade pizza dough ready at your fingertips whenever the craving strikes.
5. Can I bake pizza in a wood-fired oven?
Absolutely! Baking pizza in a wood-fired oven is a truly authentic experience. The high heat and smoky flavor add a unique dimension to the pizza. However, if you don't have access to a wood-fired oven, a regular oven can still produce delicious results.
Baking homemade pizza is a rewarding experience that allows you to unleash your creativity and enjoy a delicious meal from scratch. With a little practice and a lot of passion, you'll be turning out pizzeria-quality pizzas in no time. So, get those ovens preheated, grab your favorite toppings, and let's get baking!
Here are some additional tips and insights that might be helpful:
Additional Tips for Success
- Use a good quality pizza cutter with a sharp blade.
- Don't overcrowd the oven. Give your pizzas space to breathe.
- If you're using a pizza stone, don't place it directly on the oven rack.
- Consider using a pizza peel to slide your pizza onto the hot stone.
- Experiment with different toppings and flavor combinations.
- Don't be afraid to try new things and have fun!
Remember, baking pizza is a journey, not a destination. There's always something new to learn, something new to try. Enjoy the process and embrace the delicious results!
Everyone is watching

How to Cook Frozen Lobster Tails Perfectly: A Step-by-Step Guide
RecipesLobster. Just the word conjures up images of lavish meals, special occasions, and a taste of luxury. But let's...

Pigs in a Blanket Cooking Time: How Long to Bake for Perfect Results
RecipesAh, pigs in a blanket. Just the name conjures up images of those delightful little parcels of crispy pastry en...

Pork Fillet Cooking Time: How Long to Cook It Perfectly
RecipesPork fillet, or tenderloin as it's sometimes called, is a real favourite in our house. It's so versatile, and...

The Ultimate Guide to Cooking Delicious Frankfurters
RecipesLet's face it, we all love a good frankfurter. It's a classic, simple, and always satisfying. But let's be rea...

The Ultimate Guide to Tender, Juicy Pulled Pork
RecipesRight, let's talk pulled pork. It's one of those dishes that just screams "comfort food," doesn't it? I mean...