Alright, you're feeling ambitious, aren't you? You've got your sights set on tackling a beef brisket, that magnificent slab of meat promising a feast fit for a king. I've been there, mate. I remember my first attempt, brimming with nervous excitement, but honestly, it wasn't pretty. Tough as old boots, dry as a desert. But don't worry, I'm here to share my hard-earned wisdom, the tips and tricks I've learned over the years, so you can avoid my rookie mistakes and achieve brisket nirvana.
Part 1: The Holy Trinity: Choosing Your Brisket

First things first, you need to pick your weapon, your very own beefy hero. Now, I'm no butcher, but I've learned a thing or two about choosing the perfect brisket. It's like picking a vintage car – you want something with a bit of history, a bit of character.
1.1: Prime or Choice: The Big Decision
It's a bit like choosing between a classic sports car and a sleek modern saloon. Prime is the top dog, the Rolls Royce of beef, loaded with fat and flavour. It'll give you a melt-in-your-mouth experience, but comes with a price tag to match. Choice, on the other hand, is the trusty hatchback, a bit leaner, a bit more affordable, but still perfectly capable of delivering a fantastic brisket.
1.2: Look for Marbling, Mate
Imagine the marbling as the little pockets of flavour that make your brisket sing. You want to see a good amount of white fat interspersed throughout the lean red meat. Think of it like a beautiful mosaic of flavour, with little pockets of rich, juicy goodness.
1.3: Weighing Your Options
Now, you're not going to be grilling a miniature brisket. These bad boys are big, and they weigh in at around 10-15 pounds. If you're a beginner, go for a smaller one, say around 10 pounds. You'll have less to manage, and it'll still yield enough meat to feed a small army!
Part 2: The Art of Trimming

Alright, you've got your brisket, it's beautiful, you're itching to get started. But hold your horses! There's one more crucial step before the grilling begins: trimming.
2.1: A Little Off the Top
First, you need to trim off the excess fat cap. You want to leave a thin layer, maybe a quarter inch or so, because that's what'll give you that lovely rendered fat that seeps into the meat, creating a juicy, flavour-bomb brisket. Think of it as a little insurance policy for tenderness and flavour.
2.2: The Point and the Flat: A Tale of Two Sides
Now, your brisket has two main parts: the point, which is the thicker, rounder end, and the flat, which is the flatter, leaner section. The point tends to be more fatty and tender, while the flat is leaner and can get a little dry. This is where your personal preference comes in.
2.3: Creating a More Even Cook
You can trim the point to make it a bit more even with the flat. This is a bit of a personal preference, some people love that lovely, smoky fat from the point, while others prefer a more evenly cooked brisket. It’s a bit like deciding whether you want your steak well done or medium-rare. Ultimately, it’s up to you!
Part 3: The Rub Down: A Symphony of Flavour

Now comes the fun part! This is where you get to unleash your inner culinary artist and create a rub that’ll make your brisket sing. Think of it as painting a masterpiece, but instead of canvas, you're using a beautiful slab of beef.
3.1: The Essential Ingredients
There are a few key ingredients you'll want to include in your rub. Salt, of course, is a must. It draws out moisture, but don't overdo it! Smoked paprika, cumin, chili powder, and a touch of black pepper will add depth and smoky goodness. These are the core flavours that create that classic barbecue brisket taste.
3.2: Experiment with Flavour
Don’t be afraid to experiment with other herbs and spices. Garlic powder, onion powder, dried thyme, and even a bit of brown sugar can create a truly unique flavour profile. You can add a hint of sweetness, a touch of heat, or even a subtle citrus note. It's all about finding your own personal flavour signature.
3.3: Applying the Rub
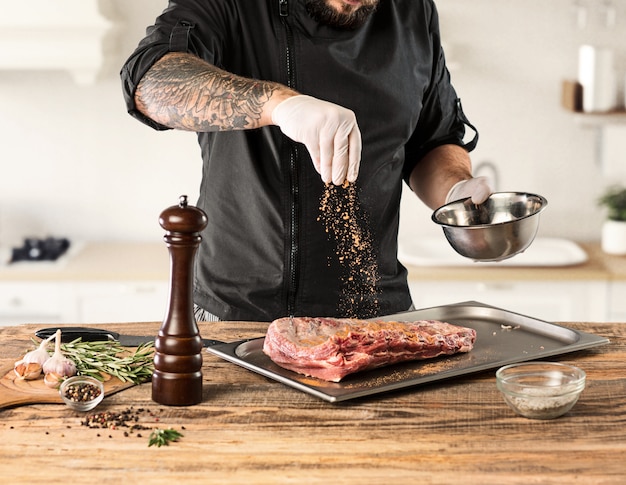
Get your hands dirty, mate! Rub the spice mixture all over the brisket, making sure to coat it evenly. Don’t be shy, give it a good massage, let those spices permeate into the meat. You’re not just coating the brisket, you’re creating a bond between the spices and the meat, allowing the flavours to mingle and create a symphony of taste.
Part 4: Smoking: The Heart of the Brisket
Now, this is where the magic really happens. Smoking your brisket is an art form, a dance with fire and time. It’s about patience, precision, and a touch of magic.
4.1: The Importance of Patience
Forget about those quick and easy meals, pal. This is a slow, deliberate process. You’re looking at around 10-12 hours of smoking. It’s like watching a good movie – you’ve got to be patient and let the story unfold.
4.2: Wood for the Win
Choose your wood carefully! Hickory, pecan, and oak are classics for a smoky, rich flavour. You can also experiment with mesquite or cherry, depending on your desired flavour profile. Each wood type brings a unique flavour, from the deep, earthy notes of hickory to the sweeter, fruity notes of cherry. It's like choosing the perfect soundtrack for your brisket masterpiece.
4.3: Maintaining Temperature
Maintain a steady temperature, around 225°F, throughout the entire smoking process. This low and slow method breaks down the connective tissues, resulting in that tender, melt-in-your-mouth texture. It’s all about creating the perfect environment for the brisket to slowly transform, breaking down those tough tissues and releasing a symphony of flavour.
Part 5: Wrapping Up the Brisket: The texas crutch
So you’ve been smoking your brisket for hours, it’s looking beautiful, the aroma is intoxicating, but it's not quite there yet. Now's the time for the Texas Crutch.
5.1: The Secret to Tenderness
The Texas Crutch is a trick used to speed up the cooking process and ensure a perfectly tender brisket. It involves wrapping the brisket tightly in foil, creating a steamy environment that helps break down the tough connective tissues. It’s like giving the brisket a little hug, allowing it to relax and become even more tender.
5.2: The Wrap and the Wait
Wrap your brisket tightly in foil, making sure there's no air trapped inside. Now, pop it back on the smoker for another 2-3 hours, until it reaches an internal temperature of about 195°F. Just like a good book, you need to let it simmer and develop its flavour.
5.3: Unveiling the Bounty
After wrapping, the brisket will release a beautiful, savory juice. Now’s the time for the “bark”. The bark is the crispy, flavorful crust that forms on the surface of the brisket during smoking. Think of it as the final touch, a beautiful, caramelized crust that adds an extra layer of flavour and texture.
Part 6: The Rest: Allowing the Meat to Relax
The brisket is cooked, you’re ready to dig in, but don’t get ahead of yourself! You need to let that beautiful beast rest.
6.1: The Importance of Relaxation
Resting the brisket allows the juices to redistribute throughout the meat, resulting in a more evenly moist and flavorful final product. It’s like giving a marathon runner a chance to catch their breath and recover.
6.2: The Resting Time
Ideally, you should let your brisket rest for at least an hour, wrapped in foil, before slicing and serving.
6.3: Keeping it Warm
While it's resting, you can wrap it in towels to keep it warm. You can also place it in a cooler, along with a few hot water bottles. This will ensure that the brisket stays warm and juicy until you’re ready to serve it.
Part 7: Slicing and Serving: The Grand Finale
Alright, the brisket has rested, you’re practically drooling, it’s time to slice and serve this magnificent creation.
7.1: The Right Tools for the Job
You'll want a sharp knife, preferably one designed for slicing meat. A carving knife is ideal, but a good chef's knife will also do the trick.
7.2: Against the Grain
Slice your brisket against the grain. This means slicing perpendicular to the muscle fibers. It will make your brisket more tender and easier to chew. Think of it like cutting through a piece of wood – you want to cut across the grain for a smooth, even slice.
7.3: The Perfect Accompaniments
Serve your sliced brisket with a selection of classic barbecue sides. Mac and cheese, coleslaw, baked beans, potato salad, and cornbread are all excellent choices. These sides provide a wonderful contrast to the richness of the brisket, creating a harmonious balance of flavours and textures.
Part 8: The Verdict: A Symphony of Flavour
You’ve done it! You’ve mastered the art of grilling brisket. And the reward? A symphony of flavour, a tender, juicy, smoky masterpiece that will leave you and your guests in awe.
8.1: The Taste Test
Take a bite. Let the smoky, savory flavors dance on your tongue. Feel that tenderness, the richness of the rendered fat. You’ve achieved greatness.
8.2: The Afterglow
As you savor those last bites, you'll feel a sense of accomplishment, a pride in knowing you've created something truly special. The next morning, you'll be dreaming of brisket sandwiches, the delicious remnants of your culinary triumph.
FAQs
You’ve mastered the art of grilling brisket, but you might have some lingering questions. Here are answers to some common ones:
| Question | Answer |
|---|---|
| How do I know if my brisket is done? | The best way to check is with a meat thermometer. You want an internal temperature of 195°F for a perfectly tender brisket. It's like a little secret handshake, a sure sign that your brisket is ready to be devoured. |
| What if my brisket is dry? | Don't panic! You can always add some moisture back in. Try adding a little bit of beef broth or apple cider to the foil before wrapping. It's like giving the brisket a little drink, ensuring that it stays moist and succulent. |
| Can I use a grill instead of a smoker? | Absolutely! You can use a gas or charcoal grill to smoke your brisket, just make sure you have a way to maintain a low and slow temperature. It’s like a little creative improvisation – you can use the tools you have to achieve the same delicious results. |
| What should I do with the leftover brisket? | You can make brisket sandwiches, tacos, or even a delicious brisket hash. It's also great for topping salads or serving as a dip. There are endless possibilities, so don't be afraid to get creative! |
| Is it really that much work? | Yes, it takes time and patience. But trust me, the deliciousness of a perfectly cooked brisket is worth the effort! It’s like a good hike – a bit of effort, but the view from the top is totally worth it. |
Everyone is watching

How to Cook Frozen Lobster Tails Perfectly: A Step-by-Step Guide
RecipesLobster. Just the word conjures up images of lavish meals, special occasions, and a taste of luxury. But let's...

Pigs in a Blanket Cooking Time: How Long to Bake for Perfect Results
RecipesAh, pigs in a blanket. Just the name conjures up images of those delightful little parcels of crispy pastry en...

Pork Fillet Cooking Time: How Long to Cook It Perfectly
RecipesPork fillet, or tenderloin as it's sometimes called, is a real favourite in our house. It's so versatile, and...

The Ultimate Guide to Cooking Delicious Frankfurters
RecipesLet's face it, we all love a good frankfurter. It's a classic, simple, and always satisfying. But let's be rea...

Wolf Meat Recipes: A Guide to Cooking Wild Game
RecipesLet's be honest, you don't see wolf meat at your local butcher shop every day. It's a bit of a wild card, but ...
