There's something magical about grilled corn on the cob, isn't there? That sweet, smoky flavour, the gentle char, the satisfying crunch – it's a taste of summer that never gets old. But let's be honest, grilling corn can be a bit of a mystery. How long do you cook it? What's the secret to that perfect char without burning the kernels? Well, fear not, my fellow corn enthusiasts, because I'm about to spill all my grilling secrets! I've spent years perfecting my corn-grilling game, and trust me, I've learned a few things along the way. From choosing the perfect corn to mastering those all-important finishing touches, I'm here to guide you through the entire process, step by delicious step.
So, grab your apron, fire up the grill, and let's get cookin'!
(Part 1) Choosing Your Corn: The Foundation of Flavor

Just like any great dish, the key to perfect grilled corn starts with the ingredients. You wouldn't build a house on a shaky foundation, and you wouldn't expect incredible flavour from stale or subpar corn.
Freshness is Key
Freshness is paramount. You want corn that's bursting with flavour, not one that's lost its vibrancy. Look for corn with bright green husks that are tightly wrapped around the ear. Those husks should feel a bit damp – a sign of freshness. The kernels themselves should be plump and juicy, not dry or wrinkled. If you're at a farmers market, ask the vendor when the corn was picked. The fresher, the better!
Choosing the Right Type
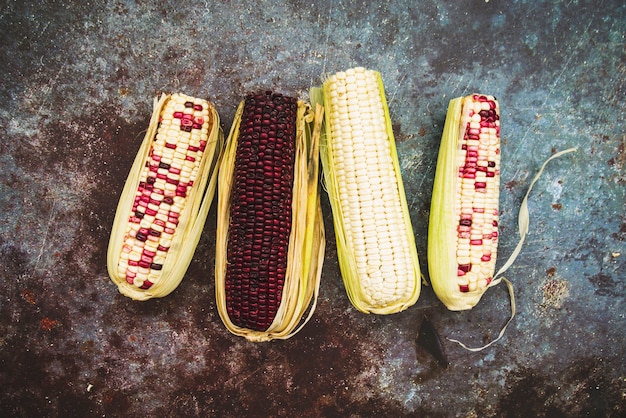
There are countless corn varieties out there, but for grilling, you want one that's sweet and juicy. sweet corn varieties like Golden Bantam or Silver Queen are fantastic choices. They have a naturally sweet flavour that intensifies when grilled. You can also try bi-color corn, which has a mix of yellow and white kernels for visual appeal and a bit of flavour contrast.
Inspecting for Perfection
Once you've got your corn, give it a gentle squeeze. It should feel firm and plump. If it feels soft or squishy, it's a sign that the corn is not as fresh. Take a peek at the tips of the husks. If they're dry and brown, the corn might be overripe. fresh corn will have green, slightly moist husks at the tip. You're basically looking for a healthy, vibrant ear of corn that's ready to be transformed into a delicious treat.
(Part 2) Preparing Your Corn for Grilling: The Art of the Prep

Now that you've got your perfect corn, it's time to get it ready for the grill. This is where a little bit of preparation goes a long way in achieving that perfect grilled flavour.
Removing the Husks and Silk
First, remove the husks and silk. Gently pull back the husks, peeling them away. Be careful not to tear the husks – you'll need them later! Once the husks are off, you can use a sharp knife to remove the silk. You can also try using your fingers to pull off the silk, but be careful not to break the kernels. Personally, I find a quick cleaning with a damp paper towel removes most of the silk. A few lingering strands won't hurt, but it's up to you how meticulous you want to be.
Adding Flavor
Now, it's time to amp up the flavour! A classic trick is to soak the corn in water for about 30 minutes before grilling. This helps to keep the corn moist and prevents it from drying out. For a flavour boost, try soaking it in a mixture of water and butter, or add a splash of lemon juice, lime juice, or your favourite herbs. I'm partial to a sprinkle of paprika or chili powder in the soaking water for a subtle kick.
Wrapping It Up
Once your corn is soaked, wrap it back up in the husks. This creates a steamy environment that helps the corn cook evenly. For a touch of extra richness, you can butter the husks before wrapping. Just don't overdo it – too much butter can lead to smoky flare-ups on the grill. Personally, I prefer to use a bit of olive oil or a spritz of olive oil spray, then sprinkle a little salt and pepper on the husks.
Hold Off on the Butter
Here's a little secret I've learned over the years: I always avoid buttering the corn until after it's cooked. This way, the butter melts beautifully over the warm corn and doesn't burn. It also prevents the butter from dripping onto the grill and causing unwanted flare-ups.
(Part 3) Mastering the Grill: Heat is Your Friend

Time to fire up the grill! This is where the magic happens, where the flames transform ordinary corn into something extraordinary. But remember, mastering the grill is about finding that sweet spot of heat.
The Importance of Medium Heat
Medium heat is your best friend. You want the grill to be hot enough to create those delicious grill marks without burning the corn. If the grill is too hot, the corn will char on the outside before it's cooked through. If it's too cool, the corn will take forever to cook and won't get that smoky flavour. A good rule of thumb is to preheat your grill to around 350-400 degrees Fahrenheit.
Grilling the Corn
Once the grill is preheated, place the corn ears on the grill, turning them every few minutes to ensure they cook evenly. Close the lid of the grill – this traps heat and helps the corn cook more efficiently. You want to grill the corn for about 10-15 minutes, or until the kernels are tender and the husks are slightly charred.
Knowing When It's Done
Here's how to tell if your corn is done:
- The husks should be slightly charred and easy to peel away.
- The kernels should be tender and slightly plump. If you gently press a kernel with your finger, it should release a milky juice.
- You'll notice a sweet, smoky aroma wafting from the grill.
(Part 4) Adding the Finishing Touches: Time to Shine
Alright, your corn is cooked to perfection! Now it's time for the finishing touches that will elevate it from delicious to divine.
Peeling Away the Husks
Carefully remove the husks from the corn. They should peel away easily. If they're stuck, just let the corn rest for a minute or two, and they should come off.
Adding Butter and Seasonings
Now's the time for butter! I like to slather my corn with butter, then sprinkle on a little salt and pepper. Feel free to get creative and add other seasonings like garlic powder, chili powder, paprika, or even a sprinkle of Parmesan cheese. I love to add a squeeze of lemon or lime juice for a touch of brightness. Fresh cilantro sprinkled on top is always a winner for me.
(Part 5) Serving Your Grilled Corn: A Feast for the Senses
You've got your beautifully grilled corn on the cob, ready to be enjoyed! Here's how to serve it up:
Keep it Simple
Grilled corn on the cob is a simple yet delicious dish. It's the perfect side dish for any meal, especially grilled meats, fish, or chicken. I love it alongside burgers, hot dogs, or even a simple salad.
Presentation Matters
Don't underestimate the power of presentation! Even though grilled corn is a simple dish, you can still make it look elegant. Try serving it on a platter with a few sprigs of fresh herbs for a touch of color. You can also use a corn cutter to cut the corn into neat rows for easy eating.
(Part 6) Variations and Tips: Beyond the Basics
Once you've mastered the basics, feel free to experiment with different variations and tips. Here are a few ideas to spark your creativity:
Spicy Grilled Corn
For a kick of spice, try adding a sprinkle of cayenne pepper, chili powder, or paprika to the soaking water. You can also brush the corn with a spicy bbq sauce before grilling. I know a friend who makes a killer chipotle lime sauce that she slathers on her corn – the smoky and spicy flavours blend beautifully.
Herbed Grilled Corn
Fresh herbs can elevate the flavour of your grilled corn. Experiment with cilantro, parsley, chives, or basil. Add them to the soaking water, wrap them in the husks, or sprinkle them on top of the cooked corn. I've even added a small bundle of fresh rosemary to the soaking water. The rosemary adds a subtle complexity to the corn that I really love.
Grilled corn salad
For a lighter option, try making a grilled corn salad. Cut the grilled corn kernels off the cob and toss them with your favourite vegetables, such as tomatoes, onions, and bell peppers. Add a dressing of your choice. I like to use a simple vinaigrette with a touch of lime juice and cilantro. This is a great way to use up leftover grilled corn. You can even throw it on a bed of greens for a satisfying summer salad.
(Part 7) FAQs: Your Grilling Questions Answered
Now, let's address some frequently asked questions about grilling corn on the cob:
1. How long should I grill corn on the cob?
The cook time for grilled corn on the cob will vary depending on the size and thickness of the corn. As a general rule, grill the corn for 10-15 minutes, or until the kernels are tender and the husks are slightly charred. Use a fork or toothpick to test the tenderness of the kernels. If they are still firm, grill the corn for a few more minutes.
2. Can I grill corn on the cob without husks?
Yes, you can grill corn on the cob without husks. Simply remove the husks and silk, then brush the corn with butter, oil, or your favorite marinade. Grill the corn for about 10-15 minutes, turning it every few minutes, until the kernels are tender and slightly charred. However, grilling corn in the husks will result in a more moist and flavorful corn.
3. How do I store leftover grilled corn on the cob?
To store leftover grilled corn on the cob, let it cool completely. Then, wrap the corn tightly in plastic wrap or aluminum foil and store it in the refrigerator for up to 3 days. When you're ready to eat it, you can reheat it in the microwave or in a skillet on the stovetop. You can also use leftover grilled corn in salads or other dishes.
4. Can I grill corn on the cob in the oven?
Yes, you can grill corn on the cob in the oven. Preheat your oven to 400 degrees Fahrenheit. Remove the husks and silk from the corn. Brush the corn with butter or oil and season with salt and pepper. Place the corn ears on a baking sheet and bake for 20-25 minutes, or until the kernels are tender and slightly charred. You can also use this method to roast corn in the oven for a similar flavor.
5. What are some alternative ways to cook corn on the cob?
While grilling is my favorite method for cooking corn on the cob, there are other ways to cook it. You can boil corn on the cob in salted water for 5-7 minutes until the kernels are tender. You can also steam corn on the cob for 10-15 minutes. Both of these methods are quick and easy, but they don't offer the same smoky flavor as grilling.
(Part 8) Embracing the Imperfect: The Joy of the Grill
Remember, grilling corn on the cob isn't about being perfect. It's about enjoying the process, experimenting with flavours, and celebrating summer. So don't be afraid to try new things, get creative, and have fun with it! And if you happen to burn a few kernels along the way, don't worry! It's all part of the journey. Just embrace the imperfections and savor every bite of that sweet, smoky goodness.
Now go forth, my friends, and grill some amazing corn! You won't regret it.
Everyone is watching

How to Cook Frozen Lobster Tails Perfectly: A Step-by-Step Guide
RecipesLobster. Just the word conjures up images of lavish meals, special occasions, and a taste of luxury. But let's...

Pigs in a Blanket Cooking Time: How Long to Bake for Perfect Results
RecipesAh, pigs in a blanket. Just the name conjures up images of those delightful little parcels of crispy pastry en...

Pork Fillet Cooking Time: How Long to Cook It Perfectly
RecipesPork fillet, or tenderloin as it's sometimes called, is a real favourite in our house. It's so versatile, and...

The Ultimate Guide to Tender, Juicy Pulled Pork
RecipesRight, let's talk pulled pork. It's one of those dishes that just screams "comfort food," doesn't it? I mean...

The Ultimate Guide to Cooking Sweet Potatoes: From Roasting to Mashing
RecipesSweet potatoes. Just the name conjures up images of warm, comforting dishes, bursts of vibrant color, and a to...
