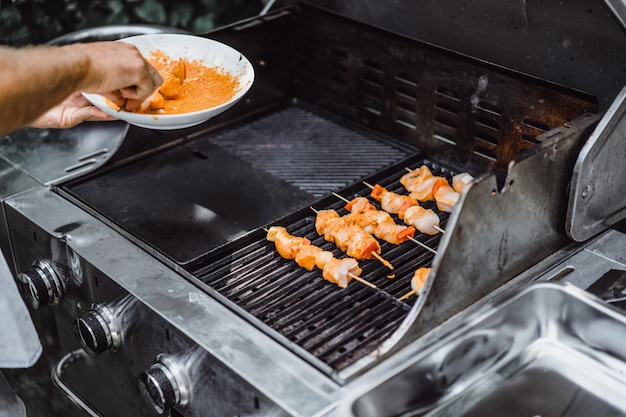
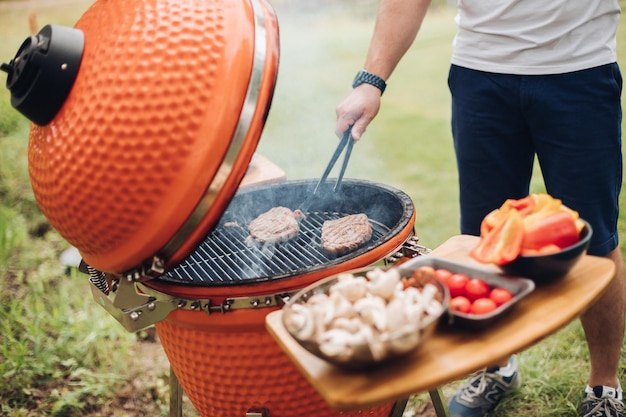
Alright, folks, let's talk tri tip. This cut of beef, often overlooked, is a true gem when it comes to grilling. It's lean, flavorful, and incredibly versatile. I've been grilling tri tip for years, and I've learned a few tricks along the way. So, grab your tongs, fire up the gas grill, and let's get this show on the road!
(Part 1) The Tri Tip: A Closer Look

The Tale of the Tri Tip
You might think, "Tri tip? What's that?" Well, let me tell you, it's a cut of beef that deserves all the attention it can get. It comes from the bottom sirloin, right near the tail of the cow. It's that triangular-shaped muscle you see, and it's a leaner cut than other popular grilling steaks, like ribeye.
Why We Love Tri Tip
The key here is that lean doesn't mean flavorless. Tri tip is packed with flavor, and it cooks up beautifully on the grill. Plus, it's a little more affordable than some other cuts, which is always a bonus.
What Makes It Unique
Now, the tri tip's unique shape can be a bit intimidating, but don't worry. That's part of the fun! The thicker end is usually more tender, while the thinner end can get a bit tougher if not cooked correctly. But fear not, we'll tackle that together.
Tri Tip Buying Guide
When you're at the butcher shop, look for a tri tip that's well-marbled. You want those streaks of fat running through the muscle, because that's what gives it that melt-in-your-mouth tenderness and rich flavor. Go for a cut that's about 1.5-2 inches thick.
(Part 2) Prepping the Tri Tip: A Symphony of Flavor

The Trimming Ritual
Before you toss that tri tip on the grill, it needs a little TLC. The first step is to trim any excess fat. Don't go crazy, just trim off any large chunks of fat that won't render nicely during cooking. This will help ensure even cooking and prevent those annoying flare-ups on your grill.
Seasoning Magic: Finding Your Flavor Profile
Now comes the fun part - seasoning! This is where your creativity really shines. There's no right or wrong way to season a tri tip, but I have a few go-to recipes I love to share:
- Simple Salt and Pepper: Sometimes, less is more. A generous seasoning of salt and black pepper is all you need for a classic flavor.
- Mediterranean Spice Rub: This is my personal favorite. It's a blend of smoked paprika, oregano, garlic powder, onion powder, and a pinch of cayenne pepper. It adds a beautiful depth of flavor.
- steak seasoning: You can't go wrong with a good steak seasoning. Look for a blend of salt, pepper, garlic powder, onion powder, and herbs like thyme and rosemary.
- Herby Garlic Blend: Get adventurous with a mix of fresh herbs like rosemary, thyme, parsley, and garlic.
Marinating for Extra Zing
Want to take your tri tip to the next level? Marinate it! I love using a simple marinade made with olive oil, red wine vinegar, garlic, and herbs like rosemary and thyme. Let it soak in the fridge for at least 30 minutes, or up to a few hours.
(Part 3) Grilling to Perfection: A Master Class in Heat

Gas Grill Preparation
Start by preheating your gas grill to medium-high heat. That's usually around 400-450°F (200-230°C). Make sure your grill grates are clean and well-oiled. You don't want your masterpiece sticking to the grill!
Direct Heat: The Sizzle and Sear
We're going for direct heat grilling, which means placing the tri tip directly over the hot grill grates. This is what creates those beautiful grill marks and ensures a quick cook.
The Initial Sear: Creating a Flavor Barrier
Place your tri tip on the preheated grill, making sure there's some space between the meat and the sides of the grill for good airflow. Close the lid and let it cook for about 5-7 minutes per side. This initial sear is crucial for creating a delicious crust and locking in those juicy flavors.
Indirect Heat: Even Cooking for a tender tri tip
After that initial sear, it's time to move the tri tip to a cooler part of the grill where there's no direct heat. This allows the meat to cook more evenly without burning. Close the lid and cook for an additional 10-15 minutes, or until the internal temperature reaches your desired level of doneness.
(Part 4) Temperature and Doneness: The Art of Knowing When It's Ready
The Internal Temperature Game
You can use a meat thermometer to check the internal temperature of the tri tip. The best way to determine doneness is to check the internal temperature at the thickest part of the meat.
Doneness Chart for Your Tri Tip
Here’s a quick table to guide your tri tip journey:
| Doneness | Internal Temperature | Description |
|---|---|---|
| Rare | 125-130°F (52-54°C) | Red center, cool to the touch |
| Medium-Rare | 130-135°F (54-57°C) | Pink center, slightly warm |
| Medium | 140-145°F (60-63°C) | Pink center, warm to the touch |
| Medium-Well | 150-155°F (65-68°C) | Slightly pink center, mostly cooked |
| Well-Done | 160°F (71°C) and above | Completely brown throughout, no pink |
Beyond the Thermometer: Visual Cues
Remember, using a thermometer is the most accurate way to check doneness. However, you can also use a visual cue. Here's a little trick:
Rare: The meat will be very red in the center.
Medium-Rare: The meat will have a pink center.
Medium: The meat will have a slightly pink center.
Medium-Well: The meat will have a very slight pink center.
Well-Done: The meat will be brown all the way through.
(Part 5) Resting and Slicing: The Key to a juicy tri tip
The Resting Ritual
Once the tri tip reaches your desired internal temperature, take it off the grill and let it rest for 10-15 minutes before slicing. This allows the juices to redistribute throughout the meat, resulting in a more tender and flavorful cut.
Slicing Techniques: Against the Grain for Tenderness
When slicing, cut the tri tip against the grain, meaning perpendicular to the muscle fibres. This will make the meat easier to chew and more tender.
(Part 6) Serving Your Tri Tip Masterpiece: The Grand Finale
side dish Inspiration: Elevating Your Tri Tip
What goes with tri tip? The beauty of this versatile cut is that it pairs well with a wide range of sides. From classic mashed potatoes and roasted vegetables to lighter salads and grilled corn on the cob, there's a side dish for every taste.
Sauce Perfection: The Final Touches
A good sauce can elevate your tri tip to another level. Here are a few ideas:
- Red Wine Reduction: A rich and flavorful sauce made with red wine, shallots, garlic, and herbs.
- chimichurri sauce: A vibrant and herbaceous Argentinian sauce made with parsley, oregano, garlic, olive oil, and red wine vinegar.
- Blue Cheese Sauce: A creamy and tangy sauce made with blue cheese, cream, and garlic.
- Peppercorn Sauce: A classic and sophisticated sauce made with black peppercorns, cream, and butter.
Table-Ready Tri Tip: Presenting Your Culinary Creation
When you're ready to serve, arrange the sliced tri tip on a platter and drizzle with your chosen sauce. Garnish with fresh herbs, if desired.
(Part 7) Dealing with the Thin End: Taming the Trickier Side
Thin End Troubles: The Challenge
The thin end of the tri tip can be a bit trickier to cook. It's prone to drying out because it cooks faster than the thicker end.
Solutions to Thin End Woes: Getting It Right
Here are a few tips for tackling the thin end:
- reverse searing: This involves cooking the tri tip at a lower temperature for a longer period, then searing it over high heat at the end. This helps ensure the thin end cooks through without drying out.
- Wrap It Up: Wrap the thin end in foil or parchment paper before grilling to help retain moisture.
- Slice It Thin: If the thin end does dry out, slice it thinly and use it in other dishes, like tacos or salads.
- Use it for a Different Dish: Think of the thin end as an opportunity to create a different dish. It's great for thinly slicing and using in tacos, fajitas, or salads.
(Part 8) Going Beyond the Basics: Expanding Your Tri Tip Horizons
tri tip tacos: A Flavorful Twist on Tradition
If you're feeling adventurous, why not use your tri tip to make delicious tacos? Simply slice the cooked meat into thin strips and serve in warm tortillas with your favorite toppings, such as salsa, guacamole, and sour cream.
Tri Tip Sandwiches: A Classic with a Twist
Tri tip sandwiches are a classic for a reason. They're simple to make and incredibly satisfying. Slice the cooked meat thinly and serve on crusty bread with your favorite toppings, like caramelized onions, cheese, and arugula.
Tri Tip Stir-Fry: A Bold and Flavorful Fusion
Slice your cooked tri tip into thin strips and add it to a stir-fry with your favorite vegetables and sauce.
(Part 9) FAQs: Your Tri Tip Questions Answered
1. How long should I grill a tri tip?
The grilling time will depend on the thickness of your tri tip and your desired level of doneness. However, a general rule of thumb is to grill for 5-7 minutes per side for the initial sear, followed by 10-15 minutes over indirect heat.
2. Can I grill a tri tip on a charcoal grill?
Absolutely! Charcoal grills are perfect for tri tip. Follow the same instructions as for a gas grill, but make sure to adjust the heat levels accordingly.
3. How do I know if my tri tip is done?
The best way to tell is by using a meat thermometer. Check the internal temperature at the thickest part of the meat.
4. What if my tri tip is overcooked?
If your tri tip is overcooked, it may be a bit dry. Don’t fret! You can still enjoy it in other dishes like tacos, salads, or sandwiches.
5. What are some other creative ways to cook tri tip?
Tri tip can also be roasted, pan-seared, or even slow-cooked in a crockpot. Experiment and find your favorite method.
6. How do I store leftover tri tip?
Store leftover tri tip in an airtight container in the refrigerator for up to 3-4 days.
Final Thoughts
And there you have it, folks, your ultimate guide to gas grill tri tip perfection. It's a simple, delicious, and versatile cut of meat that's sure to impress your friends and family. Remember to enjoy the process, experiment with different seasonings and sauces, and most importantly, have fun! After all, cooking is meant to be a delightful experience, not a chore.
Everyone is watching

How to Cook Frozen Lobster Tails Perfectly: A Step-by-Step Guide
RecipesLobster. Just the word conjures up images of lavish meals, special occasions, and a taste of luxury. But let's...

Pigs in a Blanket Cooking Time: How Long to Bake for Perfect Results
RecipesAh, pigs in a blanket. Just the name conjures up images of those delightful little parcels of crispy pastry en...

Pork Fillet Cooking Time: How Long to Cook It Perfectly
RecipesPork fillet, or tenderloin as it's sometimes called, is a real favourite in our house. It's so versatile, and...

The Ultimate Guide to Cooking Delicious Frankfurters
RecipesLet's face it, we all love a good frankfurter. It's a classic, simple, and always satisfying. But let's be rea...

Wolf Meat Recipes: A Guide to Cooking Wild Game
RecipesLet's be honest, you don't see wolf meat at your local butcher shop every day. It's a bit of a wild card, but ...
