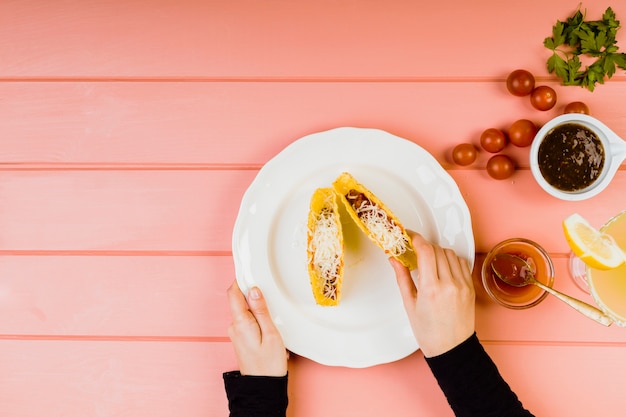
Ah, enchiladas. The very name conjures up images of warm, cheesy tortillas brimming with delicious fillings, all bathed in a rich, flavorful sauce. It's a dish that's both comforting and satisfying, perfect for a weeknight dinner or a weekend feast. But getting those enchiladas just right, with the cheese melted, the tortillas soft, and the fillings cooked through – that's where the magic of baking time comes in.
Now, I've been making enchiladas for years, and I've learned a thing or two about nailing that perfect bake. It's not just about throwing them in the oven and hoping for the best. It’s about understanding the nuances of heat, timing, and those little tricks that elevate your enchiladas from good to absolutely divine. So, grab yourself a cuppa, settle in, and let's dive into the world of enchilada baking.
Part 1: The Basics of baking enchiladas
First, let's get the fundamentals down. There's a bit of science to this, but don't worry, it's not rocket surgery (or whatever the culinary equivalent is!).
Oven Temperature: Finding the Goldilocks Zone
Think of your oven as a culinary artist's palette. Just like a painter carefully chooses their colors, you need to choose the right oven temperature to bring out the best in your enchiladas. For a perfect bake, the general consensus is that 350°F (175°C) is the sweet spot. At this temperature, the enchiladas cook evenly, ensuring a delightful balance – the cheese melts beautifully, the filling heats through, and the tortillas soften without drying out.
Baking Time: A Guide for Different Enchiladas
Now, let's get into those baking times. Remember, these are just starting points – your enchiladas might need a little more or a little less time depending on their size, your filling, and even the quirks of your oven. But hey, that's part of the fun, right?
- Traditional Enchiladas: These are the classic enchiladas, often filled with simple ingredients like cheese and spices. They usually take around 20-25 minutes to bake. But those tiny enchiladas might cook faster than their larger counterparts.
- Chicken Enchiladas: This is a crowd-pleaser for good reason. The creamy richness of chicken often needs a little extra time to come together, so you're looking at around 25-30 minutes. But, remember, those thick-cut pieces of chicken need a little longer to cook through.
- Beef Enchiladas: Beef enchiladas, with their hearty fillings, are another example where those extra few minutes make all the difference. Think around 30-35 minutes, but watch them carefully to avoid any burnt edges.
- Vegetarian Enchiladas: Vegetarian enchiladas are all about flavor and creativity. Depending on the ingredients, you're usually looking at 20-25 minutes. But, if you're using a lot of hearty vegetables, you might need to add a few minutes.
Checking for Doneness: The Telltale Signs
So, your enchiladas are nestled in the oven, and you're patiently awaiting their transformation. But how do you know when they're ready? There are some key signs to look out for:
- The Cheese: The cheese should be completely melted and bubbling, forming a beautiful, golden crust. It's a sure sign that the filling is heated through and the enchiladas are ready to go.
- The Tortillas: Those tortillas should be soft and pliable, no longer stiff or dry. If you're still feeling some resistance, they need a bit more time in the oven.
- The Filling: Take a peek at the filling. It should be piping hot and cooked through. If you're unsure, use a toothpick or a meat thermometer to check the center of an enchilada.
Part 2: Tips for Perfect Enchiladas

Right, you've got the basics down, but now we're going to take it up a notch. Here are some insider tips that will make your enchiladas truly unforgettable.
Covering Your Enchiladas: A Matter of Preference
There's a bit of debate in the enchilada world: cover or uncover? Honestly, it's up to you. Covering your enchiladas will help the cheese melt faster and keep the tortillas moist. But, leaving them uncovered allows for that golden, crispy cheese that some people just can't resist.
The Power of Aluminum Foil: A Handy Trick
If you choose to cover your enchiladas, aluminum foil is your best friend. It helps to create a gentle steam that softens the tortillas and melts the cheese. Just make sure to leave a little space between the foil and the enchiladas to avoid steam build-up and soggy tortillas.
The Importance of a Baking Dish: Choosing the Right Vessel
Selecting the right baking dish is essential. It needs to be big enough to hold your enchiladas comfortably, allowing them to cook evenly. A 9x13 inch baking dish is a classic choice for a standard batch of enchiladas, but you can adjust the size depending on your recipe and the number of enchiladas you're making.
Part 3: Factors That Affect Baking Time
Ok, now we're getting into the nitty-gritty. Certain factors can affect how long your enchiladas need to bake. Let's take a closer look.
Oven Type: Gas vs. Electric
The type of oven you're using can definitely play a role. Electric ovens tend to cook more evenly than gas ovens, but they might take a little longer to reach the desired temperature. If you're working with a gas oven, you might need to adjust the baking time slightly.
Filling Thickness: A Crucial Detail
Remember, your filling is the heart of your enchiladas. If you're using a thick filling, like one packed with beans, cheese, or lots of vegetables, it will take longer to cook through. On the other hand, a thinner filling, like a simple shredded chicken or ground beef mixture, will bake more quickly.
Enchilada Size: Smaller is Faster
As we touched on earlier, the size of your enchiladas can have a significant impact. Those petite enchiladas will cook faster than their larger counterparts. If you're working with smaller enchiladas, you might need to reduce the baking time by a few minutes to avoid overcooking.
Part 4: Dealing with Overcooked Enchiladas
It happens to the best of us – we get a little carried away, and suddenly, those enchiladas are starting to look a little too crispy. Don't panic! Here's how to salvage the situation.
Fixing Dry Tortillas: Rehydrating the Shells
If your tortillas are a bit dry, you can try to revive them by adding a splash of water or broth to the baking dish. Just gently stir it in, being careful not to break the enchiladas.
Adding Moisture: A Simple Solution
If those enchiladas seem a little too dry, you can add some moisture by drizzling a bit of salsa or enchilada sauce over the top. It will not only add moisture but also a burst of flavor.
The Power of Patience: Resting Your Enchiladas
Once your enchiladas are out of the oven, let them rest for a few minutes before slicing into them. This allows the filling to settle, the cheese to solidify, and those enchiladas to be a little less messy when serving.
Part 5: enchilada variations: Adjusting Baking Time
Okay, you've mastered the basics, but what about those more adventurous enchiladas? Let's explore some popular variations and their baking times.
Enchiladas Verdes: A Green Delight
Enchiladas verdes, with their vibrant green tomatillo sauce, are a delightful twist on the classic. These are usually filled with chicken or pork, creating a tantalizing blend of flavors. The baking time for enchiladas verdes is typically around 25-30 minutes.
Enchiladas Suizas: A Creamy Treat
Enchiladas suizas are all about that rich, creamy sauce made with queso fresco and crema fresca. They're a delightful combination of savory and creamy, and they usually need around 25-30 minutes in the oven.
Enchiladas Mole: A Complex Flavor
Enchiladas mole are truly a culinary adventure, with their complex and flavorful mole sauce. These require a little more patience, usually needing around 30-35 minutes to bake.
Part 6: Exploring Different Filling Options
Now, let's talk about the heart of any enchilada – the filling. There's a whole world of options to explore, so let your creativity run wild!
Classic Chicken Filling: Simple and Delicious
The classic chicken filling is a timeless favorite. It's simple, versatile, and always satisfying. Simply shred some cooked chicken, mix it with enchilada sauce, and add some cheese. It's a recipe for pure comfort food.
Beef Filling: A Hearty Choice
For a heartier enchilada experience, opt for a beef filling. Brown ground beef in a pan with onions and garlic, then add your favorite enchilada sauce, beans, and cheese. It's a satisfying combination that's perfect for a cold winter night.
Vegetarian Fillings: Creative and Flavorful
Don't think enchiladas have to be meat-centric! You can create incredible vegetarian enchiladas using black beans, mushrooms, spinach, roasted vegetables, and so much more. Just make sure to choose fillings that hold their shape well.
Part 7: Using the Right Cheese: A Cheesy Experience
Cheese, my friends, is the crowning glory of any enchilada. It's what brings those flavors together and adds that irresistible gooeyness.
Monterey Jack: A Classic Choice
Monterey Jack is a classic for a reason. It melts beautifully, has a mild flavor that complements most fillings, and adds a touch of creaminess.
Cheddar: A Sharp and Flavorful Option
If you prefer a bolder flavor, cheddar cheese is the way to go. It melts well, adds a sharp edge to the enchiladas, and is a great choice for those who enjoy a little tang in their food.
Queso Quesadilla: A Melty Delight
Queso quesadilla is a blend of cheeses that's designed for melting. It creates a beautifully gooey and creamy texture, perfect for a decadent enchilada experience.
Part 8: Troubleshooting Enchilada Baking
You've come so far, but even the most seasoned chef can encounter a few hiccups in the kitchen. Here's a little troubleshooting guide to help you navigate those enchilada challenges.
Burnt Edges: The Solution
If your enchiladas are starting to brown too much around the edges, cover them with aluminum foil for the remaining baking time. This will help to create a barrier and prevent further burning.
Undercooked Filling: A Quick Fix
If your filling isn't cooked through, don't despair! Simply bake your enchiladas for a few more minutes. Keep a watchful eye on them to ensure they don't burn.
Overcooked Enchiladas: What to Do
Overcooked enchiladas are still salvageable! You can try adding some salsa or enchilada sauce to the top to add moisture and flavor.
Part 9: FAQs: Your Enchilada Questions Answered
1. What if my enchiladas are too dry?
If your enchiladas are too dry, you can try to add some moisture by adding a bit of salsa or enchilada sauce to the top. You can also try to soften the tortillas by adding a bit of water or broth to the baking dish.
2. How do I know if my enchiladas are done?
Your enchiladas are done when the cheese is melted and bubbly, the tortillas are soft and pliable, and the filling is piping hot. You can also check for doneness by inserting a toothpick or a meat thermometer into the center of an enchilada.
3. Can I freeze enchiladas?
Yes, you can freeze enchiladas! Just assemble them in a freezer-safe container or bag, and freeze for up to 3 months. To reheat, thaw them overnight in the refrigerator and then bake them in a preheated oven at 350°F (175°C) for 25-30 minutes, or until heated through.
4. What's the best way to serve enchiladas?
Enchiladas are best served with a dollop of sour cream or crema fresca, a sprinkle of fresh cilantro, and a side of rice and beans. You can also serve them with salsa, guacamole, or pico de gallo.
5. What's the secret to making the best enchiladas?
The secret to making the best enchiladas is using fresh and high-quality ingredients, paying attention to the baking time, and not being afraid to experiment with different fillings and sauces. Most importantly, have fun with it! Cooking should be enjoyable.
I hope this guide has been helpful! Remember, practice makes perfect, so don't be afraid to experiment and find what works best for you. Happy cooking!
Everyone is watching

How to Cook Frozen Lobster Tails Perfectly: A Step-by-Step Guide
RecipesLobster. Just the word conjures up images of lavish meals, special occasions, and a taste of luxury. But let's...

Pork Fillet Cooking Time: How Long to Cook It Perfectly
RecipesPork fillet, or tenderloin as it's sometimes called, is a real favourite in our house. It's so versatile, and...

Pigs in a Blanket Cooking Time: How Long to Bake for Perfect Results
RecipesAh, pigs in a blanket. Just the name conjures up images of those delightful little parcels of crispy pastry en...

The Ultimate Guide to Cooking Delicious Frankfurters
RecipesLet's face it, we all love a good frankfurter. It's a classic, simple, and always satisfying. But let's be rea...

Wolf Meat Recipes: A Guide to Cooking Wild Game
RecipesLet's be honest, you don't see wolf meat at your local butcher shop every day. It's a bit of a wild card, but ...