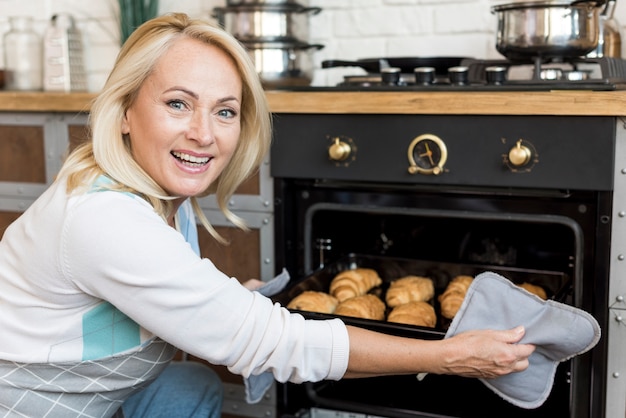
Right, let's talk dutch ovens. You know, those cast-iron beauties that seem to be in every kitchen these days? I've been a bit obsessed with mine lately, and I'm not alone. They're like the ultimate kitchen workhorses, churning out everything from hearty stews to perfectly roasted vegetables, all with that irresistible rustic charm. So, if you're considering joining the Dutch oven club, or maybe just want to up your cooking game, buckle up! I'm about to spill the beans on all my favorite techniques and recipes, and by the end, you'll be a Dutch oven pro, whipping up delicious meals that'll have your friends and family begging for more.
(Part 1) Dutch Oven 101: What's the Deal?
Let's start with the basics. What exactly is a Dutch oven? Well, imagine a sturdy pot with a tight-fitting lid, usually made from cast iron, though you can also find them in enameled cast iron. These things are built to last, and trust me, they're a kitchen investment you won't regret.
Why Everyone’s Going Crazy for Dutch Ovens
You might be wondering why Dutch ovens are so popular. It's all about their incredible versatility. They're like the Swiss army knife of cooking tools, capable of tackling pretty much anything you throw at them. From searing a juicy steak to baking a crusty loaf of bread, they're always ready to rise to the occasion. And the best part? They can handle it all – stovetop, oven, even over a campfire!
Here’s what makes them so special:
- Even heat distribution: Their cast iron construction distributes heat evenly, ensuring your food cooks perfectly all the way through. No more burnt edges and raw centers. It's like a built-in temperature control system!
- Superior heat retention: Those thick walls hold heat like a champion, making them perfect for slow cooking and braising. Pop it in the oven and forget about it for a while, knowing your food will be perfectly cooked, with no need to constantly check on it.
- Versatile: Dutch ovens are true multi-taskers. They can be used on the stovetop, in the oven, over a campfire, and even on a grill. Talk about flexibility!
- Durable: These are built to last. They're the kind of cookware you can pass down through generations, a treasured heirloom that's always there for you.
Choosing the Right Dutch Oven
Now, let’s talk about choosing the right Dutch oven for you. You've got a few options:
Cast Iron Dutch Ovens
Traditional cast iron Dutch ovens are the original, the real deal, offering incredible heat retention and durability. They're also the most budget-friendly option. However, they require a little extra care, like seasoning and hand washing. Think of it like a relationship – they need a little TLC to keep them in top shape.
Enameled Cast Iron Dutch Ovens
Enameled cast iron Dutch ovens are like the cast iron's fancy cousin. They have a porcelain coating on the inside and sometimes the outside, making them easier to clean and less prone to rust. They're also non-stick, perfect for delicate dishes. However, they come with a slightly higher price tag than their traditional cast iron counterparts.
Other Materials
You’ll also find Dutch ovens made from stainless steel, ceramic, and even copper. While they’re not as common as cast iron, they can be excellent options depending on your needs and budget.
Size Matters
Of course, the size of your Dutch oven is important. I recommend getting a 5 to 7-quart Dutch oven for a typical family. But, if you have a large family or like to cook in bulk, you might want to go for a 9-quart or larger size. Just think about how often you'll be cooking for a crowd and choose accordingly.
(Part 2) Seasoning Your Dutch Oven
Alright, so you’ve got your shiny new Dutch oven. Now, it's time for the seasoning! This is a crucial step that creates a natural, non-stick surface, making your cooking experience much smoother. It might sound a bit daunting at first, but trust me, it's really simple.
Step-by-Step Seasoning Guide
- Wash your Dutch oven: Give it a good scrub with warm, soapy water to remove any dust or residue.
- Dry it thoroughly: Use paper towels or a clean cloth to dry the inside and outside completely. No moisture allowed!
- Apply a thin layer of oil: Use a high-heat oil like canola or flaxseed oil. Spread it evenly over the entire surface using a paper towel or a silicone brush. Don't go overboard – a thin layer is all you need.
- Heat it up: Put your Dutch oven in a cold oven and turn it up to 350°F (175°C). Let it bake for 1 hour. This process helps the oil cure and create that lovely, non-stick surface.
- Turn off the oven and let it cool: Once the oven is off, let the Dutch oven cool completely inside the oven. This slow cooling allows the oil to penetrate the cast iron, creating a more durable seasoning.
- Wipe off excess oil: Use a paper towel or cloth to wipe off any excess oil.
- Repeat: You’ll want to repeat this process two or three times to create a robust, non-stick layer. The more you season it, the better it gets!
Remember, you don't need to season your Dutch oven every time you use it. Just give it a quick wipe with a paper towel and a bit of oil after washing if it feels dry. And keep in mind, the more you use it, the better your seasoning will become. It's like a relationship – the more time you spend together, the stronger it gets.
(Part 3) Dutch Oven Essentials
Okay, you’ve got your Dutch oven, and you've seasoned it. Now, let’s gather some essential tools and ingredients that will make your Dutch oven experience even more enjoyable.
Must-Have Dutch Oven Accessories
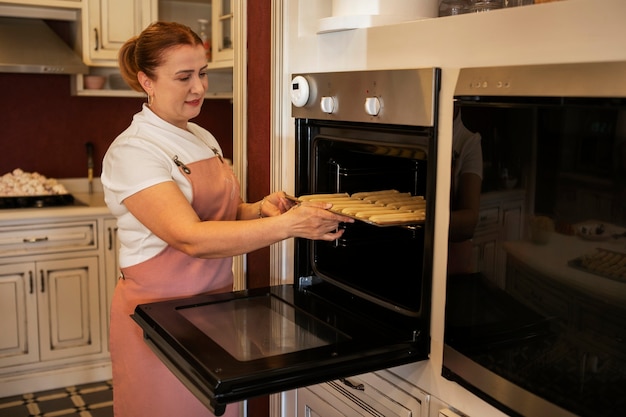
- Dutch oven mitts: These are essential for protecting your hands from the heat of the Dutch oven. You can find them in various materials, like silicone, leather, or cotton. I have a pair of heavy-duty leather mitts that I swear by – they're like a shield against the heat.
- silicone spatula: A silicone spatula is perfect for scraping the bottom of your Dutch oven and flipping food without scratching the surface. They're flexible and heat-resistant, making them perfect for the job.
- Wooden spoon: A good wooden spoon is perfect for stirring soups, stews, and sauces. I always have a few on hand, because you just can’t beat a classic wooden spoon – they add a touch of charm and warmth to the kitchen.
- meat thermometer: This is especially helpful for ensuring your meat is cooked to perfection. It's essential for perfect roasts and juicy steaks, taking the guesswork out of cooking.
- Cast iron trivet: This handy tool prevents scorching your food by elevating the pot slightly when you're cooking on the stovetop. It's a lifesaver for those delicate dishes that need a little extra care.
Ingredients to Stock Your Pantry
Now, let's talk ingredients. Here are some staples that I always keep on hand for my Dutch oven creations.
- Olive oil: A versatile oil for searing meats and vegetables. I use it for almost everything – it adds a lovely depth of flavor and helps create that golden-brown crust.
- Butter: Perfect for adding richness and flavor to soups, stews, and sauces. I’m partial to salted butter, but that’s just me. It brings a touch of decadence to any dish.
- Garlic: A must-have for adding depth and flavour to any dish. I usually have fresh garlic on hand, but garlic powder is a great substitute. It’s the magic ingredient that elevates everything from simple pasta to complex braises.
- Onion: Another staple for building flavour. I love a good yellow onion, but you can also use red onion or shallots. Onions are the backbone of many dishes, adding sweetness and complexity to the flavor profile.
- Herbs and spices: A variety of fresh or dried herbs and spices will elevate your Dutch oven creations. My go-to’s include oregano, thyme, rosemary, and paprika. They add a burst of aroma and flavor that will transport you to culinary heaven.
- Wine: A splash of red or white wine adds another dimension of flavor to stews and sauces. It adds a touch of sophistication and depth to the dish.
(Part 4) Mastering the Art of Dutch Oven Cooking
Alright, you’ve got your Dutch oven, your tools, and your ingredients. Now, let’s dive into the techniques that will transform you into a Dutch oven cooking maestro.
Basic Techniques You Need to Know
- Searing: Searing is a key technique for creating a flavorful crust on meats and vegetables. Simply heat your Dutch oven over high heat, add a little oil, and cook your food for a few minutes on each side until it develops a golden-brown crust. The result? A deliciously caramelized surface that locks in flavor and adds a touch of indulgence.
- Braising: Braising is a slow cooking method that involves browning your food first and then simmering it in liquid until it’s tender. This is a perfect technique for tough cuts of meat and vegetables that need a little extra love. The slow simmering process breaks down the tough fibers, resulting in incredibly tender and flavorful dishes.
- Slow cooking: Similar to braising, slow cooking involves cooking your food over low heat for an extended period of time. It’s a great way to make tender and flavorful dishes, and it’s perfect for busy weeknights. The gentle heat allows the flavors to meld and develop, creating a symphony of taste.
- Baking: Dutch ovens are also excellent for baking bread, casseroles, and even cakes. Just make sure to use a low oven temperature so that your food doesn't burn. The even heat distribution ensures that your baked goods are cooked evenly and have a beautiful golden-brown crust.
- Roasting: Roast your favourite vegetables and meats to perfection in your Dutch oven. The even heat distribution will ensure that your food is cooked evenly and doesn’t dry out. It's the ultimate way to unlock the natural sweetness of vegetables and create perfectly tender, juicy roasts.
- Soup making: Dutch ovens are ideal for making hearty and flavorful soups. Simply sauté your aromatics in the bottom of the pot, add your broth and vegetables, and simmer until your soup is cooked through. It's a one-pot wonder, perfect for creating comforting and soul-warming soups.
(Part 5) Dutch Oven Recipes That Will Blow Your Mind
Right, let’s get to the good stuff: the recipes! I’m going to share a few of my absolute favourite Dutch oven recipes that are sure to impress. Get ready to be blown away.
Classic Beef Stew
This is a real comfort food classic. Tender chunks of beef simmered in a rich, flavorful sauce with hearty vegetables. It’s the ultimate winter warmer.
Ingredients:
- 2 pounds beef chuck roast, cut into 1-inch cubes
- 2 tablespoons olive oil
- 1 large onion, chopped
- 2 cloves garlic, minced
- 1 teaspoon dried thyme
- 1 teaspoon dried oregano
- 1/2 teaspoon salt
- 1/4 teaspoon black pepper
- 1 (14.5 ounce) can diced tomatoes, undrained
- 1 (10.75 ounce) can beef broth
- 1 cup red wine (optional)
- 2 carrots, chopped
- 2 celery stalks, chopped
- 1 cup frozen peas
Instructions:
- Heat the olive oil in your Dutch oven over medium-high heat.
- Add the beef and cook, stirring occasionally, until browned on all sides. This step is crucial for developing a rich flavor and a beautiful crust.
- Remove the beef from the Dutch oven and set aside.
- Add the onion and garlic to the Dutch oven and cook until softened, about 5 minutes. This helps to create a base for the flavorful sauce.
- Stir in the thyme, oregano, salt, and pepper. This is where you add your aromatic magic, creating a symphony of flavor.
- Return the beef to the Dutch oven.
- Add the diced tomatoes, beef broth, and red wine (if using). This adds moisture and depth to the stew.
- Bring to a boil, then reduce heat to low, cover, and simmer for 2 hours, or until the beef is tender. The slow simmering process breaks down the tough fibers in the beef, resulting in an incredibly tender and flavorful stew.
- Stir in the carrots and celery and cook for another 30 minutes, or until the vegetables are tender. The vegetables add texture and sweetness to the stew.
- Stir in the peas and cook for 5 minutes, or until heated through.
- Serve hot.
Garlic Parmesan Chicken
Let’s be honest, chicken and garlic parmesan is a classic for a reason. It’s simple, delicious, and utterly satisfying. And in a Dutch oven, you can get that crispy skin and juicy meat every time.
Ingredients:
- 4 boneless, skin-on chicken breasts
- 1 tablespoon olive oil
- 1 teaspoon salt
- 1/2 teaspoon black pepper
- 1/2 cup grated Parmesan cheese
- 1/4 cup chopped fresh parsley
- 1/4 cup bread crumbs
- 2 cloves garlic, minced
- 1/4 cup butter
Instructions:
- Preheat your oven to 400°F (200°C).
- Heat the olive oil in your Dutch oven over medium-high heat.
- Season the chicken breasts with salt and pepper.
- Cook the chicken breasts in the Dutch oven for about 5 minutes per side, or until browned. This creates a crispy skin and seals in the juices.
- Remove the chicken breasts from the Dutch oven and set aside.
- In a small bowl, combine the Parmesan cheese, parsley, bread crumbs, and garlic. This mixture will add flavor and a beautiful golden crust to the chicken.
- Sprinkle the cheese mixture evenly over the chicken breasts.
- Add the butter to the Dutch oven and melt over medium heat.
- Place the chicken breasts back in the Dutch oven and bake for 20 minutes, or until the chicken is cooked through. The butter helps to create a rich and flavorful sauce.
- Serve immediately.
Homemade Bread
Dutch ovens are also excellent for baking bread. This is a simple recipe for a classic loaf of bread. The crust is crispy and the inside is soft and chewy. It’s the perfect bread for sandwiches, toast, or dipping in soup.
Ingredients:
- 1 cup warm water (105-115°F)
- 1 tablespoon sugar
- 1 packet (2 1/4 teaspoons) active dry yeast
- 1 teaspoon salt
- 3 cups all-purpose flour, plus more for dusting
- 2 tablespoons olive oil
Instructions:
- In a large bowl, combine the warm water, sugar, and yeast. Let stand for 5 minutes, or until the yeast is foamy. This activates the yeast, allowing it to do its magic and make the bread rise.
- Add the salt and 2 cups of the flour to the yeast mixture. Stir until a dough forms.
- Turn the dough out onto a lightly floured surface.
- Knead the dough for 5-7 minutes, or until smooth and elastic. This develops the gluten in the dough, giving the bread its structure and texture.
- Place the dough in a lightly oiled bowl.
- Cover the bowl with plastic wrap and let rise in a warm place for 1 hour, or until doubled in size. The yeast feeds on the sugar and flour, producing carbon dioxide, which causes the dough to rise.
- Preheat your oven to 450°F (230°C).
- Punch down the dough and shape it into a loaf.
- Place the loaf in your Dutch oven.
- Cover the Dutch oven with the lid and bake for 30 minutes. This creates a moist environment, allowing the bread to rise beautifully.
- Remove the lid and bake for another 15 minutes, or until the loaf is golden brown. This step creates the crispy crust and ensures the bread is fully cooked.
- Let cool on a wire rack before slicing.
(Part 6) Dutch Oven Tips and Tricks
Here are some extra tips and tricks that will help you become a true Dutch oven master.
Pro-Level Dutch Oven Tips
- Don't overcrowd: Give your food space to cook evenly. If you're cooking a lot of food, you might need to use a larger Dutch oven. Crowding the pot can lead to uneven cooking and potentially steaming instead of browning.
- Don't overcook: Keep an eye on your food, especially when you’re searing or braising. Overcooking can lead to tough meat or burnt vegetables. Overcooked food is never a good thing!
- Use a thermometer: A meat thermometer is essential for ensuring that your meat is cooked to perfection. You can also use a thermometer to check the temperature of your food when baking. This is especially important when dealing with delicate dishes.
- Don't be afraid to experiment: Dutch oven cooking is all about experimentation. Try new recipes and techniques and don’t be afraid to make substitutions. You’ll be surprised by what you discover. Embrace your inner chef and have fun!
- Clean your Dutch oven properly: Wash your Dutch oven with warm, soapy water and a non-abrasive sponge. Avoid using steel wool or harsh detergents. Gentle cleaning is key to preserving the seasoning.
- Don't put your Dutch oven in the dishwasher: The heat and detergent can damage the seasoning. The dishwasher can be too harsh for delicate cast iron.
- Don't use it for acidic foods: Acids can damage the enamel coating on your Dutch oven. Instead, use stainless steel or ceramic cookware for acidic dishes.
(Part 7) Dutch Oven Myths Debunked
We’re not done yet! Let's tackle some common myths about Dutch oven cooking.
The Truth Behind Dutch Oven Rumors
I've heard all sorts of things about Dutch ovens. But you know what? Some of them are just straight-up myths. Let's set the record straight.
- Dutch ovens are too heavy: Yes, they’re heavier than other pots and pans, but that’s because they’re made from cast iron. That heaviness is what gives them their great heat distribution and retention. It's a small price to pay for their incredible performance.
- Dutch ovens are only for experienced cooks: Nonsense! Dutch ovens are actually perfect for beginners. Their even heat distribution and forgiving nature make them easy to use. Don't be intimidated – they're your friend in the kitchen.
- Dutch ovens are only for slow cooking: While Dutch ovens are great for slow cooking, they can be used for a variety of other cooking methods, like searing, baking, and roasting. They're versatile and adaptable to different cooking styles.
- Dutch ovens are expensive: They’re not cheap, but they’re an investment that will last you for years to come. You can even find good quality Dutch ovens at reasonable prices. They're a one-time purchase that will serve you well for years to come.
- Dutch ovens are difficult to clean: It’s true that cast iron Dutch ovens require a bit more maintenance than enameled Dutch ovens, but they’re not that hard to clean. Just wash them with warm, soapy water and a non-abrasive sponge, and avoid using steel wool or harsh detergents. A little bit of care goes a long way.
(Part 8) The Dutch Oven Community
Okay, you’re ready to join the Dutch oven revolution, but there's something you need to know: you’re not alone! There’s a whole community of Dutch oven enthusiasts out there, sharing their passion and love for this incredible cookware.
Connect With Fellow Dutch Oven Lovers
The online world is filled with amazing Dutch oven resources. Check out these websites and social media groups for recipes, tips, and inspiration:
- Dutch Oven Cookery: This website offers a wealth of Dutch oven recipes, tips, and techniques.
- The Dutch Oven Cookbook: This is a great resource for finding classic Dutch oven recipes.
- Dutch Oven Facebook Groups: There are numerous Dutch oven Facebook groups where you can connect with other enthusiasts, share recipes, and ask questions.
- Pinterest: Pinterest is a great place to find Dutch oven recipes and inspiration. Just search for "Dutch oven recipes" to find a plethora of ideas.
- Instagram: Instagram is another great platform for finding Dutch oven recipes and inspiration. Search for hashtags like dutchoven, dutchOvenRecipes, and castIronCooking to find a ton of posts.
(Part 9) FAQs About Dutch Oven Cooking
I know you've got questions. So, let's get to it.
Common Questions Answered
- Q: Can I use my Dutch oven on the stovetop?
- Q: How do I know if my Dutch oven is seasoned properly?
- Q: Can I put my Dutch oven in the dishwasher?
- Q: What are some Dutch oven recipes that are perfect for beginners?
- Q: How do I clean my Dutch oven after cooking acidic foods?
A: Absolutely! Most Dutch ovens are compatible with all stovetops, including gas, electric, and induction. Just make sure to use a low to medium heat to avoid scorching your food.
A: A well-seasoned Dutch oven will have a smooth, dark, and slightly slick surface. It should also be non-stick and repel water. If your Dutch oven is still new or has a dull finish, you may need to re-season it.
A: It’s best to avoid putting your Dutch oven in the dishwasher. The heat and detergent can damage the seasoning.
A: You can’t go wrong with a classic soup or stew. I also recommend trying a simple Dutch oven bread recipe.
A: You don’t need to do anything special. Just wash it with warm, soapy water and a non-abrasive sponge. If you’re using a cast iron Dutch oven, make sure to dry it thoroughly and apply a thin layer of oil.
(Part 10) The Dutch Oven Journey Continues
There you have it. My ultimate guide to Dutch oven cooking. I hope you’ve picked up some useful tips and tricks. Remember, Dutch oven cooking is a journey, not a destination. So, get out there, experiment, and most importantly, enjoy the process. Happy cooking!
Let me know if you have any other questions. I'm always here to help you on your Dutch oven adventures!
Everyone is watching

How to Cook Frozen Lobster Tails Perfectly: A Step-by-Step Guide
RecipesLobster. Just the word conjures up images of lavish meals, special occasions, and a taste of luxury. But let's...

Pigs in a Blanket Cooking Time: How Long to Bake for Perfect Results
RecipesAh, pigs in a blanket. Just the name conjures up images of those delightful little parcels of crispy pastry en...

Pork Fillet Cooking Time: How Long to Cook It Perfectly
RecipesPork fillet, or tenderloin as it's sometimes called, is a real favourite in our house. It's so versatile, and...

The Ultimate Guide to Tender, Juicy Pulled Pork
RecipesRight, let's talk pulled pork. It's one of those dishes that just screams "comfort food," doesn't it? I mean...

The Ultimate Guide to Cooking Sweet Potatoes: From Roasting to Mashing
RecipesSweet potatoes. Just the name conjures up images of warm, comforting dishes, bursts of vibrant color, and a to...