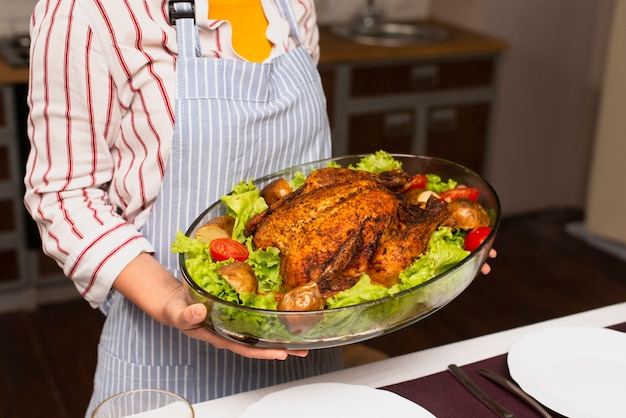
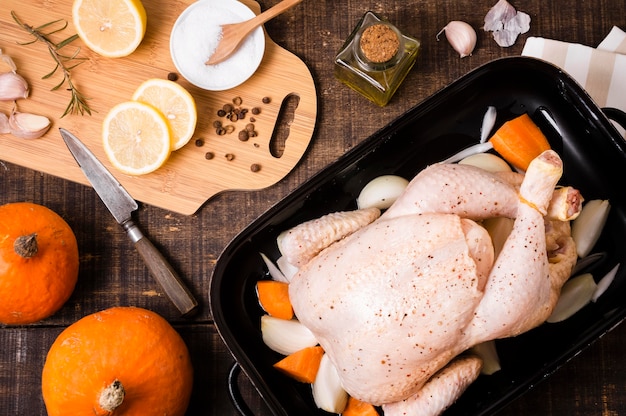
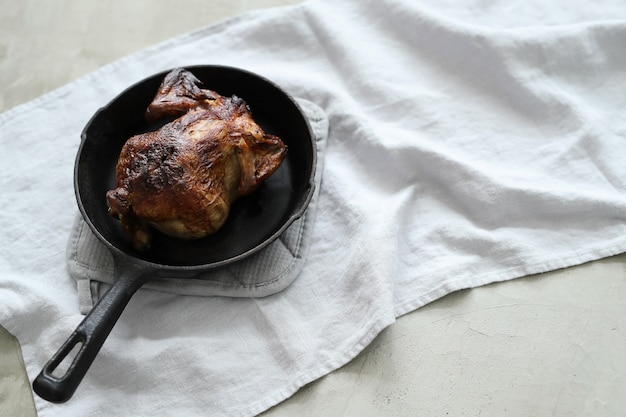
Duck. Just the word conjures images of rich, succulent meat and gloriously crispy skin. But for many, cooking duck can feel intimidating. The thought of achieving that perfect crisp, the worry of drying out the meat, and maybe a touch of "fancy bird" anxiety. Let me tell you, those worries are completely unfounded! This recipe is my go-to for a mouthwatering duck dinner, and I'm breaking it down for you step-by-step, so you can conquer this culinary adventure with ease.
You're going to love this recipe because it’s simple, it’s satisfying, and it's a real crowd-pleaser. Trust me, even the pickiest eaters will be impressed. So, grab your apron, gather your ingredients, and let's get cooking!
Part 1: Choosing the Perfect Duck

Fresh or Frozen? It’s Up to You
First things first, let's talk about the star of the show: the duck. Now, you’ll find both fresh and frozen ducks at your local supermarket. Fresh duck is ideal if you can get your hands on it because the flavor is just a little bit more intense. However, frozen ducks are perfectly fine, and you can often find them pre-portioned, making things even easier for you.
Whole Duck or Duck Parts?
Next, decide what kind of duck you want. Do you want a whole duck, or are you looking for a simpler approach with just duck breasts or legs? A whole duck is a classic choice, and it looks impressive when you present it on the table. It's also more economical. But if you’re short on time or cooking for a smaller group, duck breasts are a great option. You can usually find them already boned and skinned, making them incredibly easy to cook.
Size Matters
Once you’ve chosen your duck, you need to think about size. A smaller duck will be done more quickly than a larger duck, so make sure to adjust your cooking time accordingly. A good rule of thumb is about 1.5 hours for a smaller duck and up to 2 hours for a larger duck. But don't worry, I’ll walk you through the timing details later on.
Part 2: Preparing the Duck

A Little Prep Goes a Long Way
Now it’s time to get your duck ready for the oven. Start by rinsing it inside and out under cold running water. You can remove any stray feathers at this stage, but don't worry if you miss a few; they’ll burn off during roasting. Pat the duck dry with paper towels, making sure to dry the inside as well.
Scoring for Perfect Crispiness
Here’s where things get a little bit fun! Scoring the duck’s skin is essential for achieving that incredible crispy texture. Use a sharp knife to make diagonal cuts about half an inch apart across the duck’s skin, taking care not to cut into the flesh. This helps the fat render out more evenly, creating a crispy, golden-brown skin.
Seasoning for Flavor
Now for the flavour! I like to keep things simple with salt and pepper. But feel free to get creative. A pinch of smoked paprika adds a delightful smoky touch, while a sprinkle of garlic powder and onion powder adds a delicious depth of flavour. Just remember, go easy on the salt, as too much can make the skin tough.
Once you’ve chosen your seasonings, rub them all over the duck, working your fingers underneath the skin to ensure the seasonings coat the whole bird. Don't be afraid to get your hands dirty! You want the flavours to permeate the duck for an irresistible taste.
Part 3: The Roasting Process

Prepping the roasting pan
Before you pop the duck in the oven, you need to prepare your roasting pan. I recommend using a roasting pan with a rack to keep the duck elevated. This allows the fat to render properly, creating a crispy skin and juicy meat. If you don't have a rack, you can improvise with sturdy carrots or onions. You’ll want to add about half an inch of water to the bottom of the pan to help keep the duck moist and prevent it from burning.
The Magic of Two Temperatures
Now, the exciting part! Preheat your oven to 400 degrees Fahrenheit (200 degrees Celsius). Once it’s hot, place the duck on the rack in your roasting pan. Here’s the trick: roast the duck at 400 degrees for the first hour to get that initial crispiness, then reduce the heat to 350 degrees fahrenheit (175 degrees Celsius) for the rest of the cooking time.
This dual-temperature method is key! The high heat helps to render the fat and create a deliciously crispy skin, while the lower heat allows the duck to cook through evenly, resulting in juicy, tender meat. The cooking time will vary depending on the size of your duck, but generally, you'll be looking at about 1.5 to 2 hours.
Part 4: Knowing When Your Duck is Done
Trust Your Instincts
There are lots of ways to tell if your duck is done. You can use a meat thermometer to check the internal temperature (it should be 165 degrees Fahrenheit, or 74 degrees Celsius), or you can look for signs like the duck having a golden-brown colour and the juices running clear when you pierce it with a fork. But I prefer to trust my instincts.
When a duck is done, it will feel firm to the touch, the skin will be crispy, and the juices will run clear. But if you’re still unsure, a meat thermometer is always a good backup!
Part 5: Resting and Carving
Patience Pays Off
Once the duck is cooked, resist the urge to carve it right away! It needs to rest for at least 15 minutes, preferably 30. This allows the juices to redistribute throughout the meat, resulting in a much juicier, more flavorful duck.
Carving with Confidence
After resting, you can carve the duck. To carve a whole duck, start by cutting the legs off at the joint. Then, carefully carve the breast into slices, working along the bone. If you want to get fancy, you can remove the skin from the breast to serve it separately. But I prefer to serve the whole breast, skin and all, as it’s simply delicious!
Part 6: Delicious side dish Combinations
The Perfect Accompaniments
Now let's talk about side dishes! There are so many amazing ways to complement your roasted duck. I love roasted root vegetables, especially carrots, parsnips, and potatoes. Toss them with a little rosemary or thyme for extra flavour. green beans or asparagus are also lovely, lightly steamed or sauteed.
Sauce it Up
For a touch of extra flavour, consider serving your duck with a sauce. A simple orange sauce or a rich red wine sauce are classic pairings. You can also use the flavorful pan juices from the roasting pan to make a delicious pan sauce. Just deglaze the pan with a little wine or broth, scraping up any browned bits, and reduce it to a sauce consistency.
Don’t Waste That Duck Fat!
Here’s a little secret: duck fat is incredibly delicious! Don’t throw it away. Store it in a container in the refrigerator and use it to fry potatoes, roast vegetables, or even make your own duck fat confit. It’s a culinary treasure!
Part 7: My Personal Touches
Now, I’ve shared my basic duck roasting method, but I like to get a little creative in the kitchen. I love stuffing the duck with a mixture of herbs, spices, and even some chopped fruit like apples or oranges. This adds a lovely sweetness and aroma to the duck.
I also enjoy adding a few slices of lemon or orange to the roasting pan for extra citrusy flavour. You can also try incorporating a bit of honey or maple syrup to the sauce for a touch of sweetness. The possibilities are endless!
Part 8: FAQs
What if my duck is too salty?
If you find your duck is too salty, you can try soaking it in cold water for 30 minutes before roasting. This will help to draw out some of the excess salt.
What if my duck is too dry?
If you end up with a dry duck, don’t despair! You can try adding some sauce or gravy to the plate to help moisten it. You can also try serving it with some creamy mashed potatoes or a side of rice.
How do I store leftovers?
Leftover duck can be stored in an airtight container in the refrigerator for up to 3 days. You can reheat it in the oven, microwave, or even use it in other dishes like salads or soups.
Can I freeze duck?
Yes, you can freeze duck for up to 3 months. It’s best to freeze it whole, but you can also freeze it in pieces. Thaw it in the refrigerator for 24 hours before cooking.
What are some good wine pairings for duck?
Duck goes well with a variety of wines, but some good pairings include Pinot Noir, Cabernet Sauvignon, Bordeaux, and Zinfandel. You can also pair it with a dry Riesling or Sauvignon Blanc.
Part 9: Conclusion
And there you have it! My foolproof duck roasting recipe, tried and true. I hope this guide has helped to demystify the art of cooking duck. It’s truly not as intimidating as you might think. So go forth and roast some duck, my friends. You won't regret it!
Everyone is watching

How to Cook Frozen Lobster Tails Perfectly: A Step-by-Step Guide
RecipesLobster. Just the word conjures up images of lavish meals, special occasions, and a taste of luxury. But let's...

Pigs in a Blanket Cooking Time: How Long to Bake for Perfect Results
RecipesAh, pigs in a blanket. Just the name conjures up images of those delightful little parcels of crispy pastry en...

Pork Fillet Cooking Time: How Long to Cook It Perfectly
RecipesPork fillet, or tenderloin as it's sometimes called, is a real favourite in our house. It's so versatile, and...

The Ultimate Guide to Cooking Delicious Frankfurters
RecipesLet's face it, we all love a good frankfurter. It's a classic, simple, and always satisfying. But let's be rea...

Wolf Meat Recipes: A Guide to Cooking Wild Game
RecipesLet's be honest, you don't see wolf meat at your local butcher shop every day. It's a bit of a wild card, but ...
