Let's face it, duck is a culinary masterpiece. That rich, dark meat, the satisfying crunch of the skin, it's all just so delicious! But let's be honest, cooking duck can feel a bit daunting. You've got to nail the timing, the skin has to be crackling, and that juicy meat needs to be cooked perfectly. No pressure, right?
Well, fret no more! I'm here to take your hand and guide you through the delightful world of duck cooking. This guide is your one-stop shop for everything you need to know, from picking the right duck to achieving that glorious, succulent finish. I've spent years in the kitchen, experimenting with different techniques and recipes, and I'm thrilled to share my knowledge with you. So, grab a notebook (or your phone notes!), because we're about to embark on a culinary adventure!
(Part 1) Choosing the Right Duck
The first step in our duck journey is picking the perfect bird. It's not a one-size-fits-all situation, you know. You need to consider what you're cooking and what kind of flavour profile you're after. Let's dive into the world of ducks, shall we?
1.1 The Mighty Mallard
Now, these wild ducks are a true delicacy. They have a robust, gamey flavour that's truly unforgettable. They're a bit trickier to find, usually showing up in specialist butchers or at farmers' markets. But trust me, the effort is worth it. The flavour is simply divine!
1.2 The Versatile Aylesbury
This beauty is a classic British duck, known for its white plumage and oh-so-tender, sweet meat. It's a versatile bird, perfect for roasting, pan-frying, and even braising. It's a great option for those who want a more mild duck flavour.
1.3 The Rich Pekin
With its plump body and golden skin, the Pekin is a crowd-pleaser. It's renowned for its rich flavour and abundance of meat, making it ideal for roasting or grilling. If you're looking for a duck that packs a punch, the Pekin is your go-to.
1.4 The Intriguing Muscovy
Muscovy ducks have a distinct flavour, a bit gamey, like chicken, but with a deeper dimension. They're perfect for those who enjoy a bit of adventurous cooking. If you're looking to explore new flavours, the Muscovy is a fantastic choice.
1.5 Duck Weight: Sizing Up Your Bird
Don't just grab any old duck, you need to consider its weight! You want to make sure there's enough for everyone, right? A good size for a roasting duck is around 2.5 to 3 kg. And, remember, cooking times can vary depending on the weight, so keep an eye on the table below.
(Part 2) Duck Cooking Times: A Handy Guide
Alright, let's get into the nitty-gritty of cooking times. These are influenced by the duck's size, how you're cooking it, and how well-done you like it. But don't worry, I've got your back! Here's a handy table to guide you. Remember, these are just starting points, always use a meat thermometer to make sure it's cooked to your liking.
| Cooking Method | Duck Weight | Approximate Cooking Time |
|---|---|---|
| Roasting | 1.5 - 2 kg | 1 hour 30 minutes to 2 hours |
| 2.5 - 3 kg | 2 hours to 2 hours 30 minutes | |
| 3.5 - 4 kg | 2 hours 30 minutes to 3 hours | |
| Pan-Frying | Individual Duck Breast | 10 - 15 minutes (medium-rare) |
| Individual Duck Breast | 15 - 20 minutes (medium) | |
| Individual Duck Breast | 20 - 25 minutes (well-done) |
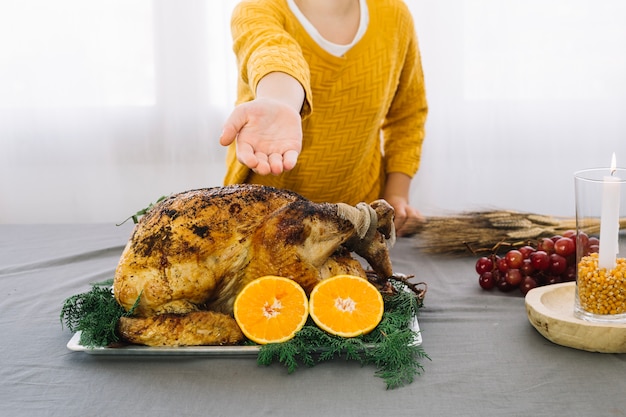
(Part 3) Roasting a Duck: A Culinary Classic
Right, let's talk about the classic way to cook duck – roasting. It's a simple yet elegant technique that yields beautifully tender meat and that glorious crispy skin, which, let's be honest, is the star of the show!
3.1 Prepping the Duck: The Foundation for Success
First things first, we need to get our duck prepped for its starring role. Rinse it under cold water, pat it dry with kitchen paper, and remove any excess fat from the cavity. Now, let's focus on the skin, the key to that mouthwatering crunch. Carefully pierce the skin with a sharp knife or fork in several places. This helps the fat render and stops the skin from curling up.
3.2 Seasoning the Duck: Unleashing the Flavour
Don't hold back on the seasoning! This is where you add a touch of your personal magic. Rub the skin generously with salt and pepper, and don't forget to season the inside cavity too. For a touch of extra flavour, add some herbs like rosemary, thyme, or sage. You can even stuff the duck with a mixture of apples, onions, and herbs for a truly decadent flavour.
3.3 Roasting the Duck: Bringing the Heat
Preheat your oven to 200°C/400°F. Place the duck on a roasting rack in a large roasting pan. This allows the fat to drip away, keeping the skin crisp and preventing it from becoming soggy. For extra moisture, you can add a cup of water to the bottom of the pan. The steam helps keep the meat juicy.
Pop the duck into the oven and roast for about 30 minutes, then reduce the temperature to 180°C/350°F. This ensures even cooking while the skin achieves that beautiful golden brown. You'll need to roast for around 1 hour 30 minutes to 2 hours, depending on the size of the duck. Keep a close eye on it and use a meat thermometer to ensure it's cooked through. You want the thickest part of the thigh to reach an internal temperature of 74°C/165°F.
3.4 Resting the Duck: The Key to Juiciness
Once the duck is cooked, take it out of the oven and let it rest for 15-20 minutes before carving. This allows the juices to redistribute, resulting in every bite bursting with flavour. While you're waiting, get your serving plates and all those delicious side dishes ready – you're about to be rewarded with a culinary masterpiece!
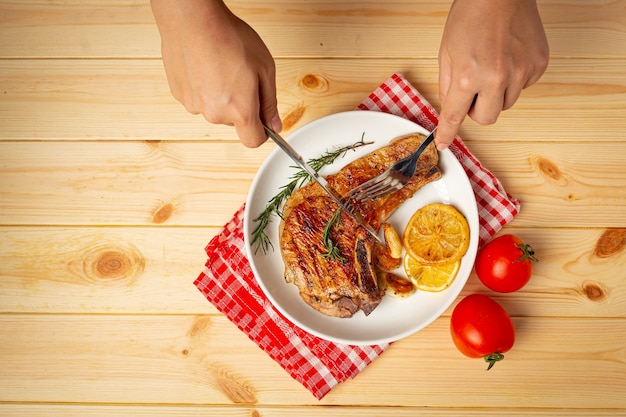
(Part 4) Pan-Frying Duck Breast: A Quick and Easy Delight
Sometimes you crave a simple yet delicious duck dinner, and pan-frying duck breast is the answer. It's a quick and easy technique that delivers wonderfully crispy skin and tender, juicy meat, perfect for a romantic dinner or a satisfying weeknight meal.
4.1 Skin Side Down: Achieving that Crisp
Start by scoring the skin of the duck breast. This helps the fat render and ensures that crispy, crackling skin we all crave. Pat the duck breasts dry with kitchen paper and heat a large frying pan over medium-high heat. Add a tablespoon of oil to the pan and carefully place the duck breasts skin-side down. Let it cook undisturbed for 5-7 minutes, allowing the skin to become golden brown and crackling.
4.2 Flipping the Duck: A Delicate Touch
Now, it's time to flip the duck breast. This is where you need a delicate hand! Avoid piercing the skin, as this could cause it to lose its beautiful crispiness. Flip the duck and cook for 3-5 minutes on the other side. You'll know it's cooked to your liking when the meat is firm and the juices run clear when you cut into it. Remember, you can adjust the cooking time based on your desired level of doneness.
4.3 Rest and Serve: A Culinary Finale
Once the duck is cooked, remove it from the pan and let it rest for 5-10 minutes before slicing. This allows the juices to redistribute, resulting in tender and succulent meat. While the duck is resting, you can deglaze the pan with a little wine or broth to create a delicious sauce to serve with your duck. And now, it's time to enjoy your culinary creation! Serve your crispy, juicy duck breast with your favourite side dishes, like roasted vegetables, mashed potatoes, or a vibrant salad.
(Part 5) Braised Duck: A Symphony of Flavour
If you're seeking a comforting and flavourful dish, braising duck is the way to go. It's a perfect choice for a cold winter evening, resulting in melt-in-your-mouth tender meat that's bursting with flavour.
5.1 Seasoning and Browning: Laying the Foundation
Start by seasoning the duck. Rub it generously with salt, pepper, and any other herbs or spices you enjoy. Heat a large dutch oven or heavy-bottomed pot over medium-high heat and add a tablespoon of oil. Carefully sear the duck on all sides until it's golden brown, about 5 minutes per side. This gives the duck a lovely crust and enhances its flavour. Once browned, remove it from the pot and set it aside.
5.2 Sautéing the Vegetables: A Symphony of Textures
Now, it's time for some vegetables! Add your favourite vegetables to the pot, such as onions, carrots, celery, garlic, or mushrooms. Sauté them until they're softened and fragrant, about 5 minutes. This creates a delicious base for your braising liquid.
5.3 Braising the Duck: Slow and Steady Wins the Race
Add a cup or two of liquid to the pot. You can use wine, broth, or even a combination of both. Bring the liquid to a simmer and add the duck back to the pot. Cover the pot and braise the duck over low heat for 2-3 hours, or until the meat is incredibly tender. You can check for doneness by using a fork to pierce the thickest part of the thigh – it should be incredibly easy to pierce and the meat should fall off the bone.
5.4 Serving your Braised Duck: A Culinary Masterpiece
Once the duck is cooked, remove it from the pot and let it rest for a few minutes. You can shred the duck meat or leave it whole, depending on your preference. Skim any excess fat from the braising liquid and strain it through a fine-mesh sieve. You can serve the duck with the braising liquid as a delicious sauce. Enjoy your comforting, flavour-packed braised duck! It's the perfect dish to warm you up on a chilly night.
(Part 6) duck recipes: Culinary Inspiration
Alright, you've got the basics, now let's get inspired! Here are some of my favourite duck recipes to get your creative juices flowing. These are real crowd-pleasers, so you'll be impressing everyone with your duck cooking skills.
6.1 Roasted Duck with Apple and Sage Stuffing: A Classic for a Reason
This is a classic recipe for a reason. The sweet and savory stuffing pairs beautifully with the crispy duck skin and tender meat.
6.2 Pan-Seared Duck Breast with Cherry Sauce: Elegance and Sophistication
This elegant and sophisticated dish is perfect for a special occasion. The cherry sauce adds a touch of sweetness and acidity that complements the duck perfectly.
6.3 Braised Duck with Red Wine and Herbs: Comfort and Depth
A hearty and flavorful dish that’s perfect for a cold winter evening. The red wine adds a depth of flavour and the herbs provide a beautiful aroma.
6.4 Duck Confit with Roasted Potatoes and Garlic: French Culinary Delights
This French classic is truly a taste sensation. The duck is slow-cooked in its own fat, resulting in melt-in-your-mouth tender meat. Serve it with roasted potatoes and garlic for a complete and satisfying meal.
6.5 Duck Curry with Coconut Milk and Spices: A Culinary Adventure
If you're looking for something a bit different, this duck curry is sure to please. The combination of coconut milk and spices creates a rich and flavorful sauce that’s perfect for serving over rice.
(Part 7) duck leftovers: Making the Most of Your Culinary Creations
Let's talk leftovers, because sometimes you have more duck than you can eat in one sitting. Don’t you worry, you can make those leftovers even more delicious! Here are a few ideas to get you started:
7.1 Duck Salad: A Refreshing and Healthy Choice
Slice the leftover duck meat and toss it with a mix of greens, vegetables, and a tangy dressing. It's a refreshing and healthy way to use up leftover duck.
7.2 Duck Pizza: A Quick and Easy Treat
Top a pre-made pizza crust with your leftover duck meat, some cheese, and your favourite toppings. It's a quick and easy way to turn leftover duck into a delicious dinner.
7.3 Duck Soup: A Comforting and Flavorful Solution
Add the leftover duck meat to a pot of soup for extra flavour and protein. It's a perfect way to use up any bones and scraps too.
7.4 Duck fried rice: A quick and easy meal
Dice the leftover duck meat and stir-fry it with rice, vegetables, and your favourite seasonings. It's a quick and easy meal that’s perfect for lunch or dinner.
7.5 Duck Quesadillas: A Delicious and Satisfying Snack
Fill tortillas with leftover duck meat, cheese, and your favourite toppings and grill them until golden brown. It's a delicious and satisfying snack or light meal.
(Part 8) FAQs: Clearing Up Common Questions
I know you're probably buzzing with questions, so let's address some common queries.
8.1 How do I tell if duck is cooked?
The best way to tell if your duck is cooked is to use a meat thermometer. The thickest part of the thigh should reach an internal temperature of 74°C/165°F. You can also check for doneness by piercing the meat with a fork. If the juices run clear, it's cooked through.
8.2 Why is my duck skin not crispy?
There are a few reasons why your duck skin might not be crispy. One common reason is that you didn’t score the skin before cooking. Scoring helps the fat render and ensures the skin gets crispy. You can also make sure you’re roasting or pan-frying the duck at a high enough temperature. Lastly, avoid overcrowding the pan when roasting or frying duck, as this can make the skin steam instead of crisp up.
8.3 What can I serve with duck?
The best thing about duck is that it pairs well with so many different flavours. You can serve it with traditional accompaniments like roasted vegetables, mashed potatoes, or a vibrant salad. But you can also get creative and pair it with more unusual side dishes like fruit compote, couscous, or even a spicy Asian slaw. It really comes down to your personal preference.
8.4 Is duck healthy?
Duck is a good source of protein, iron, and B vitamins. However, it is also high in fat. To reduce the fat content, you can trim excess fat before cooking and avoid serving the skin.
8.5 How long does duck last in the fridge?
Cooked duck can be stored in the refrigerator for up to 3 days. You can reheat it in the oven, microwave, or on the stovetop. It's best to reheat the duck until it’s steaming hot to ensure it's safe to eat.
There you have it, a complete guide to conquering duck cooking! I hope this has inspired you to explore the world of duck and create some delicious dishes. Remember, practice makes perfect, so don’t be afraid to experiment and find what works best for you. Happy cooking!
Everyone is watching

How to Cook Frozen Lobster Tails Perfectly: A Step-by-Step Guide
RecipesLobster. Just the word conjures up images of lavish meals, special occasions, and a taste of luxury. But let's...

Pigs in a Blanket Cooking Time: How Long to Bake for Perfect Results
RecipesAh, pigs in a blanket. Just the name conjures up images of those delightful little parcels of crispy pastry en...

Pork Fillet Cooking Time: How Long to Cook It Perfectly
RecipesPork fillet, or tenderloin as it's sometimes called, is a real favourite in our house. It's so versatile, and...

The Ultimate Guide to Cooking Delicious Frankfurters
RecipesLet's face it, we all love a good frankfurter. It's a classic, simple, and always satisfying. But let's be rea...

Wolf Meat Recipes: A Guide to Cooking Wild Game
RecipesLet's be honest, you don't see wolf meat at your local butcher shop every day. It's a bit of a wild card, but ...