As a seasoned home cook, I've always been drawn to the comforting aroma of a perfectly glazed ham, especially around the festive season. It's a dish that brings people together, evokes happy memories, and satisfies even the fussiest of eaters. But let's be honest, the thought of tackling a whole ham can be a tad daunting for some. What if it's dry? What if the glaze doesn't stick? What if the whole thing turns into a culinary disaster? Fear not, my fellow cooks! This article will be your ultimate guide to achieving delicious, succulent, and perfectly glazed ham, every single time. We'll cover everything from choosing the right ham to prepping, glazing, baking, and serving it like a pro.
Part 1: Choosing the Right Ham: A Foundation for Success
The first step in creating a mouthwatering glazed ham is selecting the right ham. This is where the journey begins, and it's crucial for the success of your dish. The market is flooded with different types of hams, so it's important to know what to look for. Don't worry, we'll break it down for you.
1.1 Unveiling the World of Ham Varieties: Spiral vs. Bone-In
There are essentially two main types of hams that you'll encounter:
- Spiral Sliced: These are your classic, ready-to-eat hams. They're already cooked, making them a breeze to prepare. Simply remove the packaging, add a glaze, and pop it in the oven. Perfect for busy weeknights or those who prefer a less time-intensive approach.
- Bone-In: These hams require a bit more time and effort. They’re typically raw and need to be cooked through before glazing. You can find them in various sizes and shapes, but they generally require a little more attention. bone-in hams are often considered more flavorful and offer a more traditional ham experience.
1.2 The Label Speaks Volumes: Decoding Ham Information
Once you've chosen your type, pay close attention to the label. It's like a treasure map guiding you to the perfect ham. Look out for these key details:
- Curing Method: Look for hams that are "dry-cured" or "wet-cured." dry-cured hams have a more intense flavour, resulting from a longer curing process, and are generally considered higher quality. They often have a firmer texture and a more pronounced salty aroma. wet-cured hams are typically less expensive but can sometimes have a more salty flavour due to the use of brine.
- Salt Content: Pay attention to the sodium content, especially if you're watching your salt intake. You can find low-sodium options if necessary.
- Ingredients: Look for hams that are minimally processed and don't contain any artificial ingredients or preservatives. You'll want to savor the natural flavors of the ham without any unwanted additions.
1.3 Sizing Up Your Ham: Matching Ham to Guests
The size of the ham you choose depends on how many people you're feeding. A smaller ham is perfect for a family dinner, while a larger one is ideal for a holiday feast. Personally, I always recommend opting for a slightly larger ham than you think you need. It’s better to have leftovers than to run out and disappoint your guests. Plus, leftover ham is a delicious treat for sandwiches, salads, or even a hearty soup.
Part 2: Prepping the Ham: Unveiling the Flavor
Now that you've chosen your perfect ham, it's time to prep it for cooking. This step is all about creating a delicious and visually appealing dish. It's like setting the stage for a culinary masterpiece.
2.1 Removing the Packaging: A Clean Slate for Flavor
If you’re using a spiral sliced ham, carefully remove the plastic packaging and any netting or casing that may be holding it together. Once you’ve removed the packaging, gently pat the ham dry with paper towels. This allows the glaze to adhere better and helps prevent steaming during cooking.
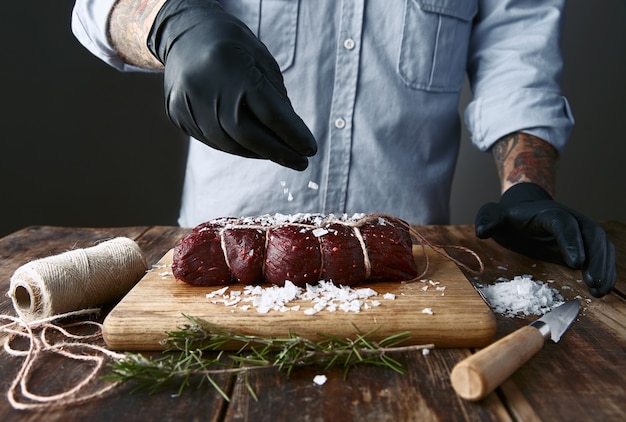
2.2 Scoring the Ham (optional): Enhancing Appearance and Flavor
Scoring the ham is a great way to enhance its visual appeal and allow the glaze to penetrate deeper, resulting in a more flavorful finish. It’s completely optional, but I find it adds a touch of elegance.
Here’s how to score a ham:
- Use a sharp knife to make diagonal cuts, about 1/2 inch deep, across the fat side of the ham.
- Space the cuts about 1 inch apart.
- If you’re feeling fancy, you can create a diamond pattern by making criss-cross cuts. This not only looks impressive but also allows the glaze to penetrate more evenly.
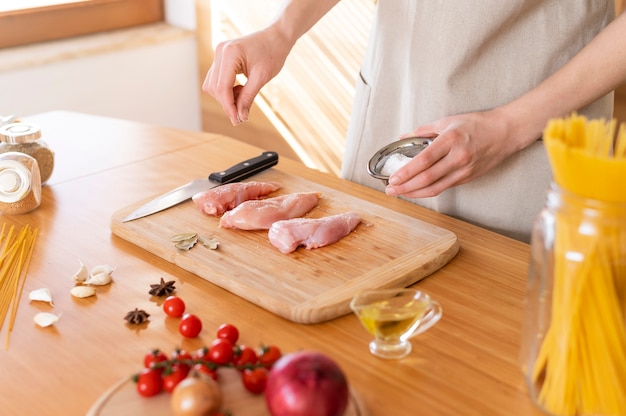
2.3 Adding Flavor with a Rub (optional): A Touch of Personalization
A simple rub can really elevate the flavour of your ham. It’s a great way to personalize the dish and create a truly unique flavour profile. I love using a combination of brown sugar, smoked paprika, garlic powder, and onion powder. It adds a wonderful smoky depth and savory notes. You can experiment with different spices to create your own signature rub.
Simply apply the rub evenly over the surface of the ham and massage it gently into the meat. Let the rub sit for at least 30 minutes, allowing the flavors to infuse.
Part 3: Glazing the Ham: The Art of Deliciousness
Ah, the glaze! This is the moment we've all been waiting for. It’s the secret weapon that transforms a simple ham into a culinary masterpiece. It's like adding the finishing touches to a painting. There are countless glaze recipes out there, but here are a few of my personal favourites. Each one adds a unique dimension to your ham.
3.1 The Classic brown sugar glaze: A Timeless Favorite
This is a simple and foolproof glaze that’s guaranteed to please everyone. It’s made with brown sugar, honey, and a touch of mustard for a subtle tang. It creates a beautiful, golden-brown glaze that caramelizes perfectly in the oven, resulting in a sweet and slightly savory finish.
Recipe
Ingredients:
- 1 cup packed brown sugar
- 1/4 cup honey
- 2 tablespoons Dijon mustard
Instructions:
- In a small saucepan, combine the brown sugar, honey, and mustard.
- Cook over medium heat, stirring constantly, until the glaze is smooth and melted. The sugar should dissolve completely, and the glaze should have a slightly thickened consistency.
- Remove from heat and set aside. Allow the glaze to cool slightly before applying, as it will be hot.
3.2 Spicy Mango Glaze: A Tropical Twist with a Kick
For those who like a touch of heat, this glaze is a must-try. It combines the sweetness of mango with the fiery kick of chili flakes. The mango adds a tropical twist, while the chili flakes provide a satisfying warmth. It's a perfect balance of sweet, spicy, and tangy.
Recipe
Ingredients:
- 1 cup mango puree (fresh or canned)
- 1/4 cup brown sugar
- 2 tablespoons orange juice
- 1/2 teaspoon chili flakes (adjust to your desired spice level)
Instructions:
- In a small saucepan, combine the mango puree, brown sugar, orange juice, and chili flakes.
- Cook over medium heat, stirring constantly, until the glaze is thickened and bubbly. You'll notice it coats the back of a spoon smoothly.
- Remove from heat and set aside. Allow the glaze to cool slightly before applying.
3.3 Applying the Glaze: The Finishing Touch
Once you’ve chosen your glaze, it’s time to apply it. You can apply it before baking or during the last 30 minutes of cooking. I prefer to apply it during the last 30 minutes, as it allows the glaze to caramelize and create a crispy, delicious crust. It also helps prevent the glaze from burning.
- Use a pastry brush to spread the glaze evenly over the surface of the ham. Make sure to cover the entire surface, paying attention to the edges and crevices.
- You can repeat this process several times during the cooking process, especially if you're using a bone-in ham. This ensures that the glaze adheres well and caramelizes beautifully.
Part 4: Baking the Ham: Bringing It to Life
Now that the ham is prepped and glazed, it’s time to pop it in the oven and let it bake to perfection. This is where the magic really happens.
4.1 Oven Temperature and Baking Time: Tailoring to Your Ham
The oven temperature and baking time will vary depending on the type of ham you are using.
For a spiral-sliced ham, you can follow the instructions on the packaging. However, I generally bake it at 325°F (160°C) for about 30-45 minutes, or until the glaze is bubbly and caramelized. You'll know it's ready when the glaze has a beautiful, glossy sheen and has thickened slightly.
For a bone-in ham, you'll need to cook it longer. The general rule of thumb is to bake it at 325°F (160°C) for about 15-20 minutes per pound. However, it’s always a good idea to use a meat thermometer to ensure that the internal temperature reaches 145°F (63°C). This guarantees that the ham is cooked through and safe to eat.
4.2 The Importance of a Meat Thermometer: Ensuring Safety and Perfection
Using a meat thermometer is essential for ensuring that the ham is cooked through and safe to eat. It’s the only way to guarantee that the internal temperature has reached the safe minimum of 145°F (63°C). You can find meat thermometers at most grocery stores and online retailers.
Simply insert the thermometer into the thickest part of the ham, avoiding the bone. If the internal temperature reaches 145°F (63°C), you’re good to go! Remove the ham from the oven and let it rest before slicing.
4.3 The Resting Process: Allowing for Tenderness and Flavor Distribution
Once the ham is cooked, don’t rush to slice it right away. Allow it to rest for at least 15 minutes before slicing. This allows the juices to redistribute throughout the ham, resulting in a more tender and juicy final product. The resting period also helps the glaze set and prevents it from running when you slice the ham. It's like letting the flavors meld and settle in.
Part 5: Serving the Ham: A Culinary Showcase
The moment of truth! The ham is cooked, glazed, and resting, ready to be sliced and served. It's time to unveil the masterpiece you've created.
5.1 Slicing Tips: Achieving Even and Beautiful Slices
When slicing the ham, use a sharp knife and slice it thinly. This will ensure that you get even slices and the meat is easy to chew. For a spiral-sliced ham, you can simply follow the spiral cuts. For a bone-in ham, you can slice it into thin rounds. A sharp knife makes all the difference in achieving clean, attractive slices.
5.2 Serving Ideas: A Feast for the Senses
Glazed ham is incredibly versatile and can be served in a variety of ways. Here are a few ideas to inspire your culinary creativity:
- Classic: Serve it with roasted vegetables, mashed potatoes, or a green salad. The classic combination is always a crowd-pleaser.
- Sandwiches: It’s perfect for sandwiches, especially on crusty bread. Add a touch of mustard, pickles, or cheese for a delicious and satisfying sandwich.
- Salads: Use it as a protein source in salads. It pairs well with fruits like pineapple, mango, and strawberries. The sweetness of the ham complements the freshness of the fruit.
- Soup: It can be added to soups and stews for extra flavour and richness. Leftover ham can add a hearty dimension to your soup recipes.
Personally, I love serving it on a platter with a selection of sides and a refreshing fruit salad. It’s a beautiful and delicious centerpiece for any meal. The presentation adds a touch of elegance to the dish.
Part 6: Storing Leftovers: Making the Most of Every Bite
The leftovers! Let's be honest, this is the best part. You can enjoy the delicious ham for days to come. The flavors only intensify with time.
6.1 Storing Safely: Preserving the Flavor and Quality
To store leftovers safely, allow the ham to cool completely before placing it in an airtight container. Store it in the refrigerator for up to 4 days. Proper storage helps prevent bacterial growth and maintains the quality of the ham.
6.2 Reheating Tips: Reviving the Flavor and Texture
When reheating leftover ham, you can do it in the oven, microwave, or on the stovetop. I recommend reheating it in the oven at 350°F (175°C) for about 15 minutes, or until it is heated through. You can also add a splash of water to the bottom of the baking dish to prevent the ham from drying out. Microwaving is a quicker option, but the oven tends to preserve the texture and flavor better.
Part 7: Glazed Ham FAQs: Answers to Your Burning Questions
Let's address some common questions about glazed ham. These are the topics that often come up in the kitchen.
7.1 What if my ham is too salty?
If your ham is too salty, you can try soaking it in water for a few hours before cooking. This will help to draw out some of the salt. You can also add more sugar to the glaze to counteract the saltiness. Remember, you can always adjust the flavors to your liking.
7.2 Can I use a different type of sugar in the glaze?
Yes, you can use a different type of sugar in the glaze. For a more intense caramel flavour, you can use brown sugar or dark brown sugar. For a milder flavour, you can use white sugar or maple syrup. Feel free to experiment with different sweeteners to find your perfect match.
7.3 Can I freeze leftover ham?
Yes, you can freeze leftover ham for up to 2 months. Simply wrap it tightly in plastic wrap or aluminum foil, then place it in a freezer-safe bag. To reheat frozen ham, thaw it in the refrigerator overnight, then reheat it in the oven, microwave, or stovetop. Freezing is a great way to extend the lifespan of your leftover ham.
7.4 How can I make a glazed ham more visually appealing?
There are many ways to make a glazed ham more visually appealing. You can score the ham, add a simple rub, or decorate it with fruit slices or herbs. You can also serve it on a decorative platter or with a side of fresh flowers. Presentation is key to creating a visually stunning dish.
7.5 What are some alternative glazes for ham?
There are many alternative glazes for ham, such as honey mustard, pineapple glaze, and cranberry sauce. You can find many recipes online or in cookbooks. Don't be afraid to experiment and explore new flavors.
Part 8: The Joy of Glazed Ham: Beyond the Recipe
Creating a perfect glazed ham isn't just about following a recipe; it's about embracing the experience. It's about the anticipation, the aromas filling your kitchen, the satisfaction of creating something delicious with your own hands, and the joy of sharing a meal with loved ones. Cooking is a journey of discovery and connection.
Remember, this is your culinary journey, and there’s always room for experimentation. Don’t be afraid to try different recipes, flavours, and techniques. Enjoy the process, have fun with it, and let your creative juices flow. After all, cooking is an art form, and your glazed ham is your masterpiece!
Everyone is watching

How to Cook Frozen Lobster Tails Perfectly: A Step-by-Step Guide
RecipesLobster. Just the word conjures up images of lavish meals, special occasions, and a taste of luxury. But let's...

Pigs in a Blanket Cooking Time: How Long to Bake for Perfect Results
RecipesAh, pigs in a blanket. Just the name conjures up images of those delightful little parcels of crispy pastry en...

Pork Fillet Cooking Time: How Long to Cook It Perfectly
RecipesPork fillet, or tenderloin as it's sometimes called, is a real favourite in our house. It's so versatile, and...

The Ultimate Guide to Tender, Juicy Pulled Pork
RecipesRight, let's talk pulled pork. It's one of those dishes that just screams "comfort food," doesn't it? I mean...

The Ultimate Guide to Cooking Sweet Potatoes: From Roasting to Mashing
RecipesSweet potatoes. Just the name conjures up images of warm, comforting dishes, bursts of vibrant color, and a to...