You know that feeling, right? You’re craving those perfectly crispy hash browns, the kind they serve at your favorite restaurant. Those golden-brown beauties, with a fluffy, tender interior – pure bliss! For years, I was convinced that achieving that level of crispness at home was impossible. I’d tried countless recipes, but nothing quite matched the magic of those restaurant-style hash browns. It felt like they had some secret ingredient, some hidden technique that only professional chefs knew. Turns out, there’s no secret – just a few key steps and a bit of patience. I’m going to let you in on my secret weapon: a foolproof recipe that’s guaranteed to help you create restaurant-worthy hash browns in your own kitchen. Let’s dive in!
(Part 1) The Perfect Potato: Choosing Your Weapon

It all starts with the right potato, my friend. Imagine standing in the supermarket, surrounded by a mountain of potatoes, trying to decipher which ones will make the best hash browns. Don’t worry, I’ve been there. The key is choosing a potato with a high starch content, a potato that can hold its shape while cooking and achieve that gorgeous, crispy exterior.
Starchy Soldiers: russet potatoes
After countless experiments, I’ve found that russet potatoes, also known as Idaho potatoes, are the ultimate hash brown warriors. They’ve got that starchy goodness that transforms into crispy perfection when cooked right. These potatoes are like little soldiers in your kitchen, ready to stand up to the heat and deliver a crispy crunch.
Prepping the Potato: A Matter of Precision
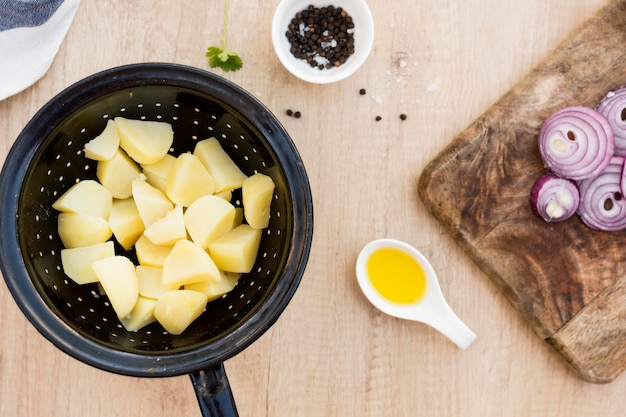
Now, let’s talk about prepping the potatoes. This is where many people go astray, resulting in mushy, unappetizing hash browns. We need even, perfectly cut cubes, not a potato paste! Start by peeling the potatoes and rinsing them thoroughly. Next, grab your sharpest knife and cut those potatoes into ??-inch cubes. Remember, consistency is key here. The more uniform the cubes, the more even your cooking will be.
The Cold Soak: Removing Excess Starch
Here’s a little trick I’ve learned: after cutting up your potatoes, give them a cold water bath. Soak them for about 30 minutes. This step removes some of the excess starch, preventing the potatoes from sticking together while cooking. It's a simple technique, but it makes a huge difference in the final texture.
(Part 2) Mastering the Crisp: From Damp to Dry

The Drying Dilemma: A Critical Step
You've got your perfectly prepped potatoes, you're feeling confident, but hold on! Don't just toss those damp potatoes into the pan. That's a recipe for disaster, trust me. We want those potatoes nice and dry before they hit the heat. After soaking them, gently pat them dry with a kitchen towel or paper towels. Remove as much moisture as possible – it’s all about maximizing that crispy potential.
The Magic of Cold Oil: Patience is Key
Now, let’s talk about oil. The key to getting those irresistible crispy hash browns is using plenty of oil, but not just any oil. I always reach for a high-heat oil like vegetable oil, canola oil, or peanut oil. Here's the trick: use cold oil. Yes, you read that right! Cold oil takes longer to heat up, giving the potato a chance to develop a beautiful, golden-brown crust before the oil reaches its peak temperature.
The Sizzle Symphony: Creating the Perfect Crust
Alright, you've got your prepped potatoes, your cold oil, and your pan is ready. Don’t overcrowd the pan! We want those potatoes to have room to breathe and cook evenly. Place them in a single layer, ensuring they’re not touching each other. Turn the heat to medium-high and let those potatoes sizzle, letting the magic happen. We’re looking for those edges to start browning and crisping up, a symphony of sounds and sights.
The Waiting Game: Patience is a Virtue
Here's where patience is your best friend. Resist the urge to flip them too soon. Let those potatoes cook for about 5-7 minutes on the first side, undisturbed. This is the key to achieving that perfect, golden-brown crust. You’ll know they’re ready to flip when those edges are crispy, and the bottoms are golden brown.
(Part 3) The Flip: A Delicate DanceFlipping the Script: The Art of the Flip
Flipping hash browns can be nerve-wracking, I know. You don’t want to break them up. My secret weapon? A large spatula. Gently slide it underneath the potatoes, lifting them up slightly. Then, with a swift motion, flip them over. Don't press down too hard, just let them glide onto the other side, maintaining their beautiful shape.
Second Act: More Sizzling Perfection
Cook those potatoes for another 5-7 minutes on the second side, until they’re golden brown and crispy all over. Remember, patience is key here. Resist the urge to flip them too often. Let those potatoes cook undisturbed until they reach that irresistible crunch.
(Part 4) Seasoning and Serving: The Finishing Touches

Adding Flavor: Beyond Salt and Pepper
You've got those magnificent, crispy hash browns, but they need a little extra oomph. Salt and pepper are essential, of course, but why stop there? I love to get creative with my seasonings. A pinch of garlic powder, paprika, or even a bit of onion powder adds depth and complexity.
Serving Up Success: Endless Possibilities
So, your hash browns are ready – crispy, golden brown, and bursting with flavor. Now, what to do with them? The possibilities are endless! They make an incredible side dish for any meal. They’re a classic companion to eggs, bacon, and sausage for breakfast or brunch. They also pair beautifully with burgers, sandwiches, or even as a topping for a salad. The world is your oyster!
(Part 5) Storage and Reheating: The Art of Preservation
Storing Your Treasures: Keeping Those Hash Browns Fresh
If you find yourself with leftover hash browns, don’t fret! You can store them in an airtight container in the refrigerator for up to 3 days. Just make sure they're completely cooled down before storing them.
Reheating Secrets: Bringing Back the Crisp
When you're ready to enjoy those leftover hash browns, you want to make sure you reheat them properly. The oven is my go-to method. Preheat your oven to 350 degrees fahrenheit (175 degrees Celsius), and spread the hash browns in a single layer on a baking sheet. Bake for about 10-15 minutes, or until they're heated through and crispy again. You can also reheat them in a skillet with a bit of oil, if you prefer. Just make sure to heat them over medium heat, and cook them until they're crispy again.
(Part 6) Variations and Twists: Adding Your Personal Touch
Flavor Fusion: Expanding the Hash Brown Horizons
If you're feeling adventurous, there are endless ways to add flavor to your hash browns. Here are a few ideas to spark your culinary creativity:
- Cheesy Hash Browns: Add shredded cheddar cheese to your potato mixture before cooking. This simple addition takes your hash browns to a whole new level of cheesy goodness.
- Spicy Hash Browns: Add a pinch of cayenne pepper or chili powder to your potato mixture. For a touch of heat, add some spice to your life!
- Herb-Infused Hash Browns: Add chopped fresh herbs like parsley, chives, or rosemary to your potato mixture. The aroma and flavor of fresh herbs will elevate your hash browns to new heights.
- Bacon Hash Browns: cook bacon separately and then crumble it on top of your hash browns before serving. A classic combination that never fails to impress.
Shaping Your Hash Browns: Getting Creative
You can also get creative with the shape of your hash browns. Use a cookie cutter to cut out fun shapes, or try making them into patties. For a truly impressive presentation, try making hash brown croquettes. Form the potato mixture into balls, roll them in breadcrumbs, and deep-fry them until golden brown. Your guests will be amazed!
(Part 7) Troubleshooting: When Things Don't Go According to Plan
The Crispy Conundrum: Why Aren't My Hash Browns Crispy?
We've all been there, trying to create the perfect crispy hash browns, only to end up with soft, disappointing potatoes. Here are a few common reasons why your hash browns might not be achieving that desired crunch:
- The Wrong Potato: If you're using a potato with a low starch content, it's unlikely to get crispy. Make sure you're using russet potatoes, the starchy heroes of the hash brown world.
- Damp Potatoes: Make sure you're drying your potatoes thoroughly. Any excess moisture will steam the potatoes in the pan, preventing them from crisping up.
- Not Enough Oil: You want to use enough oil to create a nice layer around the potatoes, but not so much that they're swimming in it. Experiment with the amount of oil to find the perfect balance.
- Overcrowding the Pan: If you're trying to cook too many potatoes at once, they won't have enough room to brown properly. Cook them in batches for the best results.
The Sticking Situation: Dealing with Hash Browns that Stick
If your hash browns are sticking to the pan, it's likely because you're not using enough oil, or the pan isn't hot enough. Make sure you're using a high-heat oil and that the pan is nice and hot before you add the potatoes.
(Part 8) Tips and Tricks: Elevating Your Hash Brown Game
non-stick pan: Your Best Friend
A non-stick pan is your best friend when it comes to making hash browns. It'll help prevent them from sticking, and it'll make flipping them much easier.
Grill Pan: A Touch of Char
If you're looking for even more crispy hash browns, try using a grill pan. The grill marks will add a nice visual appeal, and the raised ridges will help to create a crispy exterior.
Food Mill: Achieving a Smooth Texture
For a really smooth and creamy hash brown, try using a food mill to mash the potatoes before cooking them. It'll give them a smoother texture and prevent them from becoming lumpy.
(Part 9) FAQs: Addressing Your Hash Brown Concerns
1. What is the best way to store leftover hash browns?
Leftover hash browns should be stored in an airtight container in the refrigerator for up to 3 days. Make sure they are completely cooled down before storing them.
2. How long should I cook hash browns in the oven?
Preheat the oven to 350 degrees Fahrenheit (175 degrees Celsius). Spread the hash browns in a single layer on a baking sheet and bake for about 10-15 minutes, or until they are heated through and crispy again.
3. Can I make hash browns ahead of time?
Yes, you can! You can cook the hash browns and then store them in the refrigerator for up to 3 days. Reheat them in the oven or in a skillet over medium heat until they are crispy again.
4. What are some other ways to cook hash browns?
You can also cook hash browns in a skillet over medium heat, in an air fryer, or in a microwave. For the best results, cook them until they are golden brown and crispy.
5. How can I prevent my hash browns from sticking together?
Soak the potatoes in cold water for 30 minutes before cooking them. This will help remove excess starch, which can prevent them from sticking together. Make sure to dry them thoroughly before cooking.
And there you have it! Now you're equipped with the knowledge to create those irresistible, crispy, restaurant-quality hash browns at home. So go forth, experiment, and enjoy!
Everyone is watching

How to Cook Frozen Lobster Tails Perfectly: A Step-by-Step Guide
RecipesLobster. Just the word conjures up images of lavish meals, special occasions, and a taste of luxury. But let's...

Pigs in a Blanket Cooking Time: How Long to Bake for Perfect Results
RecipesAh, pigs in a blanket. Just the name conjures up images of those delightful little parcels of crispy pastry en...

Pork Fillet Cooking Time: How Long to Cook It Perfectly
RecipesPork fillet, or tenderloin as it's sometimes called, is a real favourite in our house. It's so versatile, and...

The Ultimate Guide to Cooking Delicious Frankfurters
RecipesLet's face it, we all love a good frankfurter. It's a classic, simple, and always satisfying. But let's be rea...

Wolf Meat Recipes: A Guide to Cooking Wild Game
RecipesLet's be honest, you don't see wolf meat at your local butcher shop every day. It's a bit of a wild card, but ...
