Let's face it, roasting a turkey breast can be a bit daunting. You want it juicy, flavorful, and perfectly cooked, but figuring out the exact cooking time for a 7lb breast can feel like a culinary mystery. I've been there, roasting countless turkeys over the years, but it took some trial and error to crack the code. I'm not a professional chef, just an average home cook with a passion for delicious food, and I'm excited to share my secrets for achieving a flawless turkey breast every time.
(Part 1) The Foundation of Success: Preparation Makes Perfect

Before we even turn on the oven, let's get the basics down. Proper preparation is the key to a successful turkey breast. Imagine building a house – a strong foundation is essential, and the same goes for a delicious roast. So, let's talk about the steps that make all the difference.
Thawing: Patience and Safety
A frozen turkey breast needs to be completely thawed before you start cooking. It's not just about convenience; safety is paramount. Imagine trying to cook a partially frozen turkey – it's like trying to bake a cake with a lump of frozen butter in it. It won't cook evenly, and you'll likely end up with a dry and uneven meal.
Here's how to thaw your turkey breast safely and efficiently:
- Refrigerator Thawing: This is the most recommended method for good reason – it's safe and slow, allowing the turkey breast to thaw gradually without any risk of bacterial growth. For a 7lb breast, plan on about 24 hours in the fridge. Place it on a tray to catch any drips and make sure it's stored on the bottom shelf of your refrigerator, away from any ready-to-eat foods.
- Cold Water Thawing: If you're in a time crunch, cold water thawing is an option, but remember, it's not as safe as the refrigerator method. Submerge the turkey breast in a large bowl or container filled with cold water. Change the water every 30 minutes to keep it cold. This method will take about 3-4 hours for a 7lb breast.
- The Big No-No: Warm Water: Never thaw your turkey breast in warm water! The warm temperature can encourage bacterial growth, potentially ruining your meal and causing food poisoning. Stick to cold water or the fridge method.
The Magic of Brining: Unlocking Flavor and Juiciness
If you're looking to level up your turkey breast game, brining is your secret weapon. It's not a complicated process, but it makes a world of difference in the final product. Brining involves soaking the turkey breast in a salt-based solution before cooking, which helps to retain moisture and infuse it with flavor.
Here's my go-to brine recipe:
- Mix 1 cup salt and 1 cup sugar in 1 gallon of water. This creates a balanced brine solution that adds flavor and helps retain moisture.
- Optional additions: Get creative! You can add aromatics like peppercorns, bay leaves, thyme, garlic, or even a splash of citrus juice for an extra layer of flavor.
- Submerge and refrigerate: Place the turkey breast in a large container, making sure it's completely submerged in the brine. Refrigerate for 12-24 hours.
- Pat dry before roasting: After brining, pat the turkey breast dry with paper towels to ensure a crispy skin.
Ready to Roast: Prepping and Seasoning for Success
Your turkey breast is thawed, maybe brined, and now it's time to get it ready for the oven. This final prep stage is crucial for a flavorful roast.
- Pat it dry: Dryness is your friend when it comes to a crispy skin. Pat the turkey breast thoroughly with paper towels to remove any excess moisture.
- Seasoning is key: Don't be shy with the spices! A simple mixture of salt, pepper, garlic powder, onion powder, and paprika creates a great base. You can add herbs like thyme or rosemary, or even try a pre-made dry rub for an extra kick.
- Stuffed or plain? Your choice: Stuffing your turkey breast is a delicious option, adding another layer of flavor. However, make sure you cook the stuffing thoroughly, as raw poultry can be dangerous. If you choose to stuff, cook the turkey breast for a longer period to ensure the stuffing reaches a safe temperature.
(Part 2) roasting time: Achieving perfect turkey Breast

Now, the fun part – roasting! But remember, it's not just about chucking the turkey breast in the oven and hoping for the best. The right temperature and cooking time are crucial for achieving that perfect balance of juicy and cooked through.
Temperature and Time: The Recipe for Success
The ideal oven temperature for roasting a turkey breast is 325 degrees Fahrenheit (160 degrees Celsius). This temperature provides even cooking without drying out the meat. Here's a general guideline for cooking times, but remember, every oven is different, so be prepared to adjust accordingly.
| Turkey Breast Weight (lbs) | Estimated Cooking Time (hours) |
|---|---|
| 5-6 | 1.5-2 |
| 7-8 | 2-3 |
| 9-10 | 3-4 |
Always check the internal temperature to ensure the turkey breast is cooked through. This is the most reliable way to ensure safety and avoid undercooked poultry.
Doneness: The Thermometer Tells the Tale
The secret weapon for perfect turkey breast? A meat thermometer! It's the only way to truly know if your turkey is cooked through. Insert the thermometer into the thickest part of the breast, making sure it doesn't touch any bone. The turkey breast is safe and cooked through when it reaches an internal temperature of 165 degrees Fahrenheit (74 degrees Celsius).
There's a common saying about checking for doneness by seeing if the juices run clear, but this is not a reliable method. Stick to using a meat thermometer for the safest results.
Resting: The Key to Maximum Juiciness
After the turkey breast reaches the desired temperature, resist the temptation to carve it right away. Let it rest for 15-20 minutes before carving. This crucial step allows the juices to redistribute throughout the meat, resulting in a tender and juicy turkey breast.
(Part 3) The Art of Basting: Keeping the Turkey Moist

Basting is a popular technique for keeping a turkey breast moist during roasting. It involves spooning pan juices over the turkey breast at regular intervals. It's not essential, but it can add a delicious layer of flavor and moisture.
Basting Tips: Maximizing the Benefits
Here's how to baste your turkey breast like a pro:
- Frequency is key: Baste every 30-45 minutes during the roasting process.
- What to use: You can use the pan juices, or mix in butter, broth, or even wine for extra flavor.
- Don't overdo it: Basting too often can slow down the cooking process, so strike a balance.
(Part 4) Troubleshooting: When Things Don't Go as Planned
Even the best cooks face challenges in the kitchen. Here are some common problems and solutions for a flawless roast:
Dry Turkey Breast: A Common Challenge
The most common complaint about roasted turkey breasts is dryness. This can be caused by overcooking or insufficient basting. Here's how to prevent a dry turkey breast:
- Lower the temperature: If you're worried about dryness, cook the turkey at a slightly lower temperature, around 300 degrees Fahrenheit (150 degrees Celsius). This allows for slower, more even cooking and helps retain moisture.
- Baste with consistency: Don't skip the basting! Basting every 30-45 minutes is crucial for keeping the breast moist and flavorful.
- Time it right: Overcooking is a major culprit of dryness. Keep a close eye on the internal temperature and remove the turkey from the oven as soon as it reaches 165 degrees Fahrenheit (74 degrees Celsius).
Uneven Cooking: Ensuring a Consistent Roast
If your turkey breast isn't cooking evenly, it could be due to several factors. Here's how to troubleshoot:
- Check your oven: Make sure your oven is preheated to the correct temperature. An oven thermometer can help ensure accuracy.
- Give it space: Crowding the turkey breast in the oven can prevent even cooking. Leave ample space around the breast for heat circulation.
- Target the thickest part: When using a meat thermometer, insert it into the thickest part of the turkey breast for the most accurate reading.
(Part 5) Serving Time: Carving and Presenting with Style
Your turkey breast is cooked to perfection, rested, and ready to be carved. This final step is a chance to show off your skills and present a beautiful meal.
Carving Tips: Making the Most of Your Roast
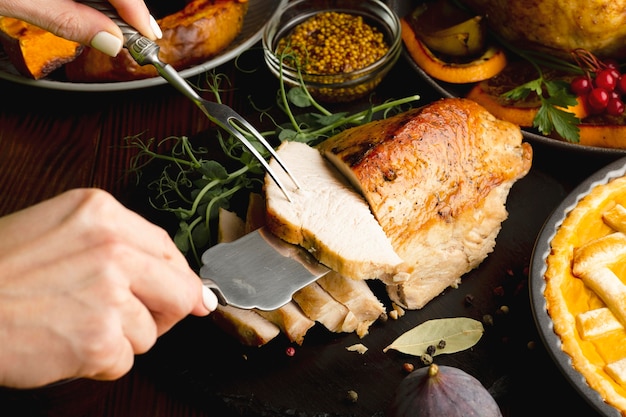
Use a sharp carving knife for clean, precise cuts. Slice the turkey breast across the grain for tender and juicy slices. If your turkey breast is stuffed, carefully remove the stuffing and serve it separately.
Presentation Matters: A Delicious Visual Feast
Presentation is everything when it comes to a festive meal. Arrange the carved turkey breast on a beautiful platter, and don't forget the gravy! Add roasted vegetables, mashed potatoes, or cranberry sauce for a complete and delicious feast.
Garnish with fresh herbs, citrus slices, or edible flowers for a touch of elegance. You've worked hard on this roast, so let it shine!
(Part 6) Leftovers: Turning Leftovers into New Delights
Let's be honest, leftovers are part of the turkey roast experience. But don't think of them as just leftovers! With a little creativity, you can turn them into new and delicious meals.
Sandwiches and Salads: Simple and Satisfying
Slice leftover turkey breast thinly and add it to your favorite bread, rolls, or lettuce for a quick and easy lunch or dinner. Add cheese, tomatoes, onions, and your favorite sauces for a flavorful sandwich or salad.
turkey soup: A Comforting Meal
Leftover turkey breast is perfect for a comforting bowl of soup. Make a classic turkey noodle soup or get creative with different vegetables, spices, and noodles.
Pot Pie Perfection: A Hearty Treat
If you're up for a challenge, try a delicious turkey pot pie. Layer leftover turkey breast with your favorite vegetables and gravy in a pie crust for a hearty and satisfying meal.
(Part 7) Extra Tips and Tricks: Elevating Your Roast
Here are a few more tips and tricks to take your turkey breast to the next level:
- roasting pan power: A roasting pan helps distribute heat evenly and prevents sticking, ensuring a beautifully roasted turkey breast.
- Roast with vegetables: Add roasted vegetables alongside your turkey breast for an extra layer of flavor and a complete meal.
- Experiment with flavor: Try different seasonings, brines, and stuffing recipes to discover your favorite combinations.
(Part 8) FAQs: Common Questions Answered
1. Can I roast a turkey breast in a slow cooker?
You can certainly try it, but the results might not be as crispy as in an oven. slow cooking is more about tender and moist results. Place the turkey breast in the slow cooker, add seasonings, and cook on low for 6-8 hours.
2. Can I freeze a cooked turkey breast?
Yes, absolutely! Wrap it tightly in plastic wrap and then aluminum foil. It can be frozen for up to 3 months.
3. How do I reheat a cooked turkey breast?
The oven is your best bet for reheating. Preheat the oven to 325 degrees Fahrenheit (160 degrees Celsius) and place the turkey breast in a roasting pan. Heat for about 20-30 minutes, or until heated through.
4. Can I use a turkey breast for thanksgiving dinner?
Definitely! A turkey breast is a great option for smaller gatherings. It's easier to cook and carve than a whole turkey, and it's just as delicious.
5. How long does it take to cook a turkey breast per pound?
As a general rule, a turkey breast takes about 20 minutes per pound to cook. However, always check the internal temperature to ensure it's cooked through.
So, there you have it – my complete guide to cooking a 7lb turkey breast. Remember, it's all about preparation, patience, and a touch of love. Happy roasting!
Everyone is watching

How to Cook Frozen Lobster Tails Perfectly: A Step-by-Step Guide
RecipesLobster. Just the word conjures up images of lavish meals, special occasions, and a taste of luxury. But let's...

Pigs in a Blanket Cooking Time: How Long to Bake for Perfect Results
RecipesAh, pigs in a blanket. Just the name conjures up images of those delightful little parcels of crispy pastry en...

Pork Fillet Cooking Time: How Long to Cook It Perfectly
RecipesPork fillet, or tenderloin as it's sometimes called, is a real favourite in our house. It's so versatile, and...

The Ultimate Guide to Cooking Delicious Frankfurters
RecipesLet's face it, we all love a good frankfurter. It's a classic, simple, and always satisfying. But let's be rea...

Wolf Meat Recipes: A Guide to Cooking Wild Game
RecipesLet's be honest, you don't see wolf meat at your local butcher shop every day. It's a bit of a wild card, but ...
