Listen up, you lot! Are you ready for a truly satisfying meal that’s guaranteed to make your taste buds sing? Then you've got to try this classic American dish, Chicken Fried Steak. It’s a real crowd-pleaser, you know? That crispy, golden-brown exterior giving way to a juicy, tender interior is simply irresistible. I’ve got to admit, I’ve always had a soft spot for Chicken Fried Steak. I remember the first time I tasted it down in Texas – it was a game-changer. The flavour was incredible, the textures were amazing, and it just felt like a real comfort food. That’s why I set out on a mission to master this dish myself, and let me tell you, it’s not as complicated as you might think! You just need a few simple ingredients, a bit of patience, and a good dose of enthusiasm.
So, grab your aprons and let’s get started.
Part 1: Gathering Your Ingredients

First things first, we need to get our ingredients sorted. This recipe is all about simple pleasures, so don't worry, it’s not a long list.
Ingredients:
- The Steak: Now, when it comes to the steak, you’ve got options! You can use any cut of steak you fancy – chuck steak, ribeye, even sirloin. I've always been a fan of using a nice, thick cut of chuck steak – it's budget-friendly, has good marbling, and tends to be more forgiving in terms of cooking. It’s all about finding what you enjoy best, mate. But hey, if you're feeling fancy and have a beautiful piece of ribeye lying around, go for it! You do you.
- The Flour: Just good old-fashioned all-purpose flour is your friend here. No need to get fancy – keep it simple and let the flavours of the dish shine through.
- The Seasoning: A pinch of salt and pepper is all you need to bring out the natural flavours of the steak. I personally like to add a touch of paprika for a hint of smokiness, but it’s totally optional. You can experiment with your favourite spices too.
- The Eggs: You’ll need a couple of eggs, beaten well. These are going to be our binding agent, helping the breading stick to the steak for that perfect crispy coat.
- The Milk: A splash of milk is our secret weapon for creating a smooth, creamy batter. You want that batter to be silky smooth, so don't be shy with the milk.
- The Breadcrumbs: This is where you can have a bit of fun! You can use plain, dry breadcrumbs, or you can add your own twist by including some herbs or seasoning. Remember, we’re not trying to make a pizza crust here, just a subtle flavour boost.
- The Oil: You’ll need enough oil to get that golden brown crust. I like to use a mixture of vegetable oil and canola oil – they’ve got a high smoke point, so you don’t have to worry about burning them.
- The Gravy: Now, gravy is the star of the show! It’s the perfect way to bring everything together. I’ve got a super easy gravy recipe that you can follow later. It’s a real game-changer, trust me.
Part 2: Preparing Your Steak

Right, let's get those steaks ready for their star turn.
Preparing the Steak:
- Tendon Removal: Give the steak a good look-over first. If you see any tough tendons, trim them off. We want a tender steak, remember? It’s all about that melt-in-your-mouth experience.
- Tenderizing: Now, tenderizing the steak is a good idea if you want to ensure a super soft texture. I like to use a meat mallet, giving it a good pounding. Just don't go overboard, you don’t want to turn it into mush. Another option is to use a marinade, maybe a mixture of soy sauce, garlic, and ginger. But if you’re short on time, don't stress. Give the steak a quick pat down with paper towels and you’re good to go.
Part 3: The Breading Process

Get ready, because this is where the magic happens! We’re going to give our steak a super crispy coating.
The Breading Process:
- Flour: First, dredge the steak in flour. Make sure you coat it completely, getting into all the nooks and crannies.
- Egg Wash: Next, dip the floured steak into the egg mixture. You want to ensure the entire surface is coated in egg.
- Breadcrumbs: Now, press the steak into the breadcrumbs, making sure it's nice and even. This is going to create that beautiful, crispy crust.
- Chill: Once the steak is breaded, it’s time to give it a rest in the fridge for at least 30 minutes. This will help the breading firm up, ensuring it stays crisp during cooking.
Part 4: Cooking the Steak
This is the part where all the hard work pays off! It’s time to cook that beautiful, breaded steak.
Cooking the Steak:
- Heat the Oil: Grab a large skillet or a cast iron pan and heat it over medium heat. You want the oil to be nice and hot before adding the steak.
- Cook the Steak: Carefully place the steak in the hot oil – you should hear that beautiful sizzle! Now, cook the steak for about 3-4 minutes per side. You want it to be golden brown and crispy.
- Lower the Heat: Once the steak is golden brown on both sides, lower the heat to medium-low. We want to make sure the steak cooks through without burning the outside.
- Cook Through: Now, keep cooking the steak for about 5-7 minutes, or until the internal temperature reaches 145°F. You can use a meat thermometer to check the temperature.
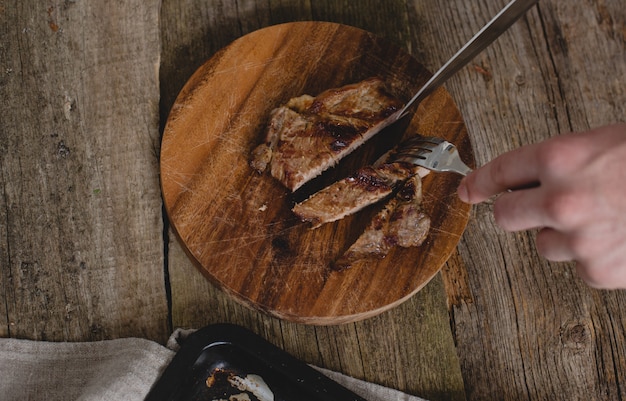
- Rest: Once the steak is cooked through, take it out of the pan and let it rest for 5 minutes before slicing and serving. This will help the juices redistribute, preventing the steak from being dry.
Part 5: The Gravy
Now, let’s talk gravy – the ultimate complement to Chicken Fried Steak! Adding a rich, savoury touch to the dish, it's the perfect finishing touch. You could go for store-bought gravy, but honestly, homemade gravy is in a league of its own.
Homemade Gravy:
- Start with Drippings: You can use the drippings from the pan to make a basic gravy. Just make sure to remove any excess grease.
- Flour and Butter: Add a tablespoon of butter to the pan, then whisk in two tablespoons of flour. Cook it for about a minute or two, stirring constantly.
- Add Milk: Slowly whisk in a cup of milk, making sure you avoid any lumps. You can add more milk if needed.
- Seasoning: Season the gravy with salt, pepper, and a pinch of garlic powder. You can even add a splash of Worcestershire sauce for an extra depth of flavour.
- Simmer: Now, simmer the gravy for about 5 minutes, stirring occasionally. You want it to thicken up nicely.
Part 6: Serving Your Chicken Fried Steak
Time to assemble your masterpiece! Get ready to enjoy the fruits of your labour.
Serving:
- mashed potatoes: This dish needs a good dollop of mashed potatoes – a classic is always a winner. Or, if you’re feeling fancy, try adding some chives or cheddar cheese.
- green beans: Some steamed green beans or a side salad will perfectly round out the meal.
- Gravy Time: Now for the grand finale – pour that heavenly gravy over the top of the steak. Make sure you get it nice and even.
- Smother It: Don’t be shy with the gravy! Let it soak into the mashed potatoes and steak – this is not a time to be dainty!
- Enjoy: Take a big bite and savour the moment! You’ve done it, you’ve created the perfect chicken Fried Steak.
Part 7: Variations
Now, listen, this Chicken Fried Steak recipe is a brilliant starting point, but don’t be afraid to experiment and make it your own. Here are a few ideas to get you started.
Variations:
- Spicy Chicken Fried Steak: For a bit of a kick, try adding some cayenne pepper or hot sauce to the breading mix. You could also add a dollop of jalapeno salsa on top of the steak.
- Italian Chicken Fried Steak: Use Italian bread crumbs for the breading and add a bit of Parmesan cheese to the mix. Don’t forget to top it off with a little bit of marinara sauce for that Italian touch.
- Mushroom Chicken Fried Steak: Try adding sautéed mushrooms to the gravy or even use some mushroom gravy powder in the flour mix for a more intense mushroom flavour.
- Chicken Fried Steak with a Twist: For a real twist, try using chicken instead of beef! You could also use pork chops for a different flavour profile.
Part 8: Tips and Tricks
Here are a few tips and tricks to help you nail that perfect chicken fried steak every time.
Tips and Tricks:
- Don't Overcrowd the Pan: Make sure you don’t overcrowd the pan when cooking the steak. It needs space to brown evenly.
- Let it Rest: Make sure you let the steak rest for a few minutes before slicing and serving. This will help to prevent the juices from running out.
- Don't Overcook: Overcooked Chicken Fried Steak is a culinary crime! Make sure you don’t overcook the steak – it should be cooked through but still juicy and tender.
- Don't Be Afraid to Experiment: Remember, this is just a recipe, not a law. Don’t be afraid to experiment with different ingredients and techniques to find your perfect version.
Part 9: FAQs
Now, let’s address some common questions you might have.
FAQs
- Q: Can I use frozen steak?
A: You can use frozen steak, but it's best to thaw it out in the refrigerator overnight. This will help to ensure that the steak cooks evenly. - Q: What kind of oil should I use?
A: I like to use a combination of vegetable oil and canola oil because they’ve got a high smoke point. This means they can withstand high temperatures without burning. - Q: Can I make this recipe ahead of time?
A: Yes, you can make the steak ahead of time! Just bread the steak and chill it in the refrigerator. You can also make the gravy ahead of time and store it in a sealed container in the refrigerator. - Q: What if I don't have a meat mallet?
A: You can use a rolling pin to tenderize the steak. Just be careful not to break the steak! - Q: What can I do with leftovers?
A: Leftover Chicken Fried Steak is a delicious treat! You can reheat it in the oven or microwave. It also makes a fantastic sandwich.
Part 10: Conclusion
Well, there you have it! Now you know how to make the perfect Chicken Fried Steak. It might sound a bit daunting, but honestly, it’s not that hard. Just follow the steps, be patient, and use good quality ingredients. And remember, the most important thing is to have fun! Grab your ingredients, put on your apron, and get cooking!
You’ll be surprised at how easy it is and how good it tastes. It’s a dish that’s sure to impress your friends and family. And trust me, you’ll be making this recipe again and again.
Everyone is watching

How to Cook Frozen Lobster Tails Perfectly: A Step-by-Step Guide
RecipesLobster. Just the word conjures up images of lavish meals, special occasions, and a taste of luxury. But let's...

Pigs in a Blanket Cooking Time: How Long to Bake for Perfect Results
RecipesAh, pigs in a blanket. Just the name conjures up images of those delightful little parcels of crispy pastry en...

Pork Fillet Cooking Time: How Long to Cook It Perfectly
RecipesPork fillet, or tenderloin as it's sometimes called, is a real favourite in our house. It's so versatile, and...

The Ultimate Guide to Tender, Juicy Pulled Pork
RecipesRight, let's talk pulled pork. It's one of those dishes that just screams "comfort food," doesn't it? I mean...

The Ultimate Guide to Cooking Sweet Potatoes: From Roasting to Mashing
RecipesSweet potatoes. Just the name conjures up images of warm, comforting dishes, bursts of vibrant color, and a to...
