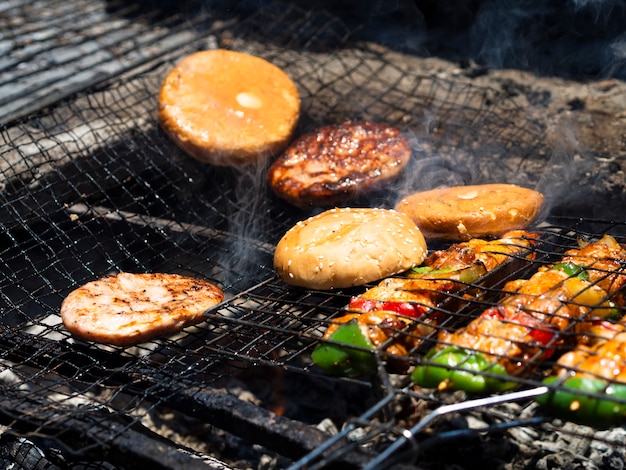
Ah, burgers. There's just something about the taste of a juicy, smoky burger cooked over a charcoal grill that screams summertime. It's the quintessential BBQ experience, a crowd-pleaser that never fails to bring people together. But let's be honest, mastering the art of charcoal grilling burgers can be a bit of a challenge, especially when it comes to those cooking times. You don't want dry, overcooked patties, but you also don't want those rare, pink centres that might leave some feeling a little uneasy. So, I thought I'd put together this ultimate guide, drawing from years of experience and a few lessons learned the hard way, to help you nail those burger cooking times and create the perfect patty every time.
(Part 1) The Fuel That Makes the Flavor: Choosing the Right Charcoal
Let's start with the foundation of a good charcoal grill burger: the charcoal itself. It's the fuel that provides that signature smoky flavor. Now, I'm a firm believer in good quality lump charcoal. It burns hot and clean, producing less ash than briquettes, giving you that ideal, intense heat for a perfect sear. But, let's dive deeper into the charcoal world:
Choosing the Right Charcoal: A Deeper Dive
- Lump Charcoal: Like I said, this is my go-to choice. Made from pure wood, it burns hotter and cleaner than briquettes. It also creates less ash, meaning less mess for you to clean up. You'll find it in different sizes, but for grilling burgers, I usually opt for the smaller lumps. They burn a bit faster, perfect for those quick cooks, especially if you're dealing with a smaller patty.
- Briquettes: These are the most common type of charcoal and are generally more affordable. Made from sawdust and other wood byproducts, they burn a bit slower and hotter than lump charcoal. Just be aware that they can produce more ash, which you'll need to manage during cooking. I've found that briquettes can be better for long, slow cooks, like smoking ribs or brisket, but for burgers, I prefer the intensity of lump charcoal.
- Bamboo Charcoal: You might see this option popping up. It's generally considered eco-friendly and burns clean, but it's not as common and can be pricier. It can be a good choice if you're looking for a more sustainable option, but I haven't experimented with it enough to give a firm opinion.
One thing to remember: no matter what type of charcoal you choose, make sure it's dry and free of any moisture. Wet charcoal won't burn as efficiently, and it can even lead to smoke that tastes a bit off, which can really ruin your burger experience.
(Part 2) Firing Up the Grill: Setting Up Your Charcoal Grill
Right, you've got your charcoal. Now, it's time to fire up the grill. It's like preparing a canvas for your culinary masterpiece.
Getting the Grill Ready: A Step-by-Step Guide
First things first, give your grill a good scrub with a wire brush. This is essential for removing any leftover food bits and preventing sticking. It's like giving your grill a fresh start before each grilling session. Next, you want to create that perfect bed of coals. Here's my method:
- Light the Charcoal: I usually use a chimney starter, as it's the most efficient way to get those coals glowing hot in a short amount of time. Fill the chimney starter with charcoal and place it over a newspaper or fire starter. Once the coals are glowing red hot, carefully pour them onto the grill grate. Remember, you want those coals hot and ready to sear your burger. You can also light the charcoal directly on the grill, but it takes longer and can be a bit messier.
- Create a Two-Zone Fire: This is where the magic happens. You'll want to create a two-zone fire, with one side of the grill hot and the other side cooler. To do this, push the hot coals to one side of the grill, leaving the other side free. This allows you to sear your burger over direct heat for a crispy exterior and then move it to the cooler side to finish cooking. This prevents the patties from burning on the outside while still achieving the desired doneness.
- Let the Grill Heat Up: Allow the grill to preheat for about 10-15 minutes, or until the coals are covered in ash and the grill grates are nice and hot. You want those grates hot enough to create those lovely grill marks on your burgers. It's like a hot iron, ready to sear those patties and create that perfect crust.
(Part 3) Crafting the perfect burger Patty: Preparing Your Burgers
Now, the fun part - the burgers! I'll admit, I'm a bit of a burger purist, so I usually keep my burger patties pretty simple. But feel free to get creative with your own mix-ins. The beauty of burgers is that you can customize them to your heart's content.
burger patty Preparation: The Secret to Juicy Success
Here's how I prepare my patties, with a few tricks I've learned over the years:
- Choose Your Meat: You can't go wrong with good quality ground beef. Look for 80/20 or 85/15 ground beef. This ratio provides a balance of fat and lean meat, resulting in a burger that's both juicy and flavorful. If you want to add a bit more flavor, you can mix in a little bit of ground pork or lamb. Just be sure to use fresh meat that's properly chilled. If you're lucky enough to have a local butcher, ask them to grind the meat fresh for you. It's like getting a taste of fresh-made magic.
- Seasoning: Keep it simple. Salt and pepper are all you really need. Don't overseason, you don't want to mask the natural flavor of the meat. Just season generously with salt and pepper, and then form the patties. For me, a simple sprinkle of salt and pepper brings out the best in the beef flavor.
- Form the Patties: Use your hands to gently form the patties. Don't press them down too hard, you want them to be loose and fluffy. Aim for patties that are about 1-inch thick. Now, here's a trick I learned: I use my thumb to create a little indentation in the center of each patty. This helps prevent the patties from puffing up in the middle during cooking, ensuring a more even cook. You'll end up with a perfectly flat burger, perfect for bun-hugging goodness.
- Refrigerate: Once you've formed the patties, refrigerate them for about 30 minutes. This helps them hold their shape during cooking, so you don't end up with a mangled mess on the grill. The cold temperature also helps the meat to solidify, which contributes to a better sear.
(Part 4) Mastering the Heat: The Art of Grilling
Finally, it's time to get those burgers on the grill. It's like a culinary dance, requiring precision and a little bit of intuition. You're aiming for a juicy, smoky burger with a crispy crust. Here's how to do it right:
Grilling Techniques: From Sear to Perfection
Here's my step-by-step guide to grilling those perfect burgers:
- Pre-heat the grill: Ensure your grill is piping hot. It's the key to getting that delicious char on the outside. You want those grill grates to be hot enough to sear the meat and create those beautiful grill marks. Remember, the hotter the grill, the faster the sear and the juicier the burger.
- Oil the Grates: Use a paper towel to lightly coat the grill grates with a little bit of oil. This will help prevent the patties from sticking and ensure even browning. If you're a fan of cast iron grates, you can skip this step, as the seasoned surface will prevent sticking. However, for standard grill grates, a little oil goes a long way.
- Place the Patties: Place the patties over the direct heat of the coals. Don't overcrowd the grill. You want to give the patties space to cook evenly. Let them cook undisturbed for about 3-4 minutes, or until a nice crust forms. This is where you'll create those coveted grill marks, adding visual appeal and enhancing the flavor.
- Flip and Cook: Carefully flip the patties over. You're looking for a good crust on the first side before flipping. Continue cooking for another 3-4 minutes. It's a bit like a dance, you're constantly checking on the patties. You don't want to be constantly flipping them. Over-flipping can lead to a dry, tough burger.
- Use a Thermometer: For the best results, use a meat thermometer to check the internal temperature of the patties. You want them to reach an internal temperature of 160°F (71°C) for medium-well. Remember, the internal temperature will continue to rise slightly after you take the burgers off the grill. This is a crucial step for ensuring food safety and achieving the desired level of doneness.
- Move to the Cooler Side: Once the patties are cooked to your liking, move them to the cooler side of the grill. This will help them finish cooking without burning or drying out. This is where the two-zone fire really comes in handy. The cooler side allows the burgers to cook through without getting those nasty burnt edges.
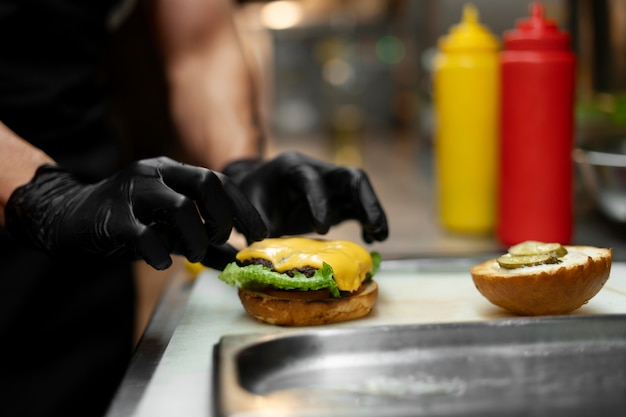
- Add Cheese: If you're adding cheese, now's the time. Place a slice of cheese on top of each patty. Cover the grill with the lid to let the cheese melt. I love a good cheddar or Monterey Jack, but you can get creative and use whatever cheese you prefer. Let those cheese flavors meld with the burger flavors for the ultimate cheesy experience.
- Rest: Let the burgers rest for a few minutes before assembling your sandwiches. This allows the juices to redistribute, resulting in a more tender, flavorful burger. It's like giving your burger a moment to relax and recover after its grilling session.
(Part 5) Cooking Times for Different Burger Thicknesses: A Handy Guide
We've talked about the techniques, but let's get specific. The cooking time for a burger depends on its thickness. Here's a handy table to guide you:
| Burger Thickness | Cooking Time (Direct Heat) | Cooking Time (Indirect Heat) |
|---|---|---|
| 1/2 inch | 3-4 minutes per side | 5-7 minutes |
| 3/4 inch | 4-5 minutes per side | 7-9 minutes |
| 1 inch | 5-6 minutes per side | 10-12 minutes |
| 1 1/2 inch | 6-8 minutes per side | 12-15 minutes |
Remember, these are just guidelines. The actual cooking time will vary depending on the heat of your grill, the type of charcoal you're using, and the thickness of the patties. So, be sure to check the internal temperature with a meat thermometer to ensure perfect doneness. It's better to be safe than sorry, especially when it comes to food safety.
(Part 6) Achieving Different Doneness Levels: From Rare to Well-Done
Let's talk about doneness. It's a personal preference, but here's a guide to achieving different doneness levels, from the adventurous rare to the classic well-done:
Doneness Levels: A Guide to Your Preferred Patty
- Rare: 125-130°F (52-54°C) - The patty will be very red in the center. This is for the bold burger enthusiasts who enjoy the raw, almost uncooked center of the burger.
- Medium-Rare: 130-135°F (54-57°C) - The center will be red and slightly pink. This is a popular choice for those who want a hint of pink in the center but still cooked through enough to be safe. It's that perfect balance of flavor and texture.
- Medium: 135-140°F (57-60°C) - The center will be pink, but not red. This is the sweet spot for many, with a cooked-through patty that still has a bit of tenderness. It's the perfect middle ground.
- Medium-Well: 140-150°F (60-65°C) - The center will be slightly pink, but mostly brown. This option is for those who want a cooked-through burger with just a whisper of pink. It's a safe and satisfying choice for those who prefer a more cooked patty.
- Well-Done: 155-160°F (68-71°C) - The patty will be completely brown throughout. This is the most cooked option, with a patty that's thoroughly cooked through. It's a great option for those who prefer a burger with no hint of pink. Be warned, this level of doneness can lead to a drier burger.
(Part 7) The Power of Resting: Why Resting Matters
It's not just about grilling those patties. Once they're cooked to your liking, remember to let them rest. It might seem like an extra step, but trust me, it's vital for achieving that ultimate burger experience.
Why Resting Matters: The Secret to juicy burgers
Here's why resting is crucial for a better burger:
- Juiciness: As the burgers cook, the juices get pushed to the edges. Resting allows those juices to redistribute evenly throughout the patty, resulting in a juicier, more flavorful burger. If you cut into a burger right off the grill, you risk losing all those delicious juices. It's like giving the burger a chance to rehydrate and regain its moisture.
- Tenderness: Resting also helps to relax the muscle fibers in the patty, making it more tender. This means a burger that's not just juicy, but also soft and easy to chew. Resting is like giving the burger a spa treatment, making it more enjoyable to eat.
For optimal results, rest your burgers for 5-10 minutes before slicing and serving. This will give those juices a chance to settle back in, creating a truly satisfying burger.
(Part 8) Beyond the Basics: Top Tips for Perfect charcoal grill burgers
Now, for a few nuggets of wisdom I've picked up over the years. These are some of my top tips for achieving those perfect charcoal grill burgers. These are the little secrets that separate the good from the great.
Top Tips: From Experienced Grill Masters
- Don't Press Down: Avoid pressing down on the patties while they're cooking. This can squeeze out the juices and result in a dry burger. Let them cook undisturbed and flip them only once. The goal is to create a burger that's juicy and flavorful, not a flat, dry disc.
- Use a Grill Brush: Keep a wire brush handy to clean the grill grates between cooks. This will help prevent sticking and ensure even cooking. A clean grill is a happy grill. It's also a great way to avoid those burnt, stuck-on bits that can make your next burger taste a bit off.
- Don't Overcrowd the Grill: Give your burgers space to breathe. Overcrowding the grill will lead to uneven cooking and steamed burgers. The goal is to create a burger with a crispy exterior and a juicy interior, not a soggy, overcooked mess. So, give those patties room to breathe.
- Add Smoke Flavor: For an extra layer of smoky flavor, soak wood chips in water for about 30 minutes. Then, place the chips in a smoker box or directly on the coals. The wood chips will create a nice smoky aroma as they burn. This is a great way to add that extra dimension of flavor to your burgers. You can experiment with different wood chips, like hickory, mesquite, or applewood, to find your perfect smoke flavor.
- Get Creative with Toppings: Don't be afraid to experiment with toppings. Try different cheeses, sauces, vegetables, and even fruits. There are no rules! The most important thing is to have fun and enjoy your burger creations. This is where your burger personality shines. From classic combos to more adventurous creations, the possibilities are endless. Let your imagination run wild!
FAQs: Your Burning Questions Answered
Now, let's address some of the most common questions you might have about charcoal grill burger cooking. It's time to clear up those burning questions.
- Q: How do I know if my grill is hot enough?
A: A good test is to hold your hand about 5 inches above the grill grates. If you can only hold it there for about 2 seconds, the grill is hot enough for grilling burgers. If you can hold it there for longer, the grill is not hot enough. It's like a little heat test for your grilling skills.
- Q: What's the best way to keep burgers from sticking to the grill?
A: Lightly oil the grill grates with a paper towel. This will help prevent the patties from sticking and ensure even browning. You can also use a nonstick grilling spray. A little oil or spray goes a long way in preventing those dreaded stuck-on burger bits.
- Q: Should I flatten my burger patties before grilling?
A: No, don't flatten them! The goal is to create a loose, fluffy patty. Pressing down will squeeze out the juices and result in a dry burger. Let them be! The loose texture will help the patty cook evenly and retain its juicy goodness.
- Q: How can I tell if my burgers are cooked to the right temperature without a thermometer?
A: You can press on the patty with your finger. If it feels firm, it's well done. If it feels soft, it's rare. But I highly recommend using a meat thermometer for accurate results. It's the best way to ensure food safety and achieve your desired level of doneness.
- Q: What are some good burger toppings?
A: The possibilities are endless! Some classic choices include lettuce, tomato, onion, pickles, cheese, and ketchup. But you can also get creative with toppings like avocado, bacon, mushrooms, or even grilled pineapple. It's up to your personal preference. Don't be afraid to experiment and find your perfect burger topping combination.
There you have it, my ultimate guide to charcoal grill burger cooking times. Remember, practice makes perfect, so don't be afraid to experiment. And most importantly, enjoy the process! There's something truly special about the taste of a perfectly grilled burger, and I'm sure you'll find it as satisfying as I do. So, grab your grill, fire up those coals, and get ready for a burger experience you won't soon forget.
Everyone is watching

How to Cook Frozen Lobster Tails Perfectly: A Step-by-Step Guide
RecipesLobster. Just the word conjures up images of lavish meals, special occasions, and a taste of luxury. But let's...

Pigs in a Blanket Cooking Time: How Long to Bake for Perfect Results
RecipesAh, pigs in a blanket. Just the name conjures up images of those delightful little parcels of crispy pastry en...

Pork Fillet Cooking Time: How Long to Cook It Perfectly
RecipesPork fillet, or tenderloin as it's sometimes called, is a real favourite in our house. It's so versatile, and...

The Ultimate Guide to Tender, Juicy Pulled Pork
RecipesRight, let's talk pulled pork. It's one of those dishes that just screams "comfort food," doesn't it? I mean...

The Ultimate Guide to Cooking Sweet Potatoes: From Roasting to Mashing
RecipesSweet potatoes. Just the name conjures up images of warm, comforting dishes, bursts of vibrant color, and a to...