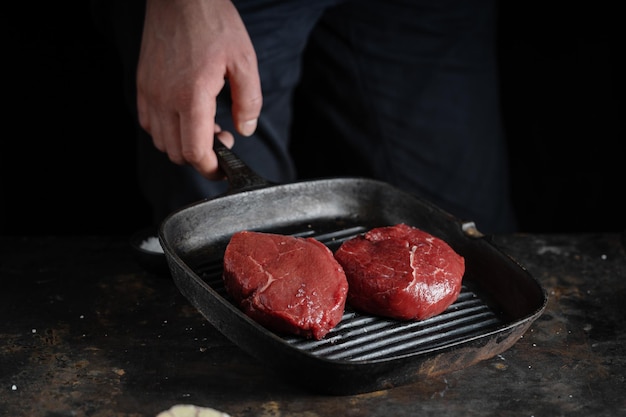
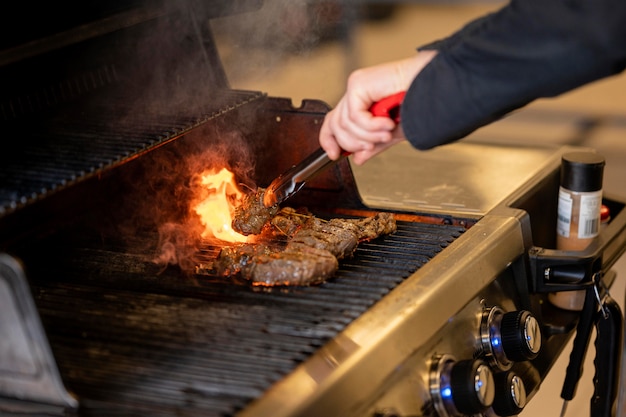
Let's be honest, there's nothing quite like a perfectly cooked steak. That juicy, flavorful, melt-in-your-mouth experience that makes you want to lick your plate clean. I've been on a bit of a steak quest lately, trying different cuts, playing around with seasonings, and, well, let's just say my taste buds have been thanking me. One of the most exciting discoveries on this journey has been the blackstone griddle. It's not your average barbecue; it's this flat, wide surface that heats up like a dream, giving you that restaurant-quality sear that takes steak to another level. And I'm not keeping this secret to myself! I'm here to share my secrets, my tips, my whole Blackstone steak game plan, so you can become a master griddle chef too.
(Part 1) The Blackstone Advantage: Why It's the Secret Weapon

For years, I was a grill guy. Loyal, dedicated, and a little bit stubborn. But the Blackstone, oh, it changed everything. And I'm not just talking about my steak game. It's this versatile, user-friendly, and frankly, magical piece of equipment that deserves all the praise. Here's why it's become my go-to:
1. Even Heat Distribution: The Great Equalizer
Think of it like a giant, flat, perfectly even skillet. No more hot spots, no more uneven cooking, no more frustration. You get that beautiful, consistent sear all over your steak, from edge to edge. It's like a culinary superpower, making every bite delicious.
2. Speed Demon: Get Cooking Faster
This thing heats up like a rocket. Seriously, you can go from cold to smoking hot in minutes. No more waiting forever for your grill to warm up, no more impatiently watching the clock. You can get straight to cooking and enjoying the delicious results.
3. Versatile Beast: More Than Just Steak
Let's get real, the Blackstone is more than just a steak machine. It's a culinary chameleon, capable of cooking up anything your heart desires. Veggies, burgers, breakfast, pancakes, even grilled pineapple for a sweet and smoky touch. It's like having a mini-kitchen on your patio, ready to tackle any culinary challenge.
(Part 2) Choosing Your Weapon: Understanding Cuts and Grades

Before you get your Blackstone sizzling, you need to pick your steak. And trust me, there's a world of cuts out there. But for Blackstone cooking, we're sticking to the classics, the ones that truly shine on this griddle:
1. Ribeye: The King of Steak
This is the top dog, the one that everyone dreams of. Ribeye is known for its marbling, that beautiful network of fat that adds incredible flavor and juiciness. It's a bit on the pricier side, but worth every penny. You'll understand why once you taste it.
2. new york strip: A Classic with Character
A classic for a reason, the New York strip is leaner than ribeye but still packs a flavor punch. It's got a great sear potential, holds its shape well on the griddle, and gives you that satisfying bite you crave.
3. filet mignon: Tender and Buttery
For those who like their steak on the thinner side, the filet is a dream come true. Tender, buttery, and oh-so-elegant, it's perfect for a special occasion. But it's a bit more delicate, so you need to be mindful not to overcook it.
4. Sirloin: The budget-friendly Champion
If you're looking for a great steak without breaking the bank, sirloin is your friend. It's a good balance of flavor and tenderness, and it's a bit more forgiving if you're new to steak cooking. It's the perfect choice for honing your Blackstone skills.
Now, let's talk grades, because they matter when it comes to the final taste:
1. Prime: The Top Tier
The cream of the crop, the one you want when you're really spoiling yourself. Prime steak has the most marbling, which means it's incredibly flavorful and juicy. It's the ultimate steak experience.
2. Choice: A Great Middle Ground
A solid choice for everyday steak enjoyment. Choice has a good balance of flavor and tenderness, and it's usually more affordable than prime. It's a great option for regular Blackstone cooking.
3. Select: The Everyday Option
The most budget-friendly option, select steak has less marbling than prime or choice. It's a bit leaner, but still flavorful. Perfect for those times when you want a good steak without spending a fortune.
For Blackstone cooking, I generally recommend going with prime or choice. They'll give you the best results, but hey, you do you! Experiment with different cuts and grades to discover your perfect match. That's part of the fun of cooking.
(Part 3) Prepping for Success: Getting Your Steak Ready

Okay, you've got your steak, it's time to get it ready for the Blackstone magic. This step is crucial for achieving that perfect sear and juicy interior. Let's walk through it:
1. Pat It Dry: The Moisture Removal Mission
This might sound obvious, but it's essential. A wet steak won't sear properly. You want a dry surface for that beautiful crust to form. Pat it dry with paper towels to remove any excess moisture. It's a small step, but it makes a big difference.
2. Season It Up: Flavor Time!
This is where you get to unleash your creativity. Salt and pepper are classics, of course, but don't be afraid to experiment. I love a good blend of garlic powder, onion powder, paprika, and a touch of cayenne pepper for a little kick. The key is to season generously, but not too much. You don't want to overwhelm the natural flavor of the steak. Let the steak shine!
3. Let It Rest: Patience is a Virtue
This is my secret weapon for a juicy, flavorful steak. Let your steak rest at room temperature for 30 minutes before cooking. This allows the steak to come to room temperature, ensuring even cooking. It also helps to relax the muscle fibers, resulting in a more tender and juicy steak. Just like a good wine, patience is key!
(Part 4) The Big Show: Mastering the Blackstone Sear
Alright, time for the showstopper. This is where the Blackstone really shines. It's time to unleash the sear!
1. Heat It Up: Get That Griddle Sizzling
Get your Blackstone screaming hot. Aim for medium-high heat, around 400-450°F. You want that griddle to be ready to give your steak a fantastic sear. You can test the heat with a few drops of water; if they sizzle and evaporate instantly, you're good to go.
2. Oil Up: The Lubricating Touch
Don't skimp on the oil! A good quality oil, like canola or avocado oil, will help create a beautiful sear and prevent sticking. Heat the oil on the Blackstone before adding the steak. You want the oil to be shimmering hot, ready to embrace your steak. It's like a warm welcome for your meaty guest.
3. Time to Sear: The Moment of Truth
Now, gently place your steak on the hot Blackstone. Don't press down on it; let it sear naturally. The goal is to get a nice, even crust on the outside without overcooking the inside. This is the art of the sear, and it takes a bit of practice. But trust me, it's worth it.
4. The Flip: Turning the Tide
After a few minutes, carefully flip the steak over. You'll know it's time when you see a beautiful brown crust forming. This is where experience comes in handy. You'll get a feel for how long it takes based on your heat and the thickness of your steak. But generally, about 3-4 minutes per side for a medium-rare steak. This is where the Blackstone's even heat makes all the difference.
5. The Finish: Doneness to Your Liking
If you're going for a medium-rare steak, you're almost there. But, if you want to cook it to a different level of doneness, you can continue to sear the steak for a bit longer. Use a meat thermometer to check the internal temperature of the steak to ensure it's cooked to your liking. This is about achieving your steak nirvana.
(Part 5) Resting is the Key: The Flavor Boost
Once your steak is cooked to your liking, don't dive in just yet! Let it rest for at least 5-10 minutes before slicing and serving. This allows the juices to redistribute throughout the steak, resulting in a more tender and flavorful cut. It's like giving your steak a chance to relax and savor its moment of glory.
(Part 6) Beyond the Basic: Adding Flavor with Sides and Sauce
Steak is delicious on its own, but let's face it, a little something extra never hurts.
1. Sides that Complement: A Feast for the Senses
This is where your Blackstone really shines again. You can cook up a feast of side dishes right on the griddle. Think about grilled vegetables like asparagus, bell peppers, onions, or zucchini, or even some cheesy potato wedges. You could even make a simple mushroom sauce or a garlicky herb butter right on the Blackstone! Let your creativity flow, and your taste buds will thank you.
2. Sauce Magic: The Finishing Touch
There's a sauce for every steak. From classic béarnaise to a rich red wine sauce, or even a simple chimichurri, the possibilities are endless. I love a simple garlic-herb butter sauce, or a spicy chimichurri. It's really up to your personal taste. The key is to find a sauce that complements the flavor of the steak, not overpowers it. It's about finding the perfect harmony of flavors.
(Part 7) The Blackstone Steak Experience: A culinary adventure
You know, I've come to realize that cooking steak on the Blackstone isn't just about making a delicious meal, it's about creating an experience. The smell of sizzling steak filling the air, the excitement of seeing that beautiful sear develop, the camaraderie of sharing a meal with friends and family – it's all part of the magic. It's a culinary adventure that you can enjoy right in your own backyard.
(Part 8) The Art of the Blackstone: Beyond Steak
I've already mentioned that the Blackstone is a versatile beast. It can handle so much more than just steak. You can whip up breakfast classics like pancakes and bacon, sear fish and chicken to perfection, and even make grilled pizzas. The possibilities are endless! You can even find Blackstone-specific recipe books and online communities dedicated to creating amazing culinary creations on this versatile griddle. The Blackstone is your culinary playground, ready for you to explore.
(Part 9) FAQs: Your Blackstone Questions Answered
1. What kind of Blackstone is best for steak?
For steak cooking, a Blackstone 36" or 40" griddle is ideal. It provides enough surface area to cook multiple steaks at once and allows you to have plenty of space for side dishes. You'll have room to move around and create your culinary masterpiece.
2. How do I clean a Blackstone after cooking steak?
Cleaning a Blackstone is surprisingly easy. Once it's cooled down, use a scraper to remove any food residue. Then, use a damp cloth and a mild dish soap to wipe down the surface. Avoid using harsh chemicals or abrasive cleaners. It's all about keeping your Blackstone in tip-top shape for years to come.
3. What are some Blackstone-friendly steak recipes?
There are countless recipes for Blackstone steaks out there. Try experimenting with different marinades, rubs, and sauces. For inspiration, check out Blackstone-specific cookbooks or online recipe resources. Don't be afraid to get creative!
4. Can I use a meat thermometer on a Blackstone?
Absolutely! Using a meat thermometer is the best way to ensure your steak is cooked to your liking. Insert the thermometer into the thickest part of the steak to get an accurate reading. This is your secret weapon for achieving steak perfection.
5. What are the best tips for Blackstone steak beginners?
The best tip for Blackstone steak beginners is to start simple. Use good quality steak, season it well, and don't be afraid to experiment with different cooking times and temperatures. Practice makes perfect! And remember, have fun with it!
Everyone is watching

How to Cook Frozen Lobster Tails Perfectly: A Step-by-Step Guide
RecipesLobster. Just the word conjures up images of lavish meals, special occasions, and a taste of luxury. But let's...

Pigs in a Blanket Cooking Time: How Long to Bake for Perfect Results
RecipesAh, pigs in a blanket. Just the name conjures up images of those delightful little parcels of crispy pastry en...

Pork Fillet Cooking Time: How Long to Cook It Perfectly
RecipesPork fillet, or tenderloin as it's sometimes called, is a real favourite in our house. It's so versatile, and...

The Ultimate Guide to Cooking Delicious Frankfurters
RecipesLet's face it, we all love a good frankfurter. It's a classic, simple, and always satisfying. But let's be rea...

Wolf Meat Recipes: A Guide to Cooking Wild Game
RecipesLet's be honest, you don't see wolf meat at your local butcher shop every day. It's a bit of a wild card, but ...
