The mere mention of "biscuits" sends a wave of warmth and comfort washing over me. I picture those fluffy, golden-brown squares, begging to be slathered with butter or jam. They're a timeless classic, a symbol of home-baked goodness. But let's face it, sometimes those smiles we associate with biscuits are a tad forced when they turn out flat, hard, or – worst of all – soggy. That's why I'm on a mission to help you achieve biscuit perfection, every single time. So, put on your apron, preheat your oven, and let's embark on this baking adventure together.
(Part 1) The Foundation of a Great Biscuit: A Deep Dive into Ingredients
The secret to a truly delightful biscuit lies in a solid foundation, just like in any other aspect of life. In the world of biscuits, that foundation is the dough. It needs to be light, fluffy, and just the right amount of moist, achieved through a harmonious blend of flour, butter, and buttermilk.
Flour: The Backbone of the Biscuit
Let's start with flour, the backbone of our biscuit creation. I've learned the hard way that not all flours are created equal. For the best results, stick with all-purpose flour. I know some cooks swear by cake flour or even self-rising flour, but I find that all-purpose flour is the most reliable for a consistent texture. Look for a good quality brand that isn't overly bleached.
Cold Butter: The Key to Flaky Layers
Now, let's talk about the star of the show: butter. Cold, cold butter is the key to those beautiful, flaky layers. I'm talking about butter straight from the fridge, so cold it's practically frozen. We're not aiming for a smooth, creamy consistency here. We want chunks of cold butter, like little nuggets of gold. These chunks will melt during baking, creating steam that separates the dough, resulting in those coveted flaky layers. Trust me, the texture of your biscuits will thank you later.
Buttermilk: The Tangy Secret
Next, let's talk about buttermilk. This isn't just a fancy name for a drink; it plays a crucial role in biscuit success. Buttermilk adds acidity to the dough, which reacts with the baking soda to create those airy pockets we all crave. Buttermilk also contributes a touch of tanginess that beautifully complements the buttery flavour. It's a win-win! If you don't have buttermilk on hand, don't worry! You can easily create your own by mixing a tablespoon of lemon juice or white vinegar with a cup of milk. The acidity is what matters here, allowing the chemical reaction to happen.
(Part 2) Mastering the Dough: Gentle Handling and Patience

With our ingredients assembled, we're ready to tackle the dough. It's all about finding that sweet spot where the dough is just barely sticky enough to hold its shape but not so wet that it's a gooey mess.
The Art of Gentle Handling: Less is More
The temptation is to knead the dough for what feels like an eternity. But resist! Biscuit dough is best kept as light and airy as possible. So, once the ingredients are combined, just give it a quick fold, maybe a few turns, and that's it. Overworking the dough will result in tough, dense biscuits, and nobody wants that. Think of it like a gentle dance with the dough, coaxing it into shape rather than forcing it.
The Power of Patience: Letting the Dough Rest
Now, here's the trickiest part: patience. Once the dough is formed, you need to let it rest. I know, waiting is a pain, especially when you're already excited to dig into those biscuits. But trust me, this is crucial. It allows the gluten to relax, preventing those biscuits from being tough. Chill the dough in the fridge for at least 30 minutes, but an hour is even better. The cooler temperature helps solidify the butter and promotes a more tender texture.
(Part 3) Shaping and Baking Perfection: Achieving Golden-Brown Glory
Alright, the dough is ready, the oven is preheating, and we're on the verge of biscuit bliss. Now comes the fun part: shaping those beauties.
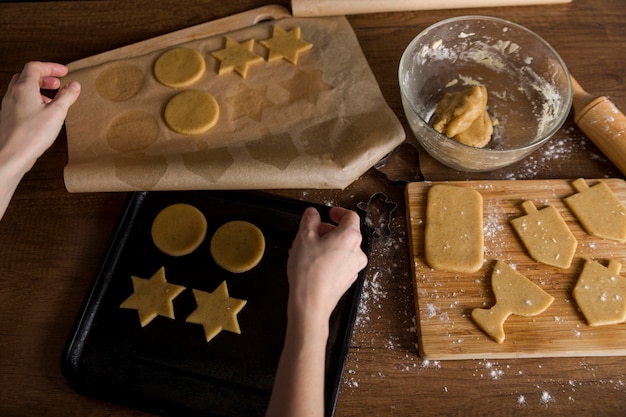
Roll, Cut, and Rise: The Final Steps Before Baking
Roll out the dough on a lightly floured surface. Keep it simple, no fancy patterns or intricate designs here. I usually aim for a thickness of about half an inch. Then, using a biscuit cutter or a glass, cut out the biscuits. Be sure to press straight down, don't twist the cutter. This ensures even biscuits, preventing them from becoming misshapen and unevenly cooked.
And one more crucial step before they go into the oven: let them rise. You don't need a lot of time for this, just a few minutes while the oven preheats. This allows them to rise just a tad more, resulting in a fluffier, more satisfying biscuit.
The Baking Dance: The Final Stage of Biscuit Transformation
Finally, it's time to bake! Place those biscuits on a baking sheet lined with parchment paper. Bake them in a hot oven, at least 425 degrees Fahrenheit. Check on them after about 10 minutes, but don't worry if they haven't reached that golden-brown colour just yet. Biscuits bake quickly, and you want them to be a beautiful, deep golden brown on the bottom. They're done when they're firm to the touch and have a slight bounce back when pressed.
A Touch of Sweetness: Finishing Touches for Maximum Enjoyment
As soon as those biscuits come out of the oven, brush the tops with melted butter. This will add another layer of flavour and create a glistening, golden crust. And for an extra touch of sweetness, sprinkle with sugar. Let them cool slightly before serving, allowing the butter to solidify and create that irresistible crunch.
(Part 4) Biscuits Beyond the Basics: Adding Flavor and Fun
Now, you've mastered the classic biscuit, but let's explore some variations to add a bit of spice to your biscuit repertoire.
Savoury Delights: Herbs and Cheese
For a savoury twist, try incorporating herbs into the dough. Chives, rosemary, and thyme are all excellent choices. You can even add a bit of grated cheese, like cheddar or parmesan, for a cheesy kick. Serve these with a hearty soup or salad for a satisfying meal.
Sweet Surrender: Chocolate Chips, Berries, and More
Let's talk about sweetness! You can add a touch of sugar to the dough, or even incorporate chocolate chips, blueberries, or even dried cranberries. These sweet variations are perfect for a delightful afternoon tea or dessert.
(Part 5) Biscuit Storage Secrets: Keeping Those Biscuits Fresh and Delicious
Your biscuits are finally ready to devour. But what if you want to enjoy them later? Here's how to ensure they stay fresh and delicious.
The Power of Airtightness: Preserving Biscuit Goodness
Biscuits are best kept in an airtight container at room temperature. They'll stay fresh for a few days this way. Avoid storing them in the fridge, as this can make them become tough. The cold temperature can cause the moisture in the biscuits to evaporate, leading to a dry, crumbly texture.
Reheating for Revival: Bringing Back the Crispness
If your biscuits have lost their crispness, you can bring them back to life with a few minutes in a warm oven. Just pop them in a preheated oven at about 350 degrees fahrenheit for a few minutes, and they'll be back to their fluffy, golden glory. This will reheat the biscuits and help restore their texture.
(Part 6) Biscuits Around the World: A Global Biscuit Journey
Biscuits aren't just a British staple, they're a global phenomenon. Each culture has its own unique twist on this comforting treat.
American Biscuits: Fluffy and Versatile
American biscuits are known for being a bit fluffier than their British counterparts, often served with gravy or honey. They're a staple at Southern breakfast tables and often accompany meals like fried chicken and shrimp and grits.
Southern Charm: Biscuits as a Culinary Staple
Down South in the United States, biscuits are a staple, served with everything from fried chicken to shrimp and grits. They're a symbol of Southern hospitality and comfort food.
Scandinavian Delight: Br??d, a Scandinavian Biscuit
In Scandinavia, you'll find a type of biscuit called "br??d", often served with butter and cheese. These biscuits are typically thinner and more crisp, making them ideal for accompanying a hearty meal.
(Part 7) Beyond Baking: Biscuit Creativity: Expanding the Horizons of Biscuits
Biscuits are not just for eating. Their versatility extends to other creative realms as well.
Crafting with Cookies: Biscuit Houses and Decorations
Biscuits can be used for craft projects like making miniature houses or decorations. You can find countless online tutorials for building elaborate gingerbread houses or creating whimsical Christmas decorations.
Biscuit Fashion: Biscuit Jewellery
Have you heard of biscuit jewellery? You can create adorable biscuit-themed necklaces, earrings, and even bracelets. This fun craft is perfect for adding a touch of whimsy to your style.
(Part 8) Biscuit Baking Mistakes: Lessons Learned: Avoiding Common Baking Blunders
Let's be honest, even the most experienced baker has their fair share of baking blunders. Here are a few common biscuit mistakes and how to avoid them.
Overworking the Dough: Gentle Handling is Key
Remember, less is more when it comes to kneading biscuit dough. Overworking it will result in tough, dense biscuits. Aim for a gentle fold or two, just enough to combine the ingredients.
Not Chilling the Dough: A Crucial Step
Chilled dough is crucial for flaky biscuits. Allow the dough to chill for at least 30 minutes before rolling and cutting. This allows the butter to firm up, resulting in those beautiful layers we all crave.
Baking at Too Low a Temperature: The Importance of Heat
A hot oven is essential for those golden-brown biscuits. Bake at 425 degrees Fahrenheit for optimal results. The high temperature will ensure the biscuits rise quickly and develop a beautiful golden-brown crust.
(Part 9) FAQs: Solving Biscuit Baking Mysteries: Addressing Common Questions
Q1. What if my biscuits are flat and hard?
This usually means the dough was over-worked. Next time, knead the dough gently, just until it comes together. Also, make sure you're using cold butter. The cold butter will prevent the dough from becoming too soft and sticky, resulting in a lighter texture.
Q2. Why are my biscuits dry and crumbly?
This can be a sign of not enough liquid in the dough. Try adding a little more buttermilk, or even a splash of milk. It's important to find the right balance of wet and dry ingredients to ensure a moist and tender biscuit.
Q3. Why do my biscuits not rise?
This could be due to a few things. First, make sure you're using baking soda. Second, ensure you're using buttermilk or a buttermilk substitute. The acidity in buttermilk is crucial for the baking soda to activate, creating those airy pockets. Finally, make sure the dough has time to rise before baking.
Q4. How do I prevent my biscuits from sticking to the baking sheet?
Use a baking sheet lined with parchment paper. This will prevent sticking and make for easy cleanup. You can also lightly grease the baking sheet, but parchment paper is generally more reliable.
Q5. What can I do if my biscuits are soggy?
This can happen if they haven't been baked long enough. Place them back in the oven for a few more minutes to crisp up. You can also check that the oven is set to the correct temperature, as a slightly lower temperature could result in soggy biscuits.
(Part 10) The Sweet Smell of Success: The Joy of Perfect Biscuits
There's nothing quite like the sweet smell of freshly baked biscuits wafting through the air. It's a scent that evokes warmth, comfort, and a sense of pure happiness. But more than just a delicious treat, biscuits are a reminder that even the simplest things in life can be extraordinary. So next time you're craving a taste of comfort, whip up a batch of these perfect golden-brown biscuits. You won't regret it.
Everyone is watching

How to Cook Frozen Lobster Tails Perfectly: A Step-by-Step Guide
RecipesLobster. Just the word conjures up images of lavish meals, special occasions, and a taste of luxury. But let's...

Pigs in a Blanket Cooking Time: How Long to Bake for Perfect Results
RecipesAh, pigs in a blanket. Just the name conjures up images of those delightful little parcels of crispy pastry en...

Pork Fillet Cooking Time: How Long to Cook It Perfectly
RecipesPork fillet, or tenderloin as it's sometimes called, is a real favourite in our house. It's so versatile, and...

The Ultimate Guide to Cooking Delicious Frankfurters
RecipesLet's face it, we all love a good frankfurter. It's a classic, simple, and always satisfying. But let's be rea...

Wolf Meat Recipes: A Guide to Cooking Wild Game
RecipesLet's be honest, you don't see wolf meat at your local butcher shop every day. It's a bit of a wild card, but ...