Let's be honest, there's something truly satisfying about a perfectly cooked burger. Juicy, flavourful, with a crispy exterior – it's the epitome of comfort food done right. But achieving that perfect burger isn't always a slam dunk. It's not just about throwing a patty on the pan and hoping for the best. No, my friends, the key lies in mastering the art of temperature. And that's what we're going to explore today.
(Part 1) The Science of a Sizzling Burger: It's All About the Maillard Reaction

You see, the secret ingredient to a delicious burger isn't some fancy spice blend or a magical ingredient from a gourmet shop. It's a chemical reaction called the Maillard reaction. This scientific marvel is what gives your burger that irresistible brown crust and complex flavour.
Think of it like this: when you heat up meat, the sugars and amino acids inside start reacting with each other. They break down, rearrange, and create hundreds of new compounds. These compounds are what give your burger its incredible flavour and aroma.
The hotter the pan, the faster the Maillard reaction happens. But there's a catch: too much heat, and you risk burning your burger before it has a chance to cook through. It's a delicate balance, isn't it?
(Part 2) Choosing Your Weapon: The Right Pan for the Job

Alright, before we delve into the nitty-gritty of temperatures, let's talk about the battleground. The right pan can make all the difference. You want a pan that distributes heat evenly and can handle high temperatures without warping. It needs to be a true warrior in the kitchen.
And in my book, there's no better choice than cast iron. It's heavy, sturdy, and retains heat like a champ. You can get it seriously hot, which is essential for a good sear. Plus, it gets better with age, developing a patina that adds to its flavour.
But if cast iron isn't your thing, don't fret. A thick-bottomed stainless steel pan can also do the trick. Just make sure it's built for high temperatures.
And here's a little insider tip: preheating your pan is crucial. Give it a good 5 minutes over medium-high heat before you even think about dropping your burger in. It's like warming up for a race – you want the pan to be ready for action.
(Part 3) The Burger Temperature Zones: A Guide for the Grill Master

Now, let's talk temperatures. Think of it as a map of burger perfection, with different zones representing various levels of heat.
Low Heat (Below 200°F / 93°C)
This is like a gentle simmer, perfect for those who prefer a slower, more even cooking experience. But for a juicy, well-seared burger, you'll want to dial up the heat.
Medium Heat (200°F - 350°F / 93°C - 177°C)
This is the sweet spot – the Goldilocks zone where you can achieve the perfect balance between a juicy interior and a crispy crust. It's where most burgers find their happy place.
High Heat (Above 350°F / 177°C)
This is for those who crave a crispy, intensely seared burger. It's great for a quick sear, but you need to be careful – it can easily lead to overcooked burgers if you're not vigilant. Think of it like a hot date – exhilarating but potentially dangerous if you're not cautious.
(Part 4) Finding the Magic Number: The Ideal Stovetop Burger Temperature
So, what's the magic number for stovetop burger perfection? Well, it's not a one-size-fits-all answer. It depends on the thickness of your patty, your preferred doneness, and even the type of burger you're making.
But as a general rule of thumb, 350°F (177°C) is a fantastic starting point. This temperature allows for a beautiful, even sear on both sides of the burger without burning it. It's like striking a delicate balance between flavour and tenderness.
(Part 5) Mastering the Stovetop: A Step-by-Step Guide to Burger Bliss
Now that we've got the basics down, let's dive into the action. Here's a step-by-step guide to cooking the perfect stovetop burger:
1. Preheating: Setting the Stage for Success
Remember that preheated pan we talked about? Well, this is where it comes into play. Give your chosen pan (cast iron, stainless steel, or otherwise) a good 5 minutes over medium-high heat. It needs to be scorching hot, ready to embrace the burger and give it a sizzling welcome.
2. Patting Dry: The Secret to a Crispy Crust
Before you toss your patty onto the hot pan, pat it dry with paper towels. This simple step is crucial. It ensures that the moisture doesn't steam the burger, allowing the surface to crisp up beautifully.
3. The First Kiss: Searing for Flavor
Carefully place the burger on the hot pan. Now, resist the urge to touch it! Let it sit for at least 3 minutes, undisturbed. This will give the bottom a nice, crispy crust, locking in the juices and creating a flavourful barrier.
4. The Flip: A Moment of Truth
After 3 minutes, it's time for the flip. This is a crucial step – you want to make sure you're flipping with a confident hand. Use a thin, flexible metal spatula for this task – it's less likely to break up the burger. Avoid using a fork or anything that could pierce the patty and let out precious juices.
5. The Final Act: Completing the Performance
Cook the other side for another 3 minutes, or until the burger reaches your desired doneness. It's like finishing a masterpiece – you're bringing it to its full potential.
(Part 6) Reading the Burger: The Doneness Checklist
So, how do you know when your burger is cooked to perfection? There are a few ways to tell.
- Rare: The center will be a vibrant red, with cooked edges. It's for those who appreciate a touch of pink in their burger.
- Medium-Rare: The center will be a lovely shade of pink, with a cooked outer ring. It's the classic burger choice for many, offering a balance of tenderness and flavor.
- Medium: The center will be light brown, with a slight pink tinge. It's a good choice for those who prefer a little less pink but still want a juicy burger.
- Medium-Well: The center will be brown, with no hint of pink. It's a safe bet for those who prefer their burgers cooked through.
- Well Done: The entire burger will be brown, with no hint of pink. For those who prefer their burgers fully cooked, this is the way to go.
You can also use a meat thermometer to take the guesswork out of things. Here's a temperature chart to help you navigate the world of burger doneness:
| Doneness | internal temperature (°F) | Internal Temperature (°C) |
|---|---|---|
| Rare | 120-125 | 49-52 |
| Medium-Rare | 130-135 | 54-57 |
| Medium | 140-145 | 60-63 |
| Medium-Well | 150-155 | 66-68 |
| Well Done | 160-165 | 71-74 |
Remember, there's no right or wrong answer when it comes to burger doneness. It's all about personal preference. I, for one, prefer my burgers medium-rare, with a juicy, flavorful center. But you do you, my friend.
(Part 7) Level Up Your Burger Game: Tips and Tricks for the Burger Connoisseur
Now that you have the basics down, let's talk about some extra tips to elevate your burger game to a whole new level.
1. Seasoning: The Flavor Foundation
Don't underestimate the power of seasoning. Salt and pepper are the essential duo, but feel free to experiment with other seasonings like garlic powder, onion powder, paprika, or even a dash of cayenne pepper for a touch of heat.
2. Burger Press: Sculpting Perfection
For perfectly shaped burgers that cook evenly, a burger press is a game-changer. It creates uniformly sized, compact patties that hold their shape while cooking. It's like having a personal sculptor for your burger.
3. Butter Basting: A Touch of Richness
After you flip your burger, add a pat of butter to the pan. It will melt and baste the burger, adding a touch of richness and enhancing the flavour. It's like giving your burger a luxurious spa treatment.
4. homemade burger Sauce: A Flavor Symphony
A good burger sauce can take your burger from ordinary to extraordinary. My go-to is a simple blend of ketchup, mayonnaise, and Dijon mustard, but feel free to get creative and add your own twists. You can even add a touch of sweetness with a spoonful of honey or a hint of spice with a dash of hot sauce.
5. Assembly: The Grand Finale
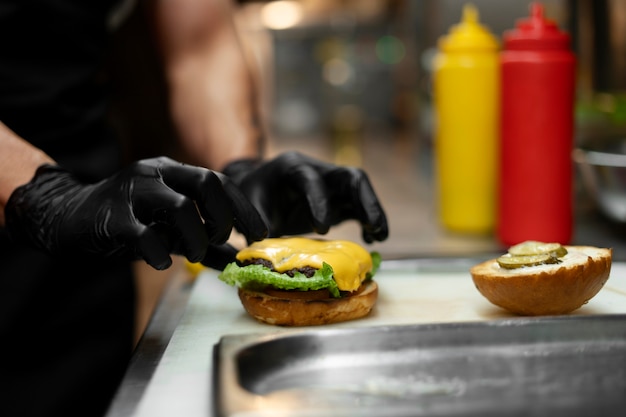
Once your burger is cooked to perfection, it's time for assembly. Start with a toasted bun, then add your cooked burger, followed by your favourite toppings. Get creative! Lettuce, tomato, onion, pickles, bacon, cheese – the possibilities are endless.
(Part 8) Embrace the Journey: Experiment and Discover Your Perfect Burger
The beauty of burgers lies in the endless possibilities for experimentation. Don't be afraid to play around with different temperatures, pan types, cooking times, and seasonings. Find what works best for you and your preferred burger style.
For example, if you like a crispier, well-done burger, you might want to cook it at a higher temperature for a shorter period of time. Or perhaps you're a fan of a juicy, medium-rare burger – then stick with a lower temperature and cook it for a longer time.
Remember, the journey to burger perfection is a continuous one. Experiment, discover, and most importantly, have fun!
(Part 9) FAQs
1. Can I use a skillet instead of a cast iron pan?
Absolutely! A thick-bottomed skillet will work just fine. Just make sure it's preheated and can handle high temperatures.
2. How long should I cook a burger on each side?
It depends on the thickness of the burger, the temperature of the pan, and your desired doneness. A general rule of thumb is to cook each side for 3-4 minutes, but you may need to adjust the time based on your preference.
3. What if my burger is sticking to the pan?
If your burger is sticking to the pan, it's likely that the pan wasn't hot enough when you added the burger. Try preheating the pan for a longer period of time, or use a little bit of oil or butter to grease the pan.
4. What are some good toppings for burgers?
The sky's the limit when it comes to burger toppings. Some classics include lettuce, tomato, onion, pickles, bacon, cheese, and mushrooms. But feel free to get creative and add your own favourite toppings. Try adding caramelized onions, avocado, roasted peppers, or even a fried egg. The possibilities are endless!
5. What are some other ways to cook a burger?
While stovetop cooking is a classic method, you can also cook burgers on a grill, in the oven, or even in a slow cooker. Each method has its own benefits and drawbacks. Experiment and see what you like best.
And remember, no matter how you cook your burger, the key is to enjoy the process. It's all about having fun and exploring different flavors. So, grab your ingredients, put on your grill master hat, and let's create some burger magic!
Everyone is watching

How to Cook Frozen Lobster Tails Perfectly: A Step-by-Step Guide
RecipesLobster. Just the word conjures up images of lavish meals, special occasions, and a taste of luxury. But let's...

Pigs in a Blanket Cooking Time: How Long to Bake for Perfect Results
RecipesAh, pigs in a blanket. Just the name conjures up images of those delightful little parcels of crispy pastry en...

Pork Fillet Cooking Time: How Long to Cook It Perfectly
RecipesPork fillet, or tenderloin as it's sometimes called, is a real favourite in our house. It's so versatile, and...

The Ultimate Guide to Cooking Delicious Frankfurters
RecipesLet's face it, we all love a good frankfurter. It's a classic, simple, and always satisfying. But let's be rea...

Wolf Meat Recipes: A Guide to Cooking Wild Game
RecipesLet's be honest, you don't see wolf meat at your local butcher shop every day. It's a bit of a wild card, but ...
