For a home cook, few things are as satisfying as mastering the art of cooking a beef tenderloin. This cut of meat, with its delicate flavour and melt-in-your-mouth tenderness, is a true culinary gem. But let's be honest, the tenderloin can be a bit intimidating for those who haven’t tackled it before. It's a prized cut that demands respect, but with the right knowledge and technique, you can achieve consistently perfect results, transforming even the most novice cook into a confident chef. Through years of trial and error, I’ve honed my methods, and I'm excited to share my wisdom, turning you into a tenderloin master in no time.
(Part 1) Unlocking the Secrets: Beef Tenderloin 101
Before we dive into the cooking process, it's important to understand what makes this cut of meat so special. The beef tenderloin, also known as the "picanha" in Brazil, is a long, cylindrical muscle that runs along the backbone of the cow. It's relatively small, with a minimal amount of fat marbling, giving it a lean and delicate flavour. It’s also remarkably versatile, lending itself to a variety of cooking techniques and serving styles.
Choosing Your Weapon: The Right Tenderloin for the Job
Tenderloins come in different sizes and shapes, each ideal for specific dishes. The smaller end of the tenderloin, known as the "tail", is perfect for steaks, while the larger "center cut" is ideal for roasting, serving a crowd, or creating beautiful medallions.
- Tail: Thin and delicate, perfect for individual steaks, grilled or pan-seared.
- Center Cut: Thick and substantial, ideal for roasting whole or slicing into medallions for elegant meals.
Don't be afraid to ask your butcher for their recommendation. They'll be happy to help you select the perfect cut for your needs.
Spotting a Winner: Choosing the best tenderloin
You’ve got your recipe, your cooking method is decided, and now it’s time to pick the star of the show - your tenderloin. A few key characteristics signal a top-notch tenderloin, ensuring a delicious outcome.
- Colour: A vibrant, cherry-red colour is a sign of freshness. Avoid any tenderloins with a brown or grayish hue, as this indicates it's not as fresh.
- Marbling: Even though it's lean, a good tenderloin will have some marbling, those little streaks of fat that contribute to its flavour and tenderness. More marbling means a richer flavour.
- Firmness: The tenderloin should feel firm and springy to the touch. Avoid any that feel mushy or soft.
(Part 2) Setting the Stage: The Art of Pre-Game Preparation
The best cooking starts with the right prep. This is where you’ll lay the foundation for a truly spectacular result. It may seem like a lot of steps, but believe me, the effort pays off big time, transforming your tenderloin into a culinary masterpiece.
1. Removing the Enemy: Trimming the Silver Skin
Most tenderloins come with a thin layer of silver skin, a tough membrane that can make the meat chewy. It’s the first thing to go! Using a sharp knife, gently slide it under the silver skin and lift it off. It’s okay if a little bit remains, you can trim it later. This step is vital to ensure tender, succulent bites.
2. The Art of Seasoning: Unlocking the Flavour
This is where your creativity can shine! While simple salt and pepper are always a classic, don't be afraid to get adventurous with your seasonings. I love experimenting with different spice blends, herb combinations, or even a touch of garlic powder for extra flavour.
Here are a few flavour pairings I enjoy:
- Herbs: Rosemary, thyme, oregano, parsley, sage, or a blend of herbs de Provence.
- Spices: Paprika, cumin, coriander, smoked paprika, or a blend of chili powder.
- Garlic: Fresh garlic cloves, garlic powder, or even a sprinkle of garlic flakes.
Season generously on all sides, making sure the spices are evenly distributed. A good rule of thumb is to season liberally, but avoid overdoing it, as you can always add more later.
3. The Searing Ritual: A Crispy Crust is Key
A good sear is like the opening act to a great performance. It creates a crispy crust that locks in the juices and adds incredible flavour. Use a cast-iron pan or heavy-bottomed skillet over medium-high heat. Let the pan get nice and hot before adding the tenderloin. Sear for about 2-3 minutes per side, making sure to achieve a deep golden-brown colour. This browning process, called the "Maillard Reaction", is responsible for that mouth-watering aroma and flavour. It's a critical step that elevates the tenderloin from good to great.
(Part 3) Mastering the Heat: Cooking Methods for Tenderloin Perfection

The prep work is done, the stage is set, and now it’s time to cook! This is where the magic happens. We have several options at our disposal, each with its own unique advantages. I’ll share my favourites, along with tips to ensure you achieve tender, juicy perfection every time.
1. The Classic Oven Roast: A Tried and True Method
This is the go-to method for many cooks, and it's surprisingly straightforward. Preheat your oven to 400°F (200°C). After searing the tenderloin, place it on a roasting rack in a baking pan. Add a little bit of water to the bottom of the pan, creating a steamy environment that will help keep the meat moist. Roast for about 15-20 minutes, or until the internal temperature reaches 130°F (54°C) for medium-rare. This method delivers a beautifully browned crust and a juicy, tender centre, perfect for a classic approach to the tenderloin.
2. The reverse searing Method: Unveiling the Ultimate Tenderness
This is my personal favourite, a technique that consistently delivers the most perfectly cooked tenderloin. The key is to cook the tenderloin at a lower temperature for a longer period, ensuring that it cooks evenly throughout. Preheat your oven to 275°F (135°C). After searing, place the tenderloin in the oven and cook for about 1.5 to 2 hours, or until the internal temperature reaches 125°F (52°C) for medium-rare. Rest the tenderloin for 15 minutes before slicing and serving. This method ensures a truly tender and juicy result, with a melt-in-your-mouth texture that is truly exquisite.
3. The Grill Master's Delight: Smoky Char for Outdoor Feasting
If you're a grilling enthusiast, you can absolutely conquer the tenderloin on the grill. Start with a hot grill, preheated to medium-high heat. Sear the tenderloin for about 2-3 minutes per side. Then, reduce the heat to medium and continue grilling for another 10-15 minutes, rotating the tenderloin every few minutes to ensure even cooking. This method gives a smoky, charred flavour that is perfect for summer barbecues. Make sure to use a meat thermometer to ensure the internal temperature reaches your desired level of doneness.
4. The Pan-Seared Elegance: Quick and Easy, Yet Exquisite
For a quick and simple approach, pan-searing is an excellent choice. Using a heavy-bottomed skillet or cast-iron pan, heat the pan over medium-high heat. Add a tablespoon of oil and sear the tenderloin for 2-3 minutes per side, until a nice golden-brown crust forms. Reduce the heat to medium and continue cooking for another 5-7 minutes, or until the internal temperature reaches your desired doneness. This method is perfect for smaller tenderloin cuts or when you're short on time, allowing you to achieve a delicious meal without spending hours in the kitchen.
(Part 4) The Art of Patience: Resting for a Tender Outcome
You’ve put in the effort to prepare and cook the tenderloin to perfection. Now it's time for a little patience. Resist the urge to slice into that beautiful piece of meat right away! Resting the tenderloin after cooking is crucial. This allows the juices to redistribute throughout the meat, resulting in a more tender and flavourful steak. Let it rest for 15-20 minutes, covered with foil, before slicing and serving. This step is often overlooked, but it's essential for achieving that melt-in-your-mouth texture.
(Part 5) Reading the Signs: Understanding Internal Temperatures
Knowing how to read a meat thermometer is essential for achieving the perfect level of doneness. A good thermometer is an investment worth making! It takes the guesswork out of cooking and ensures that your tenderloin is cooked to your exact preferences.
| Doneness | Internal Temperature (°F) | Internal Temperature (°C) |
|---|---|---|
| Rare | 125-130 | 52-54 |
| Medium-Rare | 130-135 | 54-57 |
| Medium | 140-145 | 60-63 |
| Medium-Well | 150-155 | 66-68 |
| Well-Done | 160 | 71 |
Remember, these are just guidelines, and your preference may vary. Experiment with different temperatures and find what you like best. Don’t be afraid to adjust the cooking time slightly based on your desired level of doneness.
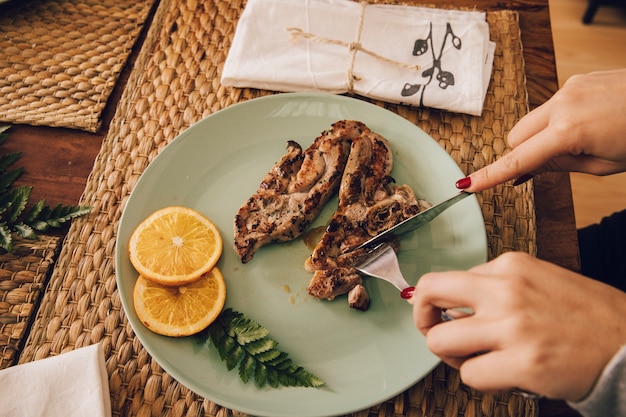
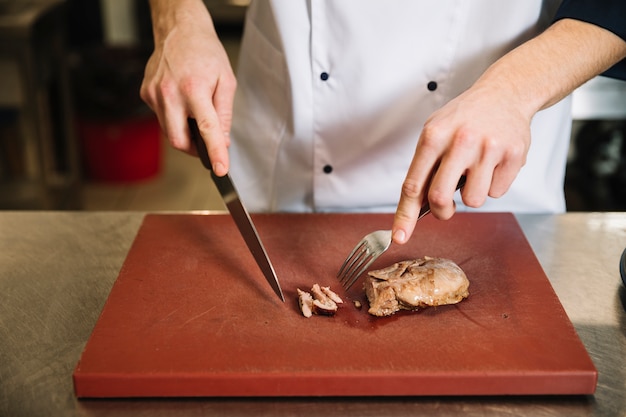
(Part 6) Slicing with Precision: Showcasing the Beauty
After the tenderloin has rested, it's time to slice it into elegant portions. Use a sharp knife and slice against the grain, which means cutting perpendicular to the muscle fibres. This ensures tender, melt-in-your-mouth bites. If you're serving a large tenderloin, slice it into individual steaks. If you’re serving a smaller tenderloin, slice it into medallions. Arrange the slices artfully on a platter, and garnish with fresh herbs or a sprinkle of coarse salt. Don’t forget to save some of the pan drippings for a luscious sauce.
(Part 7) Adding Finishing Touches: Elevating the Flavour
The beauty of beef tenderloin lies in its versatility. It pairs beautifully with a variety of sauces and sides. From classic red wine sauces to creamy mushroom sauces, the options are endless. I love to use the pan drippings from the tenderloin to create a simple sauce. Simply deglaze the pan with a little wine or broth, scraping up the browned bits at the bottom. This adds depth of flavour and richness to your sauce. Add a tablespoon of butter, and whisk until smooth. Season with salt and pepper, and drizzle over the tenderloin. You can also serve it with classic sides like roasted vegetables, mashed potatoes, or a simple green salad. Remember, the sides you choose should complement the tenderloin, creating a harmonious blend of flavours.
(Part 8) Sharing the Feast: A Culinary Celebration
The final step, and perhaps the most enjoyable, is to share your culinary masterpiece with loved ones. A perfectly cooked beef tenderloin is a meal that deserves to be savoured. Enjoy the tender, juicy flavours, and feel proud of the culinary journey you’ve taken. Remember, this is about more than just cooking; it's about creating memories and sharing moments with those you care about. So gather your friends and family, and let the celebration begin!
FAQs
1. What's the best way to store a beef tenderloin?
For optimal freshness, store your tenderloin in the refrigerator, wrapped tightly in plastic wrap or in a sealed container. It can be kept this way for up to 3-5 days. If you need to freeze it, wrap it securely in freezer paper or plastic wrap, then place it in a freezer-safe bag to prevent freezer burn. Allow the frozen tenderloin to thaw in the refrigerator for 1-2 days before cooking. This gradual thawing helps to maintain its quality and texture.
2. Can I overcook beef tenderloin?
Yes, you can definitely overcook beef tenderloin. Overcooked tenderloin will be tough and dry. The key is to cook it to the desired level of doneness, using a meat thermometer to ensure accuracy. The thermometer is your best friend, allowing you to monitor the internal temperature and avoid overcooking. It's a small investment that will pay off big time in terms of tender, juicy results.
3. What are some good side dishes to serve with beef tenderloin?
There are endless possibilities for side dishes, but some classics include roasted vegetables, mashed potatoes, asparagus, risotto, and green salads. You can also get creative with more exotic options like quinoa salad or roasted sweet potatoes. The key is to choose sides that complement the tenderloin's flavour profile, creating a harmonious blend of textures and tastes.
4. Can I use a cheaper cut of beef instead of tenderloin?
While tenderloin is the ideal choice for a tender and flavourful steak, you can use other cuts like ribeye or sirloin. However, these cuts may require a longer cooking time and may have a slightly tougher texture. Be sure to choose cuts with good marbling for optimal flavour. If you're looking for a less expensive alternative, ribeye is a great option with a similar flavour profile to tenderloin.
5. What are some tips for making the best beef tenderloin sauce?
The key to a delicious sauce is to deglaze the pan with wine or broth, scraping up the browned bits at the bottom. This adds depth of flavour and richness to your sauce. Add butter for richness and whisk until smooth. Season with salt and pepper and drizzle over the tenderloin. You can also get creative by adding herbs, spices, or a touch of mustard for extra flavour.
Remember, cooking a beef tenderloin is about more than just following a recipe; it's about understanding the nuances of the cut, mastering the cooking techniques, and unleashing your culinary creativity. With a little practice and a dash of confidence, you'll be able to wow your friends and family with perfectly cooked, mouth-watering tenderloin, transforming your kitchen into a culinary haven.
Everyone is watching

How to Cook Frozen Lobster Tails Perfectly: A Step-by-Step Guide
RecipesLobster. Just the word conjures up images of lavish meals, special occasions, and a taste of luxury. But let's...

Pigs in a Blanket Cooking Time: How Long to Bake for Perfect Results
RecipesAh, pigs in a blanket. Just the name conjures up images of those delightful little parcels of crispy pastry en...

Pork Fillet Cooking Time: How Long to Cook It Perfectly
RecipesPork fillet, or tenderloin as it's sometimes called, is a real favourite in our house. It's so versatile, and...

The Ultimate Guide to Cooking Delicious Frankfurters
RecipesLet's face it, we all love a good frankfurter. It's a classic, simple, and always satisfying. But let's be rea...

Wolf Meat Recipes: A Guide to Cooking Wild Game
RecipesLet's be honest, you don't see wolf meat at your local butcher shop every day. It's a bit of a wild card, but ...