Ah, beef tenderloin. The mere mention of it conjures images of luxurious dinners, special occasions, and that satisfying "ooh la la" moment when you sink your teeth into a perfectly cooked piece. It's the crown jewel of steaks, the one you go all out for, the one that makes you feel like a culinary rockstar. But let's be real, getting that "rockstar" level of doneness can be a bit daunting. I've been there, standing in the kitchen with a furrowed brow and a pan of overcooked, hockey puck-like tenderloin, wondering where I went wrong. Trust me, I've learned from my mistakes, and I'm here to share those hard-won lessons with you.
This guide is your ultimate recipe for tenderloin triumph. We'll explore everything from choosing the perfect cut to mastering different cooking methods, ensuring that you end up with a steak so succulent, juicy, and flavorful that your guests will be singing your praises. So grab a comfy seat, pour yourself a glass of something delicious, and let's dive in!
(Part 1) Choosing Your Tenderloin - A Cut Above the Rest

The Cut: filet mignon vs. Whole Tenderloin
First, you need to pick your tenderloin. You'll often hear the term "filet mignon" thrown around, and while it sounds fancy, it's simply a smaller, thicker cut from the main tenderloin. So, think of filet mignon as the "premium" version of your chosen steak.
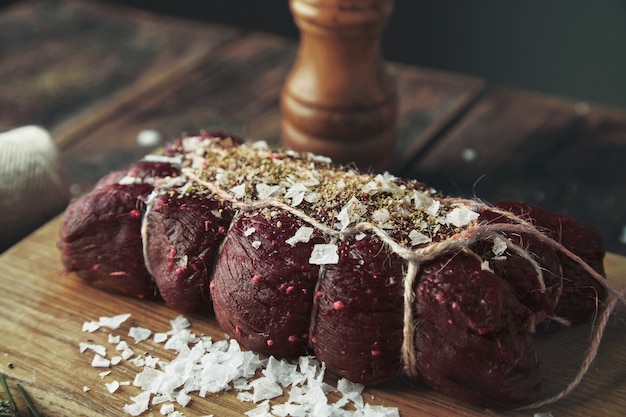
I generally go for a whole tenderloin. It's a fantastic value, and it offers the flexibility to cook it in various ways. Roast it whole, sear it, or slice it into individual steaks – the possibilities are endless! Plus, it's a showstopper when you pull it out of the oven, all glistening and magnificent.
Size and Weight: Feeding the Crowd
When deciding on size, a good rule of thumb is to allow 8 ounces of tenderloin per person. It's a lean cut, so you'll want to make sure you have enough to go around. Personally, I always recommend erring on the side of more – leftovers are a beautiful thing, especially when they involve tenderloin.
Tenderloins come in various weights, from a few pounds to over ten. For a small gathering, a 3-4 pound tenderloin will be perfect. For a bigger party, you'll need a larger one. Just make sure you've got enough oven space before you commit!
Fat: The Secret to Juicy Goodness
Now, fat is your friend when it comes to tenderloin. Look for a cut that has good marbling – those beautiful streaks of fat running through the muscle. This is what keeps the meat juicy and flavorful during cooking. You can also look for tenderloins with a thin layer of fat on the outside, which helps keep the meat moist as it cooks. Just remember to trim away any excess fat before you start cooking. We want to keep things trim, but not too trim, you know?
(Part 2) Unveiling Your Oven's Secrets

Oven Temperatures: Finding the Perfect Heat
Understanding your oven is crucial. Every oven has its own personality, and some run hotter than others. That's why investing in an oven thermometer is a game-changer. They're cheap, readily available at most grocery stores, and can save you from those dreaded overcooked disasters. You'll be thanking me later.
For roasting tenderloin, you're typically aiming for temperatures around 400-450°F. Preheating your oven to the correct temperature before you pop the tenderloin in is key. This ensures the meat cooks evenly, preventing any cold spots that can ruin the texture and flavor.
Oven Placement: Strategic Cooking
Now, let's talk about placement. I always position my tenderloin on the center rack of the oven. This provides the most consistent heat distribution and helps prevent uneven cooking. Avoid placing it too high or too low in the oven – you want that golden, evenly cooked goodness all the way through!
If you're using a roasting pan, make sure it's big enough to accommodate the tenderloin without it being cramped. You want air to circulate freely around the meat for even cooking. And if you're working with a whole tenderloin, you might need a larger roasting pan to fit the entire beast.
(Part 3) Preparing for the Roast: Getting Ready to Shine

Seasoning: A Symphony of Flavors
Now, the fun part – seasoning! This is your chance to unleash your inner culinary artist. Personally, I keep things simple with salt and pepper, but the world is your oyster! Experiment with other herbs and spices like garlic powder, paprika, thyme, or rosemary. Just remember, a little goes a long way. Over-seasoning can mask the natural flavor of the tenderloin, and we don't want to overshadow that exquisite taste, do we?
If you're feeling bold, try adding a rub or marinade. There are countless recipes online, but I'm a sucker for a simple garlic and herb rub. It's quick, easy, and delivers a delicious punch of flavor.
Searing: Achieving that Gorgeous Crust
For a beautiful, caramelized crust and an extra layer of flavor, I always recommend searing the tenderloin before roasting. This can be done in a piping hot skillet or on a grill. It only takes a few minutes per side, but the results are incredible. It's a bit like giving the tenderloin a golden tan before its grand entrance into the oven.
Make sure your pan or grill is super hot. If you're using a skillet, add a little oil to prevent sticking. Sear each side of the tenderloin for about 2-3 minutes, until you see a delicious golden-brown crust forming. Remember, this isn't about cooking it through, just about getting that gorgeous sear. We'll get to the cooking later.
(Part 4) Mastering the Roast: Time to Cook Up a Storm
Cooking Time: A Rough Guide
Alright, the moment of truth. Let's get that tenderloin in the oven! The cooking time will vary depending on the size and thickness of the cut. Here's a general guideline to get you started:
For a 3-4 pound tenderloin, plan for around 45-60 minutes for medium-rare. For a larger, 5-6 pound tenderloin, it'll take around 1 hour 15 minutes to 1 hour 30 minutes for medium-rare.
These are just estimates, however. The best way to guarantee perfect doneness is to use a meat thermometer. We'll talk more about that in a minute. You can use these times as a starting point and adjust accordingly based on your oven and the size of your tenderloin.
Temperature and Doneness: The Meat Thermometer's Role
Here's where the real magic happens. Meet your new best friend: the meat thermometer. This little gadget is a lifesaver when it comes to tenderloin. It tells you the internal temperature of the meat, so you can ensure it's cooked to your exact preference.
Here's a breakdown of the internal temperatures for different doneness levels:
| Doneness | Internal Temperature (°F) |
|---|---|
| Rare | 125-130°F |
| Medium-Rare | 130-135°F |
| Medium | 140-145°F |
| Medium-Well | 150-155°F |
| Well-Done | 160°F and above |
Remember, these are just guidelines. Ultimately, it comes down to personal preference. Some people love their tenderloin a bit more cooked, while others prefer it rare. But the meat thermometer ensures you get the doneness you desire, no matter what your preference is.
(Part 5) The Resting Stage: A Crucial Pause for Flavor
Your tenderloin has reached the perfect temperature, and you're itching to slice into it. But hold your horses! Don't rush to carve it up just yet. The key to juicy, tender, flavor-packed meat is to let it rest for at least 10-15 minutes before carving. This allows the juices to redistribute throughout the meat, resulting in a much more flavorful and tender steak. It's like giving the tenderloin a chance to relax and settle after its culinary adventure.
While the tenderloin rests, you can get your sides ready, pour yourself another drink, or simply bask in the anticipation of that delicious meal you've created. It's worth the wait, I promise.
(Part 6) Carving It Up: Unveiling the Culinary Masterpiece
After the resting time, it's time to unveil your culinary masterpiece. This is where a sharp knife makes all the difference. You don't want to tear the meat apart, so a nice, sharp knife will ensure smooth and precise slicing. I recommend using a carving knife or a good quality chef's knife – those are your best friends for this step.
Start by slicing the tenderloin into thin, even pieces. The thickness will depend on how you plan to serve it. If you're serving it as individual steaks, slice it about an inch thick. If you're serving it as a roast, you can go for thinner slices.
The most important part is to slice against the grain of the meat. This means slicing perpendicular to the muscle fibers, which helps tenderize the meat and makes it easier to chew. You'll see the difference this makes – it's like magic!
(Part 7) Serving it Up: The Grand Finale
Ta-da! Your tenderloin is ready to shine. Now it's time to wow your guests with your culinary masterpiece. Here are a few serving ideas to get your creative juices flowing:
- Classic Steak: Serve your sliced tenderloin with some roasted vegetables, a side of creamy mashed potatoes, or a simple green salad. It's a timeless classic for a reason!
- Filet Mignon with Sauce: For a touch of elegance, top your tenderloin with a rich sauce like a béarnaise, a red wine sauce, or a creamy mushroom sauce. These sauces add an extra dimension of flavor and sophistication to your dish.
- Steak Sandwiches: Create delicious and decadent steak sandwiches with your tenderloin slices. Just add some crusty bread, your favorite toppings, and enjoy a hearty and flavorful sandwich.
Don't be afraid to get creative and experiment! Add a dollop of whipped cream or a drizzle of honey for a touch of sweetness and decadence. The possibilities are endless, so let your imagination run wild.
(Part 8) Tips and Tricks: Expert Secrets for Tenderloin Triumph
Here are a few extra tips to ensure your tenderloin cooking adventure is a resounding success:
- Don't overcook it! The key to a juicy and tender tenderloin is to cook it to the desired doneness and no more. Overcooked tenderloin becomes dry and tough, which is a culinary crime.
- Use a meat thermometer. It's your best friend for achieving perfect doneness. Don't rely on guesswork – let the thermometer be your guide.
- Let it rest. It's essential for redistributing the juices and creating a more tender and flavorful steak. Be patient, the extra time is worth it.
- Slice against the grain. This makes the meat easier to chew and more tender. It's a simple tip with a big impact on the dining experience.
- Experiment with different seasonings. Don't be afraid to get creative with your seasonings and marinades. Each experiment is a chance to discover a new flavor combination.
- Enjoy! The best part of the whole process is savoring the fruits of your labor. Sit back, relax, and enjoy every delicious bite of your perfectly cooked tenderloin.
FAQs: Answering Your Burning Questions
1. Can I use a cheaper cut of beef instead of tenderloin?
Absolutely! While tenderloin is a luxurious choice, other cuts of beef can be just as delicious when cooked properly. Sirloin, ribeye, or even a top round roast can be budget-friendly alternatives that deliver excellent flavor. Just remember to adjust your cooking time and temperature accordingly, as different cuts have different cooking times.
2. How do I store leftover tenderloin?
Leftover tenderloin can be stored in the refrigerator for up to 3-4 days. Wrap it tightly in plastic wrap or aluminum foil to prevent it from drying out. You can also freeze leftover tenderloin for up to 2-3 months. Wrap it tightly in plastic wrap, then place it in a freezer-safe bag. Thaw it in the refrigerator before cooking.
3. What are some good side dishes to serve with tenderloin?
There are endless possibilities for side dishes to complement your tenderloin. Roasted vegetables, mashed potatoes, creamy risotto, or a simple green salad are always excellent choices. You can also add a touch of sweetness with a fruit compote or a cranberry sauce. The key is to find side dishes that balance the richness of the tenderloin and complement its flavor.
4. Can I cook a tenderloin in a slow cooker?
While slow cookers are great for tough cuts of meat, tenderloin is best cooked quickly to preserve its tenderness. slow cooking it can result in a tough and dry steak. If you're looking for a hands-off option, consider using a pressure cooker or an instant pot, which are better suited for cooking tenderloin quickly and efficiently.
5. What are some other ways to cook tenderloin?
Beyond roasting, you can cook tenderloin using various methods, including grilling, pan-searing, or even sous vide. Each method offers its own unique advantages and disadvantages. Experiment with different techniques to find your favorite way to cook this luxurious cut.
Remember, the key to success is understanding your ingredients, your equipment, and most importantly, yourself. Be confident, be creative, and most importantly, have fun in the kitchen. Happy cooking!
Everyone is watching

How to Cook Frozen Lobster Tails Perfectly: A Step-by-Step Guide
RecipesLobster. Just the word conjures up images of lavish meals, special occasions, and a taste of luxury. But let's...

Pigs in a Blanket Cooking Time: How Long to Bake for Perfect Results
RecipesAh, pigs in a blanket. Just the name conjures up images of those delightful little parcels of crispy pastry en...

Pork Fillet Cooking Time: How Long to Cook It Perfectly
RecipesPork fillet, or tenderloin as it's sometimes called, is a real favourite in our house. It's so versatile, and...

The Ultimate Guide to Cooking Delicious Frankfurters
RecipesLet's face it, we all love a good frankfurter. It's a classic, simple, and always satisfying. But let's be rea...

Wolf Meat Recipes: A Guide to Cooking Wild Game
RecipesLet's be honest, you don't see wolf meat at your local butcher shop every day. It's a bit of a wild card, but ...
