The aroma of a perfectly roasted beef loin filling your kitchen is a sensory experience unlike any other. It's a symphony of rich, savory notes, punctuated by the satisfying crackle of a beautifully browned crust. As a seasoned cook, I've always held a special place in my heart for beef loin roasts. They're the centerpiece of countless memorable meals, a testament to the art of slow cooking and the magic of transforming a simple cut of meat into a culinary masterpiece. In this comprehensive guide, we'll embark on a journey together, exploring every step, from selecting the perfect cut to mastering the art of searing and slow-roasting, culminating in a beef loin roast so tender, juicy, and flavorful, it will leave your guests wanting more.
(Part 1) choosing the right cut: A Foundation for Flavor
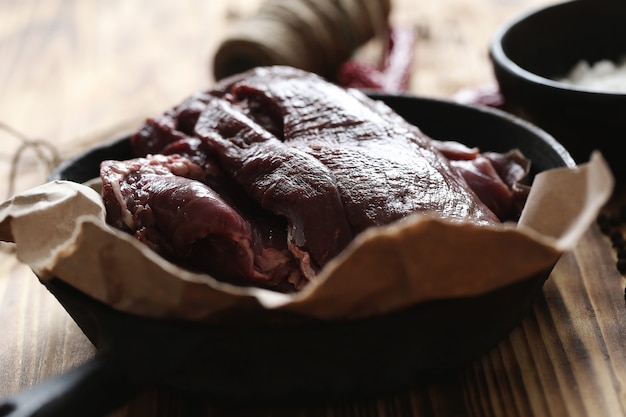
The first step in crafting the perfect beef loin roast is selecting the right cut – the foundation upon which your culinary masterpiece will be built. Each cut has its own unique characteristics, influencing its flavor, texture, and overall cooking experience. Think of it like choosing the right ingredients for a specific dish – the foundation of good cooking starts with a careful selection.
1. The Classic: Tenderloin – A Symphony of Tenderness
Ah, the tenderloin, also known as the psoas major, is the epitome of tenderness. This long, cylindrical muscle, nestled along the spine, boasts a delicate flavor and incredibly soft texture. It's often served whole as a roast, creating a dramatic centerpiece, but can also be sliced into medallions or steaks, perfect for elegant meals. This is the go-to choice for those who prioritize tenderness above all else, but be prepared for a bit of a price tag – it's a prized cut for a reason.
I remember the first time I cooked a tenderloin roast for a dinner party. I was a bit intimidated, but the result was simply divine. The tenderloin cooked perfectly, effortlessly slicing into thin, delicate pieces, each bite a symphony of melt-in-your-mouth texture and subtle beefy flavor. It was a culinary triumph and solidified my appreciation for this exquisite cut.
2. The Value Choice: Top Sirloin – Balancing Flavor and Affordability
If you're looking for a delicious roast that won't break the bank, the top sirloin is a fantastic choice. It's a slightly larger cut than the tenderloin, with a bit more marbling – those streaks of fat that add richness and depth to the flavor. This translates to a more robust, flavorful roast, while still maintaining a pleasingly tender texture. It's a champion of value, offering a great balance of taste and affordability.
I often turn to top sirloin for weeknight meals. It's versatile enough for a casual family dinner or a more formal gathering. I love how it browns beautifully, creating a gorgeous crust that locks in the juices, ensuring a flavorful and moist result. It's a cut that always delivers, regardless of the occasion.
3. The Rich and Robust: ribeye roast – A Feast for the Senses
For those seeking an experience that truly tantalizes the senses, the ribeye roast reigns supreme. This cut, hailing from the rib section, is renowned for its generous marbling, resulting in an incredibly rich and juicy flavor. It's a cut that's a bit more indulgent, but the extra flavor and tenderness are worth every penny.
I often save ribeye roast for special occasions, like holidays or when I want to impress guests. It's a statement piece, a culinary showstopper that speaks volumes about your dedication to creating a truly memorable meal. The rich, buttery flavor, enhanced by the generous marbling, is a feast for the senses, leaving you with a lasting impression.
(Part 2) Getting the Roast Ready: Prepping for Perfection
Now that you've selected the star of the show, it's time to get your roast ready for the spotlight. This crucial prepping stage sets the foundation for a flavorful and beautifully cooked result. Think of it as the opening act, setting the stage for a truly spectacular performance.
1. Pat It Dry: Embracing the Brown
Start by patting your roast dry with paper towels. This seemingly simple step is essential for achieving a beautifully browned crust. Excess moisture creates steam, which inhibits browning and can lead to a less flavorful outcome. A dry surface allows the roast to develop a gorgeous, crispy crust, enhancing the visual appeal and locking in those savory juices.
2. Season It Up: Unleash Your Culinary Creativity
Next, it's time to infuse your roast with flavor! This is your opportunity to unleash your culinary creativity. While I love keeping things simple with just salt and pepper, allowing the natural beef flavor to shine through, you're free to experiment with different herbs and spices. Rosemary, thyme, and oregano pair beautifully with beef, adding a touch of herbaceous complexity. For a hint of warmth, a pinch of smoked paprika or cayenne pepper can add a subtle kick. And don't forget the magic of garlic powder – it's a simple addition that enhances the beef's inherent flavor.
I often experiment with different spice blends, creating custom combinations based on my mood and the occasion. A simple blend of rosemary, thyme, and garlic powder works wonders for a classic roast, while a blend of smoked paprika, cumin, and chili powder adds a vibrant kick to a more adventurous meal. The possibilities are endless, so don't be afraid to experiment and find your signature spice blend.
3. Tie It Up: Ensuring Uniformity
For a more uniform roast, particularly for larger cuts, it's a good idea to tie it up. This simple technique helps ensure even cooking, preventing the meat from shrinking unevenly and ensuring a consistent texture throughout. Using butcher's twine, tie the roast at regular intervals along its length, creating a secure and evenly distributed shape. It's a small detail that makes a significant difference.
I remember struggling with unevenly cooked roasts in my early days of cooking. After learning the simple trick of tying the roast, it transformed my results. It allowed for even heat distribution and a more consistent texture, making a noticeable difference in both the look and the taste of my roast. It's a technique I've never looked back on.
(Part 3) Searing the Roast: Building a Flavorful Foundation

Searing is a critical step in creating a truly remarkable roast. It's the act of quickly browning the exterior, creating a flavorful crust that locks in the juices and enhances the overall taste. It's a transformative process that elevates your roast from ordinary to extraordinary.
1. The Hot Pan Method: Classic Searing for a Crispy Crust
For a classic sear, you'll need a heavy-bottomed pan, preferably cast iron, and a good dose of heat. The pan should be smoking hot, almost too hot to touch. Add a tablespoon or two of oil, allowing it to shimmer before carefully placing the roast in the pan, ensuring there's enough space for it to brown evenly. Sear for about 3-4 minutes per side, aiming for a beautiful, golden brown crust. Don't hesitate to use a spatula to gently lift and rotate the roast to ensure even browning on all sides.
I love the crispness and depth of flavor that the hot pan method delivers. The sear creates a flavorful barrier, keeping the juicy meat inside tender and flavorful. The aroma of browning beef fills the kitchen, a sensory teaser of the deliciousness to come.
2. The Oven-Safe Pan Method: Convenience Meets Flavor
If you're using a roasting pan with an oven-safe handle, you can streamline the process by combining searing and roasting. Preheat your oven to a high temperature (450°F/230°C). Heat the roasting pan with a drizzle of oil, then place the roast in the pan and sear for about 5 minutes per side. This method is a bit more convenient, but you might not achieve the same intense sear as the hot pan method.
I often use this method for weeknight roasts, where convenience is key. It's a great way to get a good sear without the extra step of transferring the roast from a pan to the oven. While the intensity of the sear might not be as pronounced, the result is still a flavorful and perfectly cooked roast.
(Part 4) Roasting to Perfection: The Art of Slow Cooking
After the fiery sear, it's time for a slow, gentle transformation. The roasting process is where the magic truly happens, where the heat slowly transforms the roast into a tender, juicy, and flavorful masterpiece. It's a testament to the power of patience and the artistry of slow cooking.
1. Lower the Heat: A Gentle Embrace for Tenderness
Once the roast is seared, lower the oven temperature to 325°F (160°C). This gentler heat allows for even cooking, preventing the exterior from becoming overcooked while ensuring the interior reaches the desired level of doneness. It's a delicate dance of heat and time, resulting in a roast that's tender and juicy throughout.
2. The Time Factor: A Balance of Doneness and Patience
The roasting time depends on the size and thickness of your roast. As a general rule, plan for about 15-20 minutes per pound for a medium-rare roast. For a well-done roast, add another 5-10 minutes per pound. It's always a good idea to use a meat thermometer to ensure accuracy, especially for larger roasts. It's better to err on the side of caution and check the internal temperature rather than overcooking the roast.
I often use a combination of time and temperature to gauge the doneness of my roast. I start with a general estimate based on weight, then use a meat thermometer to check the internal temperature. This ensures the roast is cooked to my desired level of doneness, whether it's medium-rare, medium, or well-done.
3. The Rest is Key: Unlocking Flavor and Tenderness
Once the roast reaches the desired internal temperature, resist the temptation to carve it right away. Let it rest for 15-20 minutes before carving. This crucial step allows the juices to redistribute throughout the meat, resulting in a more flavorful and tender roast. Cover the roast with foil during this resting period to keep it warm. It's a simple technique that yields a remarkable difference in the final product.
I've learned the importance of letting the roast rest over the years. It's a simple step that significantly elevates the final result. The juices redistribute, creating a more flavorful and tender roast that's a delight to savor.
(Part 5) Monitoring the Roast: Ensuring Perfect Doneness
The key to a successful beef loin roast is monitoring its progress, ensuring it reaches the desired level of doneness without overcooking. A watchful eye and a reliable meat thermometer are your trusted companions in this culinary journey.
1. The Meat Thermometer: A Culinary Compass for Doneness
A meat thermometer is an invaluable tool, allowing you to check the internal temperature of the roast without having to guess. It's a culinary compass, guiding you towards perfect doneness. Aim for an internal temperature of 135°F (57°C) for a medium-rare roast, 145°F (63°C) for a medium roast, and 160°F (71°C) for a well-done roast.
2. The Touch Test: A Hands-On Guide to Doneness
While a meat thermometer is the most accurate method for checking doneness, you can also use the touch test as a supplementary guide. Gently press the roast with a finger. If it feels firm and springy, it's likely medium-rare. If it's slightly firmer, it's medium. And if it feels very firm, it's likely well-done. Remember, this test is a rough guideline and should be used in conjunction with a meat thermometer.
I often use the touch test as a visual confirmation of the meat thermometer reading. It gives me a sense of the roast's doneness, supplementing the more precise data from the thermometer. It's a hands-on approach to understanding the roast's progress.
(Part 6) Making the Most of the Roast: Elevate the Experience
You've successfully roasted your beef loin, creating a culinary masterpiece. Now, it's time to savor your accomplishment and elevate the experience to new heights. Think of this as the final act, bringing the entire performance to a crescendo of flavor and satisfaction.
1. The Gravy Game: A Symphony of Richness and Moisture
Gravy is the perfect accompaniment to any roast, adding a layer of richness and moisture that complements the savory flavors of the meat. It's the orchestral accompaniment to your culinary masterpiece. You can make a simple gravy using the pan drippings, or get creative with homemade stocks, herbs, and even a splash of wine.
I often use a simple pan drippings gravy, creating a classic and satisfying complement to my roast. But I also love experimenting with different flavor combinations. A red wine gravy adds a touch of complexity, while a mushroom gravy enhances the earthy notes of the roast. The possibilities are endless, allowing you to create a gravy that truly complements your culinary creation.
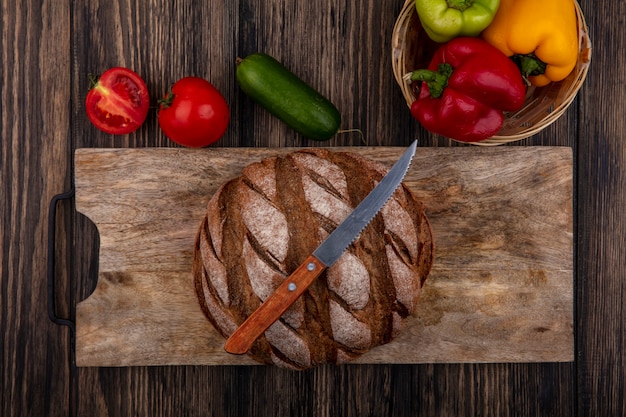
2. side dish Symphony: A Culinary Ensemble of Flavors
No roast is complete without a symphony of side dishes, each adding its own unique flavor and texture to the overall culinary experience. Think of them as the supporting cast, adding depth and complexity to the main attraction. Roasted vegetables like carrots, potatoes, and Brussels sprouts add vibrant color and earthy flavors. Classic mashed potatoes provide creamy comfort, while a creamy risotto offers a touch of elegance. A fresh salad adds a burst of brightness and freshness, balancing the richness of the roast.
I love creating a diverse array of side dishes, each complementing the roast in a unique way. Roasted vegetables provide a contrasting texture and a burst of color, while a creamy mashed potato adds a comforting element. A simple green salad balances the richness of the roast, providing a refreshing touch. It's a culinary ensemble, with each side dish contributing to a harmonious and satisfying dining experience.
(Part 7) Beyond the Basics: Variations and Twists – Unleash Your Creativity
Now that you've mastered the fundamentals, it's time to unleash your culinary creativity. Experiment with variations and twists, transforming your beef loin roast into a signature dish that reflects your personal style. Think of this as the encore, where you showcase your unique talents and leave a lasting impression.
1. Rub It In: A Symphony of Spice and Flavor
Spice rubs are a fantastic way to add depth of flavor to your roast. It's like adding a chorus of spices, each contributing to a complex and harmonious melody of flavor. Experiment with different combinations of herbs, spices, and even sweeteners. I love using a blend of paprika, cumin, garlic powder, and brown sugar for a sweet and smoky kick.
I've spent years experimenting with different spice rubs, creating a collection of flavor profiles that I love to share with friends and family. A simple blend of rosemary, thyme, and garlic powder works wonders for a classic roast. For a more adventurous flavor, I use a blend of smoked paprika, cumin, and chili powder, adding a touch of heat and depth. And for a sweet and smoky flavor, I rely on a blend of paprika, cumin, garlic powder, and brown sugar. The possibilities are endless, allowing you to create a unique spice rub that reflects your personal taste.
2. Glaze It Up: A Touch of Shine and Extra Flavor
Glazes add a touch of shine and extra flavor to the roast, taking it to the next level. It's like adding a final flourish, a touch of elegance that elevates the visual appeal and taste of your roast. Try a simple honey-soy glaze for a sweet and savory combination. Or experiment with a red wine reduction glaze for a more complex flavor profile. The possibilities are endless, allowing you to create a glaze that complements your roast and personal taste.
I often use a honey-soy glaze for a quick and easy option, adding a touch of sweetness and savory depth to the roast. But I also love experimenting with more complex glazes, like a red wine reduction glaze, which adds a touch of richness and complexity. A cranberry glaze offers a tart and festive twist, perfect for holiday gatherings. The key is to choose a glaze that complements the flavor of your roast and your personal preferences.
3. Stuff It Up: A Culinary Surprise Inside
For a showstopping roast, consider stuffing it! It's a culinary surprise, a hidden treasure of flavor within the roast. A classic stuffing made with bread crumbs, herbs, and sausage is a timeless choice, but don't be afraid to get creative. Mushroom and herb stuffing, or a hearty lentil stuffing, can add a delicious complexity to your roast.
I love the richness and complexity that stuffing adds to a roast. It's a way to incorporate additional flavors and textures, creating a truly satisfying meal. I often use a classic breadcrumb stuffing, but I also enjoy experimenting with different variations. A wild rice stuffing adds a nutty flavor, while a spinach and feta stuffing offers a savory and tangy twist. The possibilities are endless, allowing you to create a unique and delicious stuffing that complements your roast.
(Part 8) Leftovers: Turning the Roast into a Feast
The joy of a roast doesn't end with the initial meal. Leftovers are an opportunity to create a whole new culinary adventure. Think of it as a second act, a new chapter in your roast's story.
1. The Cold Roast Sandwich: A Classic comfort food
Thinly slice the leftover roast and pile it high on crusty bread with a smear of mustard, a slice of cheese, and your favorite toppings. It's a classic comfort food, a simple and satisfying way to enjoy the delicious leftovers.
2. Beef Stew Delight: A Hearty and Comforting Meal
Chop the leftover roast into bite-sized pieces and simmer them in a flavorful stew with vegetables, potatoes, and herbs. This is a hearty and comforting meal, perfect for a chilly evening. It's a way to transform leftovers into a new and satisfying dish.
3. Beef Salad Surprise: A Light and Refreshing Meal
Dice the leftover roast and toss it with a mixed green salad, fresh herbs, and a vibrant dressing. It's a light and refreshing meal, perfect for a summer lunch or a light dinner. It's a way to enjoy the leftovers in a new and lighter format, perfect for a warmer day.
FAQs
Here are a few frequently asked questions about beef loin roast.
- What's the best way to store a beef loin roast?
Store it in the refrigerator for 3-5 days, wrapped tightly in plastic wrap or aluminum foil. This ensures the roast stays fresh and flavorful for several days.
- Can I freeze a beef loin roast?
Yes, you can freeze a beef loin roast for up to 3 months. Wrap it tightly in freezer paper or plastic wrap and place it in a freezer-safe bag. Freezing is a great way to preserve the roast for future use.
- How do I know if a beef loin roast is bad?
If the roast has an off odor or a slimy texture, it's best to discard it. These are signs that the roast has spoiled and is no longer safe to eat. Trust your senses – if something doesn't look or smell right, it's best to err on the side of caution.
- What are some good side dishes for beef loin roast?
Roasted vegetables, mashed potatoes, risotto, salads, and stuffing are all excellent side dishes for beef loin roast. These classic accompaniments create a harmonious culinary experience, complementing the richness and flavor of the roast.
- What are some tips for carving a beef loin roast?
Use a sharp carving knife and cut against the grain of the meat. Slice the roast thinly and arrange it on a platter. Carving against the grain ensures tender and evenly cut slices, making the roast easier to enjoy.
And there you have it, your ultimate guide to a tender, juicy beef loin roast! Remember, it's all about selecting the right cut, prepping it properly, and taking your time during the roasting process. With a little practice and patience, you'll be turning out delicious beef loin roasts that will have everyone raving. Enjoy the journey and the delicious results!
Everyone is watching

How to Cook Frozen Lobster Tails Perfectly: A Step-by-Step Guide
RecipesLobster. Just the word conjures up images of lavish meals, special occasions, and a taste of luxury. But let's...

Pigs in a Blanket Cooking Time: How Long to Bake for Perfect Results
RecipesAh, pigs in a blanket. Just the name conjures up images of those delightful little parcels of crispy pastry en...

Pork Fillet Cooking Time: How Long to Cook It Perfectly
RecipesPork fillet, or tenderloin as it's sometimes called, is a real favourite in our house. It's so versatile, and...

The Ultimate Guide to Tender, Juicy Pulled Pork
RecipesRight, let's talk pulled pork. It's one of those dishes that just screams "comfort food," doesn't it? I mean...

The Ultimate Guide to Cooking Sweet Potatoes: From Roasting to Mashing
RecipesSweet potatoes. Just the name conjures up images of warm, comforting dishes, bursts of vibrant color, and a to...