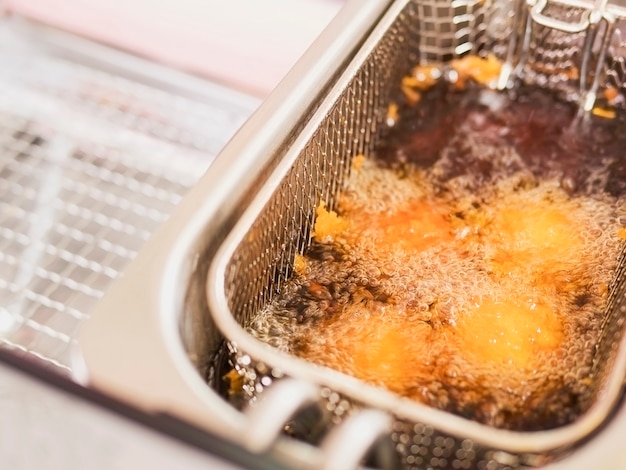
Right, let’s talk chicken tenders. We all know those little nuggets of fried goodness are a classic for a reason. Who doesn't love a crispy, juicy chicken tender? But let’s face it, frying anything can be a bit of a faff. Not to mention, the whole messy cleanup afterwards. That's why, when I got my hands on an air fryer a while back, I knew I had to try whipping up some crispy chicken tenders in it. And let me tell you, it was a revelation! The results were absolutely brilliant. Forget greasy, soggy tenders – these were perfectly golden brown, crispy on the outside, and juicy on the inside. They were so good, in fact, that I’ve been making them all the time ever since.
Now, I’m not saying you should ditch your deep fryer altogether. But for a quick and easy way to get those delicious crispy chicken tenders, an air fryer is definitely the way to go. So, if you’re looking for a recipe that’s both delicious and convenient, you’ve come to the right place. I’m going to walk you through my tried-and-tested method, from choosing the right chicken to getting that perfect golden-brown crust. You’ll be amazed at how simple it is to achieve restaurant-quality chicken tenders at home.
(Part 1) The Chicken: The Foundation of Flavor
Let’s start with the most important ingredient: the chicken. The key to good chicken tenders is using good quality, lean chicken breast. If you can get free-range, that’s even better. It’s going to make a world of difference in the taste.
Choosing the Right Chicken: A Matter of Quality
You want to pick chicken breasts that are nice and thick, about an inch or so. That way, they’ll hold up well during cooking and you won’t end up with dry, tough tenders. You’ll want to make sure there’s no discolouration, and the chicken smells fresh. Remember, a good sniff test goes a long way. And remember, if you’re not sure, ask your butcher for advice. They’re the experts, after all. They can point you towards the most tender and flavorful cuts.
Preparing the Chicken: A Little Prep Goes a Long Way
Once you’ve got your chicken, it’s time to get chopping. This is where you can go wild and decide on the size and shape you want your tenders. You can cut them into long strips or little bite-sized pieces. It’s all up to you, really. The important thing is to make sure they’re all about the same size so they cook evenly.
Before you start cooking, I like to give the chicken a little marinade. This adds extra flavour and helps to keep it juicy. I use a simple mixture of olive oil, lemon juice, garlic, and herbs. But feel free to get creative and experiment with different flavour combinations. You can try adding soy sauce, honey, or even a bit of chilli flakes for a bit of a kick. I sometimes add a dash of smoked paprika for a touch of smoky depth.
Just remember, if you’re marinating your chicken, let it sit in the marinade for at least 30 minutes, but even better, for a few hours in the refrigerator. This will allow the flavors to really penetrate the chicken.
(Part 2) The Batter: Crafting the Crispy Crust

Okay, so you’ve got your chicken sorted. Now, let’s move on to the batter. The key to achieving that perfect crispy exterior is all in the batter. I’ve experimented with various batter recipes, but this one is my favourite. It’s simple, straightforward, and gives the tenders a nice, crispy coating.
The Classic Breadcrumb Batter: A Timeless Favorite
This is the batter I use most often because it’s simple, reliable, and always delivers fantastic results. Here’s what you need:
- 1 cup plain flour
- 1 teaspoon paprika
- 1 teaspoon garlic powder
- 1/2 teaspoon onion powder
- 1/2 teaspoon salt
- 1/4 teaspoon black pepper
- 1 cup breadcrumbs
- 1 egg, beaten
- 1/4 cup milk
For extra crunch, you can use panko breadcrumbs instead of regular breadcrumbs. Panko is a Japanese-style breadcrumb that's lighter and crispier, making it ideal for creating a super-crunchy coating.
Preparing the Batter: A Simple Mix for a Perfect Result
Now, you’re going to want to mix everything up and make sure it’s evenly distributed. I use a shallow dish for each of the batter components. This makes it easier to coat the chicken without making a huge mess.
First, combine the flour, paprika, garlic powder, onion powder, salt, and pepper in one shallow dish. Next, whisk the egg and milk in a separate dish. And finally, spread out the breadcrumbs in a third dish. Once you’ve got that done, set aside your batter. We’ll get to it in the next step.
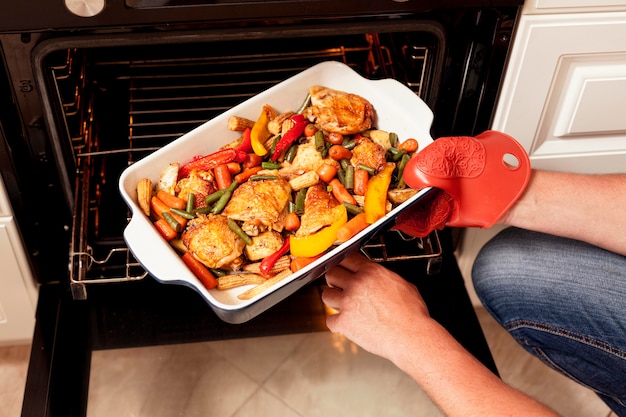
(Part 3) The Air Frying Process: The Magic Happens Here
Alright, time to get those tenders into the air fryer. This is where the magic happens.
Preheating the Air Fryer: A Key to Even Cooking
The first thing you want to do is preheat your air fryer. I usually preheat mine to 375°F (190°C). This helps to ensure that the chicken tenders cook evenly and get nice and crispy.
Breading the Chicken: A Simple Three-Step Process
Now, you’re going to take your chicken tenders and bread them one by one. This is where you want to be careful not to over-crowd your workspace. First, dip each tender into the beaten egg, making sure it’s fully coated. Next, coat the chicken tender in the flour mixture, ensuring it’s covered on all sides. Finally, dip the tender into the breadcrumbs, pressing them gently to make sure they stick. Now, you’ve got yourself a perfectly breaded chicken tender.
Cooking the Chicken: Achieving Crispy Perfection
Now, you’re going to place the breaded chicken tenders into the air fryer basket, making sure they’re not overcrowded. You don’t want to overcrowd the air fryer because it’s going to prevent them from getting crispy.
Cook for about 10-12 minutes, flipping them halfway through. You want to make sure they’re golden brown and cooked through. You can check for doneness by cutting into one of the tenders and making sure the meat is no longer pink.
If you find your chicken tenders are browning too quickly, you can reduce the air fryer temperature by 25 degrees Fahrenheit.
(Part 4) Serving and Enjoying: Elevate the Experience
Okay, so now you’ve got your delicious crispy chicken tenders. You’ve got to figure out what you want to serve them with. That’s the best part!
Serving Suggestions: From Classic to Creative
There are so many ways to serve these beauties. You can keep it simple with a side of fries or salad. Or, you can get fancy with a dipping sauce. Some of my go-to dipping sauces include:
- Honey mustard
- bbq sauce
- Buffalo sauce
- Ranch dressing
- Blue cheese dressing
- Spicy mayo (mayo with sriracha or your favorite hot sauce)
For a lighter option, try a side of roasted vegetables, like asparagus or broccoli, or a fresh salad with a light vinaigrette. You can also get creative and serve your chicken tenders in a wrap or on a sandwich.
Ultimately, it’s all about what you enjoy. Experiment with different dipping sauces until you find your favourites. You can even create your own signature dipping sauce.
(Part 5) Tips and Tricks: Mastering the Art of Crispy Chicken
Now that you’ve got the basics down, here are a few tips and tricks to help you take your air fryer chicken tenders to the next level.
Tips for Crispy Chicken: Maximize the Crunch
- Don’t overcrowd the air fryer basket. This will ensure that the chicken tenders cook evenly and get nice and crispy.
- Shake the basket halfway through cooking to help ensure that all sides of the chicken tenders get crispy.
- Add a few drops of oil to the air fryer basket before adding the chicken tenders. This will help to prevent them from sticking and will also give them a nice, crispy finish.
- If you’re looking for extra-crispy chicken tenders, try using panko breadcrumbs instead of regular breadcrumbs. Panko breadcrumbs are larger and lighter, which helps to create a crispier crust.
- Don't overcook the chicken tenders. Overcooked chicken will be dry and tough.
(Part 6) Different Flavor Variations: Get Creative with Your Chicken
Now that you’ve got the basic recipe down, you can have fun experimenting with different flavour variations. This is where you can let your creativity run wild.
Spicy Chicken Tenders: Add a Kick to Your Bite
To make spicy chicken tenders, simply add some cayenne pepper, paprika, or chili flakes to the batter. If you want to really crank up the heat, you can even add some hot sauce to the dipping sauce. I love to add a pinch of smoked paprika for a hint of smoky heat.
Garlic Parmesan Chicken Tenders: Embrace the Savory
For a more savoury flavour, try adding some garlic powder, parmesan cheese, and oregano to the batter. You can also serve these with a side of marinara sauce for a real Italian twist.
Honey Garlic Chicken Tenders: Sweet and Savory Bliss
Honey garlic chicken tenders are a popular choice because of their sweet and savory flavour. To make these, simply add some honey and garlic powder to the batter. You can also serve these with a side of dipping sauce, such as honey mustard or sweet chili sauce.
Lemon Herb Chicken Tenders: A Light and Refreshing Option
For a light and refreshing flavour, try adding some lemon zest and herbs, such as parsley, thyme, or rosemary, to the batter. You can also serve these with a side of lemon wedges for a tangy finish. This is a great option for a lighter meal.
Asian-Inspired Chicken Tenders: A Taste of the East
For a flavor adventure, consider adding a touch of Asian-inspired spices to your batter. You could add soy sauce, ginger, garlic, sesame oil, and a pinch of red pepper flakes for a spicy kick. This is a great way to change things up and try something new.
(Part 7) Storage and Leftovers: Making the Most of Your Chicken
So, you’ve got all these wonderful chicken tenders, and you want to make sure that you can enjoy them all. Here are some tips for storing and reheating leftovers.
Storing Leftovers: Keep Your Chicken Fresh
You can store leftover chicken tenders in an airtight container in the refrigerator for up to 3 days. Just make sure they’re fully cooled before you put them in the fridge.
Reheating Leftovers: Revive Your Crispy Tenders
You can reheat leftover chicken tenders in the air fryer, oven, or microwave. Each method has its advantages and disadvantages.
To reheat in the air fryer, simply place them in the basket and cook for 2-3 minutes at 350°F (175°C). The air fryer will help to crisp up the tenders again and will provide the best results for maintaining their crunch.
To reheat in the oven, place them on a baking sheet and cook for 5-7 minutes at 350°F (175°C). This is a good option if you're reheating a larger batch of chicken tenders.
To reheat in the microwave, place them on a microwave-safe plate and heat for 30-60 seconds. This is the fastest option, but the chicken tenders may not be as crispy as they were when they were freshly cooked.
(Part 8) The Air Fryer Advantage: Unlocking the Benefits
Alright, let’s talk about the air fryer itself. Why is this thing so good?
Healthier Option: Enjoy Delicious without the Guilt
The air fryer is a healthier way to cook chicken tenders because it uses less oil. This means that the tenders will have fewer calories and less fat. The air fryer circulates hot air around the food, which helps to cook it evenly and achieve that crispy texture. It’s also a good option if you’re trying to eat healthier.
Convenience: Quick and Easy Cooking
I’ve got to say, this is my favourite part of the air fryer. It’s so convenient. It’s quick and easy to use, and it’s perfect for small batches of food. You don’t have to worry about heating up a big pot of oil, and there’s no mess to clean up afterwards.
Versatile Appliance: Beyond Chicken Tenders
Another thing I love about the air fryer is that it’s super versatile. You can use it to cook all sorts of things, from chicken wings to fries to vegetables. You can even bake cakes and desserts in it. The possibilities are endless!
(Part 9) The Final Verdict: Air Fryer Chicken Tenders are a Winner
So, there you have it. My guide to making the perfect air fryer chicken tenders. I truly believe that this recipe is a game-changer, and it’s going to make a difference in your life. This recipe is easy to follow, and the results are always delicious. You’re going to be absolutely amazed by how quick and easy it is to get those perfect crispy chicken tenders.
From the first bite, you'll understand why these are so addictive. They're crispy, juicy, and bursting with flavour. Plus, they're so easy to make, even the most novice cooks can achieve success. So, what are you waiting for? Get those air fryers fired up and get ready to enjoy the perfect crispy chicken tenders.
FAQs
Q. What type of air fryer do I need?
You can use any type of air fryer for this recipe. However, if you’re looking for a bigger air fryer, you’ll need one that has a large enough basket to fit all the chicken tenders without overcrowding them. If you're cooking for a larger family or a group of friends, a larger air fryer with a bigger capacity is ideal.
Q. Can I make these chicken tenders ahead of time?
You can definitely make these chicken tenders ahead of time. Just follow the same recipe, but instead of cooking them immediately, store them in the refrigerator for up to 24 hours. When you’re ready to eat, simply reheat them in the air fryer.
Q. How do I know when the chicken tenders are cooked through?
The chicken tenders should be cooked through when the internal temperature reaches 165°F (74°C). You can check the temperature with a meat thermometer. If you don’t have a meat thermometer, you can cut into one of the chicken tenders and make sure the meat is no longer pink.
Q. What if the chicken tenders are not crispy enough?
If the chicken tenders are not crispy enough, you can try cooking them for an additional 1-2 minutes in the air fryer. If they’re still not crispy, you can try using panko breadcrumbs instead of regular breadcrumbs. You can also try increasing the air fryer temperature by 25 degrees Fahrenheit.
Q. Can I use frozen chicken tenders?
While you can use frozen chicken tenders, it is recommended to use fresh chicken tenders for the best results. If you’re using frozen chicken tenders, you’ll need to thaw them completely before breading and cooking them. Thaw the chicken tenders in the refrigerator overnight for the best results.
Everyone is watching

How to Cook Frozen Lobster Tails Perfectly: A Step-by-Step Guide
RecipesLobster. Just the word conjures up images of lavish meals, special occasions, and a taste of luxury. But let's...

Pigs in a Blanket Cooking Time: How Long to Bake for Perfect Results
RecipesAh, pigs in a blanket. Just the name conjures up images of those delightful little parcels of crispy pastry en...

Pork Fillet Cooking Time: How Long to Cook It Perfectly
RecipesPork fillet, or tenderloin as it's sometimes called, is a real favourite in our house. It's so versatile, and...

The Ultimate Guide to Cooking Delicious Frankfurters
RecipesLet's face it, we all love a good frankfurter. It's a classic, simple, and always satisfying. But let's be rea...

Wolf Meat Recipes: A Guide to Cooking Wild Game
RecipesLet's be honest, you don't see wolf meat at your local butcher shop every day. It's a bit of a wild card, but ...