You've got a whole chicken in your fridge, and you're thinking about roasting it. A classic dish, right? But how long does it actually take? And how do you make sure it's perfectly cooked, with crispy skin and juicy meat? I've been there too, my friend. It took me a few tries (and a couple of slightly undercooked chickens, let’s be honest!), but I've finally nailed the perfect method. And I'm here to share it with you.
We’re going to dive deep into the art of roasting a chicken at 400 degrees, covering everything from choosing the right chicken to seasoning, cooking time, and even how to tell if it's done. This guide is designed to make roasting a chicken a breeze, even if you're not a seasoned chef. So grab a pen and paper, or bookmark this page for later, because we're about to get into it!
(Part 1) Choosing the Right Chicken: It’s All About Quality
You know the saying, "you get what you pay for?" Well, it's definitely true for roasting a chicken. I've learned that the hard way! The first step is picking out a good bird. It might sound obvious, but choosing the right chicken really makes a difference in the final flavour and texture.
1. Fresh or Frozen?
Personally, I'm a big fan of fresh chicken. It just has that lovely, fresh flavour. Plus, you can usually find organic chickens, which are a great choice for those who care about ethical farming practices. But if you're on a budget, frozen chicken works just fine, too. You'll just need to thaw it out properly first and maybe add a little extra cooking time.
2. Size Matters!
The size of your chicken is going to be a big factor in how long it takes to cook. A 3-4lb chicken will take about 1 hour and 15 minutes at 400 degrees. But don’t worry, we'll get into the specifics later. For now, just remember that you can always adjust the cooking time based on the size of your bird. A smaller chicken will cook faster, while a larger one will take longer.
3. Give It a Look
When you're picking out a chicken, take a moment to examine it. Make sure the skin is nice and smooth, and there are no signs of bruising or discoloration. You also want to make sure that the chicken smells fresh and doesn’t have any off-putting odour. Trust your nose, my friend. If it doesn’t smell right, it probably isn’t.
(Part 2) Preparing the Chicken: The Key to Juicy and Flavorful Meat
You’ve got your perfect chicken, now it’s time to get it ready for roasting. It's not as complicated as it might seem, I promise! But a little prep goes a long way in ensuring that your chicken comes out juicy and full of flavour.
1. Pat It Dry: Get Rid of Excess Moisture
This might seem like a small thing, but it’s actually really important. When you pat the chicken dry with paper towels, you're getting rid of any excess moisture that could turn into steam and make the skin soggy during cooking. It's all about getting that crispy, golden-brown skin!
2. Seasoning: Get Creative!
Here’s where you can really let your culinary creativity shine. A simple combination of salt and pepper is always a good choice. But if you’re feeling adventurous, you can add other herbs and spices to your liking. I love to add a bit of garlic powder, paprika, and dried herbs, but you can use anything that tickles your fancy. Just remember to be generous with your seasonings, as the flavours will intensify during roasting.
3. Stuff or No Stuff?
Now this is a personal preference! I love to stuff my chicken with a simple mix of onions, herbs, and lemon, but you can also use stuffing, sausage, or whatever your heart desires. If you’re stuffing, make sure you’re using a recipe that’s safe to cook inside the chicken and that you cook it to the right temperature. The USDA recommends cooking stuffing separately to ensure it reaches the proper temperature.
4. Truss It Up: Keeping It Neat and Tidy
Trussing the chicken isn't essential, but it definitely helps! Trussing involves tying the legs and wings together to keep the chicken compact during cooking. This helps it cook more evenly and ensures that the breasts don’t dry out. You can use kitchen twine, but I’ve found that using a few toothpicks does the job just as well!
(Part 3) Roast It Right: Time to Get Cooking!
Okay, your chicken is prepped, it's time to roast! This is where a little bit of planning comes in handy.
1. Oven Temperature: 400 Degrees is the Magic Number
You're using 400 degrees Fahrenheit for this guide, so make sure your oven is preheated to that temperature. It's crucial to start with a hot oven for getting that crispy skin. Just make sure you’ve got a good oven mitt ready, because you’ll need to handle a hot pan!
2. The Right Pan: Size and Materials Matter
I usually use a roasting pan that’s big enough to hold the chicken with a little space around it. This helps with even cooking and prevents the chicken from sticking to the bottom. You can use a cast iron pan, a regular baking sheet, or even a dutch oven. Just make sure it’s oven-safe!
3. Don’t Overcrowd: Give It Some Breathing Room
It’s important to give the chicken some space in the oven. If you cram too many other dishes around it, the oven temperature won’t be consistent, and your chicken might not cook evenly. So make sure it has enough room to breathe!
(Part 4) Cooking Time: A Guide for Every Size
Here’s where we get down to the nitty-gritty. Cooking times can vary depending on the size of your chicken, but here's a general guide that I've found works well:
1. General Rule: 1 Hour and 15 Minutes for a 3-4 lb Chicken
This is the average time it takes to cook a 3-4 lb chicken at 400 degrees. However, you should always double-check the cooking time based on the size of your chicken, which we'll get into in a minute.
2. Calculating Cooking Time: A Handy Table
Here's a handy table you can use to estimate cooking time based on the weight of your chicken:
| Weight (lb) | Cooking Time (Minutes) |
|---|---|
| 2-3 | 60-75 |
| 3-4 | 75-90 |
| 4-5 | 90-105 |
| 5-6 | 105-120 |
Just find the weight of your chicken and you'll know how long to cook it for. Keep in mind that these are estimates, and you might need to adjust the cooking time slightly depending on your oven and how well your chicken is cooking.
3. Don't Be Afraid to Check: The meat thermometer is Your Friend
The best way to know if your chicken is cooked through is to use a meat thermometer. Insert it into the thickest part of the thigh, making sure it doesn’t touch the bone. The internal temperature should reach 165 degrees Fahrenheit for safe eating. The USDA recommends checking the temperature in multiple places to ensure the entire chicken is cooked through.
(Part 5) Resting Time: A Crucial Step for Juicy Meat
Once your chicken is cooked, it’s important to let it rest before carving. Resting allows the juices to redistribute throughout the meat, which will make it more tender and juicy.
1. Ten Minutes of Relaxation: Let It Cool Down
Ten minutes is the ideal resting time for a whole chicken. While the chicken is resting, you can make your favourite gravy or prepare your side dishes. Just cover it loosely with aluminium foil to keep it warm and moist.
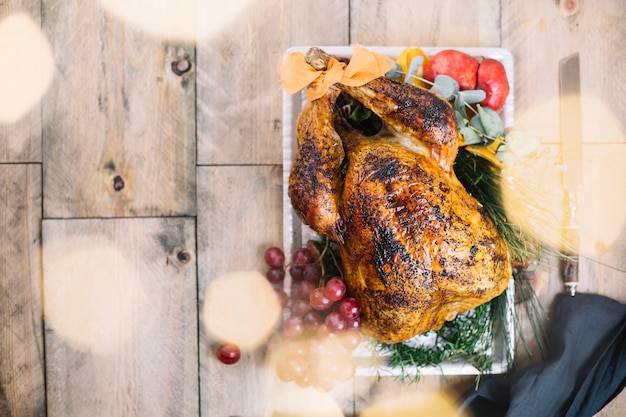
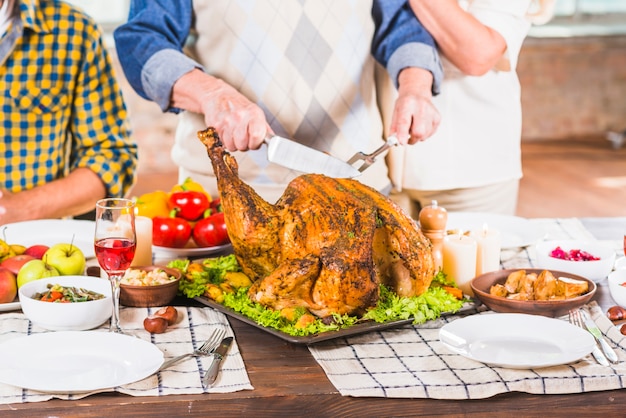
(Part 6) Carving the Chicken: A Masterful Art
Now, this is where you get to show off your culinary skills! Carving a chicken might seem daunting at first, but it’s actually quite simple.
1. Get Your Tools Ready: Knife and Carving Board
You’ll need a sharp knife and a sturdy carving board. I love using a carving knife, but a good chef’s knife works just as well. Make sure it’s sharp for easier carving!
2. Start with the Legs: First Things First
To carve the legs, simply cut through the joint where the leg meets the thigh. Then, remove the leg from the chicken. You can then cut the thigh into smaller pieces, or leave it whole, depending on your preference.
3. The Wings Come Next: Easy Peasy
The wings are easy. Just cut through the joint where the wing meets the body. You can then separate the wing into two pieces, the drumette and the winglet.
4. Finally, the Breast: Time for the Star of the Show
The breast is the star of the show, and it's also the easiest part to carve. Simply cut along the bone on either side of the breast, and then lift the breast off the chicken. You can then slice the breast into thinner pieces if you want.
(Part 7) Leftovers: Making the Most of Your Roasted Chicken
Who doesn’t love leftover roasted chicken? It's the perfect ingredient for sandwiches, salads, soups, or even just a quick snack.
1. Storage Time: Keep it Safe and Fresh
Make sure you store your leftover chicken properly! Store it in an airtight container in the fridge, and use it within 3-4 days. Or you can freeze it for longer storage.
2. Leftover Magic: Endless Possibilities
Get creative with your leftover chicken! You can make a delicious chicken salad with mayonnaise, celery, and onion. Or make a hearty chicken soup with vegetables and noodles. The possibilities are endless! I love making chicken and vegetable curry with leftovers - it's a real crowd-pleaser!
(Part 8) Top Tips for a Perfect roast chicken
Here are some extra tips to help you achieve a perfect roast chicken every time:
1. Don't Overcook: It’s All About Timing
It’s important not to overcook the chicken, as this can make it dry. I’ve made this mistake a few times, believe me! Keep an eye on the cooking time and use a meat thermometer to make sure it’s cooked through but not overdone.
2. Basting is Key: Moist and Flavorful
Basting your chicken while it’s roasting helps to keep it moist and flavorful. You can use butter, oil, or even chicken broth. Use a spoon to baste the chicken every 30 minutes or so. It's worth the effort!
3. Roast on a Rack: For Crispy Skin
Roasting your chicken on a rack helps to circulate hot air around the chicken, resulting in crispy skin. You can use a roasting rack or even just a few wire cooling racks placed on a baking sheet.
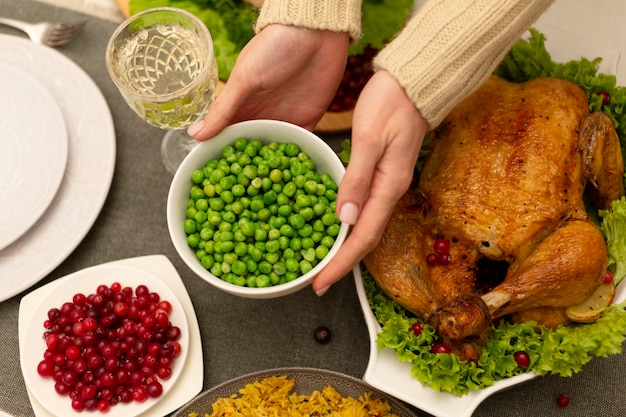
4. Don't Forget the Vegetables: A Hearty Meal
You can roast vegetables alongside your chicken for a complete meal. Potatoes, carrots, onions, and garlic are all great choices. Just make sure they’re cut into similar sizes so they cook at the same rate.
5. Experiment with Herbs and Spices: Find Your Perfect Flavor Profile
Don't be afraid to experiment with different herbs and spices. Try a blend of rosemary, thyme, and sage for a classic flavour profile. Or go for something bolder with a mix of paprika, cumin, and coriander. The possibilities are endless!
FAQs: Your Questions Answered
1. Can I roast a chicken at a lower temperature?
You can roast a chicken at a lower temperature, but it will take longer. If you’re roasting at 350 degrees fahrenheit, you can expect the cooking time to increase by about 30-45 minutes. This can be a good option if you're worried about the chicken drying out, but it will take longer to get that crispy skin.
2. What if my chicken is too large?
If your chicken is larger than 6 pounds, you might want to roast it for a longer period. Use the chart as a guide, and check the internal temperature to make sure it’s cooked through. It might also be a good idea to break the chicken into smaller pieces before roasting if it’s extremely large. This will help to ensure even cooking.
3. What do I do if the skin is too crispy?
If the skin gets too crispy, you can cover the chicken with aluminum foil during the last part of the cooking time. This will help to prevent it from getting overdone. I've found that this also helps keep the meat moist.
4. Can I reuse the pan juices to make gravy?
Absolutely! The pan juices are full of flavour, and they make a delicious gravy. Just strain the juices to remove any large pieces of fat or debris. You can then use the strained juices to make a simple gravy by whisking in flour and water.
5. What if my chicken is undercooked?
If your chicken is undercooked, don’t panic! Just put it back in the oven and cook it for a few more minutes until it reaches the correct internal temperature of 165 degrees Fahrenheit. It's best to err on the side of caution when it comes to chicken. Always ensure that the chicken is cooked to the proper temperature to prevent foodborne illness.
And that’s it, my friends! You're now equipped with all the knowledge you need to roast a perfect chicken. So go ahead and try it out. It’s really not as complicated as it seems, and you’ll be rewarded with a delicious, juicy, and flavorful meal. Happy roasting!
Everyone is watching

Corn on the Cob: The Ultimate Guide to Perfectly Cooked Ears
Healthy MealsAh, corn on the cob. Just the name evokes images of sunny days, barbecues, and that sweet, juicy flavour that ...

Scallops: The Ultimate Guide to Perfect Cooking
Healthy MealsAh, scallops. Those delicate, sweet, and utterly delicious morsels of the sea. They hold a special place in my...

Spaghetti Squash: The Ultimate Guide to Cooking and Serving
Healthy MealsRemember that time you saw spaghetti squash at the supermarket, looking all bumpy and strange, and thought, "W...

Salmon Cooking Times: Perfect Guide for Every Recipe
Healthy MealsLet me tell you, cooking salmon is an art form. It's all about getting that perfect balance: juicy and tender,...

Ham Cooking Time: How Long to Bake, Smoke, or Boil a Delicious Ham
Healthy MealsAh, ham. It's a classic, isn't it? A real crowd-pleaser, especially around holidays. And when done right, it'...