Ah, corn on the cob. It’s a summertime staple, a barbecue must-have, and a delightful treat any time of year. That sweet, juicy flavour, the satisfying crunch when you bite into a kernel – it’s pure bliss. But let’s be honest, nailing that perfect corn on the cob can be a bit of a culinary gamble. I've had my fair share of soggy, undercooked, or even charred cobs. But over the years, I’ve learned a thing or two about the art of cooking corn, and I’m here to share all my secrets with you.
(Part 1) Choosing Your Corn: The Foundation of Flavor

First things first, you need to choose the right corn. Just like picking the perfect ingredients for any great dish, selecting the right corn sets the stage for a flavourful experience. It's all about freshness and selecting the sweetest, most vibrant ears. Here's what I look for:
Finding the Perfect Ear
- Freshness is Key: If you can, snag corn straight from the farm. The taste is simply unbeatable. But even if you're buying from the supermarket, look for corn that’s been freshly delivered, with vibrant, green husks.
- Check the Husk: The husk should be bright green and tightly wrapped around the ear, like a protective blanket. If it’s dry or starting to brown, it means the corn is past its prime and might have a less sweet flavour.
- Give it a Gentle Squeeze: Gently squeeze the ear of corn. It should feel firm and plump, almost like a juicy piece of fruit. If it feels soft or squishy, it’s probably not going to be as sweet or have that satisfying crunch.
- The Sniff Test: Don’t be shy! Give those ears a little sniff. A sweet, fresh scent is a sure sign of a good ear of corn.
Remember, a little time spent selecting the perfect corn is a worthwhile investment in a delicious outcome. It's the foundation for a truly great corn on the cob experience.
(Part 2) Preparing the Corn: Getting Ready to Cook

Alright, you’ve got your perfect cobs, now it’s time to get them ready for cooking. This is where a little meticulousness pays off, ensuring a clean, flavorful result.
Cleaning the Cob
- Removing the Husks: Peel back the husks, but don’t discard them just yet! You’ll need them for some cooking methods.
- Removing the Silk: This is the messy part! You want to remove all the silk from the cob. You can do this by hand, pulling it out with your fingers. If you’re feeling impatient, a sharp knife can help scrape it off. Personally, I’m a hand-removal fan. It feels more satisfying and leaves a cleaner, more polished cob.
- A Thorough Wash: Wash the cobs thoroughly under cold running water. I like to give them a good scrub with my hands to ensure all the silk and any debris are gone.
Now your corn is ready for the cooking method of your choice. And trust me, there are some fantastic options to explore!
(Part 3) Boiling Your Corn: Classic and Reliable

Ah, boiling corn – a classic method for a reason. It's simple, straightforward, and always reliable. It might not be the most glamorous approach, but it delivers that perfectly tender, juicy corn every time. And the best part? It’s incredibly easy.
Boiling for a Perfectly Tender Cob
- Fill a Large Pot with Water: Make sure it’s enough to fully submerge the corn cobs, giving them some space to move around.
- Add a Pinch of Salt: A tablespoon of salt per large pot of water is my go-to. It brings out the corn’s natural flavour and prevents it from tasting bland.
- Bring to a Rolling Boil: Let the water come to a full boil before adding the corn. This ensures even cooking.
- Add the Corn: Carefully drop the cobs into the boiling water, making sure they’re fully submerged. Get that timer going!
- Cook for 5-7 Minutes: The exact time can vary depending on the size of your corn and how tender you like it. 5-7 minutes is a good starting point. You can always test the kernels with a sharp knife – they should be tender but not mushy.
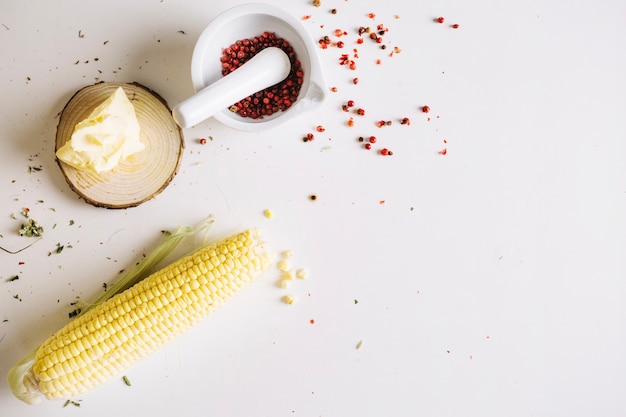
- Drain and Serve: Once the corn is cooked, drain it immediately and serve it hot. It’s perfect with a generous pat of butter and a sprinkle of salt and pepper.
Boiling delivers a truly satisfying, classic corn on the cob that’s perfect for any summer meal or barbecue.
(Part 4) Grilling Your Corn: A Smoky Delight
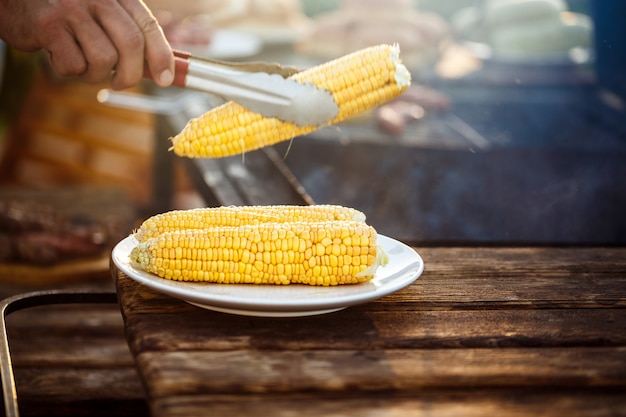
Now, let’s talk about grilling corn. This is where the fun really begins! The smoky flavour that comes from grilling takes corn on the cob to a whole new level. The key is finding that perfect balance between a crispy exterior and a tender, juicy interior.
Mastering the Grill for Smoky Perfection
- Preheat your Grill: You want a hot grill, around medium-high heat, for those perfect grill marks and a beautiful char.
- Prepare your Corn: You have two options here:
- Husks On: Leave the husks on the corn and soak them in water for about 30 minutes. This helps prevent the husks from burning and adds a lovely smoky flavour.
- Husks Off: Remove the husks and soak the corn in water for about 15 minutes to keep it moist.
Whether you leave the husks on or off, add a pat of butter or a drizzle of olive oil for extra flavour.
- Grill for 10-15 Minutes: Place the corn on the grill and cook for 10-15 minutes, turning it every few minutes for even cooking. If you’re using the husk-on method, remove the husks and check the kernels with a knife – they should be tender. You’ll know it’s done when the kernels are tender and the husk is slightly charred.
Let the corn cool slightly before digging in. Add some seasonings like garlic powder, chili powder, or smoked paprika for a truly unique flavour.
(Part 5) Roasting Your Corn: A Caramelized Treat
Hear me out on this one. roasting corn in the oven might not be the most common method, but it's seriously worth a try. It’s a little more hands-off than grilling, and the oven’s heat gives the corn a beautiful caramelized flavour, which is absolutely delicious! Plus, it’s a great option if you’re short on grill space.
Roasting for Caramelized Delight
- Preheat your Oven: Set your oven to 400 degrees Fahrenheit (200 degrees Celsius).
- Prepare your Corn: Remove the husks and silk from the corn. Give them a good wash and pat them dry. Brush the corn with olive oil or melted butter and season with salt, pepper, and any other herbs or spices you like.
- Roast for 15-20 Minutes: Place the corn on a baking sheet and roast for 15-20 minutes, or until the kernels are tender and slightly browned. Flip the corn halfway through cooking to ensure even browning.
For an extra flavour boost, try roasting the corn with chopped onions, garlic, and bell peppers for a delicious and aromatic side dish.
(Part 6) Microwaving Your Corn: A Quick and Convenient Option
I know what you’re thinking: microwaving corn? Really? But hear me out. It’s a quick and easy option when you’re short on time. And, surprisingly, it can still be delicious! Just don’t expect that smoky grilled flavour or the caramelized roasted goodness. It's more about convenience, a great option for a quick weeknight meal.
Microwaving for a Speedy Feast
- Prepare your Corn: Remove the husks and silk. Give the corn a good wash and pat it dry.
- Wrap the Corn: Wrap each cob in a damp paper towel. This helps steam the corn and keep it moist.
- Microwave for 2-3 Minutes: Place the wrapped corn in the microwave and cook for 2-3 minutes, or until the kernels are tender.
You can add a pat of butter or a sprinkle of salt and pepper before wrapping the corn. Remember, microwave ovens vary in power, so you might need to adjust the cooking time.
(Part 7) Serving Your Corn: Time to Get Creative
Now, you’ve got your perfectly cooked corn, so it’s time to serve it up! I love to keep things simple with a generous pat of butter, a sprinkle of salt and pepper, and a squeeze of lemon juice. But the possibilities are endless!
Creative Serving Ideas
- Flavored Butters: Get fancy with your butter. Try a flavoured butter, like garlic herb butter, jalapeno butter, or even a sweet honey butter. It adds a whole new dimension of flavour to your corn.
- Spice Things Up: If you like a little heat, try sprinkling some chili powder, cayenne pepper, or even a dash of hot sauce on your corn.
- Herbs: Fresh herbs, like parsley, cilantro, basil, or chives, add a beautiful aroma and a burst of flavour to your corn.
- corn salad: Cut the kernels off the cob and toss them in a salad with other summer vegetables, like tomatoes, cucumbers, and peppers. A light vinaigrette dressing will really bring out the flavours.
- Corn Dip: Combine the corn kernels with mayonnaise, sour cream, and your favourite herbs and spices for a delicious dip. Serve with tortilla chips or crackers.
You can even get creative with your presentation. Serve the corn on a platter with a variety of dipping sauces, or create individual corn skewers with different toppings. The sky's the limit!
(Part 8) Storing Your Corn: Preserving Freshness
fresh corn doesn’t last forever, so it’s important to know how to store it to keep it at its best. It’s all about maximizing freshness, which is key to preserving that wonderful flavour.
Storing for Maximum Freshness
- Refrigerate for Up to 5 Days: If you're not planning on cooking your corn immediately, you can store it in the refrigerator for up to 5 days. Keep the husks on and store the corn in a plastic bag in the crisper drawer. Remember, the longer you store it, the less sweet and juicy it will become.
- Freeze for Up to 12 Months: If you want to preserve your corn for longer, you can freeze it. Remove the husks and silk, blanch the corn in boiling water for 3-5 minutes, then plunge it into ice water to stop the cooking process. Drain the corn thoroughly and package it in freezer bags or containers. You can store frozen corn for up to 12 months.
When you're ready to use the frozen corn, you can cook it directly from frozen, but it might need a little extra cooking time.
(Part 9) Troubleshooting Tips: Saving the Day
Let’s be real, sometimes even the best laid plans go awry. You might overcook the corn, or maybe it just doesn’t have that sweetness you were hoping for. But don’t despair! We’ve all been there, and there are a few tricks up our sleeves to save the day.
Fixing Common Corn Cooking Issues
- Overcooked Corn: If you’ve overcooked your corn and it’s a little mushy, don’t worry! You can still salvage it by adding it to a salad or a soup. The extra tenderness won’t be so noticeable when it’s combined with other ingredients.
- Undercooked Corn: If you’ve undercooked your corn and it’s still too firm, simply cook it for a few more minutes in boiling water or on the grill. Just be careful not to overcook it!
- Bland Corn: If your corn tastes a bit bland, you can always boost the flavour with a little butter, salt, pepper, herbs, or spices. A squeeze of lemon juice can also add a touch of brightness.
Corn is a forgiving ingredient. Even if your cooking doesn’t go exactly as planned, there’s always a way to salvage the situation and still enjoy a delicious meal.
FAQs: Your Corn Questions Answered
I get asked a lot of questions about corn on the cob, so here are a few of the most common ones:
1. How do I know when corn is ripe?
The best way to know if corn is ripe is to check the husk. It should be bright green and tightly wrapped around the ear. You can also give the ear a gentle squeeze – it should feel firm and plump. If it feels soft or squishy, it’s likely not going to be as sweet and juicy.
2. Can I cook corn in the husk?
Yes, you can absolutely cook corn in the husk! It helps keep the corn moist and adds a lovely smoky flavour when grilling. Just be sure to soak the husks in water for about 30 minutes before grilling to prevent them from burning.
3. What’s the best way to store corn?
The best way to store corn is to refrigerate it in the husk for up to 5 days. Keep the corn in a plastic bag in the crisper drawer. If you want to store it for longer, you can freeze it. Blanch the corn in boiling water for 3-5 minutes, then plunge it into ice water to stop the cooking process. Drain the corn thoroughly and package it in freezer bags or containers. You can store frozen corn for up to 12 months.
4. What can I do with leftover corn?
Leftover corn is a great addition to salads, soups, and even dips. You can also freeze it for later use. Just be sure to cook it through before freezing.
5. Is corn a healthy food?
Yes, corn is a good source of fiber, vitamins, and minerals. It’s also a good source of antioxidants, which can help protect your cells from damage. Just be mindful of the butter and seasonings you add – they can add extra calories and fat.
I hope this ultimate guide to perfectly cooked corn on the cob has given you some helpful tips and tricks. It’s a dish that’s simple to make but full of flavour, and it’s always a crowd-pleaser. So, next time you’re looking for a delicious and satisfying side dish, give this guide a try. And remember, don’t be afraid to experiment and find what you like best. Happy cooking!
Everyone is watching

Corn on the Cob: The Ultimate Guide to Perfectly Cooked Ears
Healthy MealsAh, corn on the cob. Just the name evokes images of sunny days, barbecues, and that sweet, juicy flavour that ...

Perfect Pork Roast Oven Cooking Time: A Guide to Delicious Results
Healthy MealsThere's something truly satisfying about a perfectly roasted pork. The aroma alone is enough to make your mout...

Ham Cooking Time: How Long to Bake, Smoke, or Boil a Delicious Ham
Healthy MealsAh, ham. It's a classic, isn't it? A real crowd-pleaser, especially around holidays. And when done right, it'...

Scallops: The Ultimate Guide to Perfect Cooking
Healthy MealsAh, scallops. Those delicate, sweet, and utterly delicious morsels of the sea. They hold a special place in my...

Spaghetti Squash: The Ultimate Guide to Cooking and Serving
Healthy MealsRemember that time you saw spaghetti squash at the supermarket, looking all bumpy and strange, and thought, "W...
