Let's talk steak, shall we? Not just any steak, mind you, but the gloriously rich and flavorful striploin, the undisputed king of the grill. I've been a steak enthusiast for years, experimenting with techniques and recipes, and I've learned a thing or two along the way. This isn't just a recipe; it's an in-depth guide, a journey to steak nirvana. From choosing the perfect cut to mastering the perfect sear, we'll cover every detail of making a striploin steak that's juicy, tender, and bursting with flavor. So, grab a glass of something nice, settle in, and let's get grilling!
(Part 1) Choosing the Perfect Striploin

The Cut of the King: Striploin, the Star of the Show
Let's start with the star of the show, the striploin steak itself. Also known as a new york strip, this cut comes from the short loin of the cow and is a real charmer. Its beautiful marbling, those streaks of intramuscular fat, are the key to its rich flavor and lovely juicy texture. Think of it as nature's built-in basting system! It's a bit more tender than a ribeye, but still has that satisfying chewiness that makes steak so darn good.
Thickness Matters: Getting the Right Proportion
Now, the thickness of your steak is crucial. You want something around 1.5-2 inches thick. This is where the magic happens, you see. It allows for a perfect sear on the outside while keeping the inside juicy and pink. It's all about balance, like a well-balanced cocktail – just the right amount of everything!
The Meat of the Matter: Recognizing Quality
This is where the fun really begins – choosing your steak. Remember, you get what you pay for. A good quality striploin will have beautiful marbling, a rich, deep red color, and a firm texture. It should spring back when you press it gently. If you see any signs of discoloration, excessive fat, or a slimy surface, steer clear. That's not the quality you're looking for.
Trust Your Butcher: Seek Expert Guidance
Don't be afraid to ask your butcher for advice. They're the experts! Tell them what you're planning to cook, and they can point you towards the perfect cut. Ask about the different grades of beef available, too, to get a better understanding of the quality and price. Remember, a great butcher is like a good friend – always willing to lend a helping hand (or, in this case, a juicy steak).
(Part 2) The Prep Work: Setting the Stage for Success

The Art of Patting: Removing Excess Moisture
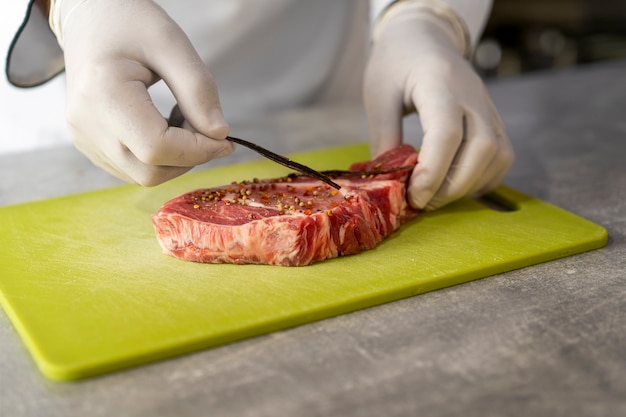
Okay, so you've got your beautiful striploin, now what? First things first, pat it dry with some kitchen paper. This removes excess moisture, which can hinder a good sear and create a soggy crust. We want a crispy, flavorful crust, don't we?
Seasoning with Flair: Enhancing Natural Flavors
Now for the seasoning. Salt and pepper are the classic duo, and for good reason. They enhance the natural flavors of the steak, bringing out its deliciousness. But feel free to experiment. I love adding a pinch of smoked paprika for a hint of smokiness, or a sprinkle of garlic powder for a touch of warmth. Remember, a little goes a long way. You want to enhance the natural flavour of the steak, not mask it.
Let It Rest: Bringing the Steak to Room Temperature
Before you even think about the grill, let the steak rest at room temperature for 30 minutes. This allows it to come up to temperature, resulting in more even cooking. It's like giving the steak a little spa day before the big event! This will ensure that your steak cooks evenly and doesn't get cold spots in the center.
(Part 3) The Grill Masterclass: Mastering the Art of the Sear

Fire Up the Grill: Achieving the Right Heat
Time to get your grill going! You want a really hot grill, like the kind that makes you flinch just looking at it. We're talking 450-500°F (230-260°C) here. This creates that beautiful sear and those gorgeous grill marks that we all crave. It's like the difference between a slow simmer and a high-powered flame.
The Sear: Creating a Crispy, Flavorful Crust
This is where the magic happens. You're going for a good sear, around 3-4 minutes per side. Be patient! Don't rush it. Let the steak get nice and crispy before flipping it. The Maillard reaction, a chemical reaction that occurs when meat is cooked at high temperatures, is what gives the steak its delicious, caramelized flavor. It's like waiting for the perfect cup of tea – you just gotta let it brew.
The Flip: Achieving Even Cooking
Once the steak is nicely seared, it's time to flip it. You want to hear that satisfying sizzle as it hits the grill. Now, you're going to cook the other side for the same amount of time, 3-4 minutes. It's all about that balance, remember? This ensures that the steak cooks evenly on all sides.
(Part 4) Bringing Down the Heat: Resting for Juiciness
Resting is Key: Allowing the Juices to Redistribute
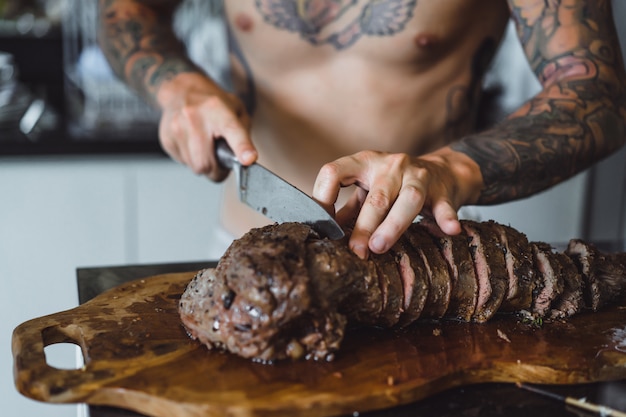
Now, don't be tempted to slice into your steak right away. It needs a little time to rest, just like us after a good meal. Cover the steak loosely with foil and let it rest for 5-10 minutes. This allows the juices to redistribute, resulting in a more tender and flavorful steak. It's like giving the steak a little post-workout stretch. This step is crucial for maximizing the tenderness and flavor of your steak.
(Part 5) Doneness Delight: Finding Your Perfect Level
A Matter of Preference: Choosing Your Doneness
There's no right or wrong answer when it comes to doneness. It's all about personal preference. Some like it rare, others like it well-done. Me, I'm a medium-rare kind of guy. It's the perfect balance of pink and tender. But the key is to cook it to your liking.
Temperature Guide: Understanding internal temperatures
To ensure your steak is cooked to your liking, use a meat thermometer. Here's a guide for different levels of doneness. The internal temperature is the most accurate way to determine the doneness of your steak. It's like checking the temperature of your oven – it ensures perfect results.
| Doneness | Internal Temperature (°F) | Internal Temperature (°C) |
|---|---|---|
| Rare | 125-130 | 52-54 |
| Medium Rare | 130-135 | 54-57 |
| Medium | 140-145 | 60-63 |
| Medium Well | 150-155 | 65-68 |
| Well Done | 160 | 71 |
Trust Your Senses: Learning to Read the Signs
Even with a thermometer, trust your senses. Give the steak a gentle press with your finger. If it feels firm but still slightly springy, it's probably cooked to your liking. It's like testing the softness of a ripe peach – you know it's just right! You can also use the color of the meat as a guide, but internal temperature is the most reliable indicator.
(Part 6) The Sidekick Showdown: Choosing the Perfect Pairing
Complementary Flavors: Creating a Harmony of Tastes
A great steak deserves a great sidekick, and by that, I mean a delicious side dish. Choose something that complements the rich flavor of the steak, without overpowering it. Think roasted vegetables, creamy mashed potatoes, or a simple salad. It's like finding the perfect dance partner – it's all about harmony!
My Top Picks: Classic side dishes for Striploin
Here are a few of my favorite side dishes to serve with striploin:
- roasted asparagus with Lemon and Garlic: This bright, flavorful side dish balances the richness of the steak with its refreshing taste. It's a classic pairing for a reason!
- Creamy Parmesan Polenta: This rich and creamy polenta provides a satisfying contrast to the tender steak. The Parmesan cheese adds a salty, nutty flavor that complements the steak perfectly.
- grilled corn on the Cob with Chili Butter: This smoky, flavorful side dish adds a touch of spice and sweetness to the steak. The chili butter adds a depth of flavor that elevates the entire meal.
- Simple Green Salad with Balsamic Vinaigrette: This light and refreshing salad provides a palate cleanser between bites of steak. The tangy balsamic vinaigrette cuts through the richness of the steak and leaves you feeling refreshed.
Don't Be Afraid to Experiment: Finding Your Perfect Match
The possibilities are endless! Don't be afraid to get creative and try new things. Experiment with different flavors and textures. You might just discover your new favorite steak companion. Whether it's a side dish from your grandmother's recipe book or a trendy new dish you discovered at a restaurant, don't be afraid to try something new and see what works for you.
(Part 7) The Finishing Touches: Adding a Touch of Magic
A Splash of Sauce: Elevating the Flavor Profile
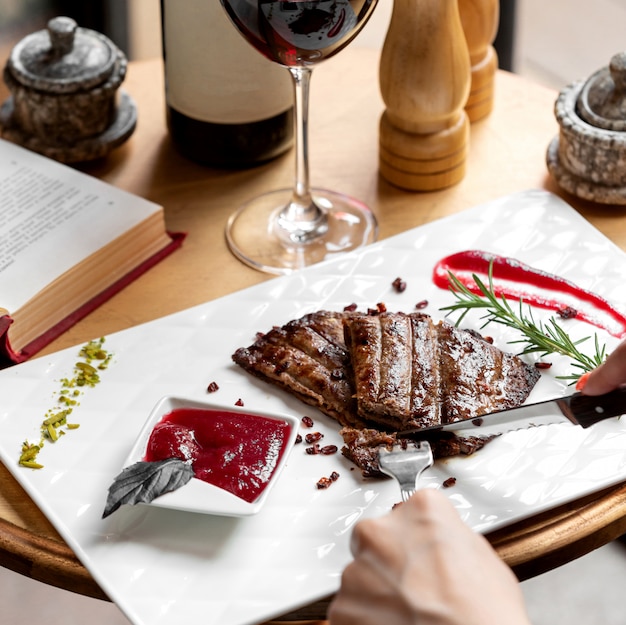
Okay, so you've got your beautifully cooked striploin, and your perfect side dish. Now, it's time to add a splash of magic – a sauce! There are countless options available, from classic béarnaise to a simple chimichurri. I love a good red wine reduction, or a creamy garlic butter sauce. It's like adding a dash of sparkle to a perfect outfit. The right sauce can really enhance the flavors of the steak and create a more complete dining experience.
A Pinch of Herbs: Adding a Burst of Freshness
For a final touch, sprinkle some fresh herbs over your steak. Parsley, thyme, or rosemary all add a burst of flavour and aroma. It's like adding a final note of music to a beautiful symphony. A little bit of fresh herbs adds a touch of freshness and vibrancy to the dish.
Presentation is Key: Making It a Visual Feast
Don't forget about the presentation! Arrange your steak and side dish on a beautiful platter. Garnish it with a few sprigs of herbs, a lemon wedge, or a drizzle of olive oil. It's all about making your steak look as good as it tastes. After all, we eat with our eyes first. Presentation matters – it can make a simple meal feel special and elevate the dining experience.
(Part 8) Enjoy Your Masterpiece!
Congratulations, you've just cooked the perfect striploin steak! Now, all that's left is to savor every bite and enjoy your culinary masterpiece. This is the moment you've been working towards, so relax, take your time, and indulge in the symphony of flavours. Take your time, savor every bite, and enjoy the fruits of your labor. You've earned it!
FAQs
Q1. Can I use a pan instead of a grill?
Absolutely! A cast iron pan is a great alternative. Just make sure it's hot enough to achieve that perfect sear. You can also add a little butter or oil to the pan for extra flavour. The key is to get the pan really hot and to sear the steak for a short amount of time on each side to create a nice crust.
Q2. What's the best way to tell if a steak is done?
While a meat thermometer is the most reliable way, you can also use the touch test. Press the steak with your finger. If it feels firm but still slightly springy, it's probably medium-rare. If it feels firm and bouncy, it's closer to medium-well. However, a meat thermometer is the most accurate way to ensure the steak is cooked to your liking.
Q3. How long should I rest the steak after cooking?
Resting is crucial! It allows the juices to redistribute, resulting in a more tender and flavorful steak. Aim for 5-10 minutes, covered loosely with foil. This step is essential for achieving a juicy, flavorful steak. You'll be rewarded with a more flavorful and tender steak if you follow this step.
Q4. What if my steak is overcooked?
Don't despair! While overcooking a steak is never ideal, you can still salvage it. Just slice it thinly and make a delicious steak sandwich with a bit of sauce and some cheese. It's a great way to use up a slightly overcooked steak. There's always a way to make the most of a situation, even if the steak is slightly overcooked.
Q5. What are some other cuts of steak that I can try?
The world of steak is your oyster! If you're looking for something different, try a ribeye, a filet mignon, or a flank steak. Each cut has its unique flavour and texture, so there's something for everyone. Don't be afraid to experiment with different cuts of steak and discover your new favorites.
Everyone is watching

Corn on the Cob: The Ultimate Guide to Perfectly Cooked Ears
Healthy MealsAh, corn on the cob. Just the name evokes images of sunny days, barbecues, and that sweet, juicy flavour that ...

Perfect Pork Roast Oven Cooking Time: A Guide to Delicious Results
Healthy MealsThere's something truly satisfying about a perfectly roasted pork. The aroma alone is enough to make your mout...

Ham Cooking Time: How Long to Bake, Smoke, or Boil a Delicious Ham
Healthy MealsAh, ham. It's a classic, isn't it? A real crowd-pleaser, especially around holidays. And when done right, it'...

Scallops: The Ultimate Guide to Perfect Cooking
Healthy MealsAh, scallops. Those delicate, sweet, and utterly delicious morsels of the sea. They hold a special place in my...

Spaghetti Squash: The Ultimate Guide to Cooking and Serving
Healthy MealsRemember that time you saw spaghetti squash at the supermarket, looking all bumpy and strange, and thought, "W...
