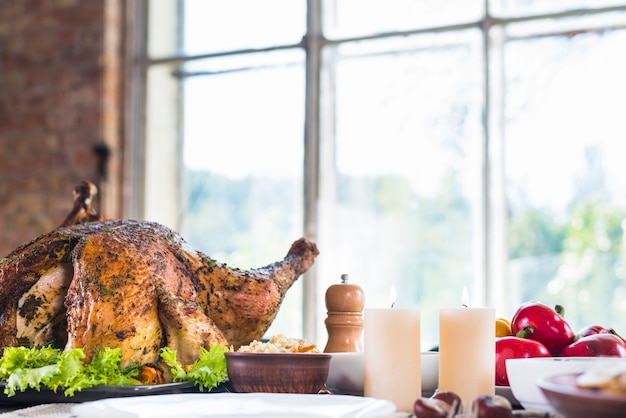
Let me tell you, there's nothing quite like a perfectly cooked turkey leg. Juicy, tender, and bursting with flavour, it's a real crowd-pleaser, whether you're hosting a festive feast or just enjoying a casual weeknight dinner. I've been cooking up a storm for years, and I've learned a few things about turkey legs along the way. So grab your apron, settle in with your favourite tipple, and let's get started on this culinary adventure!
(Part 1) Choosing the Right Turkey Leg
First things first, you need to choose the right turkey leg. It's like picking the perfect piece of art – you want something that catches your eye and promises a delicious experience.
The Size Matters
Don't be shy about going big! A good turkey leg should be plump and generous, with plenty of meat to go around. You want something that looks promising, not something that’s going to leave everyone feeling a bit peckish. And if you’re cooking for a crowd, well, you might just need a couple!
Fresh vs. Frozen
Personally, I always opt for fresh turkey legs. The flavour is just that little bit better, and I like to know where my food comes from. However, if you're working with a frozen turkey leg, no worries! Just make sure you defrost it properly before cooking. You don’t want a half-cooked, frozen turkey leg, trust me!
Look for the Label
Always check the label for any information about the turkey. It should tell you about the breed, how it was raised, and any other relevant details. This is important, as it can give you a good indication of the quality and flavour of the meat.
(Part 2) Preparing the Turkey Leg for a Delicious Feast
Now that you've got your prize-winning turkey leg, it's time to get prepped! Think of it as getting your culinary canvas ready for a masterpiece.
Pat It Dry
The first step is to pat the turkey leg dry with some kitchen paper. This will help to remove any excess moisture, which can lead to a soggy, rather than crispy, skin. You want that skin to get nice and golden brown, don't you?
Season It Up
This is where the fun begins! I love to season my turkey legs with a blend of herbs and spices. It's like adding a splash of colour to your culinary palette. Here's my go-to recipe, which I like to call "The perfect turkey leg Seasoning":
Salt: A good pinch of salt is essential to bring out the flavour of the turkey. It's like a gentle nudge to awaken the turkey's inherent taste.
Black Pepper: A generous grind of black pepper adds a touch of heat and depth. It's the perfect counterpoint to the turkey's natural sweetness.
Garlic Powder: A tablespoon of garlic powder adds a delicious aroma and flavour. It's like adding a burst of sunshine to your turkey.
Onion Powder: A tablespoon of onion powder brings a sweetness to the mix. It adds another layer of complexity and warmth.
Paprika: A teaspoon of paprika gives it a bit of colour and a smoky note. It's the final touch, a dash of spice that makes your turkey leg stand out.
Now, mix all this together and rub it generously all over the turkey leg. Don't be shy, make sure it's fully coated! You want every inch of that turkey leg to be bursting with flavour.
Make a Marinade (Optional)
If you're feeling adventurous, you can make a marinade to infuse your turkey leg with even more flavour. It's like a secret ingredient that takes your turkey leg to the next level. My favourite marinade is a simple one:
Olive oil: A good tablespoon of olive oil will help the skin stay moist and crisp. It's the key to achieving that perfect golden brown skin.
Lemon juice: A splash of lemon juice adds a tangy twist. It cuts through the richness of the turkey and adds a refreshing touch.
Honey: A tablespoon of honey adds a touch of sweetness and makes the skin caramelize beautifully. It's a secret weapon for adding depth and colour.
Mix everything together, pour it over the turkey leg, and then wrap it tightly in cling film. Let it marinate in the fridge for at least 2 hours, or even overnight. This will give the flavours time to penetrate the meat, resulting in a truly unforgettable turkey leg.
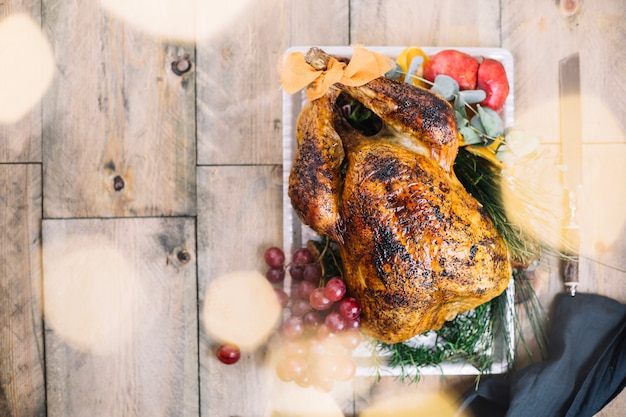
(Part 3) Cooking the Turkey Leg to Perfection
Right, time for the main event! Now, you can cook your turkey leg in a few different ways, but here are my two favourite methods.
Method 1: The Oven
This is my go-to method for a juicy, tender turkey leg. It's simple, reliable, and always delivers delicious results. Here's what you need to do:
1. Preheat Your Oven: Preheat your oven to 350°F (175°C). This will ensure your turkey leg cooks evenly and quickly.
2. Roast Away: Place the turkey leg in a roasting pan and roast for about 1 hour and 30 minutes, or until the internal temperature reaches 165°F (74°C). You can use a meat thermometer to check the temperature, making sure it doesn't touch any bone.
3. Basting Time: To keep the skin crispy and the meat juicy, baste the turkey leg every 30 minutes with a mixture of butter and chicken broth. This will keep the turkey leg moist and flavorful throughout the cooking process.
4. Rest Up: Once the turkey leg is cooked, remove it from the oven and let it rest for 10 minutes before carving. This will allow the juices to redistribute, resulting in a more tender and flavorful meat.
Method 2: The slow cooker
This is a great option if you're looking for a hands-off approach. It's perfect for those busy days when you want a delicious meal without a lot of fuss. Here's how to do it:
1. Slow and Steady: Place the turkey leg in a slow cooker, pour in about 1 cup of chicken broth, and cook on low for 6-8 hours, or on high for 3-4 hours. The slow cooker will do all the work, gently cooking the turkey leg to juicy perfection.
2. Keep It Moist: You can add more broth or water as needed during cooking to keep the turkey leg moist. This will ensure the turkey leg stays tender and succulent.
3. Don't Forget the Sides: While the turkey leg cooks, you can throw in some potatoes, carrots, and onions for a delicious side dish. It's a one-pot meal that's both convenient and flavorful.
4. Shred Away: Once the turkey leg is cooked, shred the meat and serve it with your favourite sides. It's so tender, it practically falls apart!
(Part 4) Checking for Doneness
You want your turkey leg cooked through and through, but you don't want to overcook it and end up with dry, tough meat. It's all about finding that sweet spot between juicy and cooked.
The Temperature Test
The best way to check if your turkey leg is cooked through is to use a meat thermometer. Insert the thermometer into the thickest part of the leg, making sure it doesn't touch any bone. The turkey leg is cooked when the internal temperature reaches 165°F (74°C).
The Touch Test
If you don't have a thermometer, you can use the touch test. Gently poke the thickest part of the leg with a finger. If the meat feels firm and springy, it's cooked. If it feels soft and wobbly, it needs more time in the oven or slow cooker.
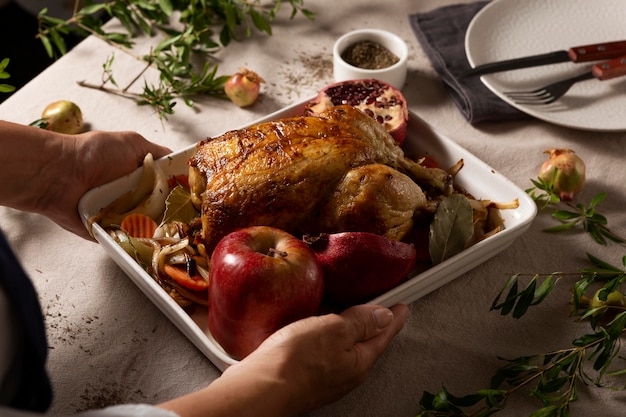
(Part 5) Carving the Turkey Leg: A Culinary Ballet
Alright, your turkey leg is cooked to perfection, so it's time to carve it up! Now, this can be a little tricky, but with a little patience and a sharp knife, you'll be a pro in no time.
Start with the Bone
First, use your knife to cut around the bone, separating the meat from the bone. You'll want to cut through the skin and any connective tissue.
Don't Be Afraid to Use Your Hands
Once you've got the meat off the bone, you can use your hands to shred it into smaller pieces. This will make it easier to eat and serve. You can use a fork to hold the bone in place while you slice the meat away.
Don't Forget the Skin!
The crispy skin is a delicious part of the turkey leg, so don't throw it away! You can either eat it as is or shred it into smaller pieces to add to the meat. It adds a delightful crunch and bursts of flavor.
(Part 6) Serving Up Your Turkey Leg: A Feast for the Senses
Okay, you've got your beautifully cooked and perfectly carved turkey leg. Now, it's time to put it on a plate and enjoy! Here are a few serving ideas to inspire your culinary creativity:
On a Plate
The simplest way to serve a turkey leg is to place it on a plate with some sides, like mashed potatoes, gravy, and green beans. It's a classic combination that never fails to please.
In a Sandwich
If you're feeling adventurous, you can turn your turkey leg into a sandwich. Simply shred the meat and pile it onto a bun with some cheese, lettuce, and tomato. It's a delicious and satisfying way to use your turkey leg leftovers.
In a Salad
For a lighter option, you can add shredded turkey leg to a salad. A mix of greens, vegetables, and a light vinaigrette makes for a delicious and satisfying meal. It's a great way to add protein and flavor to your salad.
(Part 7) Leftovers - No Waste Allowed!
Right, let's talk about those delicious leftovers. Nobody wants to see good food go to waste!
Store it Right
Once you've enjoyed your turkey leg feast, store any leftovers in the fridge in an airtight container. This will keep the meat fresh and flavorful for a few days.
Turn It Into Something New!
Leftover turkey leg can be used in a variety of recipes. Here are a few ideas to inspire your culinary creativity:
Turkey Leg Soup: Shred the meat and add it to a hearty soup with vegetables, beans, and broth. It's a comforting and flavorful meal.
Turkey Leg Salad: Mix shredded turkey leg with mayonnaise, celery, and onion for a delicious salad. It's a great way to use up leftover turkey leg.
Turkey Leg Tacos: Shred the meat and use it as a filling for tacos with your favourite toppings. It's a fun and easy way to use up leftovers.
(Part 8) Tips and Tricks for a Turkey Leg Triumph
Now, let's talk about some tips and tricks to make your turkey leg cooking experience even better. It's all about taking your turkey leg skills to the next level.
Don't Overcrowd the Oven
If you're cooking multiple turkey legs, make sure you don't overcrowd the oven. This can prevent the legs from cooking evenly. Give each turkey leg some breathing room to ensure they cook evenly and achieve that perfect golden brown skin.
Use a Meat Thermometer
A meat thermometer is essential for ensuring that your turkey leg is cooked through. It's the best way to get that perfect balance between juicy and cooked.
Don't Forget the Gravy!
Gravy is a classic accompaniment to turkey leg, so don't forget to make some! You can use the pan drippings from the roasting pan to make a delicious gravy. It's the perfect way to enhance the flavor of your turkey leg.
Serve It Hot
Turkey leg is best served hot, so keep it warm in the oven or slow cooker until you're ready to serve. It's a dish that's meant to be enjoyed while it's still steaming hot.
Experiment with Flavors!
Don't be afraid to experiment with different seasonings and marinades to find your perfect turkey leg recipe. The possibilities are endless!
(Part 9) FAQs
1. How long does it take to cook a turkey leg in the oven?
It takes about 1 hour and 30 minutes to cook a turkey leg in the oven at 350°F (175°C). However, the exact cooking time will vary depending on the size of the turkey leg. A meat thermometer will help you determine when it's cooked through.
2. How do I know if my turkey leg is cooked through?
You can check the internal temperature of the turkey leg with a meat thermometer. It should reach 165°F (74°C). You can also use the touch test. Gently poke the thickest part of the leg with a finger. If the meat feels firm and springy, it's cooked.
3. Can I freeze a cooked turkey leg?
Yes, you can freeze a cooked turkey leg. Let it cool completely, then wrap it tightly in plastic wrap and aluminum foil. Store it in the freezer for up to 3 months. It's a great way to save leftovers for later.
4. What are some good side dishes to serve with turkey leg?
Turkey leg goes well with a variety of side dishes, including mashed potatoes, gravy, green beans, corn on the cob, and baked sweet potatoes. Choose your favourites, and get creative!
5. What can I do with leftover turkey leg?
Leftover turkey leg can be used in a variety of recipes, such as turkey leg soup, turkey leg salad, and turkey leg tacos. You can also simply shred it and serve it on sandwiches or salads.
Final Thoughts
There you have it! My ultimate guide to cooking a tender and juicy turkey leg. It's a truly satisfying dish, perfect for a festive meal or a casual weeknight dinner. So, what are you waiting for? Grab your ingredients and get cooking! Happy feasting!
Everyone is watching

Corn on the Cob: The Ultimate Guide to Perfectly Cooked Ears
Healthy MealsAh, corn on the cob. Just the name evokes images of sunny days, barbecues, and that sweet, juicy flavour that ...

Perfect Pork Roast Oven Cooking Time: A Guide to Delicious Results
Healthy MealsThere's something truly satisfying about a perfectly roasted pork. The aroma alone is enough to make your mout...

Scallops: The Ultimate Guide to Perfect Cooking
Healthy MealsAh, scallops. Those delicate, sweet, and utterly delicious morsels of the sea. They hold a special place in my...

Ham Cooking Time: How Long to Bake, Smoke, or Boil a Delicious Ham
Healthy MealsAh, ham. It's a classic, isn't it? A real crowd-pleaser, especially around holidays. And when done right, it'...

Spaghetti Squash: The Ultimate Guide to Cooking and Serving
Healthy MealsRemember that time you saw spaghetti squash at the supermarket, looking all bumpy and strange, and thought, "W...