(Part 1) The Brisket Breakdown: Choosing Your Weapon
1. The Two Types of Brisket:
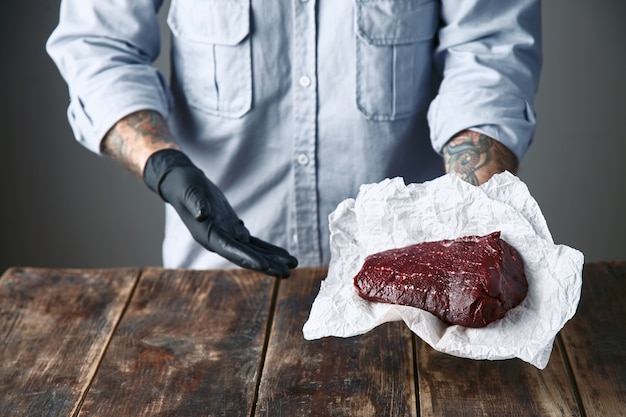
Flat: This is the leaner, more rectangular cut. It's perfect for slicing thin and serving on sandwiches or platters. Think of it as the "workhorse" of the brisket world, offering a clean, flavorful canvas for your toppings. Point: This is the more flavorful, fattier cut, with a triangular shape. It's great for making pulled brisket or serving with a side of coleslaw. Think of this as the "party animal" of the brisket world, bursting with juicy, rich flavor.2. What to Look For:
Marbling: You want a brisket with good marbling, which is the white streaks of fat running through the meat. This fat will render during cooking and add flavor. Imagine it as the "secret ingredient" that brings the brisket to life. Fat Cap: A nice thick fat cap on top of the brisket is a must. It helps to keep the meat moist during cooking. This is like the brisket's "natural shield" against dryness. Color: Look for a nice, deep red color, which indicates freshness. Avoid any signs of discoloration or bruising.3. Where to Buy:
Butcher Shop: Your best bet for a good brisket is a local butcher shop. They'll often have a selection of cuts and can advise you on the best one for your needs. Plus, you'll be supporting local businesses, which is always a good thing. Supermarket: If you're buying from a supermarket, make sure to choose a brisket that's been properly refrigerated and doesn't have any signs of spoilage. Look for a butcher counter where the meat is handled with care.4. Trimming Your Brisket:
Once you've got your brisket home, you'll need to trim it. This removes any excess fat and helps to ensure even cooking.- Start by removing the thick fat cap from the top of the brisket. You want to leave a thin layer of fat, about ?? inch, to help keep the meat moist. Think of it as a "protective layer" for your brisket.
- Trim away any tough, silver skin on the bottom of the brisket. This skin won't break down during cooking and can make the brisket tough. It's like removing a "rubber band" that could hinder your tender brisket dreams.
- Now, you can trim the edges of the brisket, making it more even in shape. This isn't essential, but it can help with even cooking. It's like giving your brisket a little "haircut" for a more aesthetically pleasing and evenly cooked result.
(Part 2) Prepping Your Brisket: The Secret to Tenderness
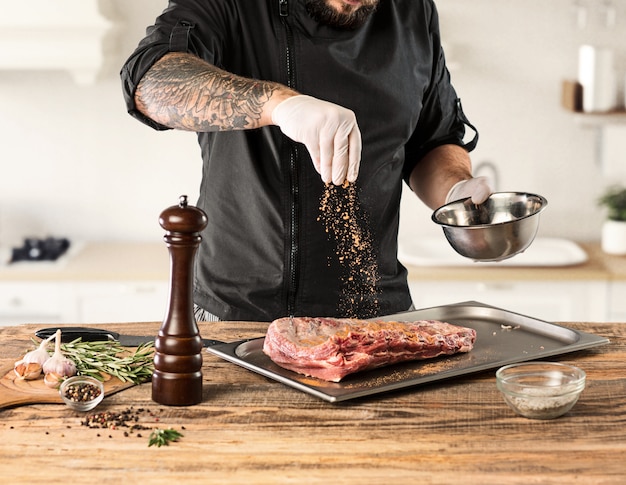
1. Salt and Pepper Seasoning:
I'm a big fan of keeping things simple. For most briskets, a good salt and pepper seasoning is all you need. This is like the "bare essentials" of brisket seasoning – simple yet effective.- Apply a generous amount of kosher salt and freshly ground black pepper to both sides of the brisket. Be sure to rub it in well, getting into all the nooks and crannies. Think of it as giving your brisket a nice massage to help the seasoning penetrate.
- Don't be afraid to be heavy-handed with the seasoning. The brisket will absorb it and develop a beautiful bark during cooking. It's all about "embracing the flavor" and allowing the seasoning to work its magic.
2. Other Seasoning Options:
Of course, if you want to get fancy, there are plenty of other seasoning options.- Garlic Powder: Adds a nice savory flavor to the brisket. Like adding a "hint of garlic goodness" to your brisket symphony.
- Onion Powder: A classic choice that complements the beef beautifully. Like adding a "dash of oniony magic" to elevate your brisket's flavor profile.
- Paprika: Gives the brisket a touch of sweetness and a beautiful red hue. Like adding a "splash of color and sweetness" to your brisket masterpiece.
- Chili Powder: For a touch of heat and a smoky flavor. Like adding a "whisper of heat" to awaken your brisket's flavor senses.
- Rubs: There are countless brisket rubs on the market, and they can add a range of flavors. Like "opening the flavor pantry" and exploring the endless possibilities of brisket seasoning.
3. The Importance of Patience:
After seasoning your brisket, it's time to let it rest in the refrigerator for at least 12 hours, ideally for 24 hours. This allows the seasoning to penetrate the meat and flavors to develop. It's like giving your brisket a "flavor spa treatment" to unlock its full potential.(Part 3) Smokin' Hot: Mastering the BBQ
1. Choosing the Right Smoker:
There are many different types of smokers available, so it's important to choose one that suits your needs and budget.- offset smoker: These are the classic, traditional smokers, with a firebox offset from the main cooking chamber. They produce a great smoky flavor and are perfect for larger briskets. Think of it as the "granddaddy" of smokers, offering a rich, authentic smoking experience.
- Pellet Smoker: These smokers use wood pellets to create heat and smoke. They are great for beginners because they are easier to control and maintain a consistent temperature. Think of it as the "user-friendly" smoker, perfect for those starting their smoking journey.
- Gas Smoker: These smokers use gas to generate heat and smoke. They are convenient and easy to use, but they may not produce as intense a smoky flavor as other types of smokers. Think of it as the "convenience king" of smokers, for those who value ease of use.
- electric smoker: These smokers are perfect for apartment dwellers or those with limited space. They are easy to use and control, but they may not produce as intense a smoky flavor as other types of smokers. Think of it as the "apartment-friendly" smoker, perfect for those with limited outdoor space.
2. Setting the Stage:
Once you've chosen your smoker, it's time to set it up for brisket smoking.- Wood Choice: For brisket, I recommend using hardwoods like hickory, oak, pecan, or mesquite. They will add a nice smoky flavor to the meat. Think of them as the "flavor orchestra" that will enhance your brisket's symphony.
- Temperature: The ideal temperature for smoking brisket is between 225°F and 250°F. You want to cook low and slow. Think of it as "slow and steady wins the race" – the key to tender, flavorful brisket.
- Water Pan: A water pan in the smoker will help to keep the meat moist and prevent it from drying out. Think of it as the "hydration station" for your brisket, ensuring it remains succulent throughout the cooking process.
3. Brisket Placement:
Place your brisket on the smoker, fat cap side up. This allows the fat to render down and keep the meat moist. Think of it as "letting the fat do its magic" to protect the meat and keep it moist.4. The Smoking Process:
Now, the long wait begins. Depending on the size of your brisket, it could take anywhere from 12 to 18 hours to cook.- The Stall: At some point during the cooking process, your brisket will hit a plateau, known as the stall. This is when the internal temperature stops rising. It's caused by the moisture evaporating from the meat. Don't worry, it's normal. Just keep cooking. You can add more wood chips to the smoker during the stall to keep the smoke going. Think of it as a "brief pause" in the brisket's journey, a necessary step towards achieving tenderness.
- Wrapping: Once your brisket has reached about 160°F internal temperature, it's time to wrap it. This will help to speed up the cooking process and ensure a tender brisket. Use butcher paper or aluminum foil. Think of it as "giving your brisket a warm hug" to promote even cooking and moisture retention.
- The Final Stage: After wrapping, the brisket will continue to cook until it reaches an internal temperature of 203°F to 205°F. This is when the brisket is fully cooked. Think of it as the "grand finale" of your brisket journey, where it reaches its peak of tenderness and flavor.
(Part 4) The Resting Game: Letting it Relax
Now that your brisket is cooked, you're not quite finished. It's time for the final step: resting. This is crucial for achieving that tender, juicy brisket that will have everyone begging for more.1. The Importance of Resting:
Resting allows the brisket to reabsorb its juices and become incredibly tender. Think of it as giving your brisket a "relaxation session" to unwind and become even more delicious.2. The Resting Process:
- Remove the brisket from the smoker and wrap it in a large piece of butcher paper or aluminum foil.
- Place it in a cooler or a large insulated container. This will help to keep the brisket warm and allow it to rest for at least two hours, preferably three.
3. Slicing Time:
After resting, it's finally time to slice your brisket. Here's how to do it like a pro.- Use a sharp, thin-bladed knife. A carving knife is ideal. Think of it as your "artistic tool" to create beautiful slices.
- Slice the brisket against the grain. This means slicing across the direction of the muscle fibers. This will help to make the brisket easier to chew and more tender. Think of it as "cutting with intention" to create the most enjoyable eating experience.
- Slice the brisket into thin, even slices.
(Part 5) The Holy Grail: Telling if Your Brisket is Done
So, how do you know when your brisket is cooked to perfection? There are a few tell-tale signs to look for.1. The Temperature:
The most reliable way to check if your brisket is cooked is to use a meat thermometer. The brisket is fully cooked when it reaches an internal temperature of 203°F to 205°F. Think of this as your "scientific gauge" to ensure your brisket is cooked to perfection.2. The Probe Test:
You can also use the probe test to check for doneness. Insert a meat thermometer into the thickest part of the brisket. If the probe goes in easily and the brisket feels tender, it's likely done. Think of it as your "tactile check" to assess the brisket's tenderness.3. The Bark:
A well-smoked brisket will have a beautiful, crispy bark. This is the hardened outer layer of the brisket that forms during cooking. It should be dark and slightly caramelized. Think of it as the "protective armor" of your brisket, a testament to its smoking journey.4. The smoke ring:
A smoke ring is a pink ring that forms beneath the bark of a smoked brisket. It's an indicator of good smoking technique and a sign that the brisket has been cooked properly. Think of it as a "badge of honor" for your brisket, a symbol of its smoky journey.(Part 6) Brisket Beyond Basics: Elevating Your Game
You've mastered the basics, now it's time to take your brisket game to the next level. Let's talk about some advanced techniques to impress your guests and elevate your grilling skills.1. The texas crutch:
The Texas crutch is a technique that involves wrapping the brisket in aluminum foil during the last few hours of cooking. This helps to speed up the cooking process and prevent the brisket from drying out. Think of it as a "moisture-boosting hug" for your brisket.- Wrap the brisket in a double layer of aluminum foil. Make sure the foil is sealed tightly to trap in moisture.
- Continue cooking the brisket until it reaches an internal temperature of 203°F to 205°F.
2. The reverse sear:
This technique involves cooking the brisket at a lower temperature for a longer period of time, then finishing it off with a high heat sear. This helps to create a crispy bark and a juicy interior. Think of it as a "two-step process" for achieving ultimate tenderness and a crispy bark.- Smoke the brisket at a low temperature (225°F to 250°F) until it reaches an internal temperature of about 160°F.
- Wrap the brisket in aluminum foil and continue cooking until it reaches an internal temperature of 190°F to 195°F.
- Unwrap the brisket and place it on a hot grill or in a hot oven (450°F to 500°F) for 10 to 15 minutes, until the bark is crispy.
3. Smoke Infusion:
To take your smoking game to the next level, try infusing your smoke with different flavors. You can do this by adding various wood chips or chunks to your smoker. Think of it as "adding a layer of complexity" to your brisket's flavor profile.- Applewood: Adds a sweet and fruity flavor to the brisket. Like adding a "hint of apple pie" to your brisket experience.
- Cherrywood: Offers a subtle, sweet and slightly tart flavor. Like adding a "kiss of cherry" to enhance your brisket's flavor.
- Maplewood: Provides a smoky, slightly sweet flavor. Like adding a "touch of maple" to elevate your brisket's richness.
4. bbq sauce:
The right sauce can really elevate a brisket, so don't neglect it. Think of it as the "final touch" that brings everything together.- Thick and Tangy: A classic choice for brisket, with a sweet and smoky flavor. Like adding a "wave of sweet and smoky goodness" to your brisket.
- Vinegar-Based: A lighter, more tangy sauce, often with a bit of spice. Like adding a "kick of vinegar and spice" to awaken your taste buds.
- Mustard-Based: A unique and flavorful sauce, perfect for those who enjoy a tangy kick. Like adding a "touch of mustard magic" to create a unique flavor experience.
(Part 7) Brisket Beyond the Plate: Serving Up Deliciousness
You've conquered the brisket, now it's time to showcase your masterpiece. Let's talk about serving it up in style.1. Slicing Perfection:
We already discussed slicing, but the presentation matters too.- Thin Slices: Perfect for sandwiches, tacos, or platters. Think of it as "easy to eat" slices for a variety of applications.
- Thick Slices: Ideal for enjoying on their own, with a side of BBQ sauce. Think of it as "show-stopping" slices for a luxurious brisket experience.
- Pulled Brisket: If you're making pulled brisket, shred the meat with two forks. Think of it as "transforming your brisket" into a versatile ingredient for sandwiches, tacos, and more.
2. Sides that Shine:
A great brisket deserves equally delicious sides. Think of them as the "supporting cast" that complements the star of the show.- Coleslaw: The classic pairing for brisket, offering a refreshing and tangy contrast.
- Mac and Cheese: A creamy and comforting side dish, a classic pairing that brings warmth and richness.
- Baked Beans: A sweet and smoky side dish that pairs perfectly with brisket, providing a complementary flavor profile.
- potato salad: A refreshing and tangy side dish, offering a contrasting texture and flavor.
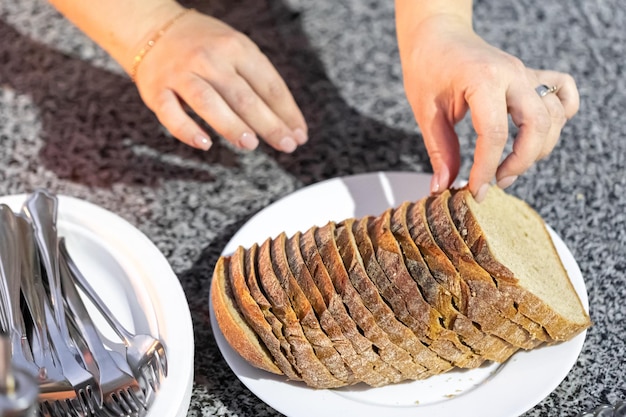
3. Don't Forget the Bread:
If you're serving brisket sandwiches, choose a sturdy bread that can hold up to the juicy meat. Think of it as the "foundation" of your brisket sandwich, providing a satisfying base for the delicious fillings.- Brioche: A soft and buttery bread that complements the brisket well, adding richness and texture.
- Kaiser Rolls: A classic choice for brisket sandwiches, offering a sturdy structure and a hint of sweetness.
- Texas Toast: Thick-sliced bread that is toasted and buttered, perfect for soaking up the juices from the brisket, providing a satisfying crunch and buttery flavor.
(Part 8) The Brisket Bible: A Cheat Sheet for Success
I know you've probably got a million notes from all this, so let's summarize it for ya. Here's a quick cheat sheet for you, the brisket-loving beginner:1. Choosing the Brisket:
Choose a brisket with good marbling and a thick fat cap. Trim any excess fat and silver skin. Season generously with salt and pepper.2. Smoking the Brisket:
Smoke at a low temperature (225°F to 250°F). Use hardwoods like hickory, oak, pecan, or mesquite. Wrap the brisket in butcher paper or aluminum foil when it reaches 160°F. Cook until it reaches an internal temperature of 203°F to 205°F.3. Resting the Brisket:
Wrap the cooked brisket in butcher paper or aluminum foil and rest for at least two hours.4. Slicing the Brisket:
Slice the brisket against the grain, into thin, even slices.5. Serving the Brisket:
Serve the brisket with classic sides like coleslaw, mac and cheese, or baked beans. Enjoy!FAQs
Let's address some common questions about brisket.
| Question | Answer |
|---|---|
| How long does it take to smoke a brisket? | It takes about 12 to 18 hours to smoke a brisket, depending on the size of the brisket and the temperature of your smoker. Think of it as a long, slow, and rewarding journey for the best brisket results. |
| What happens if my brisket is dry? | If your brisket is dry, it means it wasn't cooked low and slow enough, or it wasn't wrapped properly. Next time, try wrapping the brisket earlier or using the Texas Crutch technique to prevent drying. Think of it as "retaining moisture" being key to a juicy brisket. |
| Can I freeze brisket? | Yes, you can freeze brisket. It's best to freeze it raw, before cooking. Wrap it tightly in plastic wrap and aluminum foil, and freeze for up to 3 months. Think of it as "preserving your brisket" for future enjoyment. |
| What's the difference between a brisket and a chuck roast? | Brisket and chuck roast are both tough cuts of meat that benefit from slow cooking. However, brisket is a tougher cut and is typically cooked at a lower temperature for a longer period of time. Chuck roast is a more tender cut, and it can be cooked at a higher temperature. Think of brisket as the "marathon runner" of meat, requiring a long, slow cook. Chuck roast is more like the "sprinter", requiring a faster cook time. |
| Can I smoke a brisket on a gas grill? | Yes, you can smoke a brisket on a gas grill. Use a smoker box to add wood chips to the grill. Be sure to maintain a low and slow temperature. Think of it as "adapting your tools" to achieve the same delicious results. |
Remember, brisket is all about patience. Don't get discouraged if your first few attempts aren't perfect. Just keep practicing, and you'll eventually master the art of smoking a brisket. Happy grilling, folks!
Everyone is watching

Corn on the Cob: The Ultimate Guide to Perfectly Cooked Ears
Healthy MealsAh, corn on the cob. Just the name evokes images of sunny days, barbecues, and that sweet, juicy flavour that ...

Scallops: The Ultimate Guide to Perfect Cooking
Healthy MealsAh, scallops. Those delicate, sweet, and utterly delicious morsels of the sea. They hold a special place in my...

Spaghetti Squash: The Ultimate Guide to Cooking and Serving
Healthy MealsRemember that time you saw spaghetti squash at the supermarket, looking all bumpy and strange, and thought, "W...

Salmon Cooking Times: Perfect Guide for Every Recipe
Healthy MealsLet me tell you, cooking salmon is an art form. It's all about getting that perfect balance: juicy and tender,...

Ham Cooking Time: How Long to Bake, Smoke, or Boil a Delicious Ham
Healthy MealsAh, ham. It's a classic, isn't it? A real crowd-pleaser, especially around holidays. And when done right, it'...