Let's talk turkey, shall we? The thought of cooking a turkey can be a bit daunting, especially for beginners. I mean, it's not exactly a quick and easy dinner, is it? But I'm here to tell you, it's really not as scary as it seems. With a bit of know-how and a sprinkle of confidence, anyone can create a delicious turkey feast.
I've been cooking turkeys for years now, and let me tell you, I've learned a thing or two along the way. From the initial prep to the final carving, I've had my share of triumphs and, well, let's just say, "learning experiences". But through it all, I've come to appreciate the beauty of a well-cooked turkey. It's a real labour of love, and the end result? Well, it's worth all the effort, I promise you.
In this guide, I'm going to walk you through every step, sharing my tips, tricks, and even a few of those "learning experience" moments that I've had. We'll cover everything from choosing the right turkey to cooking it to perfection, and even a few ideas for the perfect turkey day feast. So grab your apron, and let's get started!
(Part 1) Choosing Your Bird

1.1. Fresh or Frozen?
This is the first big decision you'll need to make: fresh or frozen? Fresh turkey, with its juicy and succulent flavour, is tempting, but a frozen one offers more flexibility in terms of planning. My personal preference? Fresh, hands down. The flavour is just unbeatable. But, if you're tight on time or prefer to buy your turkey well in advance, frozen is a perfectly acceptable choice.
Here's a little trick I learned: if you're opting for a frozen turkey, make sure to give it plenty of time to thaw properly. A good rule of thumb is to allow roughly 24 hours for every 5 pounds of turkey. Trust me, you don't want to rush this step. It's a recipe for disaster, believe me.
1.2. Size Matters!
Okay, so you've decided on fresh or frozen – now, how big should your turkey be? Well, it's all about the number of guests you're expecting. A good rule of thumb is to allow about 1lb of turkey per person. But I always go for a slightly bigger bird, just to be on the safe side. You know what they say, "better safe than sorry"! Plus, you can always freeze any leftovers, which makes for a delightful turkey sandwich lunch the next day!
1.3. The Right Breed
You'll find a few different breeds of turkey out there, each with its own unique characteristics. Broad-breasted turkeys are the most common, known for their large breast, perfect for carving. But if you're looking for something a little more "rustic", consider a heritage breed like a Bourbon Red or a Royal Palm. These birds tend to have a slightly deeper flavour, and they're often raised in more humane conditions, which is a big plus for me.
(Part 2) The Pre-Game: Prepping Your Turkey
2.1. Brining – The Secret to Juiciness
Brining is a game-changer, folks! It involves soaking the turkey in a salty water solution, which helps to lock in moisture and prevent the meat from drying out during cooking. I always brine mine, and the difference is noticeable. The turkey is incredibly juicy and tender.
Now, there are tons of brining recipes out there. You can go for a classic salt and sugar solution or get fancy with herbs and spices. Experiment and find what works best for you. But remember, a good brine is the key to a moist and succulent turkey.
Here's a simple brining recipe that you can try:
Ingredients:
- 1 gallon of cold water
- 1 cup of kosher salt
- 1/2 cup of brown sugar
- 1/4 cup of fresh herbs (such as thyme, rosemary, or sage)
Instructions:
- In a large container, combine the water, salt, sugar, and herbs.
- Stir until the salt and sugar are dissolved.
- Submerge the turkey in the brine, making sure it's completely covered.
- Refrigerate the turkey for at least 12 hours, or up to 24 hours.
- Remove the turkey from the brine and pat it dry before roasting.
2.2. The Big Stuffing Debate
Here's where opinions start to diverge. Do you stuff your turkey or not? For me, stuffing is a must! It adds a wonderful flavour to the bird and creates a beautiful presentation. But there's a safety factor to consider: stuffing needs to reach an internal temperature of 165 degrees Fahrenheit to be safe.
The safest way to do it is to cook your stuffing separately, in a casserole dish, while the turkey is roasting. This way, you can ensure it reaches the correct temperature without worrying about the turkey's internal temperature. If you're set on stuffing your bird, make sure the stuffing is loose and not packed tightly. This will allow for even cooking and prevent any potential hot spots.
2.3. Seasoning Your Turkey
Now that your turkey is prepped and ready, it's time to season it. A good seasoning will add a delicious flavour to your bird. Here's a simple recipe that I like to use:
Ingredients:
- 1 tablespoon of salt
- 1 teaspoon of black pepper
- 1 teaspoon of dried thyme
- 1 teaspoon of dried rosemary
- 1/2 teaspoon of garlic powder
- 1/4 teaspoon of onion powder
Instructions:
- Combine the ingredients in a small bowl.
- Rub the seasoning mixture all over the turkey, making sure to get into all the nooks and crannies.
- You can also add some butter or olive oil to the turkey to help it brown and stay moist.
(Part 3) Roasting Your Turkey to Perfection
3.1. Getting Ready
Alright, the big day is here! You've prepped your turkey, it's all seasoned up, and you're ready to roast. First, preheat your oven to 325 degrees Fahrenheit. This is a good starting point for most turkeys. Don't forget to get your roasting pan ready – a good, sturdy pan with a rack is essential for proper airflow and even cooking.
3.2. Time to Roast!
Now, this is where it gets a bit tricky, as the roasting time varies depending on the size of your turkey. A good rule of thumb is to allow about 15 minutes per pound of turkey. But here's the thing, you can't rely solely on time. The real indicator of doneness is the internal temperature.
Here's a table to give you a general idea of roasting times:
| turkey weight | Roasting Time |
|---|---|
| 8-12 pounds | 2 1/2-3 1/2 hours |
| 12-16 pounds | 3-4 hours |
| 16-20 pounds | 4-5 hours |
Remember, these are just estimates. Always use a meat thermometer to ensure the turkey is cooked through.
3.3. Checking for Doneness
You'll need a meat thermometer to ensure your turkey is cooked through. The safe internal temperature for a turkey is 165 degrees Fahrenheit in the thickest part of the thigh. Now, I know it seems daunting, but trust me, it's a simple process.
Here's how to use a meat thermometer:
- Insert the thermometer into the thickest part of the thigh, making sure it doesn't touch any bone.
- Leave it in for a few seconds to allow it to register the temperature.
- If the temperature is below 165 degrees Fahrenheit, continue to roast the turkey for another 15-20 minutes.
Once the turkey reaches the desired temperature, you'll want to let it rest for about 15 minutes before carving. This allows the juices to redistribute, ensuring that you have a beautifully moist and tender turkey.
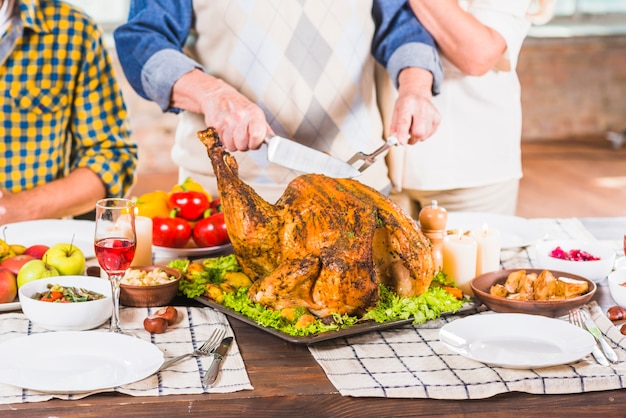
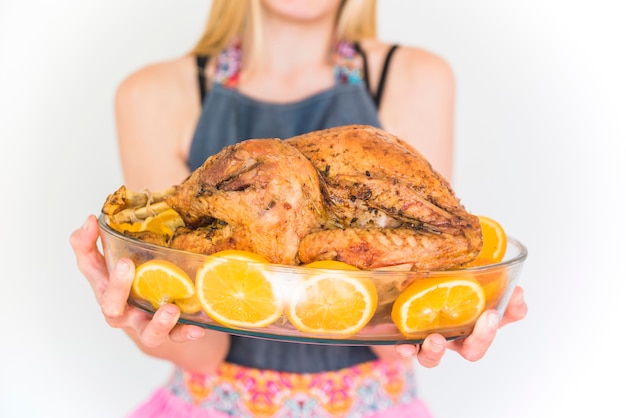
(Part 4) Carving – The Grand Finale
So, your turkey is cooked to perfection, and it's time for the grand finale: carving. A well-carved turkey is a true art form, and it's something to be proud of. Here are a few tips to help you conquer this step:
4.1. Tools of the Trade
For a clean and efficient carving job, you'll need a few essential tools. A sharp carving knife is a must. A carving fork is handy for holding the turkey steady as you carve. And a cutting board – preferably one that's large enough to accommodate your turkey – is essential.
4.2. The Carving Process
Now, here's the deal: start by removing the legs and thighs from the turkey. You'll find the joint between the leg and the body. Use your carving knife to separate the leg and thigh, then cut through the joint. Next, carve the breast. Here, you can use your carving fork to hold the breast steady. Make thin, even slices, working from one side of the breast to the other.
Now, you'll see that the breastbone is in the way. The best way to get around this is to simply slice down either side of it, making two separate pieces of breast meat. Now, you can easily carve the breast into thin, even slices.
(Part 5) Sides and Sauces – Complements to Your Feast
A turkey feast isn't complete without a selection of delicious sides and sauces. Here are a few ideas to round out your culinary masterpiece:
5.1. side dishes
There are endless possibilities when it comes to side dishes for your turkey dinner. Here are a few classics that I always find myself gravitating towards:
- mashed potatoes: Creamy, comforting, and always a crowd-pleaser. I love to add a bit of butter, milk, and fresh herbs to my mashed potatoes for extra flavour.
- Gravy: Essential for adding moisture and flavour to your turkey and sides. A good gravy is made with turkey drippings, flour, and broth. I like to add a splash of red wine for extra depth of flavour.
- Stuffing: A must-have for a traditional Thanksgiving or Christmas feast. There are endless variations of stuffing, but I love a classic bread-based stuffing with vegetables, herbs, and sausage.
- green bean casserole: This classic side dish is sure to bring back happy memories. It's made with green beans, cream of mushroom soup, and crispy fried onions.
- Cranberry Sauce: Sweet and tart, it's the perfect accompaniment to the savoury turkey. You can buy cranberry sauce ready-made, or you can make your own. A homemade cranberry sauce with orange zest and a splash of orange juice is a real treat.
- sweet potato Casserole: This sweet and savoury casserole is a real crowd-pleaser. It's made with sweet potatoes, brown sugar, butter, and spices. You can top it with marshmallows or pecans for extra flavour.
- Dinner Rolls: No turkey dinner is complete without some fluffy dinner rolls. I love to serve them with a pat of butter or a dollop of honey.
5.2. Sauces
No turkey feast is complete without a selection of sauces. Here are a few classics that complement the turkey beautifully:
- Pan Gravy: This simple gravy is made from the drippings in the roasting pan. It's rich and flavorful. To make pan gravy, simply deglaze the roasting pan with a little bit of broth or wine, then thicken it with flour.
- Cranberry Sauce: The tartness of cranberry sauce cuts through the richness of the turkey and side dishes.
- Apple Sauce: Sweet and tangy, apple sauce pairs well with the savoury turkey.
- Gravy: A classic for a reason! A rich and flavorful gravy is a must-have for any turkey dinner.
(Part 6) Leftover Magic – What to Do with Your Turkey Remains
Let's face it, turkey leftovers are a delicious problem to have. And there are so many creative ways to use them up, you'll be happy you have them!
6.1. turkey sandwiches
This is a classic, and for good reason! Simply slice the leftover turkey and add it to a sandwich with your favourite fillings. I love mine with a bit of cranberry sauce and a dollop of mayo. A slice of toasted bread completes the picture.
6.2. turkey soup
This is a great way to use up leftover turkey, stuffing, and vegetables. Simply simmer them in a pot with some broth and spices. It's a comforting and warming meal for a chilly day.
Here's a simple recipe for turkey soup:
Ingredients:
- 2 cups of leftover turkey, shredded
- 1 cup of leftover stuffing
- 1 cup of chopped vegetables (such as carrots, celery, and onions)
- 4 cups of chicken broth
- 1/2 teaspoon of salt
- 1/4 teaspoon of black pepper
- 1/4 cup of chopped fresh parsley
Instructions:
- In a large pot or dutch oven, combine the turkey, stuffing, vegetables, broth, salt, and pepper.
- Bring the mixture to a boil, then reduce heat to low and simmer for 15-20 minutes, or until the vegetables are tender.
- Stir in the parsley and serve hot.
6.3. turkey salad
This is a versatile dish that can be used in sandwiches, wraps, or salads. Simply dice the leftover turkey and mix it with your favourite ingredients, such as celery, onion, and mayonnaise. Add a splash of lemon juice for a tangy twist.
6.4. turkey pot pie
This is a hearty and satisfying dish that's perfect for a cold winter day. Simply combine leftover turkey with vegetables and a creamy sauce, then top it with a flaky pastry crust.
(Part 7) The Turkey Feast – Planning Your Table Setting
Now that you've got your turkey cooked and the sides prepped, it's time to set the stage for your feast!
7.1. Table Decorations
A well-set table instantly creates a sense of festivity. Think about using a festive tablecloth and napkins. You can add a touch of elegance with a centrepiece – a beautiful vase of flowers, a bowl of fruit, or a collection of candles.
7.2. Serving Dishes
Choose serving dishes that are appropriate for the size of your feast. You'll need a large platter for the turkey and smaller bowls for the sides. Don't forget the gravy boat!
7.3. Presentation
The way you present your food is important. Arrange your dishes attractively and use garnishes to add a touch of colour and flair. For example, a sprig of parsley or rosemary can add a touch of freshness to your turkey platter.
(Part 8) Tips and Tricks – The Little Things That Make a Difference
Now, here are a few tips and tricks that I've learned over the years that will help you create a truly memorable turkey feast:
8.1. Don't Overcook the Turkey!
The most common mistake people make when cooking a turkey is overcooking it. This can result in a dry and tough bird. Use a meat thermometer to ensure the turkey reaches the correct internal temperature, and don't overcook it.
8.2. Rest the Turkey Before Carving
Allow the turkey to rest for at least 15 minutes before carving. This allows the juices to redistribute, resulting in a moister and more flavorful turkey.
8.3. Keep It Simple
Don't try to do too much at once. Stick to a few simple recipes that you know you can execute well. It's better to have a few delicious dishes than a lot of mediocre ones.
8.4. Enjoy Yourself!
Cooking a turkey can be a lot of work, but it's also a great opportunity to create a special meal for your loved ones. Relax, have fun, and enjoy the process.
(Part 9) FAQs
9.1. How long does it take to cook a turkey?
The cooking time for a turkey depends on its size. A good rule of thumb is to allow about 15 minutes per pound of turkey. For example, a 12-pound turkey will take about 3 hours to cook.
9.2. What temperature should I cook my turkey at?
The ideal oven temperature for cooking a turkey is 325 degrees Fahrenheit. This ensures even cooking and helps to prevent the turkey from drying out.
9.3. How do I know when my turkey is cooked?
The best way to determine if a turkey is cooked through is to use a meat thermometer. The safe internal temperature for a turkey is 165 degrees Fahrenheit in the thickest part of the thigh.
9.4. What are some good side dishes to serve with turkey?
There are endless possibilities for side dishes! Here are a few classic choices: mashed potatoes, stuffing, gravy, cranberry sauce, green bean casserole, sweet potatoes, and dinner rolls.
9.5. What can I do with leftover turkey?
Leftover turkey is incredibly versatile. You can use it to make turkey sandwiches, turkey soup, turkey salad, or turkey pot pie. Get creative and experiment with different recipes!
And that's it, my friends! I hope this guide has demystified the process of cooking a turkey and inspired you to give it a go. Remember, it's all about confidence, a bit of planning, and a whole lot of love. So, go on, get your apron on, and create a delicious turkey feast that will have everyone coming back for seconds!
Everyone is watching

Corn on the Cob: The Ultimate Guide to Perfectly Cooked Ears
Healthy MealsAh, corn on the cob. Just the name evokes images of sunny days, barbecues, and that sweet, juicy flavour that ...

Perfect Pork Roast Oven Cooking Time: A Guide to Delicious Results
Healthy MealsThere's something truly satisfying about a perfectly roasted pork. The aroma alone is enough to make your mout...

Ham Cooking Time: How Long to Bake, Smoke, or Boil a Delicious Ham
Healthy MealsAh, ham. It's a classic, isn't it? A real crowd-pleaser, especially around holidays. And when done right, it'...

Scallops: The Ultimate Guide to Perfect Cooking
Healthy MealsAh, scallops. Those delicate, sweet, and utterly delicious morsels of the sea. They hold a special place in my...

Spaghetti Squash: The Ultimate Guide to Cooking and Serving
Healthy MealsRemember that time you saw spaghetti squash at the supermarket, looking all bumpy and strange, and thought, "W...