Let's talk turkey! As a seasoned cook, I've roasted countless turkeys, witnessing the joy they bring to holiday tables and family gatherings. But let's be honest, getting the timing right can be a little nerve-wracking, especially when you're catering to a crowd. You don't want to end up with a dry, overcooked turkey, or, heaven forbid, one that's still raw in the middle. I've put together this comprehensive guide to help you nail that perfect roast turkey every time, eliminating any stress and ensuring a truly delicious centerpiece for your next gathering.
(Part 1) The Big Picture: Understanding turkey cooking Times

The key to a succulent turkey lies in understanding the relationship between cooking time and the turkey's size. It's not just about sticking the bird in the oven for a set amount of time. Imagine trying to cook a small loaf of bread alongside a massive sourdough – the smaller loaf will be done much faster. The same principle applies to turkeys. A smaller bird will cook faster than a larger one. This is why we need a handy chart to guide us.
turkey cooking time chart: A Guide for Success
This chart serves as a fantastic starting point. It's based on the general rule of thumb: allow 15-20 minutes of cooking time per pound for a stuffed turkey and 13-18 minutes per pound for an unstuffed turkey. Remember, these are just guidelines, not hard-and-fast rules. Always use a meat thermometer to check for doneness – we'll talk more about that later.
| turkey weight (lbs) | Unstuffed Cooking Time (mins) | Stuffed Cooking Time (mins) |
|---|---|---|
| 8-12 | 104-192 | 120-240 |
| 12-16 | 156-288 | 180-336 |
| 16-20 | 208-360 | 240-420 |
| 20-24 | 260-432 | 300-504 |
Important Considerations: Factors That Influence Cooking Time
Now, before you dive into the oven, let's factor in a few crucial details that can affect your turkey's cooking time:
- Oven Temperature: Most recipes call for a roasting temperature between 325°F (160°C) and 350°F (175°C). A lower temperature generally gives you a more evenly cooked turkey, allowing the internal temperature to rise gradually and ensuring a more succulent outcome. Think of it like slow-roasting a joint of meat – it produces a more tender result.
- Stuffing: If you're stuffing your turkey, it's going to take a bit longer to cook. The stuffing acts as an insulator, slowing down the cooking process. Also, make sure you're stuffing the turkey with cooked stuffing to ensure safety. It's best to stuff the turkey right before roasting and cook the stuffing separately until it reaches a safe internal temperature of 165°F (74°C) before placing it inside the turkey.
- Breast Size: A turkey with a particularly large breast might take a bit longer to cook through. Always check the thickest part of the breast using a meat thermometer to ensure it's cooked to a safe temperature.
- Altitude: If you live at a higher altitude, your turkey might cook a little faster due to the lower atmospheric pressure. You might need to adjust the cooking time slightly.
- Pan Type: The type of roasting pan you use can also affect cooking time. A dark-colored pan will absorb heat more quickly, potentially leading to faster cooking.
(Part 2) Prepping Your Turkey for Perfection: Setting the Stage for Success

Alright, now that we've tackled the time estimations, let's move on to prepping the turkey. This step is crucial for achieving that golden, crispy skin and juicy meat. It's like laying the foundation for a successful roast.
Choosing the Right Turkey: Fresh or Frozen, the Choice is Yours
First things first, you need to pick the right turkey for your needs. I generally go for a fresh, whole turkey over a frozen one. Fresh turkeys offer a more intense flavour, and you can avoid the defrosting hassle. If you're opting for a frozen turkey, make sure you give it plenty of time to defrost in the refrigerator, following the instructions on the package. Never defrost a turkey at room temperature, as this can lead to bacterial growth.
Pat It Dry, Then Season It Up: Achieving the Perfect Crisp
Once you've got your turkey ready, pat it dry with paper towels. This is a vital step! Excess moisture can lead to steaming rather than browning. Now, let's get creative. Season the turkey generously inside and out with your favourite blend of herbs and spices. I'm a fan of a simple combination of salt, pepper, garlic powder, and onion powder, but feel free to experiment. You can also add a bit of paprika for a lovely reddish hue, or even a citrus blend for a tangy twist. Remember, seasoning is key to creating a flavourful and delicious turkey.
The Art of Brining (Optional but Highly Recommended): Unlocking Juicy Secrets
Now, here's a little secret weapon that'll take your turkey to the next level: brining. Brining involves soaking the turkey in a salt water solution for a few hours, which helps to retain moisture and add flavour. It's a bit of extra work, but the results are truly worth it. You'll get a turkey that's incredibly juicy and tender, especially for those larger birds. You can find countless recipes for homemade brines online, or even pick up a pre-mixed brine solution from the supermarket. Experiment with different herbs and spices to create your own unique flavour profile.
Don't Forget the Trussing: Maintaining Shape and Ensuring Even Cooking
Before we put the turkey in the oven, we need to truss it. Trussing involves tying the turkey's legs and wings together to help it cook evenly and maintain its shape. It's not a difficult process. There are various methods, but the easiest one I've found is using kitchen twine. You can find tutorials online if you need a visual guide. Trussing helps to ensure the turkey cooks evenly and prevents the legs from drying out.
(Part 3) The Roast: Getting That Golden Glow

We've prepped the turkey, now it's time to put it in the oven! This is the moment we've been waiting for, the heart of the roasting process.
Choosing the Right Roasting Pan: The Foundation for Even Cooking
The choice of roasting pan is crucial. You want a pan that's big enough to accommodate the turkey comfortably without overcrowding. Look for a pan with a rack that elevates the turkey so it roasts evenly on all sides. I usually opt for a stainless steel roasting pan, which can withstand high temperatures and is easy to clean. You can also use a roasting pan with a lid, which can help to trap moisture and keep the turkey moist.
The Importance of Temperature and Timing: A Balanced Approach
Preheat your oven to the desired temperature, which is usually between 325°F (160°C) and 350°F (175°C). Once the oven is preheated, place the turkey in the pan, breast side up. Now, remember that cooking time chart we talked about? Refer to it to get a general idea of how long your turkey needs to roast. However, don't rely solely on time. We'll be using a meat thermometer to ensure the turkey is cooked perfectly through.
The Basting Ritual: Adding Moisture and Flavor
Here's where the fun begins: basting. Basting involves pouring the pan drippings over the turkey during the roasting process. This helps to keep the turkey moist and contributes to that glorious golden-brown skin. Baste every 30-45 minutes, or more frequently if you have the time. You can use a spoon, a baster, or even a turkey baster. For a more intense flavour, try basting with butter or a herb-infused oil.
Resting is Key: Allowing the Juices to Redistribute
Once the turkey reaches the desired internal temperature, remove it from the oven and let it rest for at least 15-20 minutes before carving. This resting period allows the juices to redistribute, resulting in a more flavorful and juicy turkey. Cover the turkey with aluminium foil to keep it warm while it rests.
(Part 4) The Tell-Tale Signs: Checking for Doneness
We've come to the most important part – ensuring our turkey is cooked to perfection! You don't want to take any chances when it comes to food safety, and a meat thermometer is our trusty sidekick for this task.
The Meat Thermometer: Your Culinary Companion
Every kitchen should have a reliable meat thermometer. It's an inexpensive investment that ensures your turkey is cooked to a safe internal temperature. Insert the thermometer into the thickest part of the thigh, making sure to avoid hitting any bone. You can also check the temperature of the thickest part of the breast. Both should reach a minimum internal temperature of 165°F (74°C).
The Golden Rule: 165°F (74°C) - A Safety Guarantee
The USDA recommends a minimum internal temperature of 165°F (74°C) for a whole turkey. Once the thermometer reaches that temperature, your turkey is ready to be taken out of the oven. You can also check the temperature of the thickest part of the breast, which should also reach 165°F (74°C).
Visual Cues: Beyond the Thermometer - Signs of a Perfectly Roasted Bird
While a meat thermometer is essential, there are also some visual clues that can indicate whether your turkey is done. The juices running clear from the thigh, the skin becoming golden brown, and the leg moving freely when you wiggle it are all good indicators. However, always rely on the meat thermometer for the most accurate assessment of doneness.
(Part 5) Carving Time: The Grand Finale
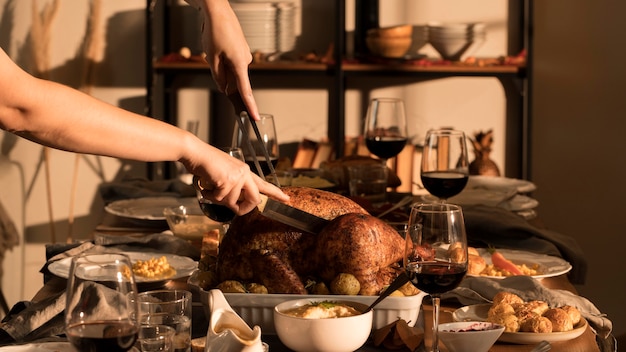
The turkey is cooked, rested, and ready to be carved! This is the moment of truth, the culmination of all our efforts. It's best to carve the turkey on a cutting board or platter. Use a sharp carving knife to make clean cuts. Remember to carve against the grain, which makes the meat easier to cut and prevents it from tearing.
A Step-by-Step Guide to Carving: Mastering the Art of Presentation
Here's a simple guide for carving your turkey, ensuring a beautiful presentation and making it easier to serve:
- Step 1: Remove the turkey legs. Cut through the joint where the thigh meets the body. You can then separate the thigh from the drumstick by cutting through the joint.
- Step 2: Remove the wings. Cut through the joint where the wings are attached to the breast.
- Step 3: Carve the breast meat. Cut across the breastbone, following the natural curve of the bone. You can then slice the breast into thin slices, carving against the grain.
- Step 4: Carve the thigh and drumstick. Cut the thigh into smaller pieces, carving against the grain. You can also carve the drumstick into smaller pieces.
(Part 6) Beyond the Basics: Taking Your Turkey to the Next Level
You've mastered the basics of turkey roasting. Now, let's explore some techniques to elevate your turkey game even further, impressing your guests with culinary creativity.
The "Butterflying" Technique: Creating a Stunning Presentation
For a more even cooking and a show-stopping presentation, try "butterflying" your turkey. This technique involves splitting the breastbone and flattening the turkey, creating a large, flat surface for even roasting. You can find detailed tutorials on butterflying turkeys online. It's a bit more involved but produces a beautifully even cook and a striking centerpiece for your table.
Spatchcocking: A Faster Way to Roast - For a Quick and Flavorful Bird
Spatchcocking is another great option for a quicker cooking time. It involves removing the backbone and flattening the turkey, allowing it to cook faster and more evenly. It's also a great way to maximize crispy skin. This technique is perfect for a smaller gathering or when you're short on time.
Elevating the Flavour: Adding a Touch of Magic
Here are some tips for adding extra flavour to your turkey, turning a classic roast into a culinary masterpiece:
- Stuffing the Cavity: Use a flavorful stuffing, like a sausage and apple stuffing, to add a burst of flavour to your turkey. Just remember to cook the stuffing separately to ensure it's safe to eat.
- Pancetta Wrap: Wrap the turkey with slices of pancetta or bacon before roasting. The fat from the pancetta will melt and baste the turkey, resulting in a wonderfully rich and flavorful bird.
- Citrus Rub: Create a citrus rub using lemon zest, orange zest, and herbs like rosemary and thyme. Rub the mixture all over the turkey for a refreshing and aromatic flavour.
- Herb Butter: Combine softened butter with chopped herbs like rosemary, thyme, and sage. Tuck the herb butter under the skin of the turkey before roasting for a burst of flavour.
(Part 7) The Leftovers: Delicious Second Helpings
Let's be honest, turkey leftovers are a treasure trove of culinary possibilities! Don't let them go to waste. Here are some ideas for using those delicious leftovers, ensuring no bit goes unused.
turkey sandwiches: A Classic for a Reason
Who doesn't love a classic turkey sandwich? Pile high with sliced turkey, cranberry sauce, stuffing, and a dollop of mayonnaise on your favourite bread. It's a simple yet satisfying meal, perfect for a quick lunch or a casual dinner.
turkey soup: Comforting and Hearty
Turn your turkey leftovers into a comforting and hearty soup. Use the turkey carcass to make a flavorful stock, then add the shredded turkey, vegetables, and your favourite herbs. It's a perfect way to warm up on a chilly day, transforming leftovers into a nourishing meal.
Turkey Shepherd's Pie: A Hearty and Savoury Dish
Layer mashed potatoes over a mixture of shredded turkey, vegetables, and gravy for a satisfying and comforting turkey shepherd's pie. It's a great way to use up leftover turkey and vegetables, creating a hearty and satisfying dish.
turkey pot pie: A Delicious and Hearty Option
Combine leftover turkey, vegetables, and gravy in a flaky pie crust for a delicious and hearty turkey pot pie. It's a perfect way to use up leftover turkey and vegetables, and it's sure to be a crowd-pleaser.
turkey salad: A Light and Refreshing Option
Combine leftover turkey with chopped celery, onion, and mayonnaise for a light and refreshing turkey salad. It's a perfect option for a picnic or a light lunch.
(Part 8) FAQs: Addressing Your Turkey Questions
Let's address some common questions about turkey roasting, providing you with the answers you need for a successful and enjoyable experience.
1. How long should I cook a turkey per pound?
Generally, allow 15-20 minutes per pound for a stuffed turkey and 13-18 minutes per pound for an unstuffed turkey. But remember, always use a meat thermometer to check for doneness, ensuring that the internal temperature reaches 165°F (74°C) in the thickest part of the thigh and breast.
2. Can I stuff a turkey the day before?
It's not recommended to stuff a turkey the day before because the stuffing could become unsafe to eat. Stuff the turkey right before roasting. It's also best to cook the stuffing separately for extra safety, ensuring it reaches a safe internal temperature of 165°F (74°C) before placing it inside the turkey.
3. What should I do if my turkey is overcooked?
Unfortunately, overcooked turkey can be dry. You can try to remedy this by adding a bit of gravy or sauce to the turkey. You can also use the overcooked turkey in other recipes, such as soups or salads.
4. How can I keep my turkey moist while roasting?
Brining is a great way to retain moisture. You can also use a turkey roasting bag, which helps to trap steam and keep the turkey moist. Basting regularly is also important for keeping the turkey juicy.
5. What are some good side dishes for turkey?
Classic side dishes for turkey include mashed potatoes, stuffing, cranberry sauce, green bean casserole, sweet potato casserole, and gravy. You can also get creative and try new side dishes, like roasted brussels sprouts with bacon or a cranberry and orange salad.
There you have it! Now you're equipped with the knowledge and confidence to roast a perfect turkey that will impress your guests and make your holiday gatherings unforgettable. Happy cooking!
Everyone is watching

Corn on the Cob: The Ultimate Guide to Perfectly Cooked Ears
Healthy MealsAh, corn on the cob. Just the name evokes images of sunny days, barbecues, and that sweet, juicy flavour that ...

Perfect Pork Roast Oven Cooking Time: A Guide to Delicious Results
Healthy MealsThere's something truly satisfying about a perfectly roasted pork. The aroma alone is enough to make your mout...

Scallops: The Ultimate Guide to Perfect Cooking
Healthy MealsAh, scallops. Those delicate, sweet, and utterly delicious morsels of the sea. They hold a special place in my...

Ham Cooking Time: How Long to Bake, Smoke, or Boil a Delicious Ham
Healthy MealsAh, ham. It's a classic, isn't it? A real crowd-pleaser, especially around holidays. And when done right, it'...

Spaghetti Squash: The Ultimate Guide to Cooking and Serving
Healthy MealsRemember that time you saw spaghetti squash at the supermarket, looking all bumpy and strange, and thought, "W...
