Ah, the turkey. The majestic centerpiece of festive feasts, the king of thanksgiving dinners, the bird that brings families together around the table. I've been tackling turkeys for years, and let me tell you, a perfectly roasted bird is a thing of beauty, bursting with flavour and juicy tenderness. But getting it right isn't always a walk in the park. That's why I'm here to share my tried-and-tested tips for roasting a 13 lb turkey, making the process a breeze for even the most novice cook.
(Part 1) Preparing the Bird for Greatness
A delicious turkey roast starts with a good foundation, like building a house on solid ground. It's all about prep, and the more you do, the better the results will be.
Choosing Your Champion
First, you need to choose your bird. A 13 lb turkey is perfect for a medium-sized gathering, giving everyone a good helping with leftovers to spare! You'll find both fresh and frozen turkeys at the butcher. While fresh might seem more "fancy," frozen turkeys are just as good, often more convenient, and easier to handle. Don't be afraid to ask the butcher for their recommendations – they're experts in the field!
The Brine: A Debate Worth Having
Now, we come to the age-old question: to brine or not to brine? It's a culinary debate as passionate as a football match! Personally, I'm a firm believer in brining. It's like giving your turkey a spa day, infusing it with moisture and making it incredibly tender and juicy. A simple brine is just salt and sugar dissolved in water, where the turkey takes a relaxing dip for a few hours. You can even add herbs and spices like rosemary, bay leaves, or peppercorns for a burst of flavour.
But if brining isn't your thing, no worries! You can still have a fantastic roast turkey. Just make sure you use a good quality bird and season it generously.
Seasoning the Star
Brined or not, seasoning is where you get to unleash your inner culinary artist. Salt and pepper are the basics, but feel free to add garlic powder, onion powder, thyme, rosemary, paprika, or even a pinch of cayenne for a little kick. Don't forget to season the cavity too – the inside is just as important as the outside!
Stuffing: To Stuff or Not To Stuff?
This is a question that divides families, friends, and even entire nations! I'm a fan of stuffing, but it's crucial to do it safely. Stuffing can trap moisture, making it harder for the turkey to cook evenly and increasing the risk of bacteria. There are two main approaches:
1. The Separate Stuffing Method: This is my preferred method. Cook the stuffing separately, ensuring it's cooked through and piping hot. This way, you have full control over the cooking process.
2. The Loose Stuffing Method: If you stuff the turkey, do it loosely, and cook the bird at a higher temperature to make sure everything reaches the correct internal temperature. This method requires a keen eye and a well-calibrated thermometer!
No matter what you choose, pack the stuffing tightly, as it will shrink as it cooks. A classic bread-based stuffing with aromatic herbs, vegetables, and sausage is a winner. And remember, if you're stuffing the bird, do it just before putting it in the oven.
(Part 2) The Grand Roast: A Culinary Stage for Your Bird
Okay, the prep is done, your turkey is seasoned and prepped, and you're ready for the main event: the roast itself.
Preheating the Oven to Perfection
Set your oven to 325°F (160°C). This is the sweet spot for a beautifully cooked turkey. The key is even heat distribution, so the bird cooks evenly throughout. And while we're on the topic of even cooking, you'll want to place your turkey on a roasting rack inside a roasting pan. This allows air to circulate around the bird, preventing it from steaming and ensuring a crispy skin.
The Time Game: How Long to Roast
A 13 lb turkey will generally take around 3-4 hours to reach that perfect level of doneness. But remember, every oven is different, and each turkey has its own personality. That's where a meat thermometer becomes your best friend. Insert the thermometer into the thickest part of the thigh (not touching bone), and it should register 165°F (74°C). That's your cue that the bird is ready to shine!
The Art of Basting: Keeping Things Juicy
While your turkey is roasting, it's important to baste it every 30-45 minutes to keep it moist and juicy. This simply involves pouring the delicious pan juices over the bird, which also contributes to the development of that beautiful crispy skin.
Resting the Star: A Moment of Relaxation
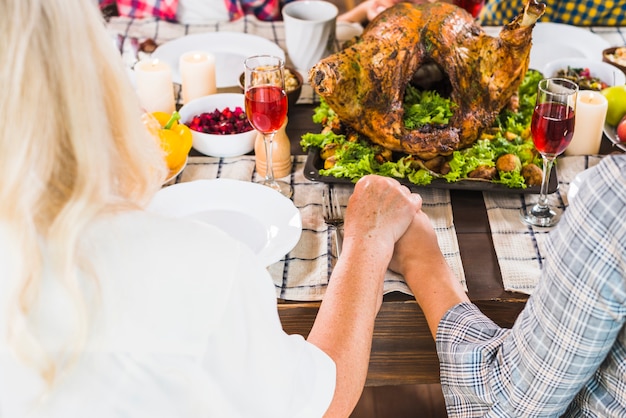
Once your turkey is cooked and the timer sings its song, resist the urge to carve it immediately. Your culinary creation needs a little time to rest, about 15-20 minutes. This allows the juices to redistribute throughout the meat, resulting in a juicy, flavorful, and perfectly tender turkey.
(Part 3) The Grand Finale: Carving the Roasted Marvel
The turkey is resting, the aroma is making your stomach rumble, and now it's time for the grand reveal: carving your masterpiece.
Tools of the Trade
You'll need a sharp carving knife, preferably one with a flexible blade. A carving fork is also a handy tool for holding the turkey steady while you slice.
The Carving Technique: A Step-by-Step Guide
Start with the breasts. Make a few slices across the breast, keeping the knife close to the bone. Then, move onto the legs and thighs. Use the fork to hold the turkey in place, and carefully cut along the bone to separate the leg from the thigh.
Presentation: A Feast for the Eyes
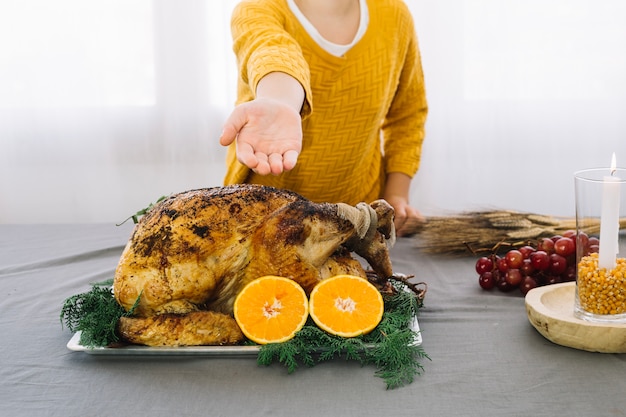
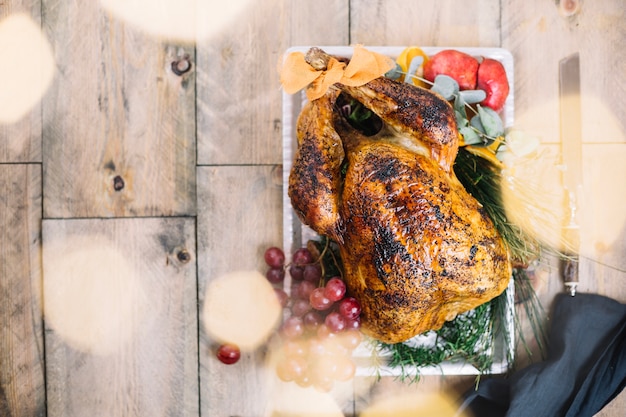
Now that your turkey is carved, it's time to put on a show for your guests. Arrange the carved turkey on a platter, surrounded by the stuffing, gravy, and cranberry sauce, creating a beautiful and enticing centerpiece for your table.
(Part 4) Gravy: The Soul of a turkey dinner
No turkey dinner is complete without a rich, flavorful gravy. This savory sauce adds depth and richness, pulling everything together for a truly satisfying experience.
Gravy from Scratch: A Culinary Triumph
You can create the perfect gravy from scratch using the pan drippings from the turkey. Remove the turkey from the pan and skim off any excess fat. Next, sprinkle a tablespoon or two of flour into the pan and stir it around, creating a roux. Gradually add broth or water, whisking constantly to avoid lumps. Bring the gravy to a simmer and season to taste.
A pinch of salt, pepper, and a dash of herbs like thyme or rosemary can elevate your gravy to new heights.
Gravy Granules: A Time-Saving Option
If time is of the essence, gravy granules are a convenient alternative. Just follow the instructions on the packet, adding water and simmering until thickened. For extra flavour, add a tablespoon of gravy browning or a sprinkle of herbs.
(Part 5) Leftover Turkey: The Treasure of Abundance
The beauty of a turkey dinner is the abundance of delicious leftovers! You can enjoy them for days, transforming them into new culinary delights.
turkey sandwiches: A Classic Comfort
Turkey sandwiches are a classic leftover solution. Combine leftover turkey, stuffing, cranberry sauce, and mayonnaise for a satisfying and easy meal. You can also use leftover turkey in salads, adding it to a bed of greens with nuts, cheese, and a vinaigrette.
Soup and Pies: A Culinary Transformation
Turn leftover turkey into a hearty soup. Simmer it with vegetables like carrots, celery, and onions, along with herbs and broth for a comforting and flavorful dish. You can also use leftover turkey to create a delicious turkey pie, adding vegetables, gravy, and a flaky crust for a satisfying and comforting meal.
(Part 6) Leftover Turkey Wisdom: Storage and Usage
Here are some helpful tips for storing and using your leftover turkey treasures:
- Store leftover turkey in airtight containers in the refrigerator for up to 3-4 days.
- You can also freeze leftover turkey for up to 2-3 months.
- Before using frozen turkey, thaw it in the refrigerator overnight.
(Part 7) Turkey Troubleshoot: Solving Common Mishaps
We've all been there, a moment of panic when the turkey doesn't turn out quite as planned. But don't despair! There's a solution for every turkey mishap.
Dry Turkey: Restoring Moisture
If your turkey comes out dry, it's likely due to overcooking. To prevent this, use a meat thermometer to ensure the turkey reaches the correct temperature. You can also try brining the turkey before roasting to lock in moisture.
To salvage a dry turkey, you can add gravy or sauce to make it more moist. You can also try shredding the turkey and incorporating it into a soup or casserole, where it will absorb some of the moisture from the other ingredients.
Undercooked Turkey: Safety First
An undercooked turkey is a big no-no. If your turkey is undercooked, return it to the oven and cook it for a bit longer to ensure it reaches the safe internal temperature of 165°F (74°C). Never eat an undercooked turkey, as it can be dangerous for your health.
Burnt Skin: Protecting the Golden Crust
A burnt turkey skin is a common problem, but you can prevent it by tenting the turkey with foil during the last part of the cooking time. This will help protect the skin from burning while the turkey finishes cooking.
(Part 8) The Journey of a Turkey Roast: Beyond the Recipe
roasting a turkey is more than just cooking a meal – it's a culinary journey. It's about embracing traditions, savoring the flavors, and sharing the experience with loved ones.
Tips for a Triumphant Roast
Here are some final tips for a successful turkey roast:
- Plan ahead and allow plenty of time for preparation and cooking.
- Don't be afraid to experiment with different seasonings and stuffing recipes.
- Use a meat thermometer to ensure your turkey is cooked to the right temperature.
- Let the turkey rest before carving to allow the juices to redistribute.
- Most importantly, enjoy the process and the delicious results!
(Part 9) Turkey Roast FAQs: Solving Your Questions
Now let's tackle those burning questions that pop up when roasting a turkey.
1. My turkey is too small for the roasting pan. What do I do?
No worries! You can use a smaller pan, or even a baking sheet, as long as it fits the bird comfortably. Just make sure you use a roasting rack to elevate the turkey so air can circulate.
2. How do I know when my turkey is cooked through?
The best way to check is by using a meat thermometer. Insert it into the thickest part of the thigh, making sure it doesn't touch bone. The turkey is cooked when it reaches 165°F (74°C).
3. What if my turkey is overcooked?
Overcooked turkey can be drier than you'd like, but it's still safe to eat. You can try adding some gravy or sauce to make it more moist. You can also shred the leftover turkey and use it in a soup or casserole.
4. Can I cook the turkey with the stuffing inside?
While it's a tradition for some, it's not recommended. Stuffing can trap moisture inside the turkey, making it harder to cook through and increasing the risk of foodborne illness. It's best to cook the stuffing separately to ensure it's cooked safely.
5. How long can I store leftover turkey in the refrigerator?
Leftover turkey can be stored in the refrigerator for up to 3-4 days in airtight containers. Be sure to use it within that time frame for the best quality.
Everyone is watching

Corn on the Cob: The Ultimate Guide to Perfectly Cooked Ears
Healthy MealsAh, corn on the cob. Just the name evokes images of sunny days, barbecues, and that sweet, juicy flavour that ...

Perfect Pork Roast Oven Cooking Time: A Guide to Delicious Results
Healthy MealsThere's something truly satisfying about a perfectly roasted pork. The aroma alone is enough to make your mout...

Ham Cooking Time: How Long to Bake, Smoke, or Boil a Delicious Ham
Healthy MealsAh, ham. It's a classic, isn't it? A real crowd-pleaser, especially around holidays. And when done right, it'...

Scallops: The Ultimate Guide to Perfect Cooking
Healthy MealsAh, scallops. Those delicate, sweet, and utterly delicious morsels of the sea. They hold a special place in my...

Spaghetti Squash: The Ultimate Guide to Cooking and Serving
Healthy MealsRemember that time you saw spaghetti squash at the supermarket, looking all bumpy and strange, and thought, "W...