I've always been a big fan of roast turkey. It's a dish that brings families and friends together, and the aroma wafting through the house as it cooks is pure comfort food bliss. But let’s be honest, cooking a turkey can feel a bit intimidating, especially if you're aiming for that picture-perfect, golden-brown roast. It's a big bird, and you want to make sure it's cooked perfectly – no one wants a dry, overcooked turkey, and definitely not a raw one! So I’ve been on a mission to master the art of roasting a turkey breast, and I'm excited to share what I’ve learned along the way.
I've tried various methods, experimented with different cooking times, and even consulted with some seasoned chefs. Through trial and error, I've finally cracked the code to a juicy, flavorful, and perfectly cooked turkey breast. Get ready to dive into the world of turkey roasting with me, as we break down everything from choosing the right turkey breast to achieving that irresistible golden-brown skin.
Part 1: Getting Started - Laying the Foundation for Success

Choosing the Right Turkey Breast: The Heart of Your Roast
The first step is selecting the perfect turkey breast. This is crucial for a successful roast, so take your time. Look for a turkey breast that’s plump and well-shaped, with a good amount of fat. That fat plays a crucial role in keeping the meat juicy and flavorful during cooking. Avoid breasts that look dry or have any discolouration. And remember, size matters! You'll want a turkey breast that's large enough to feed everyone at your table.
I typically go for a breast that weighs around 4 to 5 pounds, which is perfect for a small family gathering or a cozy dinner party. But, adjust the size according to your needs. Remember, you can always carve any leftover turkey breast into delicious sandwiches or repurpose it into another dish.
Preparing the Turkey Breast: Setting the Stage for Flavor
Once you've got your ideal turkey breast, it’s time to prep it for roasting. You can buy a pre-brined turkey breast, already seasoned and ready to go, or you can take the plunge and brine it yourself. I prefer to brine my turkey breast. It's a simple process that adds a burst of flavor and keeps the meat incredibly moist.
Brining Your Turkey Breast: A Simple Secret for Incredible Flavor and Juiciness
Brining is all about soaking the turkey breast in a salt and sugar solution. You can get creative and customize your brine by adding herbs, spices, and even fruit juices. I’m a fan of a simple brine made with salt, sugar, and fresh rosemary - it creates a beautifully balanced flavor profile. The key is to ensure the turkey breast is completely submerged in the brine for at least 4 hours, or even better, overnight. The longer it soaks, the more flavorful and juicy your turkey breast will be.
Choosing the Right roasting pan: Creating the Perfect Cooking Environment
Now, you'll need a good roasting pan. I recommend using a pan that's large enough to accommodate the turkey breast comfortably. You want to ensure the breast has ample space to cook evenly without getting crowded.
Make sure your pan is oven-safe and comes with a rack. This rack allows hot air to circulate around the turkey breast, creating a more even cooking environment. This is a crucial element in achieving that beautiful golden-brown skin and tender, juicy meat. Alternatively, you can use a roasting rack placed inside a separate pan, which is another popular method for roasting a turkey breast.
Part 2: Roasting the Turkey Breast – Bringing It All Together

Preheating the Oven: Setting the Stage for Even Cooking
Preheating the oven is a crucial step for achieving a perfectly cooked turkey breast. I always set the oven to 325°F (163°C) and let it preheat for at least 30 minutes. This allows the oven to reach the desired temperature, ensuring even cooking from the start. Remember, a consistent oven temperature is key to avoiding undercooked or overcooked spots on your turkey breast.
Placing the Turkey Breast in the Oven: Ready for the Transformation
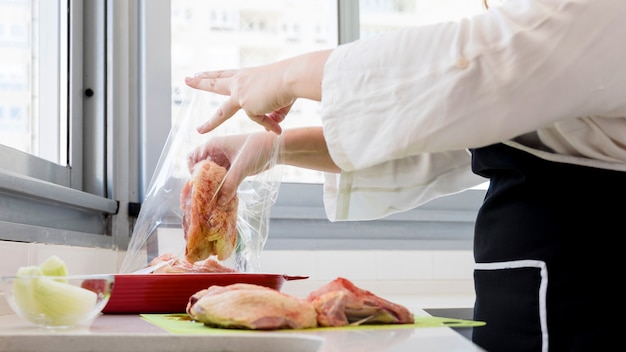
Before placing the turkey breast in the oven, you need to rub it with butter, oil, or even a combination of both. This creates a beautiful golden-brown crust and helps keep the breast moist. I prefer to use a mix of butter and olive oil for a rich, flavorful experience.
Once the oven is preheated, carefully place the turkey breast in the roasting pan or on the roasting rack. I recommend placing the breast on the rack inside the roasting pan to allow hot air to circulate all around it. This ensures even cooking and contributes to the development of that lovely crispy skin.
roasting time: A Guide to Achieving Perfection
Now, this is where things get a bit more specific. The cooking time for a turkey breast depends on its weight. As a general rule of thumb, it takes about 15 to 20 minutes per pound to roast a turkey breast. But don't take my word for it! Always use a meat thermometer to check the internal temperature. You want the breast to reach an internal temperature of 165°F (74°C) to ensure it's cooked through and safe to eat.
Part 3: Monitoring and Checking - Ensuring Success Every Step of the Way

Using a Meat Thermometer: Your Essential Tool for a Perfectly Cooked Turkey Breast
A meat thermometer is your best friend when roasting a turkey breast. It's a crucial tool for ensuring the meat is cooked to perfection. Don't rely solely on the cooking time; use a meat thermometer to check the internal temperature of the breast. I usually start checking the temperature after about 1 hour of roasting time. Insert the thermometer into the thickest part of the breast, making sure it doesn't touch bone.
The turkey is done when the internal temperature reaches 165°F (74°C). This is a sign that the turkey is fully cooked and safe to eat. A thermometer is your safety net, guaranteeing that you'll avoid undercooked meat and ensure a delicious and safe meal for everyone.
Basting the Turkey Breast: Keeping It Moist and Flavorful
While the turkey breast is roasting, you can baste it periodically to keep it moist and develop a rich flavor. Basting is simply pouring the juices from the bottom of the roasting pan over the breast. I use a basting spoon or a ladle for this. You can baste the breast with the juices from the pan or with a mix of butter, herbs, and spices for an extra burst of flavor.
However, I've found that basting too often can actually dry out the turkey breast. I usually baste it only a few times during cooking, focusing on the initial stages and towards the end. This helps maintain the moisture without overdoing it.
Resting the Turkey Breast: Allowing the Flavors to Bloom
Once the turkey breast is cooked through, you need to let it rest before carving. This allows the juices to redistribute throughout the meat, resulting in a juicier, more flavorful turkey breast. I recommend letting the turkey breast rest for at least 10-15 minutes before carving. I usually cover it with foil to keep it warm and moist.
This resting time is crucial for a delicious and satisfying meal. It allows the internal temperature to equalize, preventing juices from escaping when you carve the turkey. This ensures you get tender, flavorful slices, perfect for your festive feast.
Part 4: Carving and Serving - The Moment of Truth
Carving the Turkey Breast: The Art of Slicing Perfection
After the turkey breast has rested, you can carve it. I use a sharp carving knife and a carving fork to carefully slice the breast. Remember to carve against the grain of the meat for the most tender slices.
I usually slice the breast into thin slices, which are easier to manage and make for a more visually appealing presentation. You can then arrange them on a platter or serving dish. For a more casual meal, you can even carve the breast into individual portions.
Serving the Turkey Breast: A Feast for the Senses
Now comes the best part, serving the turkey breast. It's the star of the show! I love serving it with classic side dishes like mashed potatoes, gravy, stuffing, cranberry sauce, and roasted vegetables.
The combination of the tender, juicy turkey breast with the flavorful side dishes creates a symphony of taste and textures that will leave your guests wanting more. This is a dish that embodies the spirit of togetherness and celebration.
Part 5: Tips and Tricks: Elevating Your turkey breast roasting Game
Tips for a Juicy Turkey Breast
Here are a few tips to ensure a juicy, flavorful, and perfectly cooked turkey breast:
- Don't overcrowd the roasting pan. Give the turkey breast plenty of room to cook evenly. Overcrowding can lead to uneven cooking and a dry turkey breast.
- Use a meat thermometer to check the internal temperature. Don't rely solely on the cooking time. A thermometer is your key to a perfectly cooked turkey breast, no matter the size or shape.
- Baste the turkey breast periodically to keep it moist. Basting helps maintain the moisture and contributes to a more flavorful result.
- Let the turkey breast rest before carving to allow the juices to redistribute. Resting is crucial for a juicy, flavorful, and tender turkey breast. It’s a simple step that makes a big difference.
Tips for a Crispy Skin
For a crispy skin, follow these tips:
- Pat the turkey breast dry before roasting. Moisture hinders crispiness. Removing excess moisture helps the skin brown and become crispy.
- Rub the skin with butter or oil to create a barrier. This helps the skin develop a beautiful golden-brown color and crisp up nicely.
- Roast the turkey breast at a high temperature for the first part of the cooking time. This initial high temperature helps achieve a crispy skin, while a lower temperature ensures the meat cooks through evenly.
- Don't baste too often, as this can soften the skin. Basting is important for keeping the meat moist, but too much basting can hinder the development of a crispy skin.
Tips for a Flavorful Turkey Breast
Enhance the flavor of your turkey breast with these tips:
- Brine the turkey breast before roasting. Brining adds a burst of flavor and keeps the meat incredibly moist, creating a truly delicious experience.
- Stuff the turkey breast with herbs, spices, or bread stuffing. This adds depth of flavor and aroma to the turkey breast. Experiment with different combinations of herbs and spices to create your signature flavor.
- Roast the turkey breast with vegetables for extra flavor. Roasting vegetables alongside the turkey breast adds a layer of flavor and aroma to the dish. Experiment with different vegetables to create your perfect flavor combination.
- Make a flavorful gravy from the pan juices. The pan juices are a treasure trove of flavor. Use them to create a rich and flavorful gravy that perfectly complements your turkey breast.
Part 6: Turkey Breast Cooking Time Chart: A Quick Reference Guide
Here's a quick chart summarizing the cooking time for turkey breasts based on their weight.
| Weight (lbs) | Cooking Time (mins) |
|---|---|
| 4 lbs | 60-80 |
| 5 lbs | 75-100 |
| 6 lbs | 90-120 |
| 7 lbs | 105-140 |
Remember, these are just estimates, and the actual cooking time may vary depending on your oven and the thickness of the turkey breast. Always use a meat thermometer to ensure the turkey breast is cooked through.
Part 7: Common Mistakes to Avoid: Learning from Experience
We've all been there, made a few mistakes along the way. But learning from those mistakes is how we become better cooks. Here are some common mistakes to avoid when roasting a turkey breast:
- Overcooking the turkey breast. This can lead to dry, tough meat. Always use a meat thermometer to check the internal temperature and avoid overcooking.
- Undercooking the turkey breast. This is a serious food safety concern. Make sure the turkey breast reaches an internal temperature of 165°F (74°C) to ensure it's cooked through.
- Crowding the roasting pan. This can prevent the turkey breast from cooking evenly. Give it plenty of space to cook.
- Not basting the turkey breast. This can lead to a dry breast. Baste it periodically to keep it moist.
- Not letting the turkey breast rest. This can result in a less juicy and flavorful breast. Let it rest for at least 10-15 minutes before carving.
Part 8: Leftovers and Storage: Making the Most of Your Turkey Breast
You'll likely have some turkey breast leftovers after your feast. That's great! Leftovers are a perfect way to repurpose the turkey breast into delicious meals. You can store it in the refrigerator for 3-4 days. To ensure it stays fresh, wrap it tightly in plastic wrap or aluminum foil.
Repurposing Turkey Breast Leftovers: Turning Leftovers into Culinary Delights
Here are some ideas for repurposing your turkey breast leftovers:
- turkey sandwiches: Make delicious sandwiches with leftover turkey breast, bread, lettuce, tomato, and mayonnaise. You can add a touch of creativity by adding a slice of avocado, a few slices of cucumber, or a sprinkle of your favorite herbs.
- turkey soup: Create a hearty and comforting turkey soup by adding leftover turkey breast to a broth base with vegetables, noodles, or rice. You can add a sprinkle of dried herbs for an extra touch of flavor.
- turkey salad: Combine leftover turkey breast with mayonnaise, celery, onion, and your favorite herbs to make a flavorful turkey salad. You can add a few chopped walnuts or a drizzle of honey for added depth of flavor.
- turkey pot pie: Use leftover turkey breast in a pot pie filled with gravy, vegetables, and a flaky crust. A sprinkle of grated cheese on top adds a lovely touch.
- Turkey enchiladas: Turn leftover turkey breast into delicious enchiladas by layering it with tortillas, cheese, and your favorite sauce. You can add a touch of spice by using a jalapeno pepper or some diced onions in the filling.
FAQs: Answering Your Turkey Breast Roasting Questions
Here are some frequently asked questions about roasting turkey breast:
1. Can I use a pre-brined turkey breast?
Yes, you can use a pre-brined turkey breast. It's already seasoned and ready to go, so you can skip the brining step. Just follow the instructions on the packaging for roasting time and temperature.
2. What if my turkey breast is frozen?
If you're using a frozen turkey breast, you need to thaw it completely before roasting. You can thaw it in the refrigerator for 1-2 days, or you can thaw it in cold water for 3-4 hours. Never thaw a turkey breast at room temperature. This can create a breeding ground for bacteria, which can be harmful to your health.
3. Can I roast a turkey breast with other vegetables?
Yes, you can roast a turkey breast with other vegetables. I often roast root vegetables like potatoes, carrots, and onions alongside the turkey breast. They add flavor to the dish and are a healthy addition to the meal. You can also add other vegetables like asparagus, Brussels sprouts, or squash, depending on your preferences.
4. What kind of pan is best for roasting a turkey breast?
A roasting pan with a rack is ideal for roasting a turkey breast. This allows hot air to circulate around the breast, ensuring even cooking. You can also use a roasting rack instead of a pan.
5. How do I know when my turkey breast is done?
The best way to tell when a turkey breast is done is to use a meat thermometer. Insert it into the thickest part of the breast, making sure it doesn't touch bone. The turkey breast is done when the internal temperature reaches 165°F (74°C). Don't rely on the cooking time alone. A meat thermometer ensures a perfectly cooked and safe turkey breast.
I hope this guide has provided you with the tools and knowledge you need to create a delicious and perfect roast turkey breast. Remember, practice makes perfect! Don't be afraid to experiment with different techniques and flavors to find what you enjoy most. Happy roasting!
Everyone is watching

Corn on the Cob: The Ultimate Guide to Perfectly Cooked Ears
Healthy MealsAh, corn on the cob. Just the name evokes images of sunny days, barbecues, and that sweet, juicy flavour that ...

Scallops: The Ultimate Guide to Perfect Cooking
Healthy MealsAh, scallops. Those delicate, sweet, and utterly delicious morsels of the sea. They hold a special place in my...

Spaghetti Squash: The Ultimate Guide to Cooking and Serving
Healthy MealsRemember that time you saw spaghetti squash at the supermarket, looking all bumpy and strange, and thought, "W...

Salmon Cooking Times: Perfect Guide for Every Recipe
Healthy MealsLet me tell you, cooking salmon is an art form. It's all about getting that perfect balance: juicy and tender,...

Ham Cooking Time: How Long to Bake, Smoke, or Boil a Delicious Ham
Healthy MealsAh, ham. It's a classic, isn't it? A real crowd-pleaser, especially around holidays. And when done right, it'...
