There's something truly magical about a roast dinner, isn't there? The comforting aroma that fills your home as it cooks, the succulent meat, the crispy potatoes, and those gorgeous roasted vegetables – it's a meal that screams comfort food and brings everyone to the table. But sometimes, you want something a bit different, something that packs a punch in terms of flavour. Enter the tri tip roast.
This cut of beef, a triangular piece taken from the bottom sirloin, is packed with flavour and, when cooked right, is unbelievably tender. As a self-proclaimed meat enthusiast, the tri tip has quickly become one of my absolute favourites. It's versatile, perfect for grilling, smoking, or roasting, and it's a real crowd-pleaser. You know that feeling when you put something on the table and everyone goes silent, their eyes glued to the dish, then bursts into cheers and compliments? Yeah, that's the tri tip effect.
Over the years, I've tried countless recipes and techniques, experimenting with different marinades, rubs, and cooking times. Through these trials and tribulations, I've honed my skills and perfected my go-to recipe for a juicy, flavourful tri tip roast cooked in the oven.
So, grab your apron, get ready for some delicious smells, and let's get cooking!
Part 1: The Secret to Success: choosing the right cut
You know how they say, "you can't make a silk purse out of a sow's ear"? Well, the same applies to cooking – you need the right ingredients to create something truly special. And when it comes to tri tip, the choice of cut is crucial.
Here's what to look for when choosing your tri tip:
1. Look for a good marbling:
Marbling refers to the streaks of fat that run through the meat. This fat renders down during cooking, adding flavour and keeping the meat moist. You want to see a good amount of marbling, but not too much, as excessive fat can lead to a greasy roast.
Think of it like this: imagine a beautiful, richly marbled piece of beef. The fat streaks look like little veins, weaving through the muscle, adding depth and richness to the flavour. Now, imagine a piece of beef with hardly any marbling – it might be lean, but it might also be dry and a bit bland. You want that perfect balance, a good amount of marbling to ensure a tender, juicy, and flavourful result.
2. The colour:
A good tri tip should have a deep red colour, with a slight sheen. Avoid any cuts that are pale or have a brownish hue, as this might indicate older meat.
The colour of the meat is a great indicator of freshness. A deep, rich red colour suggests that the meat is fresh and hasn't been sitting around for too long. A pale colour, on the other hand, might mean that the meat is older and has lost its moisture and flavour.
3. Feel the texture:
The meat should feel firm and springy to the touch. If it feels mushy or slimy, it’s probably not fresh.
Think of the texture as a sign of the meat's quality. A firm, springy texture tells you that the meat is fresh and hasn't been sitting around for too long. A mushy or slimy texture, however, suggests that the meat might be past its prime and could have lost its flavour and tenderness.
Part 2: Prepping the Tri Tip: A Delicious Transformation
Now that you’ve got your perfect tri tip, it’s time to give it the star treatment – a pre-roast pampering that will take it from good to great.
1. The Trim:
Start by trimming any excess fat from the tri tip. You want a nice even layer of fat, not a thick, uneven layer that could render unevenly.
Trimming the excess fat is important for a couple of reasons. First, it prevents the fat from rendering unevenly, which can lead to some parts of the roast being dry while others are greasy. Second, it ensures that the heat penetrates the meat evenly, allowing for a more consistent cooking experience.
2. The Rub:
This is where you can get creative. The rub is your chance to create a flavour profile that suits your tastebuds. I love a simple combination of salt, pepper, garlic powder, onion powder, and smoked paprika. But you can go wild with herbs and spices, like rosemary, thyme, oregano, or even chilli powder for a spicy kick.
Think of the rub as your signature touch, your way of adding personality to the dish. It's like adding a dash of your own creativity to a classic recipe. Whether you prefer a simple, classic flavour profile or something a bit bolder, there's a rub out there for you.
Whatever combination you choose, make sure you rub it all over the tri tip, ensuring the spices are well-distributed.
Remember, a well-distributed rub ensures that every part of the meat gets a taste of your chosen flavour profile.
3. The Marinate: (Optional)
Marination isn’t strictly necessary, but it can really boost the flavour and tenderness of your tri tip.
My go-to marinade is a simple mix of olive oil, red wine vinegar, Dijon mustard, garlic, and herbs. I like to use rosemary and thyme, but you can experiment with other flavours.
Simply place the tri tip in a large zip-lock bag or a shallow dish, pour the marinade over, and refrigerate for at least 2 hours, or up to overnight.
Marination allows the flavours to penetrate the meat, creating a more intense and complex flavour profile. It also helps to tenderize the meat, making it even more succulent and enjoyable.
Part 3: Oven-Ready: Setting the Stage for Perfection
The oven is now your stage, and it's time to set the scene for the tri tip to shine.
1. Preheat:
Preheat your oven to 400°F (200°C). This high temperature will give the tri tip a beautiful sear on the outside and cook it quickly, locking in the juices.
Preheating the oven ensures that the tri tip gets a nice, even sear on the outside, which helps to seal in the juices and create a beautifully caramelized crust.
2. The Roast Pan:
Choose a heavy-duty roasting pan that is large enough to comfortably hold the tri tip. The size should allow for even heat distribution and prevent the meat from crowding.
A heavy-duty roasting pan is essential for even heat distribution and preventing the meat from sticking. It's also important to ensure that the pan is large enough to accommodate the tri tip without overcrowding. This will ensure that the meat cooks evenly on all sides.
3. The Bed:
Line the roasting pan with parchment paper or a silicone mat. This will make cleanup a breeze and prevent the tri tip from sticking to the pan.
Lining the roasting pan with parchment paper or a silicone mat makes cleanup a breeze and prevents the tri tip from sticking to the pan, which can make carving more difficult and result in a less appealing presentation.
4. The Fat Side Up:
Place the tri tip in the roasting pan, fat side up. This allows the fat to render down and baste the meat, ensuring it stays juicy and tender.
Placing the tri tip fat side up allows the fat to render down, creating a natural basting process that keeps the meat moist and tender. As the fat melts, it drips over the meat, ensuring that every bite is juicy and flavorful.
Part 4: The Roast: A Dance of Temperature and Time
The oven is hot, the tri tip is ready, and now it's time for the magic to happen – the roast. This is where a little precision comes into play.
1. The Initial Sizzle:
Place the tri tip in the preheated oven and cook for 15 minutes. This will create a beautiful sear on the outside, locking in the flavour and juices.
This initial sear is crucial for creating a beautiful crust and locking in the juices. It also adds a layer of flavour to the meat, creating a delicious contrast between the crispy exterior and the tender interior.
2. The Temperature Drop:
After 15 minutes, reduce the oven temperature to 325°F (160°C). This will allow the tri tip to cook through evenly without overcooking.
This temperature drop is important for ensuring that the meat cooks through evenly without becoming dry and tough. It allows the meat to reach the desired internal temperature without overcooking the exterior.
3. The Cooking Time:
The cooking time will vary depending on the size and thickness of your tri tip. As a general rule, allow 15-20 minutes per pound for medium-rare, 20-25 minutes for medium, and 25-30 minutes for medium-well.
These are just general guidelines. The most accurate way to determine the cooking time is to use a meat thermometer.
But the ultimate guide is the meat thermometer. You want the tri tip to reach an internal temperature of 130°F (54°C) for medium-rare, 140°F (60°C) for medium, and 150°F (65°C) for medium-well.
A meat thermometer is the most reliable way to ensure that the tri tip is cooked to the desired doneness. This is particularly important when dealing with a cut of meat that can be easily overcooked and become dry and tough.
Remember, cooking a tri tip to the right temperature is essential for achieving that perfect balance of flavour and tenderness. Don't be afraid to experiment and find the doneness that suits your palate.
Part 5: The Rest: Patience is a Virtue
The tri tip is cooked, but the journey isn’t over yet. It’s time for the rest, a crucial step in ensuring that the meat is perfectly tender and juicy.
Remove the tri tip from the oven and let it rest for 15-20 minutes before carving.
During this time, the juices will redistribute throughout the meat, creating a more tender and flavorful cut.
Think of the resting period as a time for the tri tip to relax and regain its composure after its culinary adventure. During this time, the heat from the oven continues to cook the meat gently, while the juices redistribute, creating a more tender and flavorful cut.
While the tri tip rests, you can prepare your sides.
Part 6: The Sides: A Symphony of Flavors
The tri tip is the star of the show, but it needs a supporting cast to create a truly memorable meal. I like to keep the sides simple and complement the richness of the meat.
Here are some of my favourite side dish pairings:
1. Roasted Vegetables:
Roasted vegetables are a classic pairing for roast dinners, and they add a burst of colour and flavour. My go-to combination is Brussels sprouts, carrots, and potatoes. Simply toss them in olive oil, salt, pepper, and herbs, then roast them in the oven with the tri tip for the last 30 minutes of cooking.
Roasted vegetables provide a delightful contrast to the richness of the tri tip. They add a burst of colour and flavour, creating a balanced and satisfying meal.
For an extra touch of flavour, try adding a bit of balsamic vinegar or honey to the roasting vegetables. This will caramelize the vegetables and create a delicious glaze.
2. Creamy mashed potatoes:
The creamy richness of mashed potatoes is a perfect counterpoint to the juicy tri tip. You can keep them simple with butter and milk, or add a touch of garlic or herbs for extra flavour.
creamy mashed potatoes are the perfect comfort food, and they provide a delicious counterpoint to the richness of the tri tip. The smooth, creamy texture and mild flavour balance the bold flavours of the meat, creating a satisfying meal.
For a twist, try adding a bit of cheddar cheese or Parmesan cheese to your mashed potatoes for a more decadent flavour.
3. Green Salad:
A fresh, green salad with a light vinaigrette cuts through the richness of the meat and provides a refreshing contrast.
A green salad with a light vinaigrette adds a refreshing touch to the meal, providing a welcome contrast to the rich flavours of the tri tip and side dishes. The salad adds a sense of lightness and freshness to the meal, making it more balanced and enjoyable.
For a more complex flavour, try adding a few roasted nuts or dried cranberries to your salad. This will add a bit of crunch and sweetness to the dish.
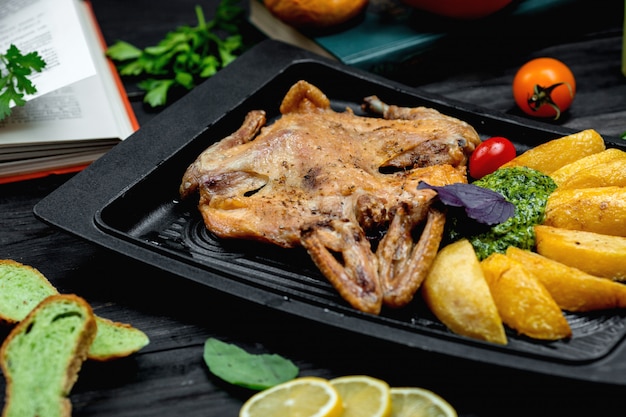
Part 7: Carving and Serving: A Culinary Finale
The tri tip has rested, the sides are ready, and it’s time for the grand finale – carving and serving.
1. The Carving:
Carefully carve the tri tip against the grain. This will make the meat easier to chew and more tender.
Carving against the grain is a crucial step in ensuring that the meat is tender and easy to chew. The muscle fibres in meat run in a particular direction, and carving against the grain breaks these fibres down, making the meat more tender.
2. The Presentation:
Arrange the carved tri tip on a platter, surrounded by your chosen side dishes.
Presentation matters! A beautifully arranged platter can elevate your meal from good to great. Arrange the tri tip and side dishes in a visually appealing way, and don't be afraid to use fresh herbs or other garnishes to add a touch of elegance.
3. The Finishing Touches:
Drizzle the tri tip with the pan juices for extra flavour.
Garnish with fresh herbs, like rosemary or thyme, for a touch of elegance.
And, of course, don’t forget to serve with a glass of your favourite red wine!
These finishing touches add a layer of sophistication and flavour to the dish, making it even more enjoyable. The pan juices add a rich and savory flavour, while fresh herbs provide a touch of freshness and aroma.
Part 8: Leftovers: A Second Act of Deliciousness
Don’t be surprised if you end up with leftovers. This is a good thing, because tri tip reheats beautifully.
Simply slice the leftover tri tip and reheat it in a skillet with a little butter or olive oil. You can also add a splash of red wine for extra flavour.
Serve the reheated tri tip on bread rolls for a delicious sandwich, or with your favourite salad.
Leftovers are an opportunity to create something new and delicious. Reheating the tri tip in a skillet with a little butter or olive oil allows you to create a crispy exterior while retaining the tenderness of the meat.
For a flavourful twist, try adding a bit of Dijon mustard or Worcestershire sauce to the skillet when reheating the tri tip.
Part 9: Tri Tip Variations: Expanding Your Culinary Horizon
While this recipe is my go-to for a classic tri tip roast, there’s a whole world of flavour waiting to be explored.
1. Spicy Tri Tip:
Add a touch of heat to your tri tip by incorporating chilli powder, cayenne pepper, or smoked paprika into your rub. You can also use a spicy marinade, like a chipotle-lime marinade.
For those who enjoy a bit of heat, a spicy tri tip is a delicious way to add a kick to your meal. The combination of spices and heat creates a flavour profile that is both bold and satisfying.
To create a truly fiery flavour, try using a combination of chipotle powder, cayenne pepper, and smoked paprika in your rub.
2. Herb-Crusted Tri Tip:
For a more herbaceous flavour, try a rub that includes rosemary, thyme, oregano, and garlic powder. You can also use a pesto marinade.
An herb-crusted tri tip is perfect for those who enjoy fresh, earthy flavours. The combination of herbs creates a complex and aromatic flavour profile that complements the rich flavour of the meat.
For a more intense flavour, try using fresh herbs instead of dried herbs in your rub.
3. Citrus-Marinated Tri Tip:
A bright, citrusy marinade can add a refreshing twist to your tri tip. Use a mixture of orange juice, lemon juice, olive oil, and herbs.
A citrus-marinated tri tip is a refreshing take on a classic dish. The bright citrus flavours cut through the richness of the meat, creating a balanced and flavorful meal.
For a more complex flavour, try adding a bit of honey or ginger to your citrus marinade.
4. Tri Tip with Asian-Inspired Flavors:
Explore Asian flavours by using a soy sauce, ginger, and garlic marinade. You can also add a sprinkle of sesame seeds to the rub.
An Asian-inspired tri tip is a bold and flavorful way to enjoy this cut of meat. The combination of soy sauce, ginger, and garlic creates a complex and savory flavour profile that is both unique and delicious.
For a truly authentic Asian flavour, try using a combination of soy sauce, mirin, and sake in your marinade.
Part 10: FAQs: Your Tri Tip Questions Answered
I’ve been cooking tri tip for years, and I’ve learned a thing or two along the way. Here are some frequently asked questions and my expert answers:
1. What if my tri tip is too thick?
If your tri tip is too thick, you can butterfly it by slicing it horizontally almost all the way through, then opening it up like a book. This will allow it to cook more evenly.
Butterflying a tri tip is a simple technique that allows the meat to cook more evenly. By slicing the meat horizontally and opening it up, you create a thinner piece of meat that cooks more quickly and consistently.
2. How can I tell if my tri tip is cooked to the right temperature?
The most accurate way to check the doneness of your tri tip is with a meat thermometer. However, you can also use a finger-test. If the tri tip feels firm and springy to the touch, it’s medium-rare. If it feels more firm, it’s medium. And if it feels very firm, it’s medium-well.
A meat thermometer is the most reliable way to determine the doneness of your tri tip. However, if you don't have a meat thermometer, the finger-test can be a helpful guide.
Remember, the finger-test is not a precise method, so it's best to use a meat thermometer for the most accurate results.
3. Can I freeze tri tip?
Yes, you can freeze tri tip for up to 3 months. Simply wrap it tightly in plastic wrap and then aluminum foil, and place it in the freezer.
Freezing tri tip is a great way to preserve it for later use.
When thawing tri tip, it's important to thaw it in the refrigerator overnight. Do not thaw it at room temperature, as this can lead to bacteria growth.
4. What can I do with leftover tri tip?
As mentioned earlier, you can reheat leftover tri tip and serve it on bread rolls for a delicious sandwich, or with your favourite salad. You can also use it in tacos, burritos, or other dishes.
Leftover tri tip is a versatile ingredient that can be used in a variety of dishes.
For a quick and easy meal, try slicing the leftover tri tip and adding it to a bowl of pasta with your favourite sauce.
5. How can I make sure my tri tip doesn’t dry out?
To ensure your tri tip stays juicy, make sure it’s cooked to the correct temperature. Also, don’t overcook it, and let it rest for 15-20 minutes after cooking. This will allow the juices to redistribute throughout the meat.
Overcooked tri tip can become dry and tough.
To further prevent dryness, you can also add a bit of broth or water to the roasting pan during cooking. This will create a moist environment that helps to keep the meat tender.
Now, go forth and conquer the world of tri tip roasts. Experiment, have fun, and enjoy the delicious results!
Everyone is watching

Corn on the Cob: The Ultimate Guide to Perfectly Cooked Ears
Healthy MealsAh, corn on the cob. Just the name evokes images of sunny days, barbecues, and that sweet, juicy flavour that ...

Perfect Pork Roast Oven Cooking Time: A Guide to Delicious Results
Healthy MealsThere's something truly satisfying about a perfectly roasted pork. The aroma alone is enough to make your mout...

Scallops: The Ultimate Guide to Perfect Cooking
Healthy MealsAh, scallops. Those delicate, sweet, and utterly delicious morsels of the sea. They hold a special place in my...

Spaghetti Squash: The Ultimate Guide to Cooking and Serving
Healthy MealsRemember that time you saw spaghetti squash at the supermarket, looking all bumpy and strange, and thought, "W...

Ham Cooking Time: How Long to Bake, Smoke, or Boil a Delicious Ham
Healthy MealsAh, ham. It's a classic, isn't it? A real crowd-pleaser, especially around holidays. And when done right, it'...