There's nothing quite like a perfectly cooked sirloin steak, is there? It's the kind of dish that can make you feel like you're dining at a fancy restaurant, even if you're just whipping it up at home on a Tuesday night. But let's be honest, getting that juicy, tender, and flavorful result can sometimes feel like a bit of a gamble. Don't worry, though, because I'm here to guide you through the entire process, from choosing the right cut to mastering the art of searing and resting. I'll even share some of my favorite tips and tricks that I've picked up over the years – the stuff they don't teach you in cookbooks!
So, grab your apron, sharpen your knives, and let's embark on this culinary journey together. We'll cover everything from the basics to the more advanced techniques, ensuring that your next top sirloin steak is a masterpiece, guaranteed to impress even the pickiest of eaters.
Part 1: Understanding Top Sirloin

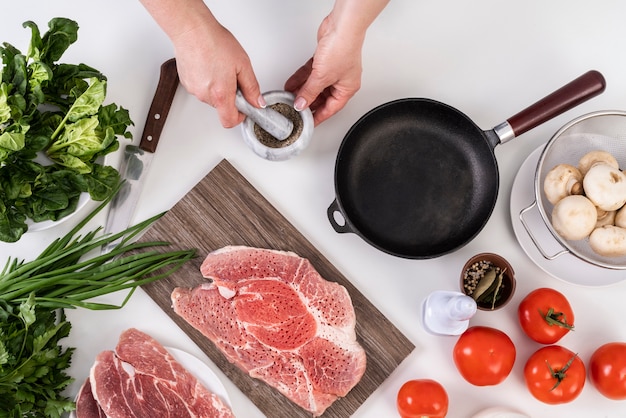
Before we get into the nitty-gritty of cooking, let's talk about the star of the show: top sirloin. It's a cut of beef taken from the loin, which runs along the backbone of the cow. Now, top sirloin is known for being a bit leaner than some of its more luxurious cousins like ribeye or filet mignon, but don't let that fool you! It's still incredibly flavorful and boasts a nice, firm texture that holds up well under various cooking methods. The trick is understanding its quirks and how to coax out its full potential.
1.1 Choosing the Right Cut: A Butcher's Guide
When you're at the butcher's counter, look for a top sirloin steak that's got a nice, even marbling of fat running through it. This marbling is key, folks, as it's what adds a ton of flavor and keeps the steak juicy and tender. Avoid those cuts that are overly lean, because they tend to dry out and get tough during cooking. You want that perfect balance of lean meat and juicy fat.
If you're feeling fancy, ask your butcher for a "center cut" sirloin steak. It's the most tender and flavorful part of the loin, so it's basically the king of the sirloin family.
And while you're talking to your butcher, don't be afraid to ask about the thickness. I find that a steak that's at least 1.5 inches thick cooks up beautifully, but it really comes down to your personal preference and how you plan to cook it. A thinner steak will cook faster, while a thicker one gives you more time to get that perfect sear.
1.2 The Importance of Resting: A Temperature Tale
Now, here's a little secret that can make a big difference: resting your steak before cooking. It might sound like a simple step, but it's crucial for getting the perfect texture and juicy results. You see, when you cook a steak, the heat causes the proteins to contract, squeezing out some of the moisture. But by letting the steak rest, you give those proteins a chance to relax, allowing the moisture to redistribute throughout the meat. This is how you end up with a steak that's tender, juicy, and oh-so-flavorful.
Here's what I do: I take my steak out of the fridge about 30 minutes before cooking. This allows it to come up to room temperature, so it cooks more evenly. Imagine putting a cold steak straight onto a hot pan – the outside gets cooked too fast, while the inside struggles to catch up. It's like a culinary game of catch-up that the steak never wins!
Part 2: The Art of Seasoning
Alright, now that you've got your perfect cut of top sirloin, it's time to unleash your inner culinary artist and season it like a pro. Remember, a little goes a long way, so don't go overboard. Too much salt can actually dry out the steak and leave it with a less-than-desirable texture.
2.1 The Salt and Pepper Duo: A Classic Combination
We're going old school here with the classic salt and pepper combo. I always use coarse sea salt because it adds a nice crunch and dissolves more evenly than table salt. And for pepper, freshly ground black pepper is the way to go. It bursts with flavor and makes a world of difference compared to that pre-ground stuff. The key here is to be generous but even, covering the entire surface of the steak with a nice, even layer of seasoning.
2.2 The Magic of Herbs and Spices: A Flavorful Twist
Don't be afraid to get creative with your herbs and spices. It's a chance to add some extra depth and complexity to your steak. Some of my go-to options include garlic powder, onion powder, paprika, and dried herbs like rosemary or thyme. A little bit of smoked paprika adds a beautiful smoky depth of flavor, and a pinch of dried rosemary really sings with a top sirloin steak.
Remember, the best seasoning is the one you enjoy the most, so feel free to experiment! You might be surprised at what combinations you come up with.
Part 3: Cooking Methods: Choosing Your Weapon
Now we're getting into the heart of the matter – cooking. There are so many different ways to cook a steak, it can be a bit overwhelming. But I'm going to share my top picks, including the pros and cons of each method. Whether you're a grill master or a cast iron aficionado, there's a method here for you.
3.1 The Grill Master's Delight: A Fiery Feast
Let's start with the classic: grilling. There's something undeniably satisfying about cooking a steak over an open flame. It imparts that unique smoky flavor and creates those iconic grill marks that just scream "delicious."
When I'm grilling, I like to use a medium-high heat and cook the steak for about 4-5 minutes per side. This gives you a nice, crispy sear on the outside while keeping the inside juicy and pink. Remember to flip the steak just once, because constant flipping can cause moisture loss, leaving you with a dry steak. Once the steak reaches your desired level of doneness, remove it from the grill and let it rest for 5-10 minutes before slicing and serving.
Pro tip: If you're using a gas grill, try to create a two-zone heat setup. This means having one side of the grill at a higher temperature for searing and the other side at a lower temperature for indirect cooking. This helps to prevent the steak from overcooking and ensures a perfect sear.
3.2 The Cast Iron King: A Pan-Seared Perfection
Another one of my favorites is the cast iron pan method. This versatile pan is a workhorse in the kitchen and it works wonders for achieving a crispy crust and a juicy interior. The key here is to preheat the pan until it's smoking hot. Once it's ready, add a little oil – grapeseed or avocado oil are great choices – and carefully place the steak in the pan.
Cook the steak for about 3-4 minutes per side, or until it's nicely browned. Then, you can reduce the heat to medium-low and cook for another 2-3 minutes, depending on how thick the steak is and your desired level of doneness. Make sure to flip the steak just once, to prevent moisture loss.
Pro tip: For an extra layer of flavor, try adding a knob of butter to the pan during the last minute of cooking. The butter will melt and baste the steak, giving it a rich, buttery aroma and taste that'll make your mouth water.
3.3 The Oven's Embrace: A Simple and Reliable Choice
Sometimes, you might not have the time or space for grilling or using a cast iron pan. That's where the oven comes in handy. It's a reliable option that always delivers a consistently cooked steak. Preheat your oven to 400 degrees Fahrenheit and then place the steak on a baking sheet. Cook for about 10-12 minutes, depending on how thick the steak is and your desired level of doneness.
To ensure the steak cooks evenly, flip it halfway through the cooking process. Once the steak is done, remove it from the oven and let it rest for 5-10 minutes before slicing and serving.
3.4 The reverse sear: A culinary adventure
And now for something a bit more adventurous: the reverse sear. This technique involves cooking the steak slowly at a low temperature for an extended period, followed by a quick sear over high heat. It's like a culinary game of opposites that results in a perfectly cooked steak, with a juicy interior and a crispy exterior.
To execute a reverse sear, preheat your oven to 275 degrees Fahrenheit. Place the steak on a baking sheet and cook for 45-60 minutes, depending on the thickness of the steak and your desired level of doneness. Once the steak reaches an internal temperature of 120-125 degrees Fahrenheit, remove it from the oven and let it rest for 10-15 minutes. Then, sear the steak over high heat for 1-2 minutes per side to achieve that crispy crust.
Pro tip: Using a meat thermometer is essential for achieving perfect results with the reverse sear technique. It allows you to monitor the internal temperature of the steak and ensures that it's cooked to your liking.
Part 4: Gauging Doneness: Mastering the Art of the Touch
Here comes the part that often causes a bit of anxiety: gauging doneness. We all have our preferred level of doneness, whether it's rare, medium-rare, medium, or well-done. But how can we tell when the steak is perfectly cooked without slicing it open?
4.1 The Finger Test: A Simple Guide
One traditional method is the finger test. Press your thumb against the palm of your hand to feel the fleshy part between your thumb and forefinger. Compare that feel to the firmness of the steak.
Here's a basic guide:
- Rare: Similar to the feel of your thumb
- Medium-rare: Similar to the feel of your index finger
- Medium: Similar to the feel of your middle finger
- Medium-well: Similar to the feel of your ring finger
- Well-done: Similar to the feel of your little finger
Remember, this is just a general guide. Everyone's finger size and muscle density varies, so it’s best to practice and find what works best for you.
4.2 The Meat Thermometer: A More Accurate Approach
For a more accurate and reliable method, invest in a good quality meat thermometer. These handy gadgets take the guesswork out of gauging doneness, ensuring your steak is cooked perfectly every time. Simply insert the thermometer into the thickest part of the steak, making sure it doesn’t touch any bone.
Here’s a guide to internal temperatures, based on desired doneness:
| Doneness | Internal Temperature (°F) |
|---|---|
| Rare | 125-130 |
| Medium-rare | 130-135 |
| Medium | 140-145 |
| Medium-well | 150-155 |
| Well-done | 160 |
As a general rule, I aim for an internal temperature of 135 degrees Fahrenheit for a juicy medium-rare steak. Remember, these are just guidelines, and you may prefer a slightly different level of doneness. Experiment and find what suits your taste buds best!
Part 5: Resting and Slicing: The Final Touches
Once your steak is cooked to perfection, don’t rush to slice it immediately. Give it a chance to rest. Just like we discussed earlier, resting allows the juices to redistribute throughout the steak, resulting in a more tender and flavorful final product.
5.1 The Power of Resting: Letting the Juices Settle
For a steak that’s at least 1 inch thick, I recommend resting it for 5-10 minutes before slicing. This may seem like a long time, but it’s worth the wait. If you cut into a steak too early, the juices will run out, leaving you with a dry and less flavorful meal.
To ensure proper resting, transfer the steak to a cutting board and loosely cover it with foil. This will trap the heat and allow the juices to redistribute evenly.
5.2 Slicing with Precision: Cutting Against the Grain
After resting, it’s time to slice the steak. This is where a sharp knife is your best friend. I like to use a serrated knife, which helps to cut through the steak cleanly without tearing or shredding the fibers.
To slice the steak, place it on a cutting board and hold it firmly with one hand. Use the other hand to make thin, even slices across the grain. This means cutting the steak perpendicular to the direction of the muscle fibers. Slicing against the grain will make the steak easier to chew and more tender.
And there you have it: your perfectly cooked top sirloin steak, ready to be enjoyed with your favorite sides!
Part 6: Sides to Accompany Your Steak: A Flavorful Ensemble
Now, no steak is complete without some delicious accompaniments. I love pairing my top sirloin with classic sides like mashed potatoes, roasted vegetables, and creamy mushroom sauce. But feel free to get creative and try out different combinations.
6.1 Mashed Potatoes: A Creamy Classic
Mashed potatoes are a go-to side for steak, and for good reason. They’re creamy, comforting, and the perfect counterpoint to the savory flavour of the steak. There are endless variations on mashed potatoes, but my favourite recipe involves using milk, butter, and a touch of garlic powder for a flavourful and creamy texture.
6.2 Roasted Vegetables: Seasonal Flavors
Roasted vegetables are another fantastic option to pair with steak. They bring a burst of colour and seasonal flavours to the plate. My go-to vegetables for roasting include broccoli, carrots, Brussels sprouts, and asparagus. The key is to toss the vegetables in a little olive oil, salt, and pepper before roasting them in a preheated oven until they’re tender and caramelized.
6.3 Creamy Mushroom Sauce: A Rich Addition
For a decadent finishing touch, add a creamy mushroom sauce to your steak. This rich and savory sauce complements the flavour of the steak beautifully. I like to use a combination of cremini and shiitake mushrooms for a more intense flavour. Simply saute the mushrooms in butter, add a splash of wine, and then thicken the sauce with some heavy cream.
6.4 Salad: A Fresh Contrast
If you want to add a touch of freshness and balance to your meal, toss in a simple green salad. A basic salad with mixed greens, cherry tomatoes, red onion, and a light vinaigrette is perfect for cutting through the richness of the steak.
Part 7: Serving and Enjoying: Presenting Your Masterpiece
You’ve reached the final stage – serving and enjoying your masterpiece! Presentation is key, so take pride in how you plate your steak. I like to arrange the sliced steak on a bed of mashed potatoes, with roasted vegetables on the side and a drizzle of creamy mushroom sauce on top.
7.1 The Art of Plating: A Touch of Flair
Don’t be afraid to get creative with your plating. A little bit of artistic flair can elevate your steak dinner from ordinary to extraordinary. You can use sprigs of fresh herbs, lemon wedges, or even a sprinkle of parsley for a touch of color and visual appeal.
7.2 Enjoying the Fruits of Your Labor: Savoring the Flavor
And finally, the moment you’ve been waiting for: enjoying your perfectly cooked top sirloin steak. Take a moment to savor the flavours and textures. The juicy, tender steak, the creamy mashed potatoes, the roasted vegetables – all coming together in a symphony of tastes.
Part 8: FAQs: Answers to Your Burning Questions
Here are some frequently asked questions that I often get about cooking top sirloin steak.
8.1 What is the Best Way to Store Top Sirloin?
To keep your top sirloin fresh, it’s best to store it in the refrigerator, wrapped tightly in plastic wrap or placed in an airtight container. You can also freeze it for up to 3 months. When freezing, be sure to wrap the steak tightly in freezer paper or aluminum foil to prevent freezer burn. This helps to keep the steak protected from the harsh elements of the freezer.
8.2 How Long Should I Cook a Top Sirloin Steak?
The cooking time for a top sirloin steak depends on the thickness of the steak and your desired level of doneness. For a 1-inch thick steak, it typically takes about 4-5 minutes per side for medium-rare. Always use a meat thermometer to ensure that the steak is cooked to your liking. This is crucial for avoiding overcooked, dry meat.
8.3 Can I Marinate a Top Sirloin Steak?
Yes, marinating a top sirloin steak can add a burst of flavor and tenderness. I like to marinate it in a mixture of olive oil, soy sauce, garlic, and herbs for at least 2 hours before cooking. This allows the flavors to penetrate the steak, creating a more flavorful and juicy result.
8.4 What Are Some Other Cuts of Steak That Are Good for Grilling?
Besides top sirloin, other popular cuts of steak for grilling include ribeye, new york strip, and filet mignon. These cuts are known for their marbling, tenderness, and flavor, making them perfect for grilling.
8.5 What Are Some Good Substitutions for Top Sirloin Steak?
If you can’t find top sirloin steak, you can substitute it with other cuts of beef, such as ribeye, New York strip, or sirloin tip. Just adjust the cooking time accordingly. These cuts will have slightly different cooking times and textures, so be sure to adjust your cooking method accordingly.
So, there you have it. I hope this comprehensive guide has equipped you with all the knowledge and confidence you need to cook the perfect top sirloin steak. Remember, practice makes perfect, so keep experimenting and have fun in the kitchen!
Bon appétit!
Everyone is watching

Corn on the Cob: The Ultimate Guide to Perfectly Cooked Ears
Healthy MealsAh, corn on the cob. Just the name evokes images of sunny days, barbecues, and that sweet, juicy flavour that ...

Perfect Pork Roast Oven Cooking Time: A Guide to Delicious Results
Healthy MealsThere's something truly satisfying about a perfectly roasted pork. The aroma alone is enough to make your mout...

Ham Cooking Time: How Long to Bake, Smoke, or Boil a Delicious Ham
Healthy MealsAh, ham. It's a classic, isn't it? A real crowd-pleaser, especially around holidays. And when done right, it'...

Scallops: The Ultimate Guide to Perfect Cooking
Healthy MealsAh, scallops. Those delicate, sweet, and utterly delicious morsels of the sea. They hold a special place in my...

Spaghetti Squash: The Ultimate Guide to Cooking and Serving
Healthy MealsRemember that time you saw spaghetti squash at the supermarket, looking all bumpy and strange, and thought, "W...