Ah, the humble beef shoulder roast. It's often relegated to the back of the fridge, overshadowed by its fancier counterparts. But trust me, this cut has a lot to offer. With a little know-how, you can turn this relatively inexpensive cut into a tender, flavour-packed masterpiece. I've been cooking with beef shoulder roast for years, and I've learned a thing or two along the way. Let me share my secrets, because a good beef shoulder roast, cooked just right, is truly a culinary triumph.
(Part 1) Understanding the Cut: Getting to Know Beef Shoulder

Before we dive into the cooking, let's talk about what makes this cut so special. Beef shoulder, also known as chuck roast, comes from the shoulder blade area of the cow. This area is heavily worked, which means it's got plenty of connective tissue and marbling. Those are good things! The connective tissue breaks down with slow cooking, resulting in unbelievably tender meat. And the marbling, that's where the flavour comes in. It's like the secret sauce, making the meat juicy and rich.
The Different Types of Beef Shoulder
There are a few different cuts of beef shoulder, each with its own characteristics. The most common are:
- Chuck Roast: This is a classic for a reason. It's well-marbled and has a good amount of connective tissue, making it perfect for slow cooking. You'll find it in various shapes and sizes, but it's usually a large, rectangular cut.
- Blade Roast: A bit leaner than the chuck roast, but still incredibly flavourful. The blade roast is a bit more tender than the chuck roast, making it a good choice for braising.
- 7-Bone Roast: This roast gets its name from the small, flat bone that runs through the centre. It's known for its intense flavour and its ability to hold its shape well during cooking.
choosing the right cut
So, how do you choose the perfect beef shoulder roast? It all comes down to your personal preference and the recipe you're making.
If you're looking for a classic slow-cooked roast, go for a chuck roast. If you prefer a leaner option that's a bit more tender, opt for a blade roast. And if you're craving intense flavour and a bit of drama, choose a 7-bone roast.
Don't be afraid to ask your butcher for advice. They'll know the best cut for your needs and can even trim it for you to make cooking easier. And remember, you want a roast that's big enough for your crowd but not so large that you're swimming in leftovers. I usually aim for a roast that's about 3-4 pounds, which is a good size for a family of four.
(Part 2) Getting Ready: Preparing the Roast for Cooking

Now that you've got your chosen roast, it's time to prepare it for cooking. This is where a little TLC goes a long way.
Trimming the Fat
First things first: trim away any excess fat. A little bit of fat is good—it helps to keep the meat moist and adds flavour—but too much fat can make the roast greasy. Use a sharp knife to trim away any thick layers of fat, leaving a thin layer (about ?? inch) on the roast.
Seasoning It Up
Now for the fun part! Seasoning is where you really get to add your personal touch. I like to keep it simple with salt and pepper, but you can get creative with herbs and spices. Here are a few ideas to get your taste buds going:
- Classic: Salt, black pepper, garlic powder, onion powder
- Herby: Dried thyme, rosemary, oregano, sage
- Spicy: Paprika, cayenne pepper, chili powder
- Sweet and Savory: Brown sugar, smoked paprika, cumin
Be sure to rub the seasoning generously all over the roast, getting into all the crevices. A little pat with your hands helps the seasoning adhere to the meat.
Letting the Flavours Mingle
Once the roast is seasoned, it's time to let the flavours meld. Place the roast in the fridge for at least an hour, or even better, overnight. This allows the seasonings to penetrate the meat, creating a symphony of flavour.
(Part 3) The Art of Slow Cooking: Unveiling Tenderness

Now, for the grand finale: cooking the roast. There are a few different methods you can use, but my personal favourite, and the method that consistently yields the most tender and flavorful results, is slow cooking.
Why Slow Cooking is a Winner
Slow cooking is like a culinary magic trick. It takes advantage of low heat and long cooking times to break down tough connective tissue, transforming the roast into a melt-in-your-mouth masterpiece. Plus, it's hands-off, which means you can spend your time doing other things while the magic unfolds.
Slow cooking tips
Here's how to make the most of your slow cooker:
- Choose the Right Liquid: I always use a combination of beef broth and red wine. The broth adds moisture and flavour, while the wine adds a lovely depth of complexity. You can also use beer, apple cider, or even just water, if you prefer.
- Don't Overcrowd: Make sure there's enough space in your slow cooker for the roast to sit comfortably, without being crammed in. If it's too crowded, the roast won't cook evenly.
- Cook Low and Slow: The key to a successful slow-cooked roast is to cook it on low heat for a long time. A good rule of thumb is to cook a 3-4 pound roast on low for 6-8 hours, or until it's incredibly tender and falling apart.
- Don't Peek Too Often: Resist the urge to open the slow cooker lid every hour to check on the progress. Every time you open it, you release heat and steam, which can slow down the cooking process.
The Importance of Resting
Once your roast is cooked, don't jump right into carving it. Let it rest for at least 15 minutes before slicing. This gives the juices time to redistribute throughout the meat, resulting in a juicier and more flavorful roast.
(Part 4) Braising: The Seared and Simmered Delight
If you're looking for a method that yields a gorgeous, caramelized crust and tender, flavourful meat, braising is your best bet. It's a bit more involved than slow cooking, but the results are worth it.
How Braising Works
Braising is essentially a two-step process that combines searing and simmering. First, you sear the roast over high heat to create a crispy, flavorful crust. Then, you transfer the roast to a braising pan or dutch oven, add some liquid, and simmer until it's fork-tender.
Braising Tips
Here's what you need to know to braise a beef shoulder roast like a pro:
- Sear to Perfection: Before you braise, sear the roast on all sides in a hot skillet. This creates a flavorful crust and adds depth of flavour to the meat. Don't overcrowd the skillet, as this will lower the temperature and prevent the roast from getting a nice sear.
- Choose Your Braising Liquid: The liquid you use for braising is just as important as the seasoning. Wine, broth, or even just water will work. I prefer a combination of red wine and beef broth for added depth of flavour.
- Simmer Slowly: Once the roast is seared, transfer it to a braising pan and add your chosen braising liquid. Bring the liquid to a simmer, then cover the pan tightly and cook until the roast is fork-tender. This usually takes about 2-3 hours, depending on the size of the roast.
- Deglaze the Pan: Don't throw away the delicious pan juices! Once the roast is cooked, remove it from the pan and deglaze the pan with a little bit of wine or broth. Scrape up all the tasty bits from the bottom of the pan and use the resulting sauce to make a rich and flavourful gravy.
(Part 5) oven roasting: A Quick and Simple Option
Sometimes, you just don't have time for slow cooking or braising. If you're in a hurry, oven roasting is a quick and easy way to cook a beef shoulder roast. It's not as tender as the other methods, but it still produces a delicious and satisfying meal.
Oven roasting tips
Here's how to oven roast a beef shoulder roast:
- Preheat the Oven: Preheat your oven to 325°F (165°C). This ensures that the roast cooks evenly and doesn't dry out.
- Use a roasting pan: Place the roast in a roasting pan with a rack. This will allow the hot air to circulate around the roast, promoting even cooking.
- Cook Until Tender: Cook the roast for 2-3 hours, or until it's tender. You can check for doneness with a meat thermometer. The internal temperature should reach 145°F (63°C) for medium-rare.
- Rest Before Slicing: After the roast is cooked, let it rest for 15 minutes before slicing. This allows the juices to redistribute throughout the meat.
(Part 6) Checking for Doneness: Knowing When It's Ready
It's important to make sure your roast is cooked through to a safe temperature. Here are a few methods to check for doneness:
Meat Thermometer
The most accurate way to check for doneness is with a meat thermometer. Insert the thermometer into the thickest part of the roast, avoiding bone. The roast is considered safe to eat when the internal temperature reaches 145°F (63°C) for medium-rare.
The Fork Test
If you don't have a meat thermometer, you can use the fork test. Insert a fork into the thickest part of the roast. If the meat is tender and easily pulls away from the fork, it's cooked through.
Visual Clues
You can also use visual clues to gauge the doneness. As the roast cooks, the internal colour will change. The meat will go from red to pink to brown. If you're looking for a medium-rare roast, the centre should be pink.
(Part 7) Serving Up the Roast: A Symphony of Flavors
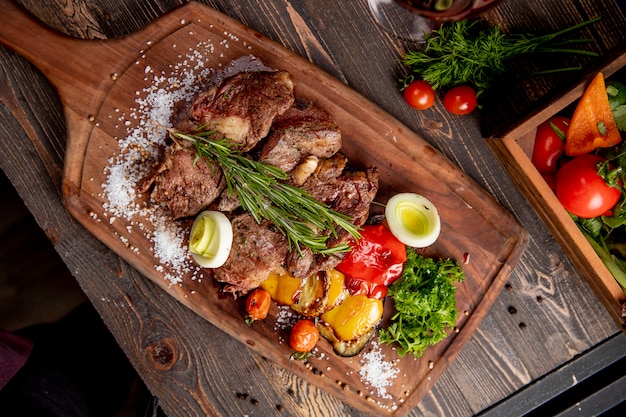
Now, for the moment of truth—serving your perfectly cooked roast. There are endless possibilities, but here are a few of my favourite pairings:
Classic Comforts
For a classic, comforting meal, serve the roast with mashed potatoes and gravy. The creamy potatoes and rich gravy are the perfect complements to the tender, flavorful meat.
Roasted Vegetable Delights
Roasted vegetables add vibrant colour and flavour to the meal. Carrots, potatoes, onions, and root vegetables all roast beautifully. You can even add a sprig of rosemary or thyme to the roasting pan for an extra layer of flavour.
Green Salad Refreshment
A crisp green salad is the perfect counterpoint to the richness of the roast. A simple salad with mixed greens, vinaigrette, and a few slices of avocado will add a refreshing touch to your meal.
Global Inspiration
Get creative and explore different flavours. Serve the roast with a side of Asian-inspired stir-fried vegetables or a vibrant salsa verde. The possibilities are endless!
(Part 8) Leftovers? No Problem!
Beef shoulder roast is a real winner when it comes to leftovers. The meat is so tender that it can be easily shredded and used in a variety of dishes.
Sandwiches
Slice the roast thinly and use it to make delicious sandwiches. Add your favourite toppings, such as cheese, mustard, pickles, and tomatoes.
Soup
Shred the leftover roast and add it to your favourite soup recipe. It'll add a rich, meaty flavour to soups like beef stew, chili, or minestrone.
Pasta
Shredded roast is a great addition to pasta dishes. Add it to a simple tomato sauce, or use it to create a more complex pasta bake.
(Part 9) FAQs
What if My Roast is Too Dry?
If your roast is too dry, you can try to revive it by adding some liquid and cooking it for a bit longer. You can also use the shredded meat in a recipe like soup, chili, or stew, where the dryness won't be as noticeable.
What Kind of Wine Should I Use?
A dry red wine, like Cabernet Sauvignon or Merlot, is a good choice for braising beef shoulder roast. These wines have the tannins and acidity to cut through the richness of the meat. However, you can also use other types of wine, like red Zinfandel or even Pinot Noir.
How Long Can I Store Beef Shoulder Roast in the Fridge?
Cooked beef shoulder roast can be stored in the refrigerator for up to 3-4 days. You can also freeze it for up to 3 months.
Can I Use a Beef Shoulder Roast for Other Recipes?
Absolutely! Beef shoulder roast is versatile and can be used in a variety of dishes, such as beef stew, chili, and shepherd's pie.
What are Some Other Cuts of Beef I Can Use for Slow Cooking?
Other cuts of beef that are well-suited for slow cooking include chuck roast, brisket, and short ribs. These cuts are all rich in connective tissue, which breaks down with slow cooking, resulting in tender and flavorful meat.
(Part 10) Conclusion: The Rewards of Slow Cooking
There you have it! My ultimate guide to tender and flavorful beef shoulder roast. Now go forth and conquer the kitchen, my friends. You've got this. Remember, with a little patience and the right techniques, this often-overlooked cut can be transformed into a culinary masterpiece. So, embrace the slow cooking process, enjoy the rich flavours, and let your taste buds rejoice!
Everyone is watching

Corn on the Cob: The Ultimate Guide to Perfectly Cooked Ears
Healthy MealsAh, corn on the cob. Just the name evokes images of sunny days, barbecues, and that sweet, juicy flavour that ...

Scallops: The Ultimate Guide to Perfect Cooking
Healthy MealsAh, scallops. Those delicate, sweet, and utterly delicious morsels of the sea. They hold a special place in my...

Spaghetti Squash: The Ultimate Guide to Cooking and Serving
Healthy MealsRemember that time you saw spaghetti squash at the supermarket, looking all bumpy and strange, and thought, "W...

Salmon Cooking Times: Perfect Guide for Every Recipe
Healthy MealsLet me tell you, cooking salmon is an art form. It's all about getting that perfect balance: juicy and tender,...

Ham Cooking Time: How Long to Bake, Smoke, or Boil a Delicious Ham
Healthy MealsAh, ham. It's a classic, isn't it? A real crowd-pleaser, especially around holidays. And when done right, it'...
