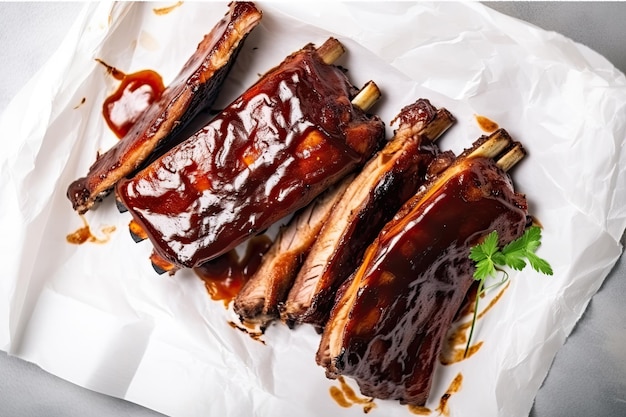
Ah, ribs. Just the word conjures up images of smoky goodness, tender meat falling off the bone, and a hearty meal shared with loved ones. But let's be honest, sometimes tackling a whole rack of ribs can feel a bit daunting. That's where oven-baked ribs come in! They offer the same deliciousness, but with a bit less fuss. I've been cooking ribs for years, experimenting with various methods, and I've gotta say, oven-baked ribs are a winner. They're incredibly flavorful, incredibly tender, and surprisingly easy to make. So, grab a comfy seat, because we're diving deep into the world of oven-baked ribs!
Part 1: Choosing the Perfect Rib

Alright, let's start at the beginning. You can't have amazing ribs without choosing the right cut. It's like picking a good bottle of wine - you want to start with something that's got potential. For oven-baked ribs, I always recommend either baby back ribs or spare ribs.
baby back ribs: The Rolls-Royce of Ribs
Imagine a Rolls-Royce, sleek and luxurious. That's baby back ribs in the world of ribs. They're smaller, more tender, and have a richer, more intense flavor. Think of them as the premium choice. But like a Rolls-Royce, they can be a bit more expensive.
Spare Ribs: The Workhorse of Ribs
Spare ribs are more like the reliable Ford pickup truck of the rib world. They're bigger, a bit more affordable, and they have a bit more fat, which gives them a richer, more robust flavor. Now, they might not be as delicate as baby back ribs, but they're definitely not lacking in flavor. They just require a bit more cooking time to achieve that melt-in-your-mouth tenderness.
Part 2: Prepping Your Ribs for Oven Perfection

Now, before we even think about firing up the oven, we need to prep our ribs. Think of this as getting your ingredients ready for a delicious cake. It takes a bit of time, but it's essential for a perfect result.
Removing the Membrane: Unleashing the Tenderness
First things first, we need to tackle the membrane. It's that thin, tough, white film on the back of the ribs. It's chewy and can make your ribs tough, so we gotta get rid of it. Grab a paper towel to get a good grip, use a sharp knife to carefully slice it off, or if you're feeling fancy, get yourself a handy membrane remover tool. It's a bit of a chore, but it's totally worth it for tender, delicious ribs.
Patting Them Dry: A Crucial Step
Once the membrane is gone, pat those ribs dry with paper towels. This is super important. It helps the seasoning stick to the ribs better and prevents them from steaming in the oven, which can make them soggy.
Seasoning Your Ribs: A Flavorful Makeover
Now, here's where the real fun starts. We're about to give our ribs a flavor makeover! I'm a big fan of dry rubs. They're easy to make and they give the ribs a fantastic smoky flavor. Here's a basic dry rub recipe that you can tweak to your liking:
1 tbsp paprika: Adds a vibrant red color and a slightly sweet, smoky flavor.
1 tbsp brown sugar: Gives the ribs a touch of sweetness, balancing out the savory flavors.
1 tbsp garlic powder: Adds a savory, pungent aroma that enhances the meat's flavor.
1 tbsp onion powder: Adds a sweet, savory flavor with subtle notes of caramel.
1 tbsp black pepper: Adds a bold, earthy flavor that provides a nice contrast.
1 tbsp salt: Enhances the natural flavors of the meat and helps to retain moisture.
1 tsp chili powder: Adds a touch of heat and a smoky depth.
Simply mix these ingredients together, then rub them all over the ribs. But hey, don't be afraid to experiment! Add some cumin for an earthy note, a pinch of cayenne for a kick, or even some smoked paprika for a deeper smokiness.
Part 3: Getting Your Oven Ready for Ribs

We've prepped the ribs, and now it's time to set up our oven. Don't worry, this part is super easy!
Preheating: The Key to Even Cooking
First things first, preheat your oven to 300 degrees Fahrenheit (150 degrees Celsius). This is a crucial step. A preheated oven helps the ribs cook evenly and prevents them from getting dry.
The Right Rack: Space is Key
Now, put a rack in the middle of your oven. This will give the ribs some space to cook evenly on all sides. Think of it as giving them room to breathe while they bake.
Part 4: The Baking Process: Let the Ribs Shine!
Alright, time to get those ribs cooking! You've prepped them, seasoned them, and your oven is ready. Let's do this!
Placing the Ribs: Bone Side Down
Place the ribs in a baking pan, bone side down. If you're using a rack in the pan, make sure the rack is at the bottom so the ribs don't sit directly in the juices. We want them to cook evenly.
The Foil Wrap: A Secret to Tenderness
Now, here's a little secret to tender, juicy ribs. Cover the ribs with aluminum foil. This helps them to steam in their own juices, which keeps them moist and tender.
Time to Bake: Let the Magic Happen
Now, you're ready to bake! Pop those ribs into the preheated oven and let them bake for 2 to 3 hours, depending on the size of the ribs. The longer they bake, the more tender they'll become.
Part 5: The Glaze: Adding that Sweet and Savory Touch
We're almost there, but we need to take our ribs to the next level with a delicious glaze. It's the finishing touch that elevates our oven-baked ribs from good to truly amazing.
Making the Glaze: A Flavor Symphony
There are countless glaze recipes out there, but here's a basic one that I love:
1 cup bbq sauce: Provides a smoky, tangy base.
1/4 cup brown sugar: Adds a touch of sweetness and caramel notes.
1/4 cup apple cider vinegar: Brings a tangy brightness to balance the sweetness.
1/4 cup honey: Adds a subtle sweetness and helps the glaze to thicken.
1/4 cup Worcestershire sauce: Adds umami depth and a savory richness.
Simply mix all these ingredients in a saucepan and heat them over medium heat until the sugar dissolves and the glaze thickens.
Glazing the Ribs: That Final Touch
After the ribs have been baking for 2 hours, take them out of the oven. Carefully uncover the ribs and brush them generously with the glaze. Then, cover them back up with the foil and put them back in the oven for another 30 minutes.
Part 6: The Rest: Patience is a Virtue
We're at the finish line! Those ribs are about to be the star of the show. But before we dig in, we need to give them a little rest.
Let Them Rest: Resting for Tenderness
Once the ribs are done, take them out of the oven and let them rest for at least 15 minutes. This allows the juices to redistribute throughout the meat, making them even more tender and flavorful.
Cutting and Serving: Time to Enjoy
Now, it's time to cut and serve those beautiful ribs! You can use a sharp knife to cut the ribs between the bones, or you can use a pair of kitchen shears. Serve them with your favorite sides, like mashed potatoes, coleslaw, or corn on the cob.
Part 7: Tips and Tricks: Boosting Your Rib Game
We've covered the basics, but here are a few tips and tricks that will elevate your oven-baked ribs from good to incredible.
The Smoking Method: Adding that Smoky Depth
If you want to add an extra layer of smoky flavor, you can smoke the ribs before you bake them. Simply use a smoker and cook them for 4 to 5 hours at 225 degrees Fahrenheit (110 degrees Celsius). The slow, smoky cooking will give them a truly amazing flavor.
The Spritzing Technique: Keeping Them Moist
Another handy trick is to spritz the ribs with apple cider vinegar or water every 30 minutes while they're cooking. This helps to keep them moist and prevents them from drying out, ensuring they stay juicy and tender.
The Slow and Low Method: The Secret to Tenderness
Remember, the key to tender, melt-in-your-mouth ribs is to cook them low and slow. Don't be tempted to crank up the heat, or you'll end up with dry, tough ribs. The slow, gentle cooking helps the collagen in the meat to break down, resulting in those incredibly tender ribs we all crave.
Part 8: FAQs: Solving Those Rib Mysteries
Now let's tackle a few questions you might have about oven-baked ribs:
How Do I Know If My Ribs Are Done?
The ribs are done when the meat is tender enough to pull away from the bone with minimal effort. You can also use a meat thermometer to check the internal temperature. It should be between 190 and 200 degrees Fahrenheit (88 to 93 degrees Celsius).
Can I Freeze Ribs?
Yes, you can freeze ribs! Just wrap them tightly in plastic wrap and then place them in a freezer bag. They'll last for up to 3 months in the freezer.
What Are Some Other Ways to Cook Ribs?
You can also cook ribs on the grill, in a slow cooker, or in a dutch oven. Each method will give the ribs a slightly different flavor, but they're all delicious in their own way.
What Should I Serve With My Ribs?
Ribs pair perfectly with a variety of sides, like mashed potatoes, coleslaw, corn on the cob, baked beans, and potato salad.
What Can I Do With Leftover Ribs?
Don't worry, those leftover ribs are not going to waste! Use them to make delicious sandwiches, salads, or even hearty soups.
Part 9: Final Thoughts: Let the Rib Journey Begin
So there you have it, a comprehensive guide to making the most delicious oven-baked ribs. Remember, it's all about preparation, patience, and a bit of creativity. Experiment with different flavors, and above all, have fun! Ribs are all about enjoying the process and sharing them with loved ones. Go on, give it a go! You won't regret it.
Everyone is watching

Corn on the Cob: The Ultimate Guide to Perfectly Cooked Ears
Healthy MealsAh, corn on the cob. Just the name evokes images of sunny days, barbecues, and that sweet, juicy flavour that ...

Perfect Pork Roast Oven Cooking Time: A Guide to Delicious Results
Healthy MealsThere's something truly satisfying about a perfectly roasted pork. The aroma alone is enough to make your mout...

Ham Cooking Time: How Long to Bake, Smoke, or Boil a Delicious Ham
Healthy MealsAh, ham. It's a classic, isn't it? A real crowd-pleaser, especially around holidays. And when done right, it'...

Scallops: The Ultimate Guide to Perfect Cooking
Healthy MealsAh, scallops. Those delicate, sweet, and utterly delicious morsels of the sea. They hold a special place in my...

Spaghetti Squash: The Ultimate Guide to Cooking and Serving
Healthy MealsRemember that time you saw spaghetti squash at the supermarket, looking all bumpy and strange, and thought, "W...
