Let's face it, Christmas dinner wouldn't be the same without a magnificent turkey. But the thought of that majestic bird, perched on a platter, glistening with golden-brown skin, can be daunting. The pressure of getting it perfect can feel immense, but don't worry! I'm here to share my secrets, my tips, and my hard-won experience to help you slow-cook a turkey that will have your guests singing your praises.
This guide goes beyond just the basics. It's about embracing the journey, from choosing the perfect turkey to mastering those crispy skin secrets, and understanding the art of creating delicious side dishes that perfectly complement the star of the show. So, grab a cuppa, settle in, and let's embark on this culinary adventure together.
(Part 1) Choosing the Perfect Turkey
The Turkey Hunt: Finding the Right Bird
First things first, we need to find our hero – the turkey! You've got to be picky here, folks. It's not just about grabbing the biggest one on the shelf. The quality of your turkey will significantly impact the taste and tenderness of your final dish.
Here's what to look for:
Plump and Firm: The breast should be nice and plump, with firm flesh that springs back when you press it gently. This indicates a well-fed, healthy bird.
A Good Fat Layer: Don't shy away from a little fat! A good layer of fat under the skin will keep the meat juicy and flavorful during the slow-cooking process.
Size Matters (But Not How You Think): You want a turkey that's big enough to feed your guests comfortably, but not so large that it overwhelms your slow cooker. A good rule of thumb is to calculate about 1 pound of turkey per person, but adjust based on your guests' appetites.
Fresh or Frozen? Weighing the Options
Now, this is where things get a bit tricky. Fresh turkeys tend to be juicier and more flavorful because they haven't been through the freezing process. However, they require more planning since you'll need to cook them soon after purchase. frozen turkeys are great for those who are short on time, but you need to allow ample time for thawing in the fridge, typically about 24 hours for every 5 pounds.
Free-Range, Organic, or Supermarket? Unpacking the Labels
The world of turkey labels can be confusing, with terms like "free-range," "organic," and "heritage" flying around. Here's a quick breakdown:
Free-Range: These turkeys have access to outdoor areas, allowing them to roam freely and potentially develop a richer flavour. However, they usually come with a higher price tag.
Organic: These turkeys are raised without the use of antibiotics or hormones, which may be appealing to health-conscious consumers. Again, you can expect to pay a premium.
Supermarket: Don't underestimate supermarket turkeys! They are often a budget-friendly option, and you can find good quality birds if you look for those with plump breast meat and good skin.
Ultimately, the choice is yours, depending on your preferences, budget, and how much time you have to dedicate to the hunt for the perfect turkey.
(Part 2) Prepping the Bird for Glory

Brining the Flavour: Unlock Tenderness
The key to a mouthwatering, juicy turkey is all about ensuring it stays incredibly moist. And that's where brining comes in. Brining is the magic trick of soaking the turkey in a salty solution, which draws moisture into the meat, plumping it up and ensuring tenderness. It's like giving your turkey a spa treatment before the big day!
There are countless brining recipes out there, but a simple one with salt, sugar, and herbs usually works wonders.
Simple Salt Brine: Combine 1 cup salt, 1 cup sugar, and 1 gallon of water in a large container.
Herbed Brine: Add fresh herbs like rosemary, thyme, sage, and bay leaves to the simple brine for an extra flavour boost.
Patting it Dry: A Crucial Step for Crispy Skin
Once your turkey has enjoyed its luxurious brine bath, it's time to pat it dry thoroughly. This might seem like a small detail, but it's essential for getting that beautiful crispy skin we all crave. Wet turkey won't crisp up properly, so don't skip this step!
Stuffing the Turkey: A Delicious Dilemma
Stuffing is a topic that sparks passionate debates amongst chefs and home cooks alike. Some swear by stuffing their turkeys, while others consider it a food safety risk.
Here's the lowdown:
Stuffing Inside: If you choose to stuff your turkey, make sure it's done loosely, and cook the stuffing separately to ensure it reaches a safe internal temperature.
Stuffing Outside: I personally prefer to cook my stuffing separately, just to be on the safe side. It allows me to control the cooking process and ensures that it's cooked through properly.
(Part 3) The Slow-Cooker Magic: Unleashing Flavor
Slow and Steady Wins the Race: Embrace the Art of Patience
Now comes the moment you've been waiting for: the slow-cooker magic. This is where the real magic happens. slow cooking allows the turkey to gently cook in its own juices, resulting in a truly succulent and flavorful final product.
But before we pop our bird into the slow cooker, we need to give it a good dose of flavour.
Seasoning Secrets: A Symphony of Flavors
Seasoning is where your creativity can shine. It's all about creating a symphony of flavors that will enhance the natural taste of the turkey.
Here are some ideas:
Classic Rub: A simple mix of salt, pepper, and a sprinkle of paprika can elevate the flavor.
Herby Delight: Combine dried or fresh herbs like rosemary, thyme, sage, or oregano for a fragrant and aromatic touch.
Spice it Up: Add a dash of ginger, garlic powder, or cayenne pepper for a kick of warmth.
You can use a dry rub, a wet marinade, or a combination of both, depending on your preferences. Experiment and find what works best for you.
Arranging for Even Cooking: The Slow-Cooker Strategy
Now, it's time to carefully arrange your turkey in the slow cooker. You want to ensure even cooking, so the breast doesn't dry out.
Here's how to do it:
Roasting Rack: If you have a slow cooker roasting rack, use it to elevate the turkey, allowing air to circulate around it.
Vegetable Bed: If you don't have a rack, create a bed of chopped onions, carrots, and celery in the bottom of the slow cooker. This will not only add flavor to the cooking juices but also provide a platform for the turkey to sit on.
The Big Wait: Letting Time Work its Magic
The final step in the slow-cooker process is the most crucial: patience. Slow cooking is all about letting time work its magic. The turkey needs to simmer and release its flavors, and rushing it will only result in a less satisfying outcome.
Low and Slow: For a tender and flavorful turkey, set your slow cooker to low and let it cook for 6-8 hours.
High and Fast: If you're pressed for time, you can cook the turkey on high for 3-4 hours. However, keep a close eye on it, and don't be afraid to adjust the cooking time if needed.
Remember, you can always use a meat thermometer to ensure the turkey is cooked through. Aim for an internal temperature of 165°F (74°C) in the thickest part of the thigh.
(Part 4) The Glorious Finish: From Slow Cooker to Crispy Perfection
Crispy Skin Secrets: Achieving Golden-Brown Perfection
So, your turkey has been slow-cooking all day, filling your home with delicious aromas. But we're not quite done yet! To achieve that irresistible crispy skin, we need to give our bird a final touch.
Preheated Oven: Preheat your oven to 400°F (200°C).
Transfer the Turkey: Carefully transfer the turkey from the slow cooker to a baking dish.
Crispy Time: Bake for 30 minutes, or until the skin is golden brown and crispy.
Resting Time: Let the Juices Redistribute
After the turkey has had its oven time, let it rest for at least 15 minutes before carving. This allows the juices to redistribute throughout the meat, resulting in a more tender and flavorful turkey. While you're waiting, you can start working on your gravy!
(Part 5) Gravy Time: The Perfect Compliment
The Gravy Game: From Pan Drippings to Deliciousness
Good gravy is a staple of any roast dinner, and the best gravy is made from the pan drippings of your slow-cooked turkey.
Here's how to create gravy magic:
Skim the Fat: Skim off any excess fat from the pan drippings.
Whisk in Flour: Whisk in a few tablespoons of flour to thicken the gravy.
Slowly Add Juices: Slowly add your cooking juices from the slow cooker, whisking constantly until the gravy thickens to your desired consistency.
Season to Perfection: Season with salt and pepper to taste.
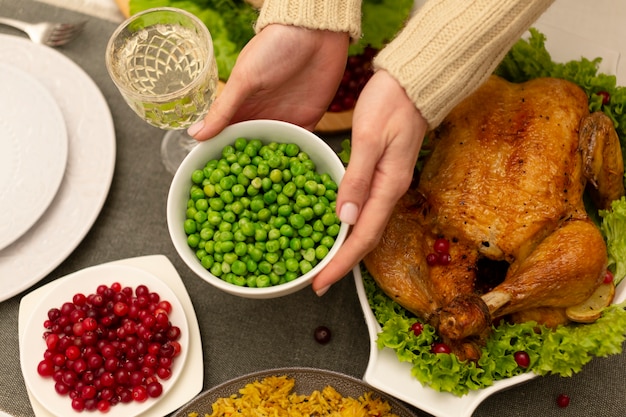
(Part 6) Side Dish Symphony: A Culinary Collaboration
The Perfect Accompaniments: Elevate the Feast
Now, let's talk about those amazing side dishes that perfectly complement your slow-cooked turkey. They're not just an afterthought; they play a vital role in creating a truly memorable meal.
Here are some side dish ideas that have become my go-to favorites:
roast potatoes: Crispy on the outside, fluffy on the inside – what's not to love?
Roasted Root Vegetables: Carrots, parsnips, sweet potatoes, and butternut squash are all excellent choices. Toss them with olive oil, herbs, and spices, and roast until tender and slightly caramelized.
green beans: A simple but classic side that provides a touch of freshness to the meal.
Stuffing: As I mentioned earlier, I prefer to cook my stuffing separately, but if you're feeling adventurous, you can stuff your turkey.
Cranberry Sauce: A festive touch that adds a touch of sweetness and tartness to the meal.
Table Talk: Bringing the Sides to Life
Remember, side dishes are a chance to showcase your culinary creativity. Don't be afraid to experiment with different flavors and textures. Get your guests involved in the discussion – ask them about their favorites and try to incorporate some of their suggestions into your menu.
(Part 7) Carving and Serving: The Grand Reveal
The Art of Carving: Preserving Those Juices
It's time to reveal your culinary masterpiece! carving a turkey requires a little finesse. You want to cut it carefully, avoiding any unnecessary loss of those precious juices.
Here are some tips for a successful carve:
Sharp Knife: Use a sharp carving knife, and if you have a carving set, even better!
Carving Fork: Use a carving fork to hold the turkey steady while you carve.
Follow the Grain: Carve the turkey by following the grain of the meat. This will make it easier to cut and prevent the meat from tearing.
Save the Breast: Save some of the turkey breast for sandwiches – it's even more delicious the next day!
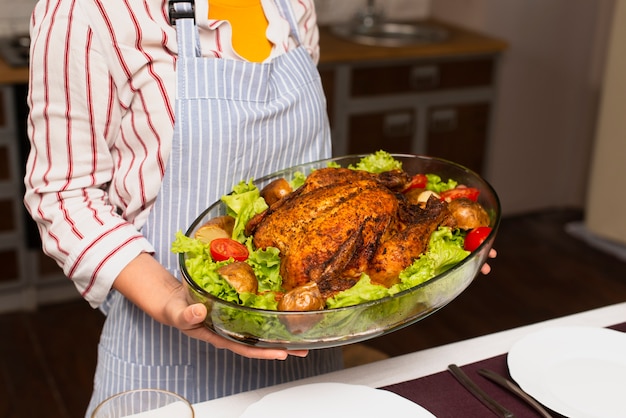
Presentation is Everything: Creating a Feast for the Eyes
Now, it's time to arrange your turkey on a platter. Remember, presentation is key, and a beautiful platter will make your turkey even more tempting.
Here's how to create an impressive display:
Plater Choice: Choose a platter that's large enough to accommodate the turkey and its accompanying sides.
Arrange with Care: Arrange the carved turkey on the platter, with the vegetables and stuffing around it.
Gravy Pour: Don't forget to pour that delicious gravy over the top!
(Part 8) Enjoying the Feast: Savouring the Moment
Bon Appetit!: Time to Indulge
Finally, the moment you've been working towards! Gather your guests, dig in, and savor every delicious bite. Let the turkey's succulent flavors dance on your palate, and enjoy the company of your loved ones.
FAQs
1. How do I know when my turkey is cooked?
The best way to tell if your turkey is cooked through is to use a meat thermometer. Insert the thermometer into the thickest part of the thigh, making sure it doesn't touch any bone. The turkey is cooked when the thermometer reads 165°F (74°C).
2. What if my turkey is too dry?
If your turkey is a bit dry, you can try adding some gravy or stock to the slow cooker to add moisture. You can also try adding a bit of butter or olive oil to the breast meat before serving.
3. How long can I keep my leftover turkey?
Leftover turkey can be stored in the fridge for up to 4 days. You can use it for sandwiches, salads, or soups.
4. Can I freeze my leftover turkey?
Yes, you can freeze leftover turkey for up to 3 months. Just make sure to wrap it tightly in plastic wrap and aluminum foil before freezing.
5. What are some good wines to pair with turkey?
Turkey pairs well with a variety of wines, but some popular choices include Sauvignon Blanc, Pinot Noir, and Chardonnay. You can also try a sparkling wine, like Prosecco or Champagne.
Now, go forth and conquer the Christmas dinner table with a slow-cooked turkey that will leave your guests wanting more. Happy cooking!
Everyone is watching

Corn on the Cob: The Ultimate Guide to Perfectly Cooked Ears
Healthy MealsAh, corn on the cob. Just the name evokes images of sunny days, barbecues, and that sweet, juicy flavour that ...

Scallops: The Ultimate Guide to Perfect Cooking
Healthy MealsAh, scallops. Those delicate, sweet, and utterly delicious morsels of the sea. They hold a special place in my...

Spaghetti Squash: The Ultimate Guide to Cooking and Serving
Healthy MealsRemember that time you saw spaghetti squash at the supermarket, looking all bumpy and strange, and thought, "W...

Salmon Cooking Times: Perfect Guide for Every Recipe
Healthy MealsLet me tell you, cooking salmon is an art form. It's all about getting that perfect balance: juicy and tender,...

Ham Cooking Time: How Long to Bake, Smoke, or Boil a Delicious Ham
Healthy MealsAh, ham. It's a classic, isn't it? A real crowd-pleaser, especially around holidays. And when done right, it'...