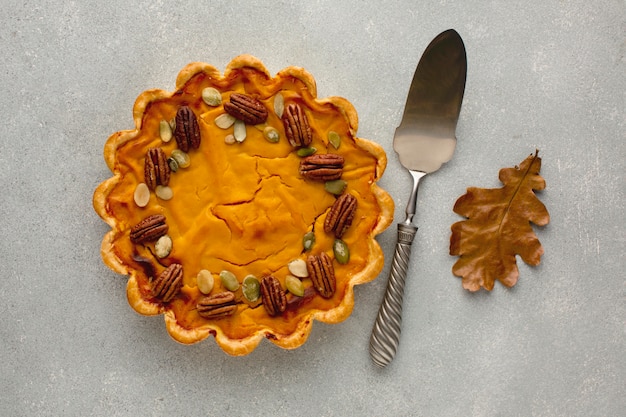
Ah, pumpkin pie. The quintessential autumn dessert, conjuring up cozy evenings by the fireplace and the aroma of warm spices. But let's be honest, sometimes the process of making that perfect pie can feel a bit daunting. You've got the recipe, but you're staring at a pumpkin, wondering where to even begin. Well, fear not, fellow pie enthusiast! I'm here to guide you through the entire process, from picking the perfect pumpkin to achieving that melt-in-your-mouth pie filling. Consider this your ultimate guide to roasting pumpkins for pie, complete with my personal tips and tricks gleaned from years of baking triumphs (and a few mishaps, too!).
Part 1: The Pumpkin Quest – Finding Your Perfect Pie Partner

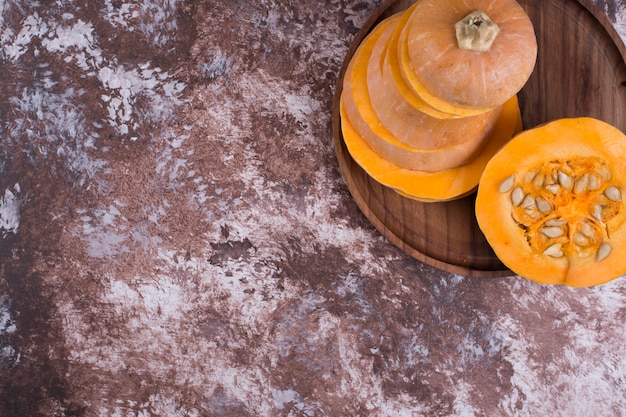
First things first, let's talk pumpkins. We're not after the big, Halloween-ready pumpkins here. Nope, we need a pie pumpkin – those smaller, squat beauties with a vibrant, almost orange-red hue. They hold the secret to a sweeter, denser flesh that's simply perfect for baking. Here's how to find the perfect pie pumpkin:
The Pumpkin Whisperer’s Guide
- Weight: Pick up a few pumpkins and give them a good feel. You're looking for a pumpkin that feels heavy for its size. This indicates a good amount of flesh packed inside.
- Color: The pumpkin should have a bright, deep orange-red color, almost like a sunset. Avoid any pumpkins with bruises or blemishes – these suggest they might not be as fresh and flavorful.
- Stem: Inspect the stem – it should be firm, dry, and attached firmly. A wilted stem can be a sign that the pumpkin is a bit past its prime.
- Size Matters: Pie pumpkins typically range in size from about 5 to 10 inches in diameter. Don't be afraid to ask the farmer or vendor for suggestions if you're unsure.
Part 2: Unleashing the Pumpkin's Inner Beauty – Prepping for Roasting

You've got your pumpkin, now it's time to get it ready for roasting. Don't be intimidated! This part is surprisingly simple, and a few key steps will set you up for success.
A Clean Slate:
- Wash it Up: Give your pumpkin a good scrub under cold water, removing any dirt or debris. This ensures a clean flavor in your pie, which is essential!
- Cut with Confidence: Using a sturdy knife, carefully cut the pumpkin in half. It's easiest to cut from stem to bottom, but you can try cutting it into quarters if you prefer. Just remember, the smaller the pieces, the quicker they'll roast.
- Seed Removal: Use a spoon to scoop out the seeds and stringy pulp. You can save the seeds for roasting later (they make a delicious snack!), but I find the stringy bits are best left behind.
Part 3: Roasting for Flavor – Unleashing the Pumpkin’s Potential

This is where the real magic happens! Roasting transforms the pumpkin, bringing out its natural sweetness and enhancing its flavor. Think of it as a culinary transformation.
oven roasting: The Classic Approach
- Preheat and Prepare: Preheat your oven to 350°F (175°C). Place the pumpkin halves (cut side up) on a baking sheet.
- Add a Splash of Moisture: For extra moisture and flavor, add a splash of water to the bottom of the baking sheet.
- Roast to Perfection: Roast the pumpkin for about an hour, or until the flesh is tender and slightly browned. You can test it with a fork – if it slides in easily, it's ready.
Microwave Roasting: A Quick and Easy Option
- Microwave-Safe: Place the pumpkin halves on a microwave-safe dish. Add a tablespoon of water to the dish.
- Microwave Time: Microwave on high for 8-10 minutes. The flesh should be tender, but you may need to roast it further in the oven for added flavor.
Part 4: Flavorful Enhancements: Taking Your Roasting to the Next Level
Now, let's talk about adding a touch of culinary magic to your roasted pumpkin. These little tweaks will elevate your pie filling, taking it from ordinary to extraordinary.
Spice Up Your Life:
- A Pinch of Cinnamon, Nutmeg, or Ginger: Add a sprinkle of these warming spices to the pumpkin halves before roasting. This infuses the flesh with irresistible aromas and flavors.
- A Touch of Sweetness: Drizzle a bit of maple syrup or honey over the pumpkin halves before roasting. This creates a subtle sweetness and caramelizes the flesh.
- A Splash of Richness: Add a tablespoon of butter, a splash of milk, or a drizzle of olive oil to the baking sheet. This creates a flavorful broth that the pumpkin absorbs during roasting.
Part 5: Extracting the Pumpkin’s Treasure – Scooping and Prepping
Your pumpkin has roasted beautifully, now it's time to unveil the deliciousness within! This step requires a bit of patience and precision.
Scoop, Smooth, and Prepare:
- Cool Down: Let the pumpkin cool completely before handling. Once cool enough, use a spoon to scoop out the flesh. The skin can be discarded.
- Smooth It Out: You can use a fork or a potato masher to smooth out any lumps in the pumpkin flesh. This makes it easier to blend and incorporate into your pie filling.
- Strain (Optional): This step is optional, but it's a great way to remove any remaining seeds or stringy bits. Strain the pumpkin flesh through a fine-mesh sieve over a bowl.
Part 6: Crafting the Pie Filling – A Symphony of Flavor
Now, for the exciting part! It's time to transform your roasted pumpkin into the most delectable pie filling imaginable. This is where your culinary creativity truly shines.
The Classic Pumpkin Pie Filling Recipe:
Here's my tried and true recipe for a classic pumpkin pie filling that never disappoints:
| Ingredient | Quantity |
|---|---|
| Roasted pumpkin flesh | 1 ?? cups |
| Sweetened condensed milk | 1 can (14 ounces) |
| Eggs | 2 large |
| Ground cinnamon | 1 ?? teaspoons |
| Ground nutmeg | ?? teaspoon |
| Salt | ?? teaspoon |
Whipping Up the Filling:
- Combine: In a large bowl, whisk together the roasted pumpkin, condensed milk, eggs, spices, and salt. Mix well until everything is evenly combined.
- Chill: For the best texture and flavor, chill the pie filling in the refrigerator for at least 30 minutes before pouring it into the pie crust.
Part 7: Baking Your Masterpiece – The Final Touch
You've come this far, and now it's time to bake your pumpkin pie masterpiece. This step requires a bit of attention to detail, but don't worry – you've got this!
The perfect pie crust:
- Homemade or Store-Bought: You can make your own pie crust from scratch (I highly recommend it!), or opt for a store-bought one for convenience. Either way, choose a good quality crust with a flaky texture.
- blind baking: To prevent a soggy bottom, pre-bake the crust before adding the filling. This technique is called blind baking. Prick the crust with a fork, line it with parchment paper or aluminum foil, and fill it with pie weights or dry beans. Bake for about 15 minutes at 350°F (175°C).
- Cool Down: After blind baking, remove the weights or foil, let the crust cool for a few minutes, and then pour the pumpkin filling into the pre-baked crust.
Baking Time:
- Oven Temperature: Bake the pie at 350°F (175°C) for about 50-60 minutes, or until the filling is set and the crust is golden brown.
- The Jiggle Test: The pie is done when the center is just slightly jiggly when you gently shake it. It shouldn't be completely solid, but it shouldn't be wobbly either.
Part 8: The Grand Finale – Cooling and Serving Your Creation
Your pie is baked, and you're about to unleash a culinary masterpiece. Take a moment to admire your handiwork, and remember, it's the details that make a pie truly special.
Cooling and Serving:
- Cool Down: Let the pie cool completely on a wire rack before serving. This allows the filling to set properly and prevents a runny mess.
- Garnish: I like to garnish my pumpkin pie with a dollop of whipped cream, a sprinkle of cinnamon, or a sprig of fresh rosemary. Let your creativity run wild!
- Enjoy! Now, take a slice, and savor the sweet, spiced flavors of your perfectly roasted pumpkin pie.
Part 9: Storage and Leftovers – Keeping the Magic Alive
You've conquered the art of roasting pumpkins and baking a delicious pie. Now, how to handle those leftovers?
Storing Your Pie:
- Refrigerator: Store the leftover pie in an airtight container in the refrigerator for up to 3 days. The filling may become slightly denser, but it will still taste delicious.
- Freezing: You can freeze the leftover pie for up to 3 months. Simply wrap it tightly in plastic wrap, then in aluminum foil, and place it in the freezer. Thaw in the refrigerator overnight before serving.
FAQs – Solving Your Pumpkin Pie Puzzles
Here are some common questions about roasting pumpkins for pies.
1. Can I Use a Regular Pumpkin for Pie?
It's technically possible, but the flavor won't be as sweet and intense as a pie pumpkin. A regular pumpkin tends to be more watery and less flavorful, so it's best to use a pie pumpkin for the best results.
2. How Long Does Roasted Pumpkin Last in the Fridge?
Roasted pumpkin flesh will keep well in the refrigerator for about 3-4 days in an airtight container. You can also freeze it for up to 3 months.
3. What if the Pumpkin Flesh is Too Wet?
If your roasted pumpkin flesh is too wet, you can drain off some of the excess moisture before adding it to your pie filling. You can also try cooking it a bit longer in the oven to evaporate some of the moisture.
4. Can I Add Other Spices to My Pie?
Absolutely! Feel free to experiment with other spices, such as ginger, cloves, or allspice. You can also add a touch of orange zest or lemon zest for a citrusy twist.
5. What Can I Do with the pumpkin seeds?
You can roast them for a healthy and delicious snack! Simply toss the seeds with olive oil, salt, and pepper, and roast them in a preheated oven at 300°F (150°C) for about 15-20 minutes.
6. What if My Pie Crust is Soggy?
A soggy pie crust is a common issue, but there are a few things you can do to prevent it. First, make sure you're using a good quality pie crust. Second, be sure to blind bake your crust before adding the filling. Third, if your filling is very wet, you can try draining off some of the excess moisture before adding it to the crust.
7. How Can I Make My Pie Filling Thicker?
If your pie filling is too thin, you can thicken it up by adding a tablespoon or two of cornstarch to the filling before baking. You can also try adding a little bit of flour to the filling, but be sure to mix it well to avoid lumps.
8. Can I Add Other Ingredients to My Pie Filling?
You can definitely add other ingredients to your pie filling, like chopped pecans, walnuts, or chocolate chips. Just be sure to mix them in well before baking. You can also add a touch of cream cheese for a richer flavor and texture.
There you have it – your complete guide to roasting pumpkins and baking a truly delicious pie! Now go forth, armed with knowledge and a little bit of confidence, and create a pumpkin pie that will impress everyone you know. And remember, a little bit of love goes a long way in the kitchen. Happy baking!
Everyone is watching

Corn on the Cob: The Ultimate Guide to Perfectly Cooked Ears
Healthy MealsAh, corn on the cob. Just the name evokes images of sunny days, barbecues, and that sweet, juicy flavour that ...

Perfect Pork Roast Oven Cooking Time: A Guide to Delicious Results
Healthy MealsThere's something truly satisfying about a perfectly roasted pork. The aroma alone is enough to make your mout...

Ham Cooking Time: How Long to Bake, Smoke, or Boil a Delicious Ham
Healthy MealsAh, ham. It's a classic, isn't it? A real crowd-pleaser, especially around holidays. And when done right, it'...

Scallops: The Ultimate Guide to Perfect Cooking
Healthy MealsAh, scallops. Those delicate, sweet, and utterly delicious morsels of the sea. They hold a special place in my...

Spaghetti Squash: The Ultimate Guide to Cooking and Serving
Healthy MealsRemember that time you saw spaghetti squash at the supermarket, looking all bumpy and strange, and thought, "W...
