(Part 1) Choosing Your Weapon: The Bacon
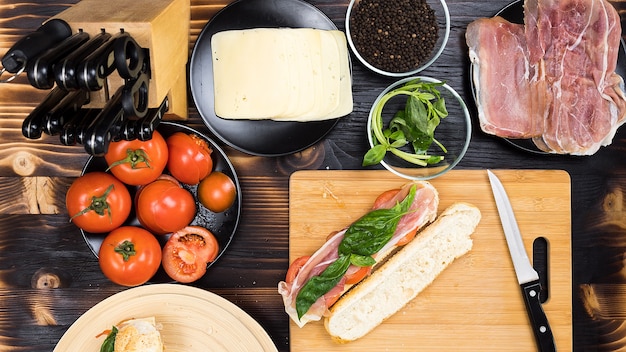
What Makes a Great Bacon?
Firstly, let's talk fat content. Think of fat as the fuel that makes your bacon sing. You want bacon with a good amount of fat, as this is what renders down and creates that beautiful crispy texture. Imagine a campfire - you need plenty of wood to get a roaring fire going, and it's the same with bacon. Avoid bacon that's too lean, as it can dry out and become tough. It'll be more like chewing on a piece of cardboard than a delicious breakfast treat.
Secondly, consider the cut. While thick-cut bacon is certainly trendy, it can be a bit tricky to cook evenly on the stovetop. It's like trying to cook a giant steak perfectly on both sides – you need a lot of patience and attention! If you're a beginner, I'd recommend starting with a standard cut. It's easier to manage and you'll have a better chance of achieving that perfect crisp. However, if you're feeling adventurous, go for the thick-cut! It just takes a little more patience and attention.
types of bacon and their Advantages
Here’s a quick rundown of the main types of bacon and their strengths:- streaky bacon: This is the classic, traditional bacon. It’s typically made from the belly of the pig and is known for its rich flavour and high fat content. It’s perfect for creating that crispy, crackly texture. You’ll often find this type of bacon in the UK, Australia, and New Zealand, and it’s a real crowd-pleaser.
- back bacon: Made from the loin of the pig, this is a leaner type of bacon with a slightly more delicate flavour. It’s often a good choice for those who prefer a less fatty bacon. This is more common in the US and Canada, and it has a more distinct flavour profile.
- smoked bacon: Smoked bacon has a unique smoky flavour that many people adore. It’s usually made with streaky bacon, but you can also find smoked back bacon. This is a great choice for adding a smoky depth to your dishes.
- unsmoked bacon: This bacon is not smoked and has a more natural flavour. It’s a good choice if you want to control the flavour profile of your dish. You can really taste the essence of the pork without the added smoky notes.
- organic bacon: Made with pigs raised without the use of antibiotics or hormones, organic bacon is a great choice for those looking for a healthier option. It's often a little pricier, but the quality is generally excellent.
- Salt-Cured Bacon: This is the traditional method of curing bacon, and it results in a rich, salty flavour. It’s often considered the “real” bacon by purists. This method involves soaking the bacon in salt to draw out moisture and enhance flavour.
- Dry-Cured Bacon: This type of bacon is cured for a longer period of time, resulting in a more intense flavour and firmer texture. This is a real gourmet option, and it's worth trying if you're a bacon aficionado.
My Personal Recommendations:
I’m a big fan of streaky bacon for stovetop cooking. It’s got that perfect balance of fat and flavour, and it renders down beautifully. I also really enjoy smoked bacon, especially when I’m making a hearty breakfast or brunch. For those who prefer a less fatty bacon, back bacon is a good alternative, and it still cooks up nicely.
(Part 2) Gear Up for Bacon Success: The Tools of the Trade
The Must-Have’s
- Large, Heavy-bottomed Skillet: This is crucial for even heat distribution. You want a skillet that can handle the heat without warping. Think of it as a sturdy foundation for your bacon masterpiece. A cast iron skillet is a classic choice, but a good stainless steel skillet will also work just fine.
- Tongs: You'll need tongs to flip the bacon and transfer it to a plate or paper towels. Get a pair that's comfortable to grip and has good leverage.
- Paper Towels: These are essential for soaking up excess grease and keeping your bacon nice and crispy. You can use a whole roll for this – it’s worth it!
- meat thermometer: This is optional but very helpful, especially if you’re dealing with thick-cut bacon. A meat thermometer allows you to ensure your bacon reaches the proper internal temperature for safety and optimal doneness. It’s a good investment for peace of mind.
Optional but Useful
- bacon press: A bacon press helps to distribute the heat evenly and renders the fat more quickly, resulting in crispy bacon. Imagine a weightlifter pressing down on the bacon, squeezing out the fat and making it crisp. You can use a heavy pan or a cast iron skillet to act as a press as well.
- Spatula: A spatula is useful for scraping up any bits of bacon that stick to the bottom of the pan. It’s especially handy if you’re using a cast iron skillet.
- Wire Rack: A wire rack is a great way to drain the bacon and keep it crispy after cooking. It’s like a little bacon throne for your crispy treats.
I’ve found that a simple, well-seasoned cast iron skillet is really the only essential tool for perfect stovetop bacon. It’s durable, heats evenly, and imparts a subtle flavor to the bacon. It’s like the perfect companion for your bacon journey.
(Part 3) The Art of Bacon Rendering: Getting It Right
The Golden Rules of Stovetop Bacon
Here are some general guidelines to keep in mind:
- Don’t overcrowd the pan: Give your bacon some space to cook evenly. Overcrowding the pan will lead to uneven cooking and soggy bacon. Think of it as a spa treatment for your bacon – it needs room to breathe and crisp up nicely.
- Cook over medium heat: This is the sweet spot for rendering the fat and achieving that perfect crispy texture. Too low and it will take forever, too high and it will burn before it renders.
- Flip frequently: This helps ensure that the bacon cooks evenly on both sides. I usually flip my bacon every 2-3 minutes. It’s like a dance – you need to keep it moving to get that perfect result.
- Be patient: Good bacon takes time to cook properly. Don’t rush the process! Patience is key to achieving perfection in all things, especially bacon.
- Don’t drain the fat immediately: Leave the bacon in the rendered fat for a few minutes after cooking. This helps to ensure that it stays crispy and allows the fat to solidify. It’s like a little bacon sauna to lock in that crispy texture.
The Steps
Now, let’s get down to the nitty-gritty. Here’s my step-by-step method for perfect stovetop bacon:
- Get your skillet nice and hot: Place your skillet over medium heat. It should be hot enough to sizzle a drop of water immediately. Imagine a sizzling hot pan like a welcoming embrace for your bacon.
- Add the bacon: Lay your bacon strips in a single layer, making sure they don't touch. Avoid overcrowding the pan. Give each strip its own space to shine.
- Let it render: Allow the bacon to cook for about 3-4 minutes per side, or until it’s golden brown and crispy. You’ll start to see the fat rendering out and the bacon becoming firm. It’s like a little magic show – the fat slowly disappears and the bacon transforms into a crispy delight.
- Flip and cook: Flip the bacon over with tongs and continue cooking for another 3-4 minutes per side, or until it reaches your desired level of crispiness. Keep an eye on it, and adjust the cooking time depending on your preference for how crispy you like it.
- Test the doneness: You can test the doneness of the bacon by pressing it with a spatula or tongs. It should be firm and springy. You can also use a meat thermometer to ensure the bacon reaches an internal temperature of 145°F (63°C). This is especially important if you're cooking thick-cut bacon.
- Remove and drain: Remove the bacon from the skillet and place it on paper towels to absorb excess grease. Leave it on the paper towels for a few minutes to allow the fat to solidify and the bacon to crisp up. It’s like a little spa treatment for your bacon to make it extra crispy and delicious.
- Enjoy! Once the bacon is cooled slightly, it’s ready to enjoy. And trust me, it’s going to be the best bacon you’ve ever had!
(Part 4) bacon variations: Adding Flavor and Fun
Now, we’ve covered the basics, but let’s explore some exciting ways to elevate your bacon game. Here are some variations on the classic stovetop bacon recipe:Flavor Bombs: Spicing It Up
Get creative and add some flavour to your bacon! Here are some ideas:
- Maple Bacon: Sprinkle a little maple syrup or maple sugar onto the bacon while it cooks. This creates a sweet and salty flavour combination that's simply irresistible. It's like a little taste of heaven on your plate.
- Peppered Bacon: Sprinkle freshly ground black pepper onto the bacon before cooking. It adds a lovely kick to the flavour, giving your bacon a spicy edge.
- Garlic Bacon: Add a few cloves of minced garlic to the skillet along with the bacon. The garlic will infuse the bacon with a delicious flavour and aroma, creating a truly satisfying and savoury experience.
- Brown Sugar Bacon: Add a teaspoon or two of brown sugar to the skillet with the bacon. It creates a caramelized flavour and a beautiful golden brown colour, turning your bacon into a sweet and crispy treat.
- Spicy Bacon: Add a pinch or two of cayenne pepper or chili powder to the skillet with the bacon for a spicy kick. This is a great option for those who like a little heat in their bacon.
Beyond the Pan: Bacon as a Topping
Bacon is a versatile ingredient that can be used as a topping for many dishes. Here are a few ideas:
- Bacon-Wrapped Dates: Wrap a strip of bacon around a pitted date, then bake in the oven until the bacon is crispy. This creates a sweet and salty combination that’s perfect for an appetizer or a snack.
- Bacon Cheeseburger: Top your next burger with crispy bacon and melted cheddar cheese. It's a classic combination that’s sure to please everyone.
- Bacon-Wrapped Asparagus: Wrap a strip of bacon around a spear of asparagus and bake or grill until the bacon is crispy and the asparagus is tender. This is a great way to add a smoky flavour to your vegetables.
- Bacon and Blue Cheese Salad: Toss a salad with crispy bacon, crumbled blue cheese, and a vinaigrette dressing. The salty bacon and the tangy blue cheese create a truly delicious flavour combination.
- Bacon and potato soup: Add some cooked bacon to your favourite potato soup for a flavour boost. It adds a richness and a smoky depth to your soup.
(Part 5) The Golden Rules of bacon storage
You’ve cooked the perfect bacon, now how do you keep it crispy and delicious for later? Here are some tips for storing cooked bacon:
- Store it in the fridge: Cooked bacon can be stored in an airtight container in the refrigerator for up to 5 days. If you’re storing it for a longer period, you can also freeze it for up to 3 months.
- Store it in a single layer: To prevent the bacon from sticking together, store it in a single layer in the container. You can also separate the strips with parchment paper or wax paper. This ensures that each piece of bacon stays crisp and doesn’t get soggy.
- Reheat it properly: To reheat cooked bacon, you can bake it in the oven, microwave it, or pan-fry it.
Reheating Tips
Here are some tips for reheating cooked bacon to ensure it remains crispy:
- Oven Reheating: Preheat the oven to 350°F (175°C). Place the bacon on a baking sheet lined with parchment paper or foil and bake for about 5 minutes, or until crispy. This is a great way to reheat a large batch of bacon.
- Microwave Reheating: Place the bacon on a microwave-safe plate and microwave on high for 10-15 seconds, or until warmed through. This is a quick and easy way to reheat a few slices of bacon.
- Pan-Frying Reheating: Place the bacon in a skillet over medium heat and cook for a few minutes, or until crispy. This is the best way to reheat bacon if you want it to be extra crispy.
(Part 6) Mastering the Art of bacon grease
Now, let’s talk about that glorious golden elixir: bacon grease. It’s not just a by-product of the bacon-making process. It’s a culinary treasure, and it shouldn’t be wasted. Here are some tips for using bacon grease in your cooking:
Treasured Treasure: Bacon Grease
Bacon grease is a fantastic cooking oil. It has a rich, smoky flavour that can enhance many dishes. It’s also incredibly versatile and can be used for frying, baking, and even sauteing. It's like a secret ingredient that can elevate your cooking to a whole new level.
Storing and Using Bacon Grease
- Strain the grease: After cooking your bacon, strain the grease through a fine-mesh sieve lined with cheesecloth or a coffee filter to remove any solid particles. This will ensure that your bacon grease is clear and ready to use.
- Store the grease in an airtight container: You can store the grease in a glass jar or container at room temperature for several months. It will solidify in the refrigerator, but it will melt back to liquid at room temperature.
- Use it for frying: Bacon grease is perfect for frying eggs, potatoes, and other breakfast staples. It adds a delicious flavour to the food. Think of it as a way to add an extra layer of flavour and richness to your dishes.
- Use it for baking: You can also use bacon grease in baking. It adds a rich flavour and makes cakes and cookies moist and tender. It's like a little secret ingredient that makes your baked goods extra delicious.
- Use it for sauteing: Bacon grease can also be used for sauteing vegetables or other ingredients. It imparts a lovely smoky flavour. It's a great way to add a depth of flavour to your vegetables.
Bacon Grease Recipes
Here are a few recipes that call for bacon grease:
- Bacon-Grease Cornbread: Add a tablespoon or two of bacon grease to your cornbread recipe for a richer flavour. It's a classic combination that's sure to please everyone.
- Bacon-Grease Potatoes: Fry potatoes in bacon grease until they are crispy and golden brown. It's a simple but delicious way to prepare potatoes.
- Bacon-Grease Biscuits: Add a tablespoon or two of bacon grease to your biscuit recipe for a rich and flavourful biscuit. This is a great way to add a touch of indulgence to your biscuits.
(Part 7) bacon hacks: Tips and Tricks
Here are some handy bacon hacks that I’ve learned over the years, to make your bacon life easier and more delicious:
Bacon Hacks
- Get rid of bacon curls: To prevent bacon strips from curling up while cooking, score the fat side of the bacon with a few shallow cuts. This helps to distribute the heat more evenly and prevents the bacon from curling. Think of it as a little bacon massage to keep it nice and flat.
- Keep bacon flat: To keep bacon strips flat while cooking, use a heavy pan or a cast iron skillet as a press. This also helps to render the fat more quickly and create crispy bacon. It's like a little weightlifter pressing down on the bacon to make it nice and crisp.
- Use a wire rack: A wire rack is a great way to drain the bacon and keep it crispy after cooking. Place the bacon on the wire rack and let it cool for a few minutes before serving. It's like a little bacon throne for your crispy treats.
- Use a baking sheet: If you're cooking a large batch of bacon, use a baking sheet lined with parchment paper or foil. This helps to prevent the bacon from sticking to the baking sheet and makes cleanup a breeze. It's a great way to make your life easier and avoid any bacon mishaps.
- Use a meat thermometer: A meat thermometer is helpful for ensuring the bacon is cooked to the proper internal temperature. The USDA recommends cooking bacon to an internal temperature of 145°F (63°C). It's a good investment for peace of mind.
- Make bacon bits: To make bacon bits, cook the bacon until crispy, then crumble it into small pieces. You can use the bacon bits for salads, soups, or other dishes. They’re a great way to add a smoky flavour to any dish.
(Part 8) The Ultimate bacon faqs
Here are some frequently asked questions about stovetop bacon:
FAQs
| Question | Answer |
|---|---|
| What is the best type of bacon to use for stovetop cooking? | The best type of bacon for stovetop cooking is streaky bacon. It has a good amount of fat, which renders down beautifully and creates that crispy texture. However, if you prefer a less fatty bacon, back bacon is a good alternative. |
| How long should I cook bacon on the stovetop? | The cooking time for bacon will vary depending on the thickness of the bacon and your desired level of crispiness. It generally takes about 3-4 minutes per side for a standard cut of bacon. |
| How do I know when my bacon is cooked? | When bacon is cooked, it will be golden brown and crispy. You can test the doneness by pressing it with a spatula or tongs. It should be firm and springy. You can also use a meat thermometer to ensure the bacon reaches an internal temperature of 145°F (63°C). |
| What should I do with bacon grease? | Don’t throw away your bacon grease! It’s a culinary treasure and can be used for frying, baking, and even sauteing. Strain the grease through a fine-mesh sieve lined with cheesecloth or a coffee filter to remove any solid particles, then store it in an airtight container at room temperature. |
| What are some tips for preventing bacon from curling? | To prevent bacon from curling, score the fat side of the bacon with a few shallow cuts. This helps to distribute the heat more evenly and prevents the bacon from curling. You can also use a heavy pan or a cast iron skillet as a press to keep the bacon flat while cooking. |
I hope this guide has helped you become a bacon master. It’s a journey, not a destination, so don’t be afraid to experiment and find what works best for you. Remember, the perfect bacon is the bacon you enjoy the most!
Everyone is watching

Corn on the Cob: The Ultimate Guide to Perfectly Cooked Ears
Healthy MealsAh, corn on the cob. Just the name evokes images of sunny days, barbecues, and that sweet, juicy flavour that ...

Perfect Pork Roast Oven Cooking Time: A Guide to Delicious Results
Healthy MealsThere's something truly satisfying about a perfectly roasted pork. The aroma alone is enough to make your mout...

Ham Cooking Time: How Long to Bake, Smoke, or Boil a Delicious Ham
Healthy MealsAh, ham. It's a classic, isn't it? A real crowd-pleaser, especially around holidays. And when done right, it'...

Scallops: The Ultimate Guide to Perfect Cooking
Healthy MealsAh, scallops. Those delicate, sweet, and utterly delicious morsels of the sea. They hold a special place in my...

Spaghetti Squash: The Ultimate Guide to Cooking and Serving
Healthy MealsRemember that time you saw spaghetti squash at the supermarket, looking all bumpy and strange, and thought, "W...