You've seen those mouthwatering, fall-off-the-bone country style ribs at your favourite barbecue joint, and you're thinking, "I could do that!" Well, you absolutely can, my friend! And I'm here to be your guide, taking you on a journey from rib newbie to full-fledged rib master.
We'll cover everything from choosing the right cut and perfecting your rub to achieving that irresistible smoky flavour with a few tricks up our sleeve. It's going to be a blast, I promise you! So, grab your apron, fire up your oven, and let's get stuck in!
Part 1: Choosing Your Ribs
1.1 Country Style vs. spare ribs: A Quick Breakdown
First things first, let's clear up a common point of confusion: country style ribs and spare ribs are not the same thing! Country style ribs are actually a cut of pork shoulder, while spare ribs come from the pork belly. This means country style ribs are bigger, leaner, and usually less expensive than their spare rib counterparts.
For oven baking, country style ribs are the way to go! They hold up beautifully in the oven, and their leaner texture means they're less likely to dry out during cooking. Plus, they're generally easier to work with for beginners, making them a great starting point for your rib journey.
1.2 Picking the perfect ribs: What to Look For
Now, let's talk about choosing the perfect ribs at the butcher's counter. Here are a few key things to keep an eye out for:
- Colour: Look for ribs with a nice, even pink colour. Avoid any that look pale or discoloured, as this could indicate they've been sitting around for a bit too long.
- Marbling: Marbling, those beautiful streaks of fat in the meat, is your friend! It adds incredible flavour and juiciness to your ribs. Aim for ribs with a good amount of marbling throughout. Remember, fat equals flavour!
- No Damage: Make sure your ribs are intact with no tears or punctures. Any damage can lead to uneven cooking and dryness.
Don't be afraid to ask your butcher for advice! They're usually happy to help you pick the best ribs for your needs.
1.3 Prepping Your Ribs: A Simple But Essential Step
Once you've got your ribs, it's time to get them ready for their oven adventure. Here's what you need to do:
- Give them a good wash: Rinse the ribs under cold water to remove any dirt or debris.
- Trim any excess fat: You can trim off some of the excess fat, but remember that fat adds flavour and keeps your ribs moist! Just trim any particularly thick pieces to avoid them becoming overly crispy.
- Pat them dry: Use paper towels to pat the ribs dry. This will help the rub adhere better and ensure even cooking.
And that's it! Now your ribs are prepped and ready for their flavour transformation.
Part 2: The Art of the Rub: Unlocking Flavor Potential

2.1 Why a Rub Matters: More Than Just a Sprinkle
A good rub is the secret ingredient that elevates your ribs from good to absolutely fantastic. It's a blend of spices that you generously rub all over the meat before cooking. This not only adds incredible flavour, but it also creates a beautiful, crispy crust that locks in the juices and intensifies the taste.
2.2 The Essential Ingredients: Building a Flavor Foundation
Here's a rundown of the key ingredients that make up a delicious rib rub:
- Salt: This might seem basic, but salt is absolutely essential. It seasons the meat and draws out moisture, enhancing the flavour. Don't skimp on the salt!
- Black Pepper: Pepper adds a kick of heat and a little bit of bite. If you're not a pepper fan, you can always substitute it for paprika.
- Garlic Powder: Garlic powder brings a rich, earthy flavour that complements the pork perfectly. It's an absolute must-have for that classic barbecue taste.
- Onion Powder: Just like garlic powder, onion powder adds a touch of sweetness and depth of flavour, rounding out the taste profile.
- Paprika: Paprika adds a subtle sweetness and a beautiful colour to your ribs. You can use sweet or smoked paprika, depending on your preference.
- Brown Sugar: Brown sugar provides a touch of sweetness and helps create a caramelized crust. It's a key ingredient for that addictive, sticky glaze.
- Chili Powder: Chili powder adds a bit of heat and smokiness. Adjust the amount based on your heat tolerance.
- Other Spices: You can get creative and add other spices like cumin, cayenne pepper, or even a touch of mustard powder to create your unique blend.
Don't be afraid to experiment with different combinations to find your perfect rib rub. It's part of the fun!
2.3 My Favourite rib rub recipe: A Simple Yet Delicious Blend
Here's a simple rib rub recipe that I've been using for years, and it consistently delivers incredible flavour. It's a great starting point for beginners and a reliable favourite for seasoned rib masters.
Ingredients:
- 2 tbsp salt
- 1 tbsp black pepper
- 2 tbsp garlic powder
- 1 tbsp onion powder
- 1 tbsp paprika
- 1 tbsp brown sugar
- 1 tsp chili powder
Instructions:
- Combine all the ingredients in a small bowl and whisk until evenly mixed.
- Rub the mixture all over your ribs, ensuring you get into all the crevices and nooks.
- Place the rubbed ribs in the fridge for at least an hour, or up to overnight. This allows the flavours to meld and the ribs to absorb the rub, resulting in deeper, more intense flavour.
You can also find endless rib rub recipes online, but this one is a classic that always gets rave reviews. Try it out and see for yourself!
Part 3: oven-baked ribs: The Perfect Method
3.1 Setting Up for Success: Getting Ready to Bake
Now it's time to get those ribs into the oven! Baking ribs in the oven is a simple and straightforward method, but there are a few essential steps to make sure they come out perfectly tender and juicy.
First, preheat your oven to 300°F (150°C). This low temperature allows the ribs to cook slowly and evenly, ensuring that they become incredibly tender and melt-in-your-mouth delicious.
3.2 Getting Those Ribs Moist: The Key to Juicy Perfection
We don't want our ribs to dry out in the oven, so we need to help them retain moisture. There are two tried-and-true methods to achieve this:
- The water bath: This is the classic, reliable method for keeping ribs moist. Place the ribs in a roasting pan, add a cup of water to the bottom of the pan, and cover the ribs tightly with foil. The steam created from the water will keep the ribs moist and prevent them from drying out. This method is super easy and perfect for beginners.
- The Beer Bath: This method adds a delicious layer of flavour to your ribs. Choose a beer with a flavour profile that complements pork. A pale ale or IPA works well. Place the ribs in a roasting pan, pour in a cup of beer, and cover the ribs tightly with foil. The beer will infuse the ribs with a beautiful, subtle flavour while keeping them moist. It's a bit more hands-on, but the flavour is worth the extra effort!
3.3 Baking Time: Patience is Key!
With your ribs nestled in the oven, set a timer for 2-3 hours. This gives them plenty of time to cook through and achieve that incredible tenderness. The exact baking time will depend on the size and thickness of your ribs. If you're unsure, it's always better to err on the side of caution and cook them for a bit longer.
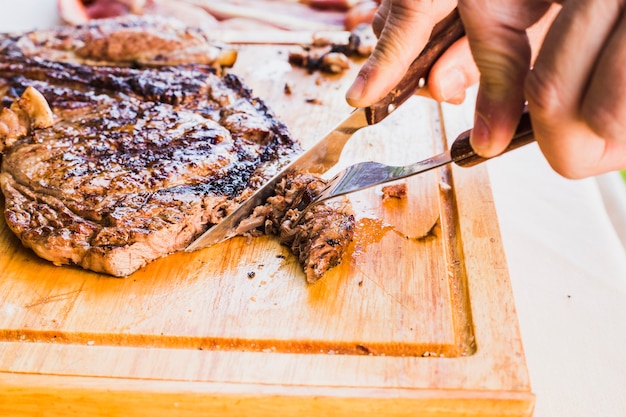
After 2-3 hours, carefully remove the foil. It's time to check for tenderness! The meat should be very tender and easily pull apart with a fork, with the bone readily exposed. If the ribs still feel a little tough, cover them again with foil and cook for another 30 minutes.
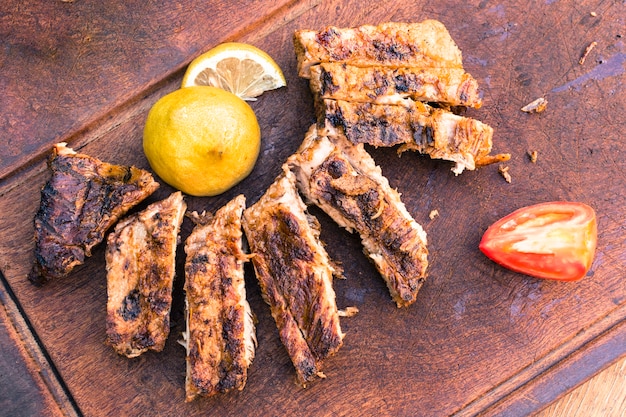
3.4 The Finishing Touch: Glazing the Ribs for That Perfect Shine
We're almost there! Now that the ribs are tender, it's time to add that beautiful, sticky glaze that will take them to the next level. There are endless glaze recipes out there, but my personal favourite is a simple honey and mustard glaze. It's sweet, tangy, and creates a beautiful caramelized crust.
Ingredients:
- 1/2 cup honey
- 1/4 cup Dijon mustard
- 1 tbsp apple cider vinegar
- 1 tbsp Worcestershire sauce
Instructions:
- In a small saucepan, combine all the ingredients and simmer over low heat for a few minutes, stirring occasionally, until the glaze slightly thickens.
- Using a pastry brush, generously glaze the ribs. Make sure to get into all the crevices!
- Return the ribs to the oven and bake for another 15-20 minutes, or until the glaze is caramelized and sticky. You'll know it's ready when it's beautifully glossy and has that irresistible sheen.
As a tip, if you want a thicker, more intense glaze, simmer it for longer. And if you prefer a more subtle glaze, use less honey and more mustard. It's all about personal preference!
3.5 Let Them Rest: The Secret to Juicy, flavorful ribs
We're at the finish line! Once those ribs are glazed and glistening, remove them from the oven and let them rest for 10-15 minutes before serving. This might seem like an unnecessary step, but it's essential for achieving the most juicy, flavourful ribs possible. During the resting period, the juices redistribute throughout the meat, making it incredibly tender and succulent. It's a little bit of patience, but trust me, it's worth it!
Part 4: Elevating Your Ribs: Taking it to the Next Level
4.1 Smoking Your Ribs: Adding a Smoky Depth of Flavor
For those who want to take their ribs to the next level, smoking is the way to go! Smoking adds an incredible smoky depth of flavour that really elevates the taste. If you've got a smoker, you can use it to smoke the ribs before or after baking, or even cook them entirely in the smoker. It's a whole new world of rib flavour!
Smoking Before Baking: To smoke the ribs before baking, place them in your smoker and smoke them at 225°F (110°C) for 2-3 hours, or until they reach an internal temperature of 145°F (63°C). Then, follow the baking instructions from Part 3. You'll find the ribs have a lovely smoky aroma and taste.
Smoking After Baking: If you want to smoke the ribs after baking, simply smoke them for 30-60 minutes, using wood chips like hickory or apple for that classic barbecue flavour. The smoke adds a beautiful layer of complexity to the already delicious baked ribs.
If you don't have a smoker, don't worry! You can still achieve a smoky flavour by adding a few drops of liquid smoke to your rub or glaze. It won't be quite the same as smoking, but it does add a nice smoky note.
4.2 Serving Your Ribs: The Perfect Accompaniments
Now it's time to show off your culinary masterpiece! Serve those ribs with all the trimmings to create a truly memorable meal.
- Coleslaw: The creamy tang of coleslaw provides a lovely contrast to the rich, smoky ribs. A classic combination for a reason!
- Macaroni and Cheese: A comforting, cheesy side dish that perfectly complements the ribs. It's a match made in barbecue heaven!
- Baked Beans: A sweet and smoky side dish that complements the ribs beautifully. The smoky flavours of the beans echo the smokiness of the ribs, creating a harmonious flavour profile.
- Cornbread: A Southern staple that soaks up all the delicious juices from the ribs, creating a delightful combination of textures and flavours.
- potato salad: A classic side dish that's always a crowd-pleaser. The creamy texture of the potato salad provides a refreshing contrast to the richness of the ribs.
Don't be afraid to get creative with your side dishes! The beauty of barbecue is that you can create a meal that perfectly reflects your own taste and preferences.
Part 5: FAQs: Answering Your Rib-Related Questions
5.1 How do I tell if my ribs are done?
The best way to tell if your ribs are done is to check for tenderness. If the meat easily pulls apart with a fork and the bone is exposed, they're ready to go! Another way to check is by inserting a meat thermometer into the thickest part of the rib: it should register an internal temperature of 145°F (63°C).
Remember, don't be afraid to give them a gentle tug. If they feel like they're just about to fall off the bone, you've got rib perfection.
5.2 Can I reheat my ribs?
Absolutely! You can reheat your ribs in the oven at a low temperature (250°F/120°C) for about 30 minutes. You can also reheat them in the microwave, but I find the oven gives them a more even and flavorful heat. Just make sure to cover them with foil while they're reheating to prevent them from drying out.
5.3 What if my ribs are too dry?
If your ribs are too dry, don't despair! You can add a little moisture back in by basting them with a sauce or glaze. You can also try adding a small amount of liquid to the bottom of the baking pan before reheating them. If you're reheating them in the oven, make sure to cover them with foil to keep them moist.
5.4 How long can I store my ribs?
You can store cooked ribs in the refrigerator for up to 3 days. Just make sure to store them in an airtight container. You can also freeze cooked ribs for up to 3 months. Just wrap them tightly in plastic wrap and then aluminum foil. To reheat frozen ribs, thaw them in the refrigerator overnight and then reheat them in the oven as described above.
5.5 Any tips for beginners?
Of course! Here are a few tips to help you create delicious ribs from the very start:
- Don't be afraid to experiment: Cooking is all about trying new things. So, don't be afraid to try different rubs, glazes, and sides. You might just discover your new favourite combination!
- Start with a simple recipe: There are tons of great rib recipes out there, so choose one that looks appealing and doesn't have too many ingredients. You can always experiment with more complex recipes later.
- Don't overcook the ribs: Overcooked ribs can be dry and tough. So, be sure to check them for tenderness and don't overcook them. A little bit of patience is key!
- Let the ribs rest: This is essential! Letting the ribs rest allows the juices to redistribute and makes them even more tender and juicy. It's a short wait for big flavour payoff!
- Have fun! Cooking should be enjoyable, so don't get too stressed if things don't go perfectly the first time. Just keep practicing, and you'll become a rib master in no time!
Well, there you have it! You're now armed with the knowledge and confidence to tackle oven-baked country style ribs like a pro. Remember, practice makes perfect, so keep trying new things and experimenting with different techniques and flavours. And most importantly, enjoy the process! There's nothing quite like the satisfaction of creating a delicious meal from scratch. So, fire up your oven, grab your ribs, and get cooking! You've got this!
Everyone is watching

Corn on the Cob: The Ultimate Guide to Perfectly Cooked Ears
Healthy MealsAh, corn on the cob. Just the name evokes images of sunny days, barbecues, and that sweet, juicy flavour that ...

Perfect Pork Roast Oven Cooking Time: A Guide to Delicious Results
Healthy MealsThere's something truly satisfying about a perfectly roasted pork. The aroma alone is enough to make your mout...

Scallops: The Ultimate Guide to Perfect Cooking
Healthy MealsAh, scallops. Those delicate, sweet, and utterly delicious morsels of the sea. They hold a special place in my...

Ham Cooking Time: How Long to Bake, Smoke, or Boil a Delicious Ham
Healthy MealsAh, ham. It's a classic, isn't it? A real crowd-pleaser, especially around holidays. And when done right, it'...

Spaghetti Squash: The Ultimate Guide to Cooking and Serving
Healthy MealsRemember that time you saw spaghetti squash at the supermarket, looking all bumpy and strange, and thought, "W...