Part 1: Choosing the perfect brisket - The Foundation of Flavor
Imagine this: you're standing in the meat aisle, surrounded by glistening cuts of beef. The key to a fantastic brisket starts right here – selecting the right cut. There are two main types: the flat and the point. The flat is the leaner, more rectangular brother, while the point is a bit chunkier with a thicker layer of fat, giving it a more rounded shape. Personally, I'm a point fanatic – it's just so full of flavor! But don't underestimate the flat; it can deliver some seriously delicious results, too. For the ultimate brisket experience, you can't beat a whole brisket, which combines both cuts.
Picking the Right Brisket: Look for These Clues
Now, let's dive into the nitty-gritty of selecting your brisket. There are a few things to keep in mind as you navigate the meat aisle:
- Marbling: This refers to the fat streaks woven throughout the muscle. It's like the secret ingredient to a juicy, flavorful brisket. Look for a decent amount of marbling, especially in the point cut, which tends to be a little leaner.
- Fat Cap: Imagine that gorgeous layer of fat on top of the brisket. It's not just for looks! That fat cap acts like a built-in moisture bomb, keeping your brisket succulent and flavorful. Make sure it's well-trimmed and intact, like a shiny, protective coat.
- Freshness: Give that package a sniff test. The meat should smell fresh, not funky. Check the date, too. You want a brisket that's not hanging around too long.
Prepping the Brisket: Setting the Stage for Success
Once you've snagged your perfect brisket, it's time to give it a little TLC. This seemingly simple step makes a huge difference in the end result:
- Trim the fat: Don't go overboard! Remove any excess fat, but leave a good layer on top – about 1/4 inch of fat should do the trick. Remember, that fat cap is your friend!
- Season generously: Salt and pepper are the foundation of any great brisket. Be generous with both, all over the brisket, even on the fat cap. You can get fancy with additional spices later, but for now, let's stick with the basics.
Part 2: The Low and Slow Method - The Art of Tenderness
Here's the magic formula for melt-in-your-mouth brisket: low and slow! This approach allows the muscle fibers to break down, resulting in the most tender, juicy brisket you can imagine. Think of it as a slow dance between the meat and the heat.
The oven method - Simple, Reliable, and Delicious
I'm a big fan of the oven method for brisket. It's simple, reliable, and lets you focus on other things while the brisket works its magic. Here's my tried-and-true technique:
- Preheat your oven to 275°F (135°C). This low temperature is key to gentle, even cooking.
- Place your brisket in a large roasting pan. No need to crowd it. Give it some breathing room! You can add a bit of liquid to the bottom of the pan, like beef broth or water. It's not strictly necessary, but it helps with moisture and adds flavor.
- Cover the pan tightly with foil. Think of this as a warm hug for your brisket. The foil traps moisture and creates steam, which helps tenderize the meat.
- Cook for 6-8 hours, or until the meat is fork-tender. Patience is key! Don't rush this process.
How to Tell if Your Brisket is Done: The Tenderness Test
The moment of truth! Knowing when your brisket is done is essential. Here are a few ways to check for that glorious tenderness:
- The Fork Test: Take a fork and plunge it into the thickest part of the brisket. If it slides in easily and comes out clean, without any resistance, your brisket is ready.
- The Probe Test: For a more precise reading, use a meat thermometer. Insert it into the thickest part of the brisket. It should read 190°F (88°C) for a well-done brisket.
Part 3: Adding Flavor to Your Brisket - A Symphony of Taste
You've got your tender, juicy brisket, but it's time to take it to the next level! We're talking about flavor, baby!
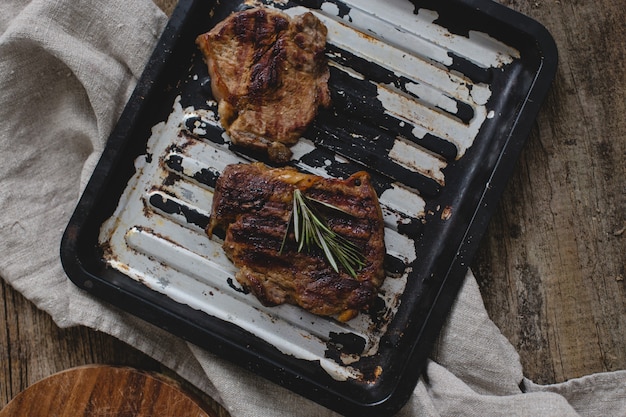
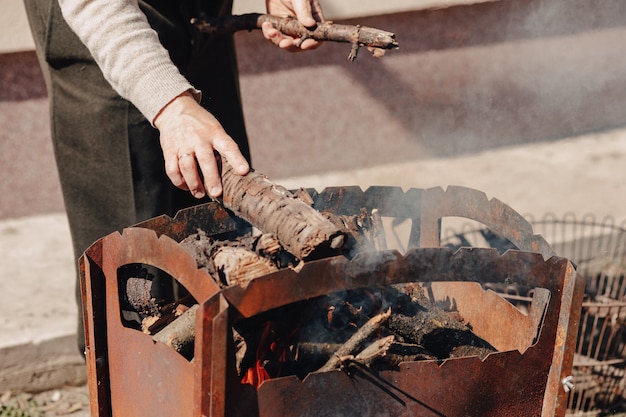
The smoke ring: A Sign of Flavorful Excellence
There's something captivating about that beautiful pink smoke ring on a brisket. It's not just for show, folks! It's a sign of true smoky goodness. While smokers are ideal for achieving that coveted smoke ring, you can still get a hint of smoky flavor in your oven. Here's how:
- Use wood chips: Pick up some wood chips like hickory, pecan, or mesquite. Soak them in water for about 30 minutes, then drain them. Wrap them in a foil packet and place the packet on the bottom of your oven. The heat will release those fragrant smoky aromas as the chips smolder.
Spice Rubs: Unleashing a Flavor Explosion
Spice rubs are your secret weapon for adding depth and complexity to your brisket. Don't be afraid to get creative and experiment! Here are a few of my favorite spice rub combinations:
- Classic BBQ: A timeless favorite with paprika, garlic powder, onion powder, black pepper, brown sugar, and a touch of cayenne pepper for a hint of heat.
- Texan BBQ: A bolder blend featuring paprika, cumin, chili powder, garlic powder, onion powder, and black pepper. It's all about that smoky, earthy flavor.
- Sweet and Smoky: This one combines paprika, brown sugar, smoked paprika, garlic powder, onion powder, and black pepper. It's a sweet and savory symphony on your palate.
Basting: A Touch of Moisture and Flavor
Basting your brisket during cooking adds another layer of flavor and keeps it beautifully moist. Think of it as a flavorful rain shower. You can use a simple bbq sauce, a homemade marinade, or even a beer-based mixture. Just brush it on every hour or so during the last few hours of cooking.
Part 4: Resting the Brisket: A Moment of Patience, A Reward of Tenderness
This is a crucial step that's often overlooked. Resist the urge to slice into your brisket immediately after cooking! Let it rest, covered in foil, for at least 30 minutes. This allows the juices to redistribute throughout the meat, resulting in a beautifully tender and juicy brisket. Think of it as giving the brisket a chance to relax and unwind after its long journey.
Part 5: Slicing and Serving - The Grand Finale
This is the moment we've all been waiting for – time to savor the fruits of our labor!
Slicing the Brisket: The Art of the Slice
Use a sharp knife to slice the brisket against the grain. This means slicing perpendicular to the direction of the muscle fibers. It's like slicing a beautiful piece of wood. You want thin slices so the meat melts in your mouth, creating a symphony of flavor with each bite.
Serving Options: A Brisket Feast
Brisket is a versatile superstar. Here are a few ideas to inspire your culinary creativity:
- Sandwiches: Pile slices of brisket onto toasted buns with your favorite BBQ sauce, tangy coleslaw, and crisp pickles. It's a classic for a reason!
- Tacos: Shred the brisket and fill tortillas with your favorite toppings like salsa, guacamole, sour cream, and cilantro. It's a flavor fiesta in every bite.
- Plate it up: Serve with creamy mashed potatoes, buttery corn, or a vibrant side salad. It's the perfect centerpiece for a hearty meal.
Part 6: Leftovers - A Delicious Second Act
You'll likely have leftovers, and that's a beautiful thing! Brisket often tastes even better the next day, as the flavors have time to mingle and deepen.
Storing Leftovers: Keeping the Flavor Fresh
Store leftovers in the fridge in an airtight container. It's like a mini vacation for your brisket, keeping it safe and sound until its next adventure.
Reheating: Bringing the Flavor Back to Life
The best way to reheat brisket is in the oven or slow cooker. It's all about low and slow, just like the original cooking process. Reheat at a low temperature until warm throughout. You can also reheat in the microwave, but it won't be as flavorful.
Part 7: Troubleshooting: Handling the Unexpected
We all have those moments when things don't go perfectly to plan. Here's a look at some common brisket issues and how to tackle them:
Brisket Too Dry: Saving a Dry Situation
This happens if you didn't cook it low and slow enough, or if you accidentally overcooked it.
- Solution: Add a little liquid to the pan, like beef broth or water. Let it simmer until the brisket is fork-tender. You can also try wrapping it tightly in foil for the last hour of cooking to lock in moisture.
Brisket Too Tough: Reviving a Tough Cut
This happens if you didn't cook it long enough.
- Solution: Continue cooking until the brisket is fork-tender. You can also try braising it for an extra hour or two.
Brisket Overcooked: Learning from Mistakes
This happens if you cook it for too long.
- Solution: There's not much you can do to salvage an overcooked brisket. It's best to prevent this by using a meat thermometer and checking for tenderness regularly.
Part 8: Tips and Tricks: Elevating Your Brisket Game
Here are a few extra tips to make your brisket even more amazing:
- Don't be afraid to experiment: Try different spice rubs, sauces, and marinades. Let your culinary creativity shine!
- Use a thermometer: It's the most reliable way to check if your brisket is done. It's like having a little detective in your kitchen.
- Be patient: Brisket takes time. Don't rush the process. It's a journey, not a race!
- Enjoy the journey: Cooking a brisket is a fun and rewarding experience. Savor every step, from choosing the perfect cut to slicing that beautiful, tender meat.
Part 9: FAQs - Answering Your Burning Questions
Let's address some of those burning questions you might have about this meaty masterpiece.
Q: Can I cook a brisket in a slow cooker?
A: Absolutely! The slow cooker is a great way to achieve that melt-in-your-mouth tenderness. Just set your slow cooker on low and cook for 8-10 hours.
Q: What is the best temperature to cook a brisket?
A: For a classic oven-baked brisket, 275°F (135°C) is the ideal temperature. It's all about slow and steady.
Q: How long does it take to cook a brisket?
A: The cooking time depends on the size of the brisket. A 5-pound brisket will take about 6-8 hours, while a 10-pound brisket will take about 10-12 hours. Just be prepared for a long, delicious journey!
Q: How do I make my brisket more flavorful?
A: A good spice rub is essential! Experiment with different spices and herbs. You can also add some liquid to the pan, like beer or beef broth, for extra flavor and moisture.
Q: What should I serve with brisket?
A: The possibilities are endless! Some classic sides include mashed potatoes, creamy coleslaw, baked beans, and comforting cornbread. You can also serve it with fresh salads, roasted vegetables, or even a simple side of rice.
Now, go forth and conquer the world of brisket. You've got this!
Everyone is watching

Corn on the Cob: The Ultimate Guide to Perfectly Cooked Ears
Healthy MealsAh, corn on the cob. Just the name evokes images of sunny days, barbecues, and that sweet, juicy flavour that ...

Perfect Pork Roast Oven Cooking Time: A Guide to Delicious Results
Healthy MealsThere's something truly satisfying about a perfectly roasted pork. The aroma alone is enough to make your mout...

Ham Cooking Time: How Long to Bake, Smoke, or Boil a Delicious Ham
Healthy MealsAh, ham. It's a classic, isn't it? A real crowd-pleaser, especially around holidays. And when done right, it'...

Scallops: The Ultimate Guide to Perfect Cooking
Healthy MealsAh, scallops. Those delicate, sweet, and utterly delicious morsels of the sea. They hold a special place in my...

Spaghetti Squash: The Ultimate Guide to Cooking and Serving
Healthy MealsRemember that time you saw spaghetti squash at the supermarket, looking all bumpy and strange, and thought, "W...