(Part 1) The Tools of the Trade: Your Kitchen Arsenal
Essential Equipment:
- A tortilla press: This is the star of the show. It's essentially a heavy-duty press that helps you shape your tortillas into perfect circles. You can find them online or at your local Mexican grocery store. Don't be tempted by those flimsy plastic ones – invest in a good quality press, you won't regret it. I've learned the hard way that a sturdy press makes a world of difference!
- A large bowl: This will be your mixing bowl for the dough. Make sure it's big enough to accommodate the ingredients and leave some room for kneading. A good-sized bowl is essential for a comfortable kneading experience.
- Measuring cups and spoons: Precise measurements are key for consistent results. Don't wing it! Accurate measurements ensure your tortillas turn out perfectly every time.
- Plastic wrap: This is for covering the dough while it rests. A little bit of plastic wrap goes a long way in keeping the dough moist and pliable.
- A rolling pin: A rolling pin is useful if you don't have a tortilla press, but honestly, the press makes things much easier. If you're going the rolling pin route, be sure to choose one that's comfortable to hold and maneuver.
- A flat, non-stick surface: This is where you'll be shaping your tortillas. A cutting board or a clean countertop will do. A smooth surface is key for easy shaping and prevents sticking.
- A griddle or skillet: This is for cooking the tortillas. A griddle is ideal, but a cast iron skillet works just as well. A well-seasoned cast iron skillet can add a fantastic flavor to your tortillas.
(Part 2) The Ingredients: What Makes a Perfect Tortilla?
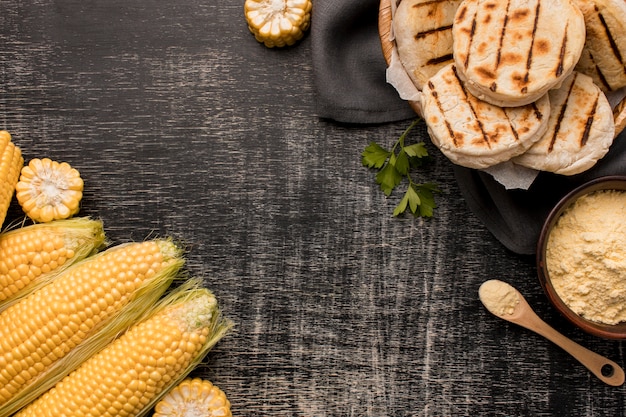
Choosing Your Masa Harina: A Guide to corn flour
Masa harina is essentially dried corn flour that has been treated with lime (calcium hydroxide) to soften the kernels and make them easier to grind. This process also gives the tortillas their unique flavour and texture. Look for masa harina that is labelled "corn tortillas" or "masa harina for tortillas," and avoid anything labelled "masa harina for tamales," as this is a different type of masa harina. It's all about finding the right corn flour for the job!
When choosing masa harina, consider the following:
- Brand: Different brands will have different flavour profiles and textures. Experiment with different brands to find your favourite. I've tried a few different brands, and each one has its own unique personality.
- Freshness: Check the expiry date and try to buy masa harina that's as fresh as possible. It will make a difference in the taste and texture. Freshness is key! You'll taste the difference in the final product.
- Ingredients: Ideally, the only ingredients in your masa harina should be corn flour and lime. Some brands may add other things, like preservatives or emulsifiers, so it's always good to check the label. Keep it simple! The fewer ingredients, the better.
(Part 3) The Secret to Fluffy, Soft Tortillas: Dough Consistency
The Right Dough Consistency: A Balance of Firmness and Pliability
You want your dough to be firm but pliable. Not too dry, not too sticky. Think of it like playdough, but a bit firmer. It should hold its shape when you press it but still be easy to shape. It's all about finding that perfect balance.
How to Achieve the Perfect Dough: A Step-by-Step Guide
- Follow the Recipe: Don't be afraid to stick to a tried-and-true recipe. Most recipes will call for a specific ratio of masa harina, water, and salt. Start with those proportions and adjust as needed. Trust the recipe! It's your roadmap to tortilla success.
- Warm Water is Key: Use warm water to activate the masa harina and make it easier to mix. Warm, not hot. Hot water can make the dough too sticky. Warm water is the key to a smooth and manageable dough.
- Knead, Knead, Knead: Kneading the dough is essential for developing the gluten and creating a smooth, elastic texture. Knead for about 5-7 minutes until the dough is smooth and no longer sticky. Kneading is a labor of love! It takes some effort, but it's worth it.
- Rest the Dough: Allow the dough to rest for at least 15 minutes. This allows the gluten to relax, making the dough more pliable and easier to work with. Rest is essential! It's like giving the dough a chance to breathe and become more manageable.
(Part 4) Shaping Your Tortillas: A Perfect Circle Every Time
You've got your dough, it's time to turn it into tortillas!Using a Tortilla Press: The Easiest Way to Perfection
- Divide the Dough: Divide your dough into equal portions, about 1.5-2 ounces each. Consistent portions lead to consistently shaped tortillas.
- Form a Ball: Shape each portion of dough into a smooth ball. A little bit of rolling between your palms can help achieve that smooth ball shape.
- Flatten the Ball: Place the ball of dough in the centre of the bottom plate of the tortilla press. Cover with the top plate and press down firmly. Press with confidence! You're aiming for a thin and even tortilla.
- Release and Peel: Carefully release the top plate, then peel the tortilla off the bottom plate. Gentle is the key word here! You don't want to tear the delicate tortilla.
- Adjust Thickness: If you want thinner tortillas, you can press them again for a few seconds. Experiment with the pressure to find your perfect tortilla thickness.
Shaping Without a Tortilla Press: A Rolling Pin Alternative
- Divide the Dough: Divide your dough into equal portions, about 1.5-2 ounces each.
- Form a Ball: Shape each portion of dough into a smooth ball.
- Flatten the Ball: Place the ball of dough between two sheets of plastic wrap and press down firmly with your hands to flatten it into a disc. You're aiming for a flat and even disc, like a pizza crust.
- Roll it Out: Using a rolling pin, roll out the dough to a desired thickness. Aim for about 1/8 inch. Roll with a light touch, and ensure the dough is evenly distributed.
(Part 5) Cooking Up a Storm: Griddling Perfection
The moment of truth – cooking your tortillas!Griddling Technique: A Masterclass in Cooking Tortillas
- Preheat the Griddle: Heat a flat griddle or cast iron skillet over medium heat. You want it hot enough to cook the tortillas quickly but not so hot that they burn. A good griddle should be sizzling hot! But not too hot!
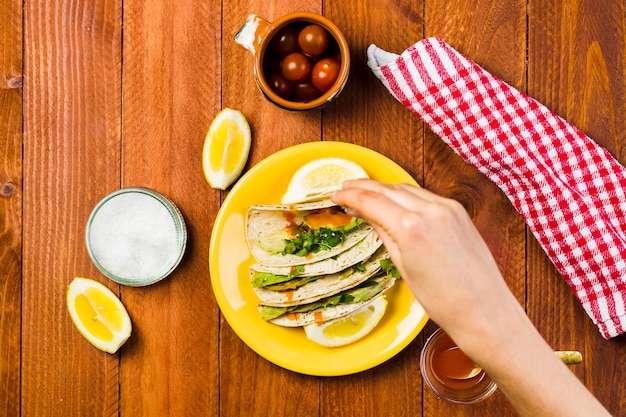
- Cook Both Sides: Place a tortilla on the hot griddle and cook for about 30-60 seconds per side, until it's golden brown and slightly puffed up. Don't press down on the tortilla while it's cooking, let it cook naturally. Let the tortilla do its thing! Don't force it.
- Warm or Toasted: Once cooked, you can stack the tortillas and wrap them in a clean tea towel to keep them warm. For a more intense flavour, you can toast the tortillas in a dry skillet or under the broiler for a few minutes. Warm tortillas are essential! It's the perfect finishing touch.
Troubleshooting Tips: Conquering Common Challenges
If the tortillas are sticking to the griddle, try greasing the griddle with a little oil or butter before cooking. A light greasing is all you need! It's a little trick I learned from my grandma.
If the tortillas are burning, reduce the heat slightly. It's all about finding the right heat! You're aiming for a golden brown color, not burnt.
If the tortillas are not cooking evenly, try rotating them halfway through cooking. Keep an eye on your tortillas! They're ready for a flip once they're golden brown on one side.
(Part 6) Storage Secrets: Keeping Your Tortillas Fresh
You've made a batch of beautiful tortillas, now it's time to keep them fresh and tasty.Storing Cooked Tortillas: Preserving Your Creations
- Wrap Them Up: Wrap the cooked tortillas in a clean tea towel, plastic wrap, or aluminum foil. This will help to prevent them from drying out. A little bit of protection goes a long way! You want to keep those tortillas moist and delicious.
- Refrigerate or Freeze: Store the wrapped tortillas in the refrigerator for up to 3-4 days. For longer storage, you can freeze them for up to 2 months. Refrigeration is ideal for short-term storage, while freezing is great for long-term preservation.
- Reheating: To reheat refrigerated tortillas, you can steam them, microwave them, or warm them on a griddle. A few seconds on a hot griddle does wonders for bringing them back to life!
(Part 7) Beyond the Basics: Flavourful Variations
Now that you've mastered the basics, let's get creative. There are so many ways to add flavour and texture to your tortillas.Flavoured Tortillas: A World of Possibilities
- Herbs and Spices: Incorporate herbs like cilantro, parsley, oregano, or cumin into your dough for a burst of flavour. Experiment with different herbs! You'll be surprised at the delicious combinations you can create.
- Cheese: Add grated cheese to the dough for a cheesy twist. Cheddar, Monterey Jack, or even Parmesan work well. Cheese adds a delightful richness to tortillas. You can even use a blend of cheeses for a complex flavor profile.
- Chiles: Add a touch of heat with some chopped jalape??os or serranos. Just be careful not to overdo it! A little heat can go a long way! You can always add more later, but you can't take it back.
- Garlic: For a more savory flavour, add some minced garlic to the dough. A touch of garlic adds depth and complexity to the flavor of your tortillas.
- black beans: For a hearty and satisfying tortilla, add some cooked black beans to the dough. Black beans add a fantastic protein boost and a satisfying texture. Try it out for a more substantial tortilla.
Textured Tortillas: Adding Variety to Your Recipe
- Grilled: Grill your tortillas over medium heat for a smoky flavour and char. A quick grill gives your tortillas a wonderful smoky aroma and a slightly charred texture.
- Crispy: Fry the tortillas in oil until crispy for a delicious snack. Crispy tortillas are a perfect snack or an addition to a variety of dishes. Try them with your favorite salsa or guacamole.
- Toasted: Toast the tortillas in a dry skillet for a slightly crunchy texture. Toasted tortillas are great for dishes like chilaquiles and add a delicious crunch to your meals.
(Part 8) The Perfect Tortilla for Every Dish
Now, you're armed with the knowledge to make perfect corn tortillas. But, what type of tortilla is best for your dish?Tortilla Thickness: Choosing the Right Gauge
| Thickness | Ideal for |
|---|---|
| Thin | Tacos, quesadillas |
| Medium | Burritos, enchiladas |
| Thick | Tostadas, chilaquiles |
Tortilla Flavour: Matching Flavors to Your Dish
- Plain: Versatile and works with a variety of fillings. Plain tortillas let the flavors of your fillings shine through.
- Herbed: Great for enhancing the flavour of dishes with milder fillings. Herbed tortillas add a subtle complexity to milder fillings.
- Spiced: Adds a punch of flavour to dishes with bold fillings. Spiced tortillas complement bold flavors and create a harmonious blend of tastes.
(Part 9) FAQs: Your Tortilla Questions Answered
So, you're ready to start making your own tortillas? Awesome! But, some questions might pop up. Here are a few common ones:1. What if my dough is too dry?
If your dough is too dry, add a tablespoon or two of warm water at a time, kneading it in well between each addition until it reaches the desired consistency. Start slowly and add the water gradually! You don't want to add too much at once.
2. What if my dough is too sticky?
If your dough is too sticky, add a tablespoon or two of masa harina at a time, kneading it in well between each addition until it reaches the desired consistency. Don't worry! A little bit of masa harina can fix a sticky dough.
3. Why are my tortillas breaking?
Tortillas can break if they are not cooked long enough or if they are not kneaded properly. Make sure to cook them until they are golden brown and slightly puffed up, and knead the dough for at least 5-7 minutes. Give your dough a good workout! It'll thank you for it.
4. Can I use cornmeal instead of masa harina?
No, you can't use cornmeal instead of masa harina. Cornmeal doesn't contain the lime that is essential for making tortillas. Masa harina is the secret ingredient to authentic tortillas!
5. How do I make tortillas gluten-free?
You can make gluten-free tortillas by using a gluten-free masa harina. Look for brands that are labelled "gluten-free." Gluten-free tortillas are becoming increasingly popular! You'll find a variety of brands in most grocery stores.
(Part 10) Your Journey to Tortilla Mastery
There you have it – everything you need to know about making perfect corn tortillas at home! Now, go forth and conquer your kitchen. With a little practice, you'll be making tortillas like a pro in no time. Remember, it's all about experimenting and finding what works best for you. And hey, if you mess up, just laugh it off and try again! The journey to tortilla mastery is a delicious one. Happy cooking!Everyone is watching

Corn on the Cob: The Ultimate Guide to Perfectly Cooked Ears
Healthy MealsAh, corn on the cob. Just the name evokes images of sunny days, barbecues, and that sweet, juicy flavour that ...

Perfect Pork Roast Oven Cooking Time: A Guide to Delicious Results
Healthy MealsThere's something truly satisfying about a perfectly roasted pork. The aroma alone is enough to make your mout...

Ham Cooking Time: How Long to Bake, Smoke, or Boil a Delicious Ham
Healthy MealsAh, ham. It's a classic, isn't it? A real crowd-pleaser, especially around holidays. And when done right, it'...

Scallops: The Ultimate Guide to Perfect Cooking
Healthy MealsAh, scallops. Those delicate, sweet, and utterly delicious morsels of the sea. They hold a special place in my...

Spaghetti Squash: The Ultimate Guide to Cooking and Serving
Healthy MealsRemember that time you saw spaghetti squash at the supermarket, looking all bumpy and strange, and thought, "W...